To avoid difficulties with assembly and disassembly during installation work, it is better to familiarize yourself in advance with what parts it consists of. If involving specialists in the renovation is not part of your plans, then our specialists’ advice on how to install a faucet in a bathroom on the wall will help you figure it out.
As visual materials, photos and video instructions are attached to the article.
What does a bathroom faucet consist of?
Before dismantling and installing the faucet in the bathroom, you need to understand what it looks like and what parts it consists of. In addition, knowing how it is equipped, you can avoid unscrupulous sellers. Packaged plumbing consists of the following elements:
- Frame. Its standard diagram is as follows: two pipes for supplying hot and cold water, two sockets and a spout;
- Shower hose. This is the part of the system that connects the mixer body to the shower head (nozzle). Since this part is the one that most often fails, it is not recommended to skimp on it.
Before installing a faucet in the bathroom, let's figure out what types of shower hoses there are, because their choice is huge: from plastic products with a metal winding, to improved models with anti-twist protection and a silicone layer on a metal braid.
- Shower head (another name is shower head). Shower heads range from the simplest with two or three standard modes, to half a dozen functions for creating a soft aerated, massage or jet stream, an “economy” mode and many other pleasant shower options.
- Eccentric. This type of shower adapter has an elongated round shape, one edge of which is attached to the mixer, and the other to the pipe. The length and size of the eccentrics is individual for each model.
- A gander called a spout or twist. The most common gander models are J, C and L-shaped.
- Decorative lampshades.
- Rubber or silicone gaskets.
The nuances of installing a faucet in the bathroom with your own hands video
However, checking the complete set is not always enough, since to be completely sure that the purchased product is free of defects, it is necessary to ensure the integrity of the threads of the eccentrics and fastening nuts. Assembly instructions are included in the plumbing package. Assembling and disassembling it is quite simple, you can see this by watching the assembly video tutorial.
How to choose the right faucet for a wall sink
In the modern plumbing market you will be offered a huge number of different mixers, so making a choice is very difficult.
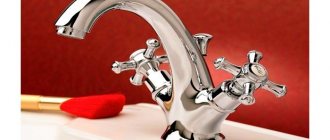
Spouts of various shapes can be equipped with a sieve filter. These spouts are designed for both sinks and bathtubs. When choosing, it is better to give preference to a wall-mounted mixer with a two-valve tap - for connecting cold and hot water.
When choosing a wall-mounted faucet for a kitchen sink or a wall-mounted sink faucet, you must rely primarily on their physical and technical parameters. Only then pay attention to the appearance and functional features. Choose plumbing equipment, paying attention to the following criteria, namely:
- material from which the body is made;
- connection methods;
- protective coating and its quality;
- type of cartridge (faucets with a ceramic cartridge are better);
- the presence of a retractable watering can for kitchen faucets;
- aerator properties;
- Possibility of connection to the filter - only new models are equipped with it;
- volume of water consumption (especially important if you choose a faucet for the kitchen).
Have you studied the model in detail and have no doubts? So, feel free to purchase this faucet.
The successful combination of all the properties of the mixer - technical and aesthetic - determines its reliability, durability and style. Confidence in the proper operation of cranes usually does not come cheap. Choosing an inexpensive faucet risks having to replace it within a month.
The purchase of a high-quality mixer is justified:
- long service life;
- economical water consumption;
- guarantee of reliability - you don’t have to worry about flooding your neighbors and other related troubles.
Read material on the topic: Types of bathroom faucets
Criteria for choosing a bathroom faucet
How to install a faucet on a wall, what methods are most common? Firstly, it is the replacement of the old one, and secondly, installation during repairs.
In order to replace old plumbing fixtures with new ones, you first need to select them correctly. This is not difficult to do, since today’s range of products offered by plumbing stores makes it possible, taking into account financial capabilities, to choose a mixer, both domestic and foreign. Below are the characteristics you should pay attention to when purchasing:
- Weight. Even if you are not a specialist and are not able to distinguish stainless steel from brass, the quality of a product can be determined by its weight. A product that is too light indicates its small thickness and fragility of the device.
- Metal. If a store consultant offers a choice of silumin and brass faucet models, give preference to the second. Silumin is not highly durable; its composition is an alloy of silicon and aluminum; products made from it have minimal weight and can be deformed during installation.
Many novice craftsmen make the standard mistake of choosing products from it because of the low price. Brass models have the highest viscosity of the alloy, which prevents the clamping nut from bursting during slight deformation and installation. In addition, brass appliances are less susceptible to corrosion.
- Dimensions. This characteristic concerns not so much the size of the faucet as its suitability to the installation location on the wall in the bathroom. If the model is selected incorrectly (excessively long or short, massive or, conversely, miniature crane and other inconsistencies) or does not correspond to the installation location, it can not only look ridiculous, but also quickly fail.
What only a wall sink faucet can do
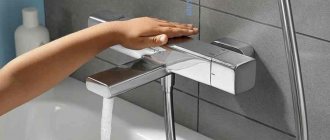
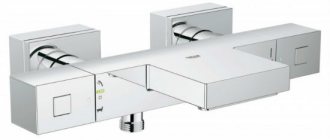
- Maintain the set temperature.
Thermostatic mixers are usually built-in. Traditional models are not equipped with a temperature regulator, so that a child or an elderly person with poor eyesight does not accidentally get burned. The built-in mixer easily copes with this task.
Thermostatic faucets operate at a preset temperature, but it can be easily adjusted when needed.
- Combine aesthetics and convenience.
By using a concealed faucet - more compact than a traditional one - you do not risk accidentally hitting the spout. Such faucets are installed, just like any other plumbing fixtures, so that they are convenient to use.
- Visually lighten the space.
Concealed faucets are mainly used by those who are adherents of similar styles such as purism and minimalism, which are characterized by practicality, functionality and the use of only the most modern technological solutions in the interior.
- Save space in a small bathroom.
Built-in faucets save space, which means they solve the problem of cramped space in a small bathroom.
- Create fewer cleaning problems.
A minimum of chrome fittings means less time to remove calcium stains from the surface of plumbing fixtures.
Read material on the topic: Mixer with nut: types and functions
Removing the old mixer
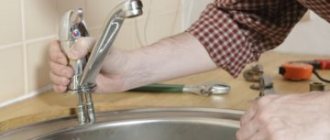
Removing an old faucet in a bathroom is a fairly simple task. To do this, you will need pliers and wrenches - gas and adjustable. Dismantling is carried out in several steps:
- Shut off the water supplied both through the main line and from the electric boiler or gas water heater;
- Drain any water remaining in the system;
- Remove the faucet from the wall. Do this with extreme caution, being careful not to disturb the threads of the fitting in the wall;
- Clean the threads on the metal-plastic pipes in the wall from winding.
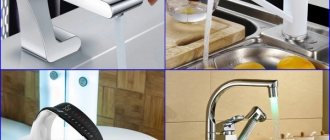
Touch faucets
Touch or contactless faucets are a modern “word” in the plumbing equipment market. The operation is ensured by a special sensor installed in the sink or on the mixer itself.
To supply water, you just need to bring your hand to the sensor; the device is activated at the distance specified by the program.
The stream is turned off automatically.
Advantages of the model:
- hygiene;
- reliability;
- comfort;
- safety;
- efficiency.
The disadvantage of a touchless faucet for supplying water to plumbing fixtures is its high cost. In addition, its installation is not always justified; it is not advisable to use it as a kitchen faucet.
The design of the sensor mixer for water supply includes:
- electronic control unit;
- connecting hoses;
- valves;
- levers for adjusting the temperature;
- purifying water filters;
- lithium batteries.
Manufacturers include a control panel in the package of expensive elite models, with which you can remotely configure the necessary parameters.
Touch sensors are powered by lithium batteries. The battery charge lasts up to 5000 on/off cycles. Experts believe that the contactless sensor can operate without replacing the lithium battery for five years.
Types of sensors To complete touch taps, sensors using infrared rays or photocells are used. Sensors whose operating principle is based on infrared radiation do not require special distance gradation.
When choosing a touchless faucet, it is important to consider:
- spout shape;
- sensitivity zone limit;
- country of origin.
Mixer installation
Installing a faucet in the bathroom with your own hands is as follows. Pre-connect the body with the shower hose, watering can and gander. Such manipulations are possible even without tools, since the process of installing a mixer yourself is not difficult at all.
For direct installation of plumbing in the bathroom, we will use the so-called fum tape, a special translucent sealing material, although in the old fashioned way you can use ordinary tow with sealant or ordinary sunflower oil. We check the screw-in level of the eccentrics using a building level - this is perhaps the most difficult task when installing a mixer.
To screw eccentrics onto metal-plastic pipes on the wall, we wrap them with fum - tape or tow. Typically, the distance between the holes in standard models is 15 cm. If for some reason this distance has been violated, eccentrics will help remove the imbalance.
After this, you can start trying on the mixer body. If the housing becomes easy, then the eccentrics have been installed correctly. Now you need to remove the body and screw on the decorative lampshades. At the same time, make sure that they adhere to the wall as much as possible.
Installation and installation of a faucet in the bathroom with your own hands video
We screw the body. When installing it, there is no need for additional use of winding, since its function is performed by the gaskets that come with the device. Tighten the nuts with a wrench. When tightened correctly, the key should make a squeaking sound. To tighten the nuts sufficiently, run water and pull just enough until the water stops dripping. Now you can connect the gander and shower head.
Installing a new bathroom faucet on the wall
Let's start with the simplest option: water sockets are made, the distance between them is standard 15 centimeters. Horizontally, the terminals are approximately at the same level. All small errors can be eliminated by adjusting the eccentrics.
Step 1. Check that the mixer is complete. All elements of the device, eccentrics and seals must be present.
Mixer set in box
Eccentrics included in the kit
Wall mixer
Step 2. Turn off the water, remove the plugs from the sockets. Clean the threads and remove dirt. If plumbing has not been connected to the pipes before, it is advisable to flush them. To do this, place a container below to collect water, cover the sockets with a cloth to prevent a strong horizontal stream, and fully open the water supply tap. Strong pressure will remove all dirt and foreign objects from the pipelines. If this is not done, then while using the bathroom you will have to disassemble the faucet for cleaning.
Prepared exits
Step 3. Wrap FUM tape around the eccentrics.
Fum
This is what an eccentric looks like with fum tape wound around its threads
We strongly recommend using tape rather than traditional tow. It holds water well; to reliably seal threaded connections, there is no need to tighten them too much. We have already mentioned above that silumin eccentrics react negatively to high forces. But the tape has one unpleasant property - it can only be used once. If you have not wound enough sealant, then you cannot rewind it onto the old one. It is completely removed and new material is used to seal it.
Linen
Winding flax onto a thread
Applying plumbing paste to flax
Paste protects flax from rotting
Instead of paste, you can apply sealant to the flax
To find out the approximate amount of tape to be wound, screw the eccentrics into the threads without a sealant. See if there is a large gap between them and if they wobble a lot. If the screwing is normal, then you need to wind 5–6 rows of tape; if the eccentrics are noticeably loose, then you will need 10–12 rows.
How to install eccentrics correctly? This is a very important point.
- Screw one eccentric into the thread, but not all the way, leave approximately one turn. This is necessary for precise regulation of their position.
- Place the mixer nut against it and approximately determine the position of the second eccentric. Wrap the tape around it and twist it, leaving about a turn until it is fully tightened.
- Place one mixer nut on the eccentric, and slowly turn the second until the remaining nut is located exactly on the same axis with the eccentric.
Screwed eccentrics
Important. Never install faucets with force; we have already said that silumin will certainly crack over time. Leaks will appear and repairs will have to be made. In addition, a cracked eccentric may break off completely, leaving part of the thread in the socket. It is very difficult to get it out of there. We will tell you how to do this below.
- Remove the mixer, place a level on the two eccentrics and align them horizontally. Carefully turn both at once, making sure that the distance between them does not change.
It is important to install the eccentrics strictly horizontally
To control, constantly apply a mixer to the thread. When screwing in the eccentrics, you should always remember that the ends must be located in the same plane, otherwise the mixer will be at an angle to the wall, which will complicate installation. But this is not all the problems. In order to tightly press the rubber gaskets into the device in this position, great efforts have to be made, these forces will constantly act on the elements. We have already said that eccentrics react extremely negatively to long-term static loads, a fatigue effect appears, and the metal cracks. As a result, leaks and the inevitability of repairs.
You can check the tightness by screwing the plugs onto the eccentrics and turning on the central water supply tap
Apply sealant around the water outlets to prevent water from getting behind the tiles.
- Everything is normal - install the decorative protective caps and tighten the faucet.
Decorative protective caps
The nuts have a thin decorative coating, so as not to damage it with a wrench, use any spacers. Rubber gaskets are most often installed between the eccentrics and the mixer; there is no need to tighten them too much for several reasons. Firstly, the rubber may cut through, leaks will appear, and the gaskets will have to be changed. Secondly, gaskets serve not only to seal the connection, but also to compensate for thermal expansion. As a rule, when heated, the mixer increases in size more than the eccentrics; the rubber easily compensates for these differences. But if you compress it too much, then this function will not be performed, as a result of cracks and leaks.
Insert seals
The nuts must be screwed in evenly
When tightening the nuts with a wrench, do not use too much force.
Use a cloth to avoid scratching the nuts with the wrench
Practical advice. There are often situations when the length of the threaded part of the eccentrics is so large that it cannot be covered with decorative caps, and a gap is visible between them and the wall. This is very ugly, don’t allow this to happen. Before installation, screw them on without a seal, replace the decorative caps and attach the faucet. If there is a problem, use a grinder to shorten the thread. This must be done carefully; cut the thread only at right angles to the axis. Be sure to straighten the first turn with a triangular file. To check, run the thread with a nut of the appropriate diameter and pitch. Ideally, the eccentrics should be pressed tightly against the wall with the mixer mounting nuts.
The long eccentric can be sawed off
You can find other recommendations for leveling the mixer. Screw it to the eccentrics and place a level on the body. Next, turn one of the nuts with a wrench, due to the fact that the body is attached, both eccentrics will rotate through the lever at once. We do not recommend using this method. Why? Firstly, it will take a lot of force on the nut to turn two eccentrics at the same time. This cannot be done, we have already mentioned why. Secondly, this nut can cut through the rubber gasket; we also talked about the consequences. And thirdly, the thread with FUM tape cannot be unscrewed, it can only be tightened. Otherwise, leaks may occur.
The mixer is screwed
Screw on the shower hose
Screw the spout
Installation tricks
Knowing some of the nuances will help you cope with the task no worse than an experienced master. Here are some of them:
How to install a faucet in the bathroom if the pipes on the wall are crooked video
- It is not difficult to use tow correctly; to do this, wrap it tightly around the thread in the direction of twisting. Be careful and do not allow the tow to twist into strands.
- When installing plumbing fixtures along with water pipes, you will need to mark the height. It ranges from 15 to 20 cm above the top side of the bath.
How to properly install a faucet in a bathroom on the wall, which does not require calling a specialist and financial costs. In addition to invaluable experience, this process will help you grow in your own eyes. Remember: if you want something done well, do it yourself!
Installation nuances
The installation of a faucet on the side of an acrylic bathtub deserves special attention - in this case, you can drill holes for installation in a convenient place and mount any faucet. This also has its own characteristics:
- holes must be drilled with a special tungsten-coated drill;
- you need to install the mixer before installing the bath itself;
- the side of the bathtub must be strengthened with a special gasket so that it does not bend during operation;
- the tap must be located next to the open side in order to easily and without unnecessary problems reach the pipes and valves.
Single lever mixers.
And here's another single-lever mixer
Single-lever faucets appeared relatively recently but are quickly gaining popularity due to their ease of use and large selection on the market. The water supply is regulated by moving the lever up and down, and the temperature adjustment is to the right and left, which is much faster and more convenient compared to two-valve faucets. Single-lever faucets use cartridges. They are reliable and durable, easy to replace during repairs. Disadvantage: high requirements for water quality and price.
Faucet types
There are several types of faucets. They differ not only in their intended purpose, but also in the installation method. For example, installation of a three-way mixer is necessary exclusively in heating systems, and this device itself has nothing in common with a conventional faucet.
Depending on the functional purpose, the following types of mixers can be distinguished:
- kitchen,
- showers,
- decorative,
- industrial.
Kitchen faucets have the simplest system. Such devices consist of:
- the crane itself,
- rubber gasket,
- fastening elements.
This type of faucet is installed not only near the kitchen sink, but also wherever there is a washbasin.
In addition to standard elements, bathroom faucets also include a shower. The operating principle of such units is based on a system of shut-off valves.
Decorative faucets appeared on the market not so long ago. They represent various art objects. A common feature is that only the part of the faucet through which water is supplied is visible. Cheaper mechanical options consist of a locking mechanism and a water supply channel. Electronic analogues react to human presence automatically, so the mixer consists only of a tap.
Industrial mixers are rarely used at home. Their main distinguishing feature is wear resistance. Firstly, they are designed for high pressure, and secondly, they have the simplest design. As a rule, industrial faucets are designed for a separate water supply to each tap. They do not have temperature regulators or the ability to adjust the water supply. This type of mixer can be installed by owners of private houses. This would be a good option for street washing.
Crane design
But in order to properly install or repair this equipment, you need to have an idea of what it is and on what principle it works. Although there is a wide variety of models on the market, different in shape, size, and individual design elements, in general the design of mixers is similar and includes the following main parts:
- Frame.
Provides mixing of hot and cold water, imparts the necessary rigidity to the entire structure, and serves to secure the mixer to the sink (sink) or wall. Made from corrosion-resistant stainless steel or brass. - Spout.
Forms a stream of water and gives it direction. Made from the same materials as the body, it can be rotating or stationary. At the end of the spout there is an aerator that reduces splashing. Often this element is rotating or retractable, which allows you to adjust the height of the fall and the direction of the water jet. - Shut-off and regulating element.
Designed to adjust the pressure and temperature of the water jet, as well as its complete shutoff. In single-lever models, its role is played by a metal ball or ceramic disk cartridge connected to a lever-switch; in two-valve models - two valve axle boxes with rotating valves.
The mixer is assembled and connected to the water supply system using the connecting elements supplied in the kit (nuts, sealing gaskets, flexible hoses). Shower models can also have an additional shut-off and control element for switching the water supply from the spout to the watering can, and kitchen models can have another lever for supplying filtered drinking water.
This faucet design diagram is general in nature and therefore somewhat arbitrary - what the mixer consists of is determined by its purpose and design solutions adopted in a particular model. For example, there are electronic varieties, the design of which has fundamental differences - in particular, they do not have movable controls. However, such models are presented in small quantities on the market, so further we will talk about their most common mechanical analogues.
Installing faucets in the bathroom
The most common solution for this room is separate installation of taps for the sink and the bath itself. In both cases, they can be installed on a horizontal plane (countertop, washbasin and edge of the bathtub) or on a vertical wall. In general terms, installation of mixers includes the following steps.
Checking the complete set.
Cranes are usually sold partially assembled, with the exception of connecting and fastening elements. In the case of bathtub faucets, a shower head or stand, a connecting hose and a bracket for it are also supplied separately. Before installing the mixer, you need to make sure that the package is complete - that is, check the presence of all components with the instructions. It is also necessary to check the functionality of the equipment and the absence of any defects or damage.
Preparation.
To correctly install faucets on a sink or bathtub, you will need the appropriate tool - a screwdriver of a suitable size, a set of wrenches (or an adjustable wrench), pliers, a tape measure, a building level. To prevent leaks at the joints, use sealing plumbing tape or flax tow with Unipak paste. Before installation, it is necessary to completely shut off the hot and cold water supply pipes to avoid flooding of the room.
Tow and paste are successfully replaced by anaerobic sealants, which are a polymer gel. In the absence of air, the gel hardens and provides a reliable sealed connection.
Marking the installation site.
For taps installed on the wall of a room, there are generally accepted standards for their location:
- the standard height of the mixer above the bathtub (more precisely, the outlet pipes of the water supply system) is 20 cm (counting from the top edge of the container), and relative to the floor - 80 cm;
- if the faucet will serve both the bathtub and the washbasin, then it must be placed at a level of 1 m above the floor, with at least 25 cm remaining between it and the sink;
- if it is planned to install a mixer with a shower stand, then its height must be at least 120 cm relative to the bottom of the bath.
It is worth noting that these standards are not mandatory, but recommended - ultimately, the specific installation height of mixers is determined by the location of the communication outlet pipes, as well as the convenience of users. It is important that the connecting fittings for hot and cold water supply pipes are located at a distance of 15 cm from each other, located strictly at the same level and do not extend beyond the wall cladding. If the distance between the pipes is smaller or larger, eccentrics are first installed on their outlet pipes to correct this discrepancy. For taps installed separately on a washbasin, the installation height is determined by the placement of the bowl itself, and their connection to the water supply system is carried out using a flexible liner.
Vertical installation.
To install taps on the wall, you must perform the following steps:
- if necessary, corrective eccentrics are screwed onto the communication pipes - in this case, it is necessary to first wrap the threads with tow with sealant or sealing rubber tape;
- then cups are screwed onto the inlet holes of the mixer, covering the holes in the wall, after which, using union nuts and rubber gaskets, the faucet is connected to eccentric bushings;
- When the main device is connected to the water supply system, a spout and a hose with a shower head are connected to it.
All joints must be sealed with the sealing washers supplied in the kit to prevent leaks.
Horizontal installation.
Installation of the faucet on the sink, countertop or side of the bathtub is carried out in a hole specially provided for this (in metal and acrylic plumbing fixtures, as well as in the countertop, you can do it yourself):
- before mounting the mixer on the supporting surface, you need to connect flexible hoses to it and thread this entire structure into the hole;
- then fix the mixer using a pressure washer and a sealing gasket - alternatively, using the studs supplied in the kit, which are screwed into the base of the faucet and then secured with nuts;
- The supply hoses must then be connected to the outlets of the hot and cold water supply pipes.
All connections are made using gaskets, rubber tape or tow with sealant.
Examination.
When the mixer is installed and fully connected, you need to carefully wipe all connections with a cloth and check the tightness of the fittings. The previously closed hot and cold water supply pipes are then opened and the faucet is tested for leaks. If there are none and the device demonstrates stable operation without pressure drops, the installation was successful. Otherwise, it is necessary to turn off the water supply again, disassemble and remove the mixer, check the integrity of the sealing and connecting elements and repeat the procedure. Helpful advice - for installation, use tools (wrenches and pliers) without notches, which can damage the surface of the nuts being tightened. Tightening the connecting elements should be done carefully so as not to strip the threads on the pipes.
Installing a faucet in the kitchen
Currently, in kitchens, taps are installed horizontally on the sink or countertop. It is carried out similarly to installing faucets on a bathroom sink and includes the same steps:
- connecting a flexible line to the inlets of the faucet;
- screwing the fixing pins into the mixer base;
- installing the assembled faucet into the hole in the sink or countertop and securing it;
- connecting supply hoses to the outlet pipes of the water supply system.
As in previous cases, all threaded connections are first wrapped with tow and sealant (or rubber tape), and sealing washers are installed in the designated places. Some kitchen faucets provide a connection to a drinking water filter; for this purpose, the kit includes a separate flexible hose and connecting elements.
Independent system installation
A huge advantage, without a doubt, is that you don’t need to take any specific tool to do the job - a regular plumber’s kit will come in handy.
The only thing you may not have is a hammer drill with a chisel to create a niche in the wall for installing the box. But it’s not necessary to take this either - try to save money and rent this power tool - it will come in handy since it’s only for a few hours.
And before you start installing a concealed faucet, it may be worth considering one popular question.
What type of eyeliner to choose
This refers to what connection to make between the water main and the faucet mechanism. There are actually only two options here, but sometimes this moment becomes difficult when assembling the structure.
Let's consider both solutions.
- Solid eyeliner . This method involves using a piece of plastic or iron pipe with special nuts (American) at the ends as an adapter.
What is good about this is that the vibration force will be reduced during the operation of the system, but the downside is the need to make a deeper groove in the wall for the adapter (due to the lack of flexibility).
- Flexible connection . As you may have already realized, the main advantage here is the ability to lay the adapter in a not very even groove - the hoses will simply “bypass” the unevenness. In other words, it turns out that installing this element is very comfortable.
But there is also the “other side of the coin” - the hoses do not help for very long, and in addition, if they are not fixed, then the connecting nuts will slowly “loose” during pressure changes. Which, as you understand, can certainly lead to a leak.
Based on this, try to fix the hose using fasteners, or perhaps also blow out the entire volume around them with foam.
The features of each option have been discussed, now let's move on specifically to the installation procedure.
Assembly diagram
The very first thing you need to do is to understand how to assemble and disassemble a concealed faucet for a shower stall or bathtub. This information can be taken from the instructions that come with each similar product. And it turns out that, based on the data from the instructions, it is possible to notice what technical nuances you will encounter.
Let's consider the sequence of work:
- We determine the installation location. This is a very important stage, since the correct placement of the point will determine how comfortable a hygienic shower with a concealed-mounted mixer will be for you.
- We make markings for cutting a niche for the box.
- We take a hammer drill and cut channels for pipes, hoses and a niche for the mounting box.
- We install the box, secure it well with screws and clamps.
- We install the mixer and all mechanisms inside the box.
- We monitor the performance of the system - in other words, we observe whether the pressure is normal, whether there are any leaks, etc.
- We remove the mixer if necessary (see instructions) and assemble the outer finishing panel. At the same time, remember to treat the edges of the lid with silicone - as if along the line where the elements adjoin the wall.
- We attach the mixer itself.
This is an approximate installation diagram. This concludes our review.
Choosing a new bathtub faucet
To replace the old faucet, you need to buy a new mixer.
Parameters by which mixers should be evaluated:
- Weight. The quality of the mixer is indicated by its mass. A good faucet cannot be too light. Long-term service is determined by the thickness of the material. Weight is the key to metal.
- Material of manufacture. The taps are made of 2 materials: brass or silumin. Silumin taps are much cheaper than brass taps. However, silumin metal is not durable. With such faucets, the clamping nuts often burst or the handles break off. Their only advantage is their low price.
Brass taps have a large mass with increased viscosity of the alloy. Due to the viscosity of the alloy, clamping nuts with pipes do not burst due to minor deformations, which cannot be avoided when using a crane. Taps made of brass alloys have an impressive appearance and are not subject to corrosion.
Installation features
- Read the instructions for the mixer, think about the location of the future structure.
- Entrust the installation and wiring of the water supply system to specialists.
- Decide on the location of the hose outlet.
- The connecting water pipeline is being laid.
- The niche is created using a hammer drill with a special attachment.
- Installation of pipes.
- A test run is carried out to eliminate possible leaks and only after that finishing work is carried out.
For reliability, all holes for the system are made 9.5 to 12 cm wide, with a diameter of up to 12-15 cm.
Replacing the mixer
If the house already has installed plumbing, but during the renovation process you need to install a new one instead, you need to first dismantle the old equipment. Replacing the faucet in the bathroom is carried out after shutting off the cold and hot water supply pipes and draining the remaining water through the tap. After this, the spout, shower head or stand are sequentially removed, the flexible hoses or the mixer body are disconnected from the communications. The old equipment is removed from the installation site, the threads on the outlet pipes are again wrapped with tow with sealant or rubber tape. After this, the new crane is installed according to the previously indicated scheme. Replacing a kitchen faucet follows a similar procedure. The main point is that it is necessary to carefully monitor the tightness of the connections, as well as the integrity of the threads on the outlet pipes. If the notch is torn off or damaged by rust, you will not be able to install a new faucet yourself - you need to seek help from a specialist.
Replacing the shut-off and control element
During the operation of a faucet in the kitchen or bathroom, it is this part that experiences the greatest load due to the mechanical interaction of moving parts, the influence of water and small particles suspended in it, water hammer, and careless handling of the equipment. Therefore, it is often necessary to replace not the entire faucet, but only the shut-off and control elements - fortunately, they are removable and can easily be purchased separately at any plumbing store. Depending on the design of the crane, we will consider two options for this procedure.
Replacing the cartridge in the mixer.
Single-lever models have only one such element. It is recommended not to purchase a cartridge in advance, as it may not fit your specific faucet - it is better to do this after removing the faulty part, with which you can go to a plumbing store and buy a similar one. To replace, you must perform the following steps:
- remove the decorative plug from the mixer lever and unscrew the fixing screw located under it;
- Carefully remove the handle and disconnect the protective ring located underneath it;
- Use a wrench to unscrew the clamping nut and remove the faulty cartridge;
- clean the internal surface of the mixer from salt deposits and rust;
- install a new shut-off and control element so that its fixing protrusions coincide with the corresponding grooves in the mixer;
- screw the clamping nut and protective ring back on, install the control lever, secure it with a screw and insert the decorative tab into place.
To perform the procedures, you do not need any specialized tools or professional skills - you only need standard screwdrivers or hexagons and wrenches of a suitable size.
Replacing the faucet axle box in the mixer.
This shut-off and control element is used in valve taps. As in the previous case, you should not buy a new faucet axle box in advance, as it may not fit a specific mixer model. Its replacement is performed in the following order:
- the decorative plug is removed from the faulty valve and the fixing screw covered by it is unscrewed;
- the valve handle is removed and, using a wrench or pliers, the valve axle itself is unscrewed - sometimes for this it is necessary to first loosen the anti-nut, if any;
- the mixer is cleaned inside of salt deposits and rust, after which a new faucet axle box is screwed into it, onto the threads of which sealing tape or tow with sealant is pre-wound;
- The valve handle is put back on the stem, the fixing screw is screwed in and a decorative plastic plug is inserted.
In both cases, before starting work, it is necessary to first turn off the supply of cold and hot water, and drain the remaining water through the tap to avoid flooding of the room. After replacing the cartridge or faucet, you need to turn on the water again and check the operation of the mixer. If a leak is detected, it will be necessary to check the compatibility of the shut-off and control element with this faucet model, as well as the quality of reassembly.
Obviously, installation, replacement and repair of the mixer in most cases can be carried out by a non-professional using standard installation tools. However, this applies to mechanical models - electronic faucets have a more complex design, so it is better to entrust their installation to specialists. If you still doubt your skills, after purchasing this equipment from the Santehnika-Tut.ru online store, seek help from our employees, who will quickly and correctly carry out all the necessary work.