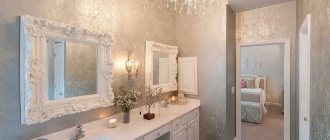
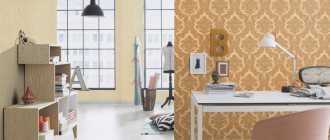
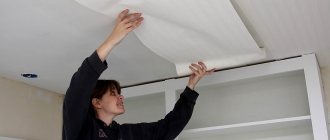
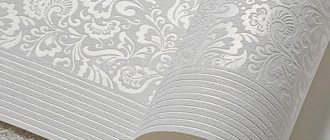
Rules for gluing non-woven wallpaper yourself
The pasting technique involves the use of generally accepted norms and rules. In addition, you need to take into account the characteristics of non-woven finishing materials. They are wider than paper ones and are heavier. All you need to know so that the interlining does not swell and the pattern is preserved is:
- Before gluing the walls you need to putty (if the panels are uneven) and prime.
- The direction of the pattern is indicated on the packaging using special symbols.
- Adjustment of the pattern along the edges is carried out in accordance with the instructions (straight - all strips are glued in one direction; reverse - in the opposite direction).
- The non-woven fragments are pressed against the wall from top to bottom, smoothed with a dry cloth, and the joints are rolled with a special rubber roller.
- Glue needs to be applied to the wall. Non-woven fabric allows you not to apply it to the back side of the fabric base.
- The technology involves gluing strips without seams (joint to joint, without overlap).
The temperature in the building must be constant during drying. The large weight of non-woven finishing materials requires that the glue have the appropriate thickness and viscosity. Wallpaper does not wrinkle if, after gluing, the surface is smoothed using rollers or clean rags.
Vinyl wallpapers
This wallpaper has two layers. The top layer consists of a polyvinyl chloride film, which protects the wallpaper from moisture and various damage, and the bottom layer is made of paper or non-woven backing.
Vinyl wallpaper, with proper care, can be used for quite a long time, is easily cleaned and hides minor wall defects well. Also, to avoid the appearance of mold underneath, they are impregnated with special antiseptic emulsions.
Flaw
Vinyl wallpaper, especially if it has a non-woven base, practically does not allow air to pass through, since the top layer consists of PVC film. Therefore, it is not recommended to glue vinyl wallpaper in rooms with constantly high humidity, as if raised, dampness and fungus may form.
But today, air-permeable vinyl wallpaper has already appeared. For this purpose, special micropores are made in the upper layer of their surface.
Which wallpaper glue is best to choose for non-woven wallpaper?
Paper is used as the basis for wallpaper production, which allows the use of starch-containing compositions. You can glue using PVA glue or specialized mixtures. If they contain polymer components, then such wallpaper can be glued to drywall or cork without puttying. Mixtures are now being sold that include antibacterial additives that prevent mold and mildew from appearing.
This problem is solved with a primer. Before gluing, you need to take into account the thickness, size and weight of the strips. If we are talking about massive non-woven wallpaper, then a thick (viscous) solution is used when gluing. The lungs can be glued to liquid. If the wall surface has unputtyed shells, glue that has increased thickness is used. The preparation recipe is indicated in the instructions for use.
Pros and cons of the vinyl plus non-woven combination
Formally, this wallpaper consists not of two, but of three layers - the non-woven base contains two layers - opaque, designed to hide the color unevenness of the walls, and decorative vinyl (types and nuances of gluing).
A huge variety of textures (including those imitating other materials) and patterns of such wallpapers allows you to implement quite bold design solutions.
One of the main advantages of using a non-woven base is considered to be ease of gluing. Although from a practical point of view, wallpaper has many other advantages:
- density and elasticity - allows the wallpaper to hide defects in the wall topography, even small cracks;
- tensile strength;
- resistance to abrasion and fading;
- durability;
- do not create problems during maintenance - both dry and wet cleaning are acceptable;
- high level of noise absorption;
- no deformation - wallpaper does not tend to stretch or shrink when exposed to moisture.
More often they are sold in meter lengths - in this article the nuances of gluing.
Does this finish have any disadvantages? The main negative point is associated with the likelihood of obtaining a vapor-tight wall surface that sometimes releases harmful substances.
Non-woven non-woven canvas, made from cellulose fibers with the participation of polymers, is not only soft and durable, it is also absolutely harmless to health. This, unfortunately, cannot be said about the vinyl layer applied on top of the base. Some wallpapers can be covered with a special breathable vinyl layer, but they are less accessible and expensive. As for regular vinyl, even products that have all the necessary certificates are not recommended for bedrooms and children's rooms. Find out: how to choose the right wallpaper.
3D photo wallpaper for the bedroom – the best design ideas
However, this only drawback of vinyl wallpaper can be practically eliminated by not forgetting to regularly ventilate the room.
What tools will you need?
You should prepare in advance. You will need equipment and tools. Before you start working with non-woven materials, you need to think about what kind of glue to use and what you will need for this. The process cannot complete successfully without:
- wide brushes or rollers for applying adhesive;
- wallpaper knives and a wide spatula for cutting the ends of the strips;
- special equipment (electronic levels, plumb lines or levels);
- containers for preparing glue;
- clean dry rags for smoothing the surface of the wallpaper;
- stationery scissors;
- narrow rubber rollers for rolling seams (joints);
- pencils or ballpoint pens for marking.
All of the above must be available. The list does not indicate the tools necessary for the preparatory work.
Proper preparation for gluing
General requirements state that before gluing non-woven wallpaper, you must:
- Wash the floor, or better yet, lay cellophane on it. This will save time on cleaning.
- All electrical wiring outputs are isolated.
- By removing socket covers and switches, the room is de-energized.
- If there is not enough natural light in the room, the “glasses” with connectors for sockets and switches are sealed with masking tape, which is then removed.
All necessary equipment must be in good working order, clean, and preferably new.
How to dilute glue correctly?
It is best to do the preparation immediately before gluing non-woven wallpaper. Strips of the required length are cut in advance. The dry granular mixture is poured into a dry container. Then it is filled with the required amount of water. In this case, you need to continuously stir the resulting mass until the granules are completely dissolved, monitoring the consistency.
IMPORTANT! The recipe indicated on the packaging of wallpaper glue is designed for the entire pack, and it is not advisable to dilute the glue in advance. Over time it thickens. The optimal quantity is for 4-5 strips.
Surface preparation
Non-woven wallpaper can be glued to:
- concrete panels;
- plastered brick walls;
- plywood or OSB;
- drywall or other prepared surface.
Tips and tricks for wallpapering
Quite often you can hear the question of whether it is possible to glue vinyl wallpaper on a paper base with non-woven glue. Now you know the answer is yes. However, all rules for using such compositions must be followed. If the walls and wallpaper have been prepared, you can also apply a primer, which will help adhere the finish to the surface even more securely.
After this, the canvas is smeared with glue and left for a few minutes, then you can begin to paste the wallpaper on the wall. Sometimes experts recommend applying the composition only to the surface to be treated. You can read the instructions for a specific material by looking at the packaging.
Vinyl wallpaper is glued end-to-end, the panels should not overlap each other. It is important to remember that the material stretches greatly when gluing. You should try to match the pattern while cutting the fabric. Some of the material will end up in waste. Short pieces can be used for gluing surfaces under and above windows. You can use the remains for subsequent repairs.
If you are wondering how to glue paper-based vinyl wallpaper with non-woven glue, then you should know that this coating uses polyvinyl chloride as the top layer. It is responsible for moisture resistance. This suggests that the walls after repair can be washed even with the use of special products.
Algorithm for gluing on walls with your own hands
First, the wall is coated with glue. The width of the treated surface is greater than the width of the roll. Lubricate with a special soft roller or a wide thick brush. When preparing the stripes, take into account the need to adjust the pattern. Non-woven wallpaper needs to be glued joint to joint.
Stage 1: diagram and marking of walls
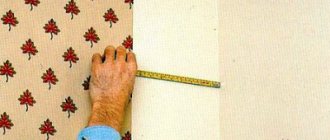
The width of the roll is measured from the window, and a vertical strip is drawn along the level or plumb line. This is a guideline so that the fragments and joints are even. By marking the wall along its entire length, you can determine the required number of solid strips, which should be cut in advance.
Stage 2: preparing wallpaper
If non-woven wallpaper is glued without matching the pattern, the fragments are cut with a small margin in length (5-7 cm more than the ceiling height). When it is necessary to adjust the pattern, the margin is made larger by the amount indicated on the packaging of non-woven wallpaper opposite the corresponding symbol.
Stage 3: gluing
The pasting process begins from the window. When applying fragments, you must ensure that they are vertical. To do this, markings are applied to the wall.
When gluing non-woven wallpaper, only the wall is covered with glue. If the canvases are heavy (vinyl-coated), it may be necessary to apply glue to both the wall and the wallpaper.
Rolling with a roller or smoothing with a rag, press the middle of the strip along the entire length, having previously unrolled the wallpaper.
Remaining air and excess glue are expelled from the axis to the edges, which are rolled with a narrow special roller for tight adhesion. There should be no overlaps.
Stage 4: final
All protruding parts of the fragment are cut off with a wallpaper knife. To ensure an even cut, apply a wide metal spatula to the cutting line. Below you can leave the wallpaper as is, since after gluing, a plinth is installed that hides the defects.
Useful tips
Prepare the necessary equipment
If you've never hung wallpaper before, don't start without help. Follow the instructions carefully. Prepare the surface.
Preparing the wall
Primer promotes better adhesion
- Clean old enamel, paper, whitewash, plaster from the surface
- All irregularities, depressions and cracks are filled with gypsum plaster. If the room is humid, add the second part of the cement to the composition.
- When the plaster has dried, coat the walls with a primer and antiseptic.
- Wait for it to dry completely and start gluing
The thinner your wallpaper and the more glossy its structure, the more carefully the wall is leveled. And vice versa, if the canvases are porous with relief, the less you can bother with plaster.
After gluing
Do not ventilate the room for 24 hours after gluing
The drying process takes 3-5 hours in a room with a temperature of up to 25°C. During the day, the room is not ventilated and the air conditioning is not turned on. Monitor the humidity level - it should remain at the green mark (medium).
The correct choice of glue determines whether the wallpaper will last long. Always pay attention to the composition. Also, make sure that the packaging indicates that the product is intended for non-woven vinyl wallpaper.
They are heavy and not as hygroscopic as paper, so they require glue with a more viscous consistency. They cost much more than a standard product, but if you remember about the long-term service life of the coating, the expenses no longer seem unreasonable.
The highest quality products are methylcellulose-based products. In second place are mixed preparations with modified starch and PVA glue. The worst performers are universal substances intended for all types of roll coatings.
Elegant interior in soothing colors
Watch the video on how to properly apply wallpaper, listen to the recommendations of a specialist on choosing the optimal adhesive product:
How long does non-woven wallpaper take to dry?
It all depends on the temperature in the room. The higher it is, the longer it will take until it dries completely. Usually it is 6-10 hours. At this time, there should be no drafts in the room.
The pasting procedure is simple and can be carried out independently, without the involvement of a professional construction team. Non-woven wallpaper is ready for painting, which is a definite plus. The only thing you need for a quality repair is accuracy and the above instructions.
How to glue vinyl wallpaper on a non-woven base (video)
Vinyl wallpaper based on non-woven fabric is a strong, durable, beautiful and modern coating. They dry quickly, the foam materials give a chic texture, and there are so many other attractive aspects that open up - ease of care, the ability to wash (and after washing they dry quickly), design experiments. Not the cheapest, but affordable wallpaper will last you a long time and will delight both you and your guests with its spectacular appearance.
The best posts
- How to make a plasterboard box in the bathroom - step-by-step instructions
- Drywall figures or how to make the interior stylish and fashionable
- DIY decorative corner fireplace made of plasterboard
- Wiring under drywall: lay it out correctly
- Painting drywall - step-by-step instructions
- How to join drywall in corners and the process of building a decorative niche
- Socket boxes for drywall: correct selection and installation
- Sealing drywall joints - recommendations from professionals
