Try asking two different teams of repairmen the same question: what is better to do forward - a suspended ceiling or a partition in the room?
If you are sure, the answers you will receive are uncertain and, most likely, different. In fact, if you have to install a partition to divide the room into two parts, then what is the best and correct thing to do - stretch the ceiling and then partition the room? Or fix the partition structure to the ceiling and walls and then stretch two sheets for the ceiling structure? This article talks about what a partition in a room with a suspended ceiling is and how to install it.
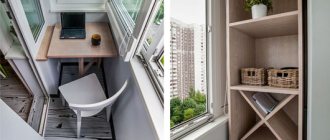
What is a septum
To begin with, let us recall what a partition is in the modern sense of the word. After all, the current structure for dividing the room is not at all the thick brick wall that was erected to divide the apartment into rooms. Today these are a variety of designs, sometimes very light and airy. They differ in materials, shapes, and can be room dividers or complement the interior. With the help of partitions you can easily zone the space. Finally, if the apartment has design flaws, a well-organized partition will correct the situation and even visually change the geometry of the room.
All this explains the popularity of partitions among many apartment owners. The only question that arises quite often is how to build partitions where a suspended ceiling is installed or planned? There are several solutions to this problem.
Choosing a plasterboard ceiling design for the living room
For many of us, the living room is the room where we most often spend our free time.
Here we watch TV, receive guests at family celebrations, or simply relax with a book in our hands. In modern renovations, plasterboard is increasingly used to decorate living rooms. After all, with its help you can create the most fascinating and incredible ceiling designs. The design of such floors can be very diverse. Plasterboard ceilings in the living room allow you to achieve incredible design solutions and completely transform the appearance of the room.
Partition in a room with a suspended ceiling
Almost all partitions that exist today can be combined in one way or another with suspended ceilings. We will tell you about the types, design features and design options taking into account the stretch ceiling.
Stationary partitions
Such structures are made from durable and popular materials:
- drywall;
- gypsum fiber;
- tree;
- plywood in sheets;
- veneered plate.
The frame is sheathed with any of the listed materials - it is made of wood or profiles. For sound insulation, sound insulating materials are laid.
The design turns out to be durable, strong, powerful, so you can simply attach it to the floor and walls without affecting the ceiling. We will tell you below how to make such a partition after installing the ceiling.
Mobile partitions
This type of partition does not pose any problems with the ceiling at all, since they practically do not touch the ceiling surface. Mobile partitions are convenient to use to delimit space. The basis for such a structure is made of wood or metal, and a durable partition material, for example, fabric, is attached to it. Typically, such partitions are also made to solve interior problems. After all, any design can be quickly and beautifully complemented by the construction of an elegant or, on the contrary, brutal partition that matches the style of the main interior of the room.
The advantages of such partitions:
- attractive appearance;
- possibility of quick dismantling;
- ease of installation;
- ease of construction.
Lightweight designs
Such structures are lightweight, and therefore even have advantages over other types of partitions - both mobile and stationary. Lightweight options look very fresh, modern, and fit perfectly into the interior of almost any style. Material for their manufacture:
- glass, tinted or transparent, decorated, etc.;
- plastic structures such as blinds;
- frame made of profile or plastic.
This is a convenient option for installing a partition over existing stretch ceilings. This partition is attached to the floor.
Such structures, despite their lightness, are quite durable; they are easy to install and quickly disassemble. In addition, the material is durable and the design is soundproof.
Semi-septa or pseudo-septa
Actually, they cannot be called partitions in the full sense of the word, because they are installed more as an object of decoration. Usually fancy, original designs of such partitions separate different areas of the room and, of course, decorate the room. They are made from plasterboard, usually designed so that the shelves and through holes remain open.
Such partitions do not clutter up the space at all; on the contrary, they sometimes lighten the interior and expand the room.
As for installation options and connection with a suspended ceiling, in each case the option is thought out separately, depending on what the structure is and the method of its fastening. A simple solution is to first install a partition, then make a stretch ceiling frame.
Types of tension walls
There are several classifications. The first, namely the installation method, is discussed in the first chapter. Like suspended ceilings, walls are made using the harpoon or glazing bead method. The second reason for division is the nature of the canvas. This question is also discussed above. There are polymer and fabric tension walls .
Other classifications of tension walls are related to their appearance. Partitions are divided, for example, by texture. The canvases come in glossy, satin and matte. For fabric walls, only the last option is possible. PVC film comes in all three types.
The matte texture looks similar to whitewash. Satin walls visually resemble shiny paint or satin fabric of the same name. It is characterized by mother-of-pearl tints. Gloss is akin to a mirror, reflecting the surrounding environment.
The reason for dividing tension walls into groups is their external decor. Canvases come not only in different textures, but also in different colors. In addition to plain ones, they produce decorative films. It has a factory design on it.
It could be a sky with clouds, drops of water, randomly scattered gold or silver threads. Decorative films, as a rule, are 2-3 times thicker than standard films, so they can withstand high mechanical loads. This is important for walls.
The drawing on the wall is also not factory. The image can be applied on a special photo printing machine. It can be eco-solvent or ultraviolet. The latter is used for printing on canvases more than 4 meters wide.
Tension walls with photo printing allow you to make your interior unique. Images are selected from Internet stock databases, for example, Shutterstock. Among the millions of pictures divided into categories, everyone will find their own. It can reflect the tastes and interests of the owners, be placed on the canvas in a non-standard manner, and be of a different color than in the stock base.
In terms of structure, tension walls can be made not only from a single fabric, but also with soldering or perforation. In the latter case, 2 levels of film are stretched. The first is a solid base of standard thickness. The face layer is denser because it has slits.
They can form a pattern, or be distributed randomly. Lighting is done between the layers of film. Walls with soldering involve the connection of several canvases of different textures and colors into one level. A unique pattern is created, reminiscent of artistically sewn fabrics.
Sliding partitions in suspended ceilings
Surely many people are familiar with this situation: there is a dark corner in the apartment that can be converted into a quite spacious dressing room.
Or, for example, a child is growing up and needs to allocate his own personal space. In both cases, the simplest solution would be to install a partition structure. Moreover, the partitions are not simple, but with sliding sections or doors. How to do it? Sliding doors or a sliding partition can be installed either before you start on the ceiling or along the finished canvas. You can do this in four ways.
Method one
This method can be called the most universal, because in this case the ceiling is not connected to the doors in any way. It is only suitable if the repair has just begun and the tension structure is yet to be installed.
Its essence is that separate fastening systems are created for both the ceiling and the partition. This is done like this:
- Guides for the sliding partition are installed on the main (draft) ceiling.
- Having retreated a little, they mount a wooden beam. It is also located on the rough ceiling.
- A profile is attached to it for further installation of the stretch ceiling.
- The ceiling is being installed. Install a sliding partition of the desired type.
This method is good because it allows you, without touching the partition structure, to replace the stretch ceiling fabric if necessary. What to put in front - a partition or a ceiling - in this case no longer matters.
Method two
This method is also applicable if the ceiling has not yet been installed. That is, doors or a sliding partition are initially installed, and only after that the suspended ceiling structure is installed. The progress of work is as follows:
- The doors are attached, for which a false panel is placed on the ceiling, to which the suspended ceiling is then attached.
- The panel is reinforced with a wooden beam; the same beam will be used as a fastener for the guides and the sliding partition.
With such an installation it will be possible to change the stretch ceiling sheet without any problems, and in principle the method is similar to the previous one, the difference is that it still involves installing the doors first, then the ceiling.
Method three
This method is convenient if the repairs have already been done, everything seems to be in place, but you need to highlight some area. That is, the case described at the beginning of the section. Here, first we install the suspended ceiling, and only then do we attach guides to it for installing the sliding partition.
This is done like this:
- The installation location of the partition is determined.
- A wooden beam is attached to it.
- A frame of profiles for a stretch ceiling is installed, the canvas is stretched over this wooden beam.
- In the place where the partition was planned to be attached, special stickers are glued - these are adhesive pieces that prevent tears at the places where the tension fabric is punctured (pierced).
- The guides for the sliding partition are secured in the required places with self-tapping screws.
The advantage of this method is that you can install doors or partitions after the suspended ceiling has been installed. However, it will not be possible to replace it if something happens.
Fourth method
Experienced craftsmen can also offer another option. It is good because you can, already having a finished ceiling, make a partition by working a little on its design. How it's done?
- The tension fabric must be removed from one edge, where the future door or partition will be located.
- In the right place, strengthen the embedded board, which is placed at the level with the suspended ceiling.
- Tighten the tension fabric again to the old place, using the usual method - heating for film material and stretching for fabric base.
- Make a mark on the ceiling in the place where the guide will be attached. The guide and embedded board are preliminarily combined.
- Where the fastening will be, we fix it with a sticker; such plugs are sold in any furniture or hardware store. Use self-tapping screws to pass through the plugs; this will prevent the film from being damaged when pulled.
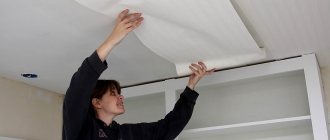
How to install the structure
Plasterboard ceilings in the living room always begin with the installation of a frame. To do this, the following procedures should be carried out:
- lower the ceiling level to the desired height. The minimum by which the ceiling can be lowered is 5 cm;
- First, we attach the profile guides along the entire perimeter. We fasten them with dowels;
- then at a distance of 60 cm we screw the profile guides in parallel to the frame;
- If there is a backlight, we draw wires for it.
For single-level structures, at this stage the installation of the frame is completed, and we cover the frame with plasterboard sheets. If there is a backlight, cut holes in them in the right places.
Single-level ceiling frame
If you need to make a second level, then you should do the following:
- apply the required markings of figured elements, steps, or make the contours of a circle, oval or square on the first level. Be sure to check the evenness of the drawn lines using a level;
Note! We draw a square around the perimeter and install the structure according to the principle of a niche, in which it will then be easy to hide lighting fixtures. Here we use rack-mount (transverse) fastenings and profile guides.
- creating shaped elements involves cutting the profile with scissors. The cut profile easily takes the desired shape during the process of fastening it;
- We install all straight and cut profiles along the marking line and fasten them with dowels.
Second level frame
When creating a multi-level stepped ceiling structure, we make each subsequent level smaller. It should be reduced by an equal distance to avoid visual imbalance of the ceiling. It should be remembered that creating a multi-level floor involves covering each level with plasterboard before installing the frame of the next level. Fastening plasterboard sheets is carried out as follows:
- the first level can simply be sheathed with solid sheets;
- on the sheets of the first level we apply markings of those figured elements that will be present on your ceiling;
- We use a special knife for cutting. The sheets should be cut on one side first. We cut through the paper, turn the sheet over and lightly hit it with your hand. Then cut off the remaining layer of paper;
Cutting plasterboard sheets
- We attach the pieces to the frame and fasten them with self-tapping screws.
Now the main ceiling structure is ready.
How to make a partition if the ceiling is already stretched?
It happens like this: people move into a new apartment, but it does not meet the needs of the family. Redevelopment is needed in order, say, to allocate space for a work area in the living room. Or divide the spacious kitchen into separate cooking areas and a dining room. Or, for example, you need to determine a place in the hallway for a storage room. The simplest solution is redevelopment with the installation of a partition. But the ceiling is already there. He is good. And I don’t want to start a big renovation. What to do?
Note! Different types of partitions - in particular, mobile and other lightweight “pseudo-walls” are very functional, although they are simple to implement and inexpensive. With them, the room becomes not only zoned, but also cozy in a new way.
Types and features of installation
New walls can be made in different ways. Depending on the volume of work, complexity, and the designer’s idea, both financial investments and labor costs will vary. This will make repairs more expensive. If you need to make a full-fledged room, selecting part of another, larger room. And if you just want to allocate part of the studio apartment for the kitchen, visually separating it from the sleeping area, then you can get by with a simpler partition. Let's talk about how this or that structure is attached to the walls and how the finished stretch ceiling is used:
- Screen or open shelving. This mobile structure is easy to make, it divides the room and at the same time has its own functionality in the form of additional storage space in drawers, on shelves, etc. Such “pseudo-walls” do not need to be fixed at the installation site. In order not to damage the suspended ceiling fabric, you just need to correctly calculate the required height of the screen and mount a new wall in a matter of minutes.
- False walls made of lightweight materials. They are mobile; they are used both as sliding structures and in the form of glass or transparent partitions. They are made of glass or plastic, and are loosely fixed in place, so that they can be removed and moved. Unlike screens, they are quite well secured, more reliable, and stable. Such structures are installed along the entire length and width of the room. You can, for example, use them when dividing a kitchen - sufficient sound and odor insulation will be guaranteed.
Advice! If you have a small studio apartment, then the best option for zoning or dividing the room into zones would be to design a lightweight false wall.
- Stationary structures. They are made on the basis of a frame and slabs made of different materials; they represent a wall with a load-bearing frame with the cavity between the slabs filled with soundproofing material. The installation of such a wall is clean, dry, it can be done quickly and dismantled just as quickly. Such structures may be incomplete, that is, they are not installed to the full height, but they can also be mounted in spacers. In this case, the appearance of the wall is more complete, but it is more technically complex. The above describes the method of mounting on a finished ceiling, applicable to sliding partitions. Stationary blank walls are built according to the same principle. And yet, for a non-professional, this matter is quite complicated. We recommend that you contact a specialist so as not to inadvertently damage the stretch ceiling fabric.
Note! It is not always technically possible to attach a partition to a suspended ceiling. For example, the polyester fabric base of the ceiling does not provide this. In this case, the partition is not attached to the ceiling, but to the walls and floor of the room. It will look just like a real wall if it is made almost flush to the ceiling, but still not to its full height.
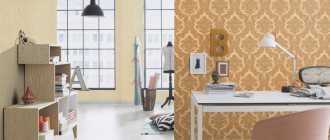
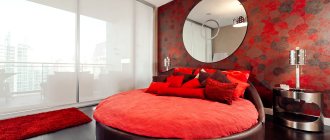
Options for using paintings on walls
Thousands of years ago, people knew how to appreciate beauty and tried to decorate their homes with images. At first they painted with charcoal, created frescoes on plaster, then photography and graphics appeared. By and large, it makes no difference exactly how beauty is created - if the work is talented, it always improves your mood and invigorates you no worse than morning exercises.
You can contemplate the beauty while admiring the plot on the tension wall
The plot corresponds to the eco style in which the room is decorated
In contrast to minimalism in the interior - a panorama of the metropolis
Advantages over photo wallpapers
Now, in order to decorate your home, it is not at all necessary to paint on the walls, which, by the way, is still quite a labor-intensive and expensive pleasure today. What for? After all, you can create the desired ambiance in the interior quite quickly and for a very reasonable price. For example, by mounting a stretched canvas with a corresponding image on the wall.
- To do this, you can, of course, use photo wallpaper, but there is a lot of hassle with them: you need to perfectly align the wall under them, stick the canvases, trying to match the pattern as accurately as possible. At the same time, the choice of images is not very diverse, and the print quality is not always satisfactory.
- Another thing is PVC film or ceiling fabric with photo printing, which has clear and rich colors and a huge range of subjects. In addition, you can put a backlight under the film or along its perimeter, which will not only enliven the picture, but create the effect of presence.
- In order to achieve overall harmony, all that remains is to choose the right plot. Some of them (landscapes, animals and even large flowers) often looked out of place on the ceilings. But the walls are the best place to place them. It is only necessary that the theme of the image corresponds to the general concept of the interior, and the color background echoes its content.
For example, we offer a gallery of photographs with a similar design:
Women's feet walking on water - an unusual plot
Ceiling and wall plasterboard structure, decorated with fabric
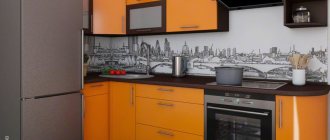
Brooklyn Bridge on the billiard room wall
Manhattan skyscrapers in an ordinary living room
Floral accent in the seating area
Stretch fabric “night sky” both on the ceiling and on the wall
The space theme on the canvas is supported by the shape of the lighting fixtures
Canvas with an image similar to a fresco
City in an apartment
Pastoral landscape for a small living room
Design ideas
An interesting plot, chosen with meaning, will never spoil the overall atmosphere of the interior. And there is always a choice, because photo printing allows you to put any image, design, texture on the base, to imitate any technique - be it ancient or modern. Moreover, a picture on the wall can serve not only as decor as such, but also serve as a zoning element or adjusting the parameters of the room.
Find out how to install a glossy white stretch ceiling with your own hands in a special article on our portal.
With this design, you can beautifully dilute an interior with a predominance of black and white or pastel colors, or, conversely, balance the riot of colors in decoration or textiles. In a small room, for example, a plot with endless expanses (sky, sea, forest) - or any landscape or small ornament - will look great. For a studio, some compact composition the size of half a wall would be better suited.
Example of small room design
The image visually expands the walls of a narrow corridor
There will always be morning in this bedroom
Zoning a large room
Tension wall in a classic interior
Wall and floor covering in one color scheme
An image can calm, encourage action, or be abstract - it all depends on what kind of room it will decorate. So, having decided to highlight one wall surface with the help of a stretched fabric, and approaching the choice of the theme of its design with all responsibility, you can “kill” not only two, but three birds with one stone at once.
Find out how to install a floating stretch ceiling with lighting in a special article on our portal.
Prices for glossy stretch ceilings
Glossy stretch ceilings
How to make a partition under a suspended ceiling?
So, if you need to make a partition under a suspended ceiling. In any case, it will be, to one degree or another, incomplete in height. Let us tell you in more detail how such a project can be implemented.
The design solution can be very different, and the partition can have niches, windows, shelves, steps and a linear top. Some decorate the side of the partition with a wave, steps and other design elements. The main thing here is not this, but the method of joining the partition to the ceiling. In other words, how to install it by surprise.
This is done like this:
- The frame of the future wall is made from aluminum rack profiles, which is fixed to the wall and to the floor.
- Then the frame is covered with plasterboard.
- At this point, you can install niches, lighting devices in the form of lighting, as well as glass inserts and other decorative elements on the wall.
- The wall is finished in accordance with the decoration of the rest of the room. This could be painting, wallpapering, etc.
Transition form
The design in which only part of the tension fabric is lowered looks unusual. There are no restrictions as to what the decor on the wall surface should be. The following forms are popular:
- Arch. By choosing this shape, you can hide the corners on the wall. There is a gradual transition to the wall from the ceiling surface. Using this effect will help visually expand the space in the room, since the corners will not be noticeable. This option is often used if you want to create an antique atmosphere in the room.
- Cone. The cone-shaped element resembles a drop of water that is about to fall. Can be used as a separate decorative element or as a way to decorate columns.
- Plane. This is a classic perfectly flat surface. Installation of such a ceiling occurs in the shortest possible time. This option is perfect for small spaces. The usual perfectly flat plane is a design option that is not chosen so often. Many people want to make their ceiling unique, so they choose original solutions. Nevertheless, the plane remains a classic of the genre. This is a win-win option that will look good in any case.
- Rounded corners. Rounding is carried out at the junction of the wall and ceiling. Using this design you can create a smooth transition from the wall to the ceiling surface. This design will decorate the room and add a touch of originality. This is the best option if there is a significant defect at the junction of walls or ceilings. The design with rounded corners will help hide defects.
Photo print on tiles
Creating an image on ceramic tiles can be done in two ways - using UV printing and decal techniques. The UV printing method involves the printer applying special ink to the surface, which, after hardening under the influence of ultraviolet radiation, “grows” firmly to the surface. The image is bright and clear. Before applying the design, the tiles are well primed, and after the image transfer procedure is completed, they are opened with a special varnish to protect the print. The product turns out to be resistant to moisture and temperature changes, wear and mechanical damage (but you should not deliberately try to scrape off the pattern with a knife).
The decal technique involves printing an image onto special paper, which is then coated with a protective varnish. Then the design is transferred to the tile using the decal principle, then the product is glazed and fired. This technique allows you to apply a design to a surface of any configuration. But it also costs significantly more than simple UV printing.
Plasterboard ceilings for the living room - all design methods with examples from interiors
- not suitable for very low rooms due to a serious downward shift in the ceiling level - from 10 to 15 centimeters;
- not recommended for use in newly built buildings - it may crack after the inevitable shrinkage of the building;
- may deform over time or lose its color due to specific operating conditions (temperature changes, flood).
- the lack of free space in the living room can be perfectly solved by using a plasterboard ceiling that is a lighter tone than the walls;
- if the task is to make an overly tall and large room a little more comfortable, then you can darken the ceiling by choosing black or any other color that is a tone or several shades darker than the design of the wall surfaces;
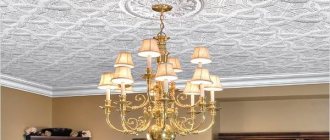
- a combination of a central chandelier and spotlights;
- hidden lighting of niches using LED strips;
- overhead lamps located symmetrically or randomly;
- hanging lampshades for placing the necessary accents in the interior;
- combined use of spots and LED strips in the format of linear and shaped frames;
- use of illuminated tension fragments.
We invite you to carefully study all the most popular ways to design plasterboard ceilings for the living room using photos. The following methods for decorating plasterboard ceilings for a hall are relevant only in cases where you are dealing with a structure of two or more tiers
.
Plasterboard ceilings
It is recommended to place plasterboard ceilings only in kitchens with high ceilings or above average levels, as they take away the height of the room and do not reflect light well. For a small kitchen with low ceilings, you can make the structure two-level or simply place a small cornice around the perimeter: this will help to visually “raise” the ceiling higher and make the space more airy and free. You can experiment with color and come up with a different color scheme for each level.
Unfortunately, square or narrow bedrooms in an apartment are far from uncommon! The main feature of such a bedroom is high ceilings, but this height can be easily adjusted using color. To visually increase the height, pale tones are suitable, and dark colors will help to “lower” the top. If you paint the walls two shades darker than the ceiling, this will also make it lower.
Remember that the colors of the ceiling and floor should always be different! Choose colors in warm, light colors. And if you make the ceiling and walls the same color, then the boundaries of the room will seem to blur, and this will also create the illusion of a large space.
We have prepared for you everything you need to decide on the design of such a structure. And also choose the location of the built-in lighting. A hall in a Khrushchev building is, as a rule, a small room with ceilings up to 2.5 meters high and practically zero sound insulation.
Therefore, when planning the room and ceilings, it is necessary to choose design solutions that will help correct these features for the better.
Features of gray ceilings
The reason to love gray color is that it highlights all the elements of the interior. Any chandelier will look aesthetically pleasing on a gray ceiling, especially if it has a gold or black base.
The combination of gray and purple colors fills the bedroom with tenderness and romance Source potolok.expert
Exquisite textiles on the chairs and a golden chandelier go perfectly with the gray ceiling Source potolok.expert
A gray ceiling with white wooden beams emphasizes the beauty of a classic interior Source potolok.expert
Best colors to pair with gray:
- terracotta - modern, status interior;
- yellow, white - Scandinavian style, the combination inspires optimism and has a positive effect on the psyche;
- flesh-beige, white - luxurious baroque;
- soft pink - romantic interior;
- white, black - minimalism, hi-tech, modern;
- purple - the interior is conducive to creativity, uplifting;
- blue - Moroccan, Mediterranean style;
- blue - light and spacious interior;
- purple, yellow, blue, pink - suitable for the avant-garde;
- red, orange - the interior will be filled with strength and energy.
A concrete ceiling that flows into a wall looks bold in a modern kitchen Source potolok.expert
The gray ceiling matches the facade of the kitchen furniture and accessories Source potolok.expert
A dark shade of gray looks even darker next to white drywall Source art-potolok.by
Gray ceilings are suitable for people who strive for harmony, creative and emotional individuals. The shade softens the bright colors in the room, relaxes, restores the nervous system, erasing bad moments from memory. If you choose a dark tone for the ceilings, you should take care of bright lighting. Light shades (silver, pearl) will increase the space of the room and elongate the walls.
Several lamps will make the gray surface of the ceiling lighter Source design-homes.ru
A fan with a metal base looks unique on a gray concrete ceiling Source design-homes.ru
Gray ceiling in different interior styles:
- Gray is the main color of the high-tech style. The metallic shade will easily fit into the interior.
- A gray ceiling in a loft interior will look good next to brickwork. Concrete surfaces or their imitation are ideal for the room.
- In an antique interior, the color will successfully highlight the reliefs on the ceiling. Will make the surface more voluminous.
- Light gray will suit a snow-white room in the Provence style. The room will be airy and gentle.
- In a classic style, gray will emphasize severity and make the room ideal.
- Gray in the Scandinavian style will fill the room with coziness, especially if you take its warm shade.
- In a retro style it will harmoniously combine with black and white posters, photographs and art paintings.
A light gray ceiling enlarges the room and softens the contrasting print on the wallpaper Source kakpotolok.ru
Gray matte ceiling, classic chandelier combined with the color of natural wood Source kakpotolok.ru
Photo printing on glass
As a rule, to create images on solid materials, transparent optiwhite glass is used - this is the best option for creating a pattern with the least distortion. But ordinary glass, tempered (for bathrooms), multilayer (for display cases, etc.) can also be used. The production technology involves UV printing or transferring an image onto film. In this case, a film with a pattern can be applied on top of the product or “sintered” inside the so-called triplex - laminated glass.
A photo print on glass is always original, festive, and unusual. Reviving the minimalist decor of a modern kitchen with the help of a bright, colorful kitchen apron is a small cost compared to the effect produced. Photo printing on glass will look luxurious in any room, but this method of finishing surfaces also has its drawbacks. In addition to the high cost of the material itself, you will also have to fork out for the hefty price tag of installation work. Among other things, the surface for glass cladding must be perfectly level. During operation, it is necessary to take certain precautions, but caring for the glass surface is simple - cleaning with a damp sponge is enough.
Plasterboard ceilings for the living room: modern options in the interior
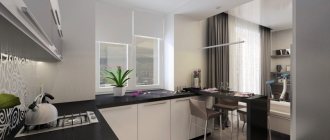
There are many opportunities to create a modern version of a plasterboard ceiling in the living room interior. This is a relatively cheap and easily processed material, which allows you to create almost any shape even without experience in construction, so it is very popular. Some people manage to turn their living room into a real masterpiece of art, thanks to interesting projects.
A chic solution for a spacious room using simple geometric shapes. Thanks to various spotlights and a glossy surface, additional volume is created. The choice of ceiling design for the living room will initially depend on its size. You should not create massive multi-level structures of complex geometric shapes if the room area does not exceed 18 square meters. m. or even less.
For such small rooms, a single-level suspended ceiling is most suitable, into which you can install several bright spotlights around the perimeter. To increase volume, it can be made light or with a glossy reflective surface. To create a chic and pompous living room interior, there are various ideas for a plasterboard ceiling.
Such projects are most suitable for rooms with a large area. Usually they use several levels, a variety of colors, and a large number of built-in spotlights. In a large living room of a country house or hotel, you can use stepped ceilings, elements of several geometric shapes with hidden lighting, or abstract compositions. The ceiling may have stucco ornaments, images of flowers, pilasters, medallions, gilding and bas-reliefs.
These details can harmoniously transition into wall decoration, columns, and a decorative fireplace. Another distinctive feature of the classic design of a living room is the observance of symmetry, a harmonious combination of proportions of all elements (the rule of the golden ratio). All this can be achieved using drywall.