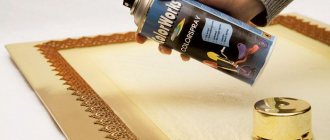
How to remove Oracal self-adhesive film
Nowadays, printing on film has become commonplace, but sometimes you have to perform the opposite action - remove the self-adhesive film (SAF).
The main thing is not to cause harm to the material on which it is glued. Basic methods of film removal
Common to most methods is heating: 1. Using hot water (wet it generously); 2. Hairdryer (household or industrial); 3. A heater directed at the gluing site.
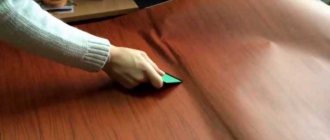
After softening the SCP, it is carefully removed by hand or with a spatula/scraper. It is necessary to warm up individual areas, holding the hairdryer about ten cm from them, and scrape as they warm up.
It will be more difficult to eliminate cheap, low-quality films, especially if the glue extends beyond their edges. It is recommended to preheat them to 50°C and then peel them off; if it doesn’t work out, scrape it off.
Elimination of expensive self-adhesives - automotive or temporary - is usually done manually; heating is not required. You can also use an aerosol sticker remover (classified as automotive products): spray it under the film and slowly tear it off.
Removing Oracal film
Popular printing on film is done in any format, but the biggest problem is the dismantling of large street banners. In the warm season, you can remove Oracal from the wall of a house or from a billboard without major problems, the exception being if its structure has changed as a result of long-term use and exposure to sunlight. In this case, traces of glue with dust adhering to them will remain on the wall/billboard. However, removal in the cold season, especially during frosts, is very difficult, since oracal, as a result of freezing, loses its elastic properties and breaks. In this case, it (or its narrow strips cut vertically) is heated with an industrial hair dryer and removed.
How to get rid of glue residue
Glue drips are usually removed using: 1. Solvent; 2. A special liquid that removes glue; 3. Eraser (a labor-intensive but reliable method that does not damage the surface).
The surface may suffer from exposure to a low-quality solvent. When a “delicate” approach is needed, use nail polish remover; white spirit is least harmful to furniture. For subsequent renewal of the coating, the remaining SCP and glue must be sanded.
Due to the rapid evaporation of nitro solvent, traces of glue should be wiped with a rag as soon as possible.
After removing Oracal, the wall/billboard plane, if necessary, is also treated with a solvent.
Remember: safety precautions include protective gloves, glasses, and, if possible, a respirator; the room must be thoroughly ventilated.
We wish you success and hope that these rules and recommendations are useful!
The opinions of the authors of articles may not coincide with the position of the editors.
Found a spelling mistake? Select it with the mouse and press Ctrl+Enter
Source: www.kchetverg.ru
How to stick it correctly?
So, when all the calculations have been made, the film has been purchased, the tools are ready, and you are charged with scrupulous work, then you can begin. The process of covering doors with film or other furniture is practically no different. The main thing is to understand the principle of how to cover the required area correctly.
Surface preparation
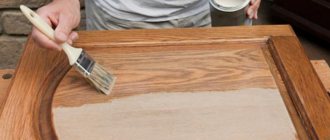
First of all, you need to make sure that the surface of the furniture is smooth. Wash the product with a detergent, and then remove all accessories. Check the furniture for various bulges, irregularities, chips and cracks - if there are any, sand them down with sandpaper.
The next step is degreasing the surface (you can use alcohol for this). After this, treat the surface with a primer for better adhesion to the film, if a varnish coating is not applied to the surface.
It is important not to neglect this stage, since the presence of defects or dirt under the film will significantly worsen the final result.
Pasting furniture
Here we come to the most important point. All the aspects described below should definitely be taken into account when deciding how to stick the film on a door or other surface.
- You must first moisten the prepared area with a spray bottle. This will allow the film to glide over the surface without difficulty, which will avoid bubbles.
- Cut off as much film as needed for pasting. It will be better if you cut a little more so that the cut piece is exactly enough.
- Separate the paper layer by about 10 centimeters from the protective layer.
- Smoothly, with one hand, begin gluing the film, while smoothing the surface from center to edge with a soft cloth. This work, of course, is best done by two people - one glues it, the second removes the protective layer of film.
- In order to cover a rounded corner of a cabinet, table or bedside table, simply heat the film a little with a hairdryer (preferably a hair dryer) and, stretching it, glue the film to the surface.
If you do everything slowly and correctly, drops of water and air will come out from under the film, and your furniture will acquire an excellent appearance without any unevenness.
If bubbles do form, simply pierce them with a thin needle.
A lot of videos have been made on how to glue film to furniture, which can be found on popular video hosting sites. To consolidate the information, we also recommend viewing them.
Help! Remove the self-adhesive film from the walls.
Dear Sirs! Please tell me what to do: About 15 years ago the walls were covered with adhesive film, now we need to remove all this in order to hang new normal wallpaper. The film was once glued to painted walls. Now, when the film is removed, an adhesive layer remains on the walls. How can I remove it?
Have you tried solvents? IMHO, acetone should dissolve this shit
There's nothing you can do about such wallpaper, especially if it's pasted onto paint; generally, it's been tested on your own hands. I started the renovation, so it took me 3 days to tear out a kitchen of 6 sq.m., after which I could no longer hold a handle. The technology was like that. First I scratched it tightly with the corner of a spatula, then I wet it generously for several rows. Before the next wetting, you rip off what is being torn off, the rest until next time. And so on until the wall is clean. In some places it was easier to tear it off along with the paint, and even with the plaster. I mastered it. So you can too.
What's the point in wetting, old wallpaper is like oilcloth with adhesive backing?
You need a hairdryer. When heated, the glue becomes softer, making the wallpaper easier to apply. If the glue still does not become softer, it is easier to burn it not until it chars, but until the wallpaper shrinks, and then with a spatula. A “gas mask” respirator is required, otherwise it is very harmful.
Yuri R says it all
Yes. with a hairdryer, you can even use it for hair, gradually heat it up and calmly tear it off.
I bought a hairdryer. I'll try it on Wednesday. So far I have tested it on paint. Cool! Thanks for the advice.
Plague wrote: I bought a hairdryer. I'll try it on Wednesday.
. This will come in handy if you need to dry your hair quickly.
2 Paletsky The instructions strictly prohibit doing this.
On the box of my hair dryer there are pictures where it can be used. one drawing - cooking The hairdryer is placed with the nozzle up and the pan on top.
2Techred. Well then you can grind the wild boar or smoke the kebab
Paletsky wrote: . This will come in handy if you need to dry your hair quickly.
Well, they completely took me for a fool. I was offended!! By the way, I adore any construction tool. My husband gave me this hairdryer for my birthday, and my parents gave me a concrete mixer - awesome. We bought ourselves a dacha - there’s a lot of work to do and a hairdryer will come in handy from the beginning. I’ll help my parents make repairs in the kitchen - remove the self-adhesive wallpaper, and then the windows at the dacha need to be repainted.
2Plague. what are you doing!? . just kidding around a bit. I’m still wondering whether it’s possible to do depilation with this hairdryer, or do I need a more powerful model?
2You can shave your fingers. qualitatively. It won't grow back anytime soon.
2 janitor. Got it, thanks, I'll need to get such a wonderful tool
The hairdryer was not useful. The film was scraped off before me. There was an adhesive layer left on the wall, first I tried it with a hairdryer - it turned out to be some kind of nonsense and was very slow, then I tried it with acetone - it really removes well, but the consumption of acetone is high. To my surprise, an ordinary primer removes the adhesive layer perfectly. First, coat the walls with it, and then wipe it with an ordinary rag and the glue just starts to roll off. PALETSKY - I hope your depilation with a hot air dryer was more successful than my removal of wallpaper using it.
Source: mastergrad.com
How to cover furniture with self-adhesive film.
Man is designed in such a way that he needs to periodically update his environment. If finances allow, this can be done by purchasing new furniture. But if the family budget does not allow for such expenses, then simply update the façade of the old set using self-adhesive film.
With its help, you can give furniture a new look and eliminate defects that appear during its operation.
Recently, self-adhesive film intended for various furniture has become increasingly popular.
Method number 2: hot air
A hairdryer is the next handy item that you can use to remove the film from a cabinet, cabinet or chest of drawers.
Experts say that in order to get rid of this material, it is enough to warm it up well. Therefore, when solving the problem of how to remove self-adhesive film from furniture, the first thing you need to remember is how you can increase its temperature.
If you don't have an industrial hair dryer at hand, a regular hair dryer will do. You will have to work harder with it, since the area heated by it is much smaller, but the result will be 100%. You can also use a regular fan, which is set to warm air mode. After 5-10 minutes, it will warm the surface of the film, soften the glue, and you can easily get rid of the coating. The transparent self-adhesive film is also removed in the same way.
How to choose film for furniture
To give your furniture an unforgettable look, you need to choose the right self-adhesive decorative film. Modern industry offers various options for this material. From cheap polypropylene and polyethylene models, to practical polyvinyl chloride cladding.
Every potential buyer can count on a variety of textures and colors.
Strength and durability, maximum safety in use, and a variety of design options can be noted.
In addition to the material that forms the basis of the furniture film, you need to pay attention to the presence of a protective layer. In the kitchen, such a layer is important for protection from high temperatures and high humidity. If self-adhesive film is used to cover children's cabinets and tables, then the protective layer plays an important role here too.
It will help protect furniture from careless handling by a child.
If direct sunlight falls on the set, then cover it with a cladding that has a layer that protects from ultraviolet radiation. Today you can buy transparent models with such a layer.
Without hiding the facades, it will protect them from fading.
The presence of a protective layer adds additional cost to this material. But it’s impossible without him. If you are going to use cladding in the bathroom, be sure to ensure that it has a high degree of moisture resistance.
The coating can be matte or glossy, imitating various materials.
Pasting of objects located near heaters, stoves and other similar appliances is done using a self-adhesive film based on a thermally stable polymer.
The modern assortment is amazingly diverse, so you are sure to find a suitable option for yourself.
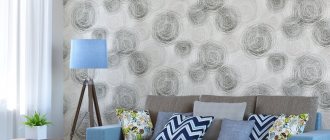
The decorative layer can be made to resemble stone, ceramics, fabric and wood. For furniture, “wooden” cladding or marbled material are suitable. Photo wallpapers have become popular lately.
Especially if they are used for pasting wardrobes.
In addition to furniture, old doors, glass and even walls are suitable for processing with this material. Surfaces covered in this way can be easily washed.
Even a material that is not protected from moisture easily tolerates short-term contact with a wet sponge.
Selection of self-adhesive film
To choose a self-adhesive film for decorating an old cabinet, you need to familiarize yourself with the properties and characteristics of this coating, pay attention to the structure, base material, type of surface, decorative design and purpose.
All films are based on polyester, propylene and polyvinyl chloride. Additionally, plasticizers, stabilizers, pigments, paper, natural and synthetic fabrics can be added.
Self-adhesive film consists of three main parts:
- The surface is made from paper, polymer film or metallized foil.
- Acrylic or rubber adhesive base.
- Protective backing made of siliconized paper. Retains the adhesive side of the film and peels off before gluing.
There are calendered films that can stretch under the influence of high temperatures and shrink during the cooling process. They are best used to cover cabinets with even, smooth fronts. If you need to decorate rough or corrugated facades with self-adhesive film, or hide existing protrusions, preference is given to injection molded materials.
The surface fabric differs in structure, it can be:
| Single layer: | All the constituent components, including resins, plasticizers, stabilizers and pigments, are mixed together and formed into a thin film by hot roll rolling or extrusion. |
| Double layer: | It is produced by applying polyvinyl chloride resin to a fabric or paper base. The result is a plastic material. Its technical characteristics are slightly lower than those of a single-layer one. |
If all quality characteristics affect durability and scope of application, then the appearance of the furniture depends on the type of surface. The following types are distinguished:
- Glossy film – has high reflectivity. It can be used to cover the façade in dark and small rooms.
- Matte – has a soft surface. The canvas is used in good lighting.
- Mirror.
- Transparent coating - excellent for treating glass elements in facades.
- Holographic material.
When choosing, take into account the size of the parts that will be pasted over. You need to purchase the most suitable roll of film to avoid a lot of waste. The length can be 2 and 15 m, the width is 45, 67.5, 90 cm.
How to cover furniture with self-adhesive film
One of the advantages of this material is the ability to work with it yourself. There is no need to look for specialists and pay for the service. You can easily cope with this task yourself.
You can successfully use self-adhesive film to protect tables, window sills in any room, countertops and furniture in the kitchen.
The most important stage in facade processing is preliminary surface preparation.
- It needs to be inspected for defects, dirt, loose layers of paint or varnish, protruding pieces of glue, etc. must be removed. Use sandpaper.
It is necessary to clean the base from dust, dirt and uneven surfaces.
Rough and porous surfaces must be primed before gluing the film.
Ideally, the surface should be wooden and varnished.
After cleaning the surface from contaminants, it must be degreased. Thanks to this procedure, you can avoid the appearance of wrinkles during pasting.
Any detergent or alkaline solution is used as a means to degrease the surface.
After preparing the surface, we proceed to cutting the material. Sheets need to be cut with a margin. This makes them easier to stick to the surface. If you need to take into account the pattern, then a margin of 2-3 cm is required. Without it, it will not be possible to accurately adjust the drawing. Excess pieces are carefully cut off after pasting the furniture.
To make cutting the material easier, manufacturers print a centimeter scale (grid) on its back side.
Sticking the self-adhesive film is not difficult.
- You need to take a piece cut from the roll and separate the paper from its upper part. The paper should not be separated completely, but by 5–7 cm.
Try to pull the paper evenly.
Carefully smooth the film, it should lie well and no defects should be allowed.
To prevent the appearance of air bubbles between the surface of the furniture and the material, you need to smooth it by hand during the gluing process.
If it is not possible to eliminate bubbles, they can be easily removed by piercing the lining with a thin needle. After gluing, the puncture site will not be visible.
Sticker of self-adhesive film: steps, nuances, tips
The instructions for the self-adhesive film describe the gluing process in sufficient detail. You can see in practice that it is very simple and does not require much time. But be careful and be attentive when working to avoid making many mistakes that will have to be corrected.
- Take the prepared “pattern” and separate the film from the paper backing by literally 5 cm. Apply the sticky side to the surface to be pasted so that the shape and dimensions exactly match.
- Carefully, slowly, separate the backing from the film, while simultaneously distributing the film over the surface and smoothing it with a dry soft cloth. The principle of smoothing is the same as when gluing wallpaper: from the center to the edges of the canvas. This way you can avoid the formation of air bubbles.
- If you notice any error during your work, you need to correct it immediately. Peel off the film and level it over the surface until it has set thoroughly. Otherwise, the work will have to be completely redone.
If you are covering a large area, make sure that the surface being treated absorbs moisture well. Clean and dry the wall on which the self-adhesive film is being applied, cover it with a layer of wallpaper glue and, without waiting for it to dry, spread the film, adjusting it to size. After this, iron the film with a dry soft cloth.
Please note: if you purchased a film that sets almost instantly to the surface, this may cause inconvenience when it comes to adjusting the dimensions. Talc and powder can help with this; they will slow down sticking. Any air bubbles that have arisen must be punctured and carefully smoothed out.
If you decide to cover surfaces made of metal, glass or synthetic materials, moisten them with water adding a small amount of detergent or soap solution. Separate the paper backing and the film completely, apply it to a damp surface, the solution helps the film to be correctly adjusted to the required dimensions. After this, wipe thoroughly with a sponge or soft cloth.
Nuances that may appear when using self-adhesive film
Pasting smooth surfaces will not cause problems for those who are faced with such work for the first time. Difficulty may arise when gluing corners. And here you can use a trick.
To make it easier to bend the corners of the sheets, you need to take a regular hand-held hair dryer and heat the material with it.
It is also difficult for a person who is encountering self-adhesive film for the first time to compose sheets of material. To prevent a gap from forming, the sheets must be glued so that the next sheet overlaps the previous one by 1.5 cm. Then we apply a ruler to the central part of the allowance along the entire length. And along it, using a sharp knife, we make an incision.
Remove the unnecessary strip. The joint will be perfect.
Lighting is important when working with this material. If it is not enough, then it is easy to overlook minor flaws. They will become visible against the general background or in bright light.
Using film you can create unique interior and decorative solutions.
If you purchased a self-adhesive film that sticks to the surface too quickly and is difficult to work with, use powder or talcum powder.
Sprinkle the surface with powder over the entire area and you will not experience any difficulties when adjusting the sheets.
Self-adhesive film: material features
Now there are many types of self-adhesive film for any surface: cars, furniture, walls in any room, even in the kitchen and bathroom. What they have in common is that they are manufactured using adhesive tape technology, which combines the qualities of adhesive tape and wallpaper.
Using self-adhesive film, you can not only apply various design solutions. This material has a number of the following advantages:
- moisture resistance;
- resistance to high temperatures - up to 80 degrees;
- a variety of not only patterns, but also textures;
- low cost;
- ease of use;
- easy care of the pasted surface.
Also, the distinctive features of self-adhesive film include the fact that it can be applied to any surface: wood, glass, metal, plastic, cork, ceramic tiles, plywood, drywall.
The only difficulty that you may encounter when working with this material is the need to level the surface covered with film. All defects and irregularities should be carefully eliminated, otherwise over time the film may bubble and peel off in places.
But gluing the film itself is a simple task and does not require any skills. All you need is patience, a little time and a reliable assistant in case you are covering a large surface, as well as the following tools:
- pencil;
- ruler;
- scissors;
- mounting knife;
- felt spatula or special ratel;
- industrial dryer.
Please note: using a hair dryer, you should thoroughly heat not only the corners and joints of the surface to be glued, but also the entire glued film around the perimeter.
How to remove self-adhesive film from furniture
Sometimes the problem becomes removing old cladding from furniture. If the material is of high quality, then removing it will not be difficult. But, if you are unlucky and it is very difficult to remove, then heat the surface. Use the same hairdryer.
Warm up the material with it, and it will come off without much difficulty.
Self-adhesive film is an inexpensive modern material that will help update the appearance of furniture and protect it from moisture and ultraviolet radiation. It's not difficult to stick on. The main thing is to do everything carefully and follow the tips described in this article.
Now you know how to decorate and protect furniture and various surfaces with self-adhesive film.
How to stick self-adhesive film on furniture
Preparatory stage: The base before sticking must be even, smooth, without roughness or cracks. Seal the cracks with putty and sand it. Otherwise, the film will repeat all the flaws of the base and will not adhere well. The surface must be cleaned of any type of contamination. Remove the handles and screw them back on after finishing the work. Also temporarily dismantle glass, decorative trims, and moldings. Degrease the prepared base with any dishwashing detergent. Cover the wooden base with acrylic varnish.
Material cutting
Before buying self-adhesive tape, draw a sketch with the dimensions of the elements to be glued. This will help you choose the correct size of material in width (rolls are sold in different widths) so that there are as few joints as possible. Ideally, in small areas there should be no joints at all. After purchasing the material, correctly cut it into pieces on the back side - there is a marking grid divisible by 1 centimeter, which is very convenient. Cut out each fragment and proceed to the main stage.
Pasting furniture with self-adhesive film
If the gluing element is small, for example, the door of a kitchen cabinet, then it can be glued dry, but if you need to glue a cabinet with self-adhesive film, then it is better to moisten the base with water or a soapy water solution. Then the self-adhesive will not immediately stick firmly, it will be movable, so you can even out any distortion. This happens if you are gluing for the first time. How to properly glue self-adhesive film to furniture is not such a complicated process - the main thing is accuracy, accuracy in measurements, and lack of haste. The panels should be glued from the top. If these are doors, then they can be removed. Separate the self-adhesive material from the protective backing by 8-10 centimeters and apply it tightly to the top of the element to be pasted. Fix it by smoothing this area from the center to the edges with a cloth, pressing well. The bottom hangs down along with the backing. Gradually separate the top layer from the backing and smooth out the glued piece well. So you go down in small sections, removing the protective layer, and gluing it well, you get rid of the bubbles. Evaluate your work, and if you see bubbles on the surface, pierce them with a thin needle, squeeze out the air, and press this area. If a wrinkle suddenly appears during smoothing, warm up the area with a hairdryer and smooth it again.
Let the film dry, if you used water, and get used to its new habitat, then return the fittings and glass to their place.
How to remove self-adhesive film from furniture
If the self-adhesive has been stuck on for a long time and has begun to look untidy, or you have damaged it, then it is better to remove it and stick a new one. During the next repair, the previous self-adhesive design does not harmonize with the rest of the interior, then remove it and replace it with a new one. We looked at how to stick the film on furniture, and the principle of removal is based on heating the adhesive composition, which will then easily separate from the surface.
Use a hairdryer to remove the self-adhesive
Use a hair dryer – for small areas, a hair dryer will do, but if the area is large, use an industrial blow dryer. Start heating the film and at the same time pull it slowly and carefully so as not to tear it. There may be some glue residue left on the base. Remove it with gasoline, thinner, alcohol, white spirit or another. It all depends on the base material. To avoid damaging the base, try applying the compound in an inconspicuous area. If everything is ok, then use it. Proper care Caring for self-adhesive film is reduced to wiping it with a damp sponge. If the stains are greasy, wash it with liquid detergent. Do not use powder-type products to avoid scratching it. Solvents can damage the film; it is better to wipe the stains with a swab of alcohol. Pasting furniture is accessible to everyone - it is a simple, but also a fascinating process. We learned how to properly apply self-adhesive film to furniture, all that remains is to choose the right one and start transforming your apartment.
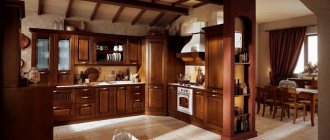
Using self-adhesive film is a great way to update your kitchen set
A good quality kitchen set can last for decades. But time passes, and the shine of the new furniture fades, stains, chips and scratches appear, and your favorite set or any of its cabinets are no longer pleasing.
There are two ways out of this situation: do some repairs and buy new furniture, or update existing cabinets and pencil cases. Moreover, in the second case, the cost of the issue will be minimal, and you will not have to deal with rearrangements. All you need is decorative self-adhesive film.
Unlimited possibilities of self-adhesive film
Kitchens covered with film look impressive both in photos and in real life. Surfaces are updated using vinyl or other film. The range of this material is amazing in its diversity, and the price pleases with its affordable price.
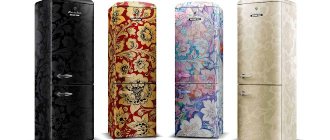
Decorative “self-adhesive” imitates:
- natural wood of different species;
- natural stone;
- ceramics and tile texture;
- leather and fabric.
In the photo - imitation wood.
Its texture can resemble patterned silk, a colorful tapestry or cute chintz. The material is produced in matte and glossy versions. There are films with holographic and mirror patterns. And all this can be combined with each other, creating interesting effects, changing an ordinary kitchen cabinet beyond recognition, as in the photo below.
The price of the film depends on the manufacturer and the decorative surface.
Vinyl “self-adhesive” is quite practical because it:
- not afraid of moisture;
- does not fade in the sun;
- does not respond to temperature changes.
With its help, you can completely update the design of both the kitchen and the bathroom, transform the kitchen cabinet or the entire set.
Adhesive film is a good budget replacement for a full-fledged repair. Of course, you need certain knowledge and skills, but the video will help you quickly understand the intricacies of the process.
In what rooms can it be used?
As mentioned above, self-adhesive film is not afraid of moisture and high temperatures, and it is completely unpretentious in maintenance. Therefore, it can be used to decorate absolutely any premises and furniture in them, and even household appliances.
- In the kitchen, especially if you live in a private house, self-adhesive film will not only help you update the interior as often as you see fit and without special expenses, but will also serve to maintain cleanliness and neatness. As you know, it is kitchen surfaces that often become dirty and deteriorate during use. The easiest way to fix this is with self-adhesive film.
- For the bathroom and toilet, covering with self-adhesive film is also the best option. This material will protect the walls from excess moisture and splashes of soapy water, which can be very easily wiped off the surface.
- Do you have little things to do? Then you know how much trouble their love of drawing on any surface causes. It is much easier to erase traces of paint or felt-tip pens from self-adhesive film than from wallpaper or fabric upholstery. As a last resort, you can re-glue the film, which will cost you very little.
- In fact, self-adhesive film is an excellent material for a child’s room, and it doesn’t matter how old the child is, whether he goes to kindergarten or graduates from school. A child will have fun in a room with bright colors, and a teenager will be able to independently work on the interior of the room.
- If you decide to use film for covering interior items, for example, chairs, tables, cabinets, chests of drawers, then the modern range of colors and patterns of this material will help you not only update the appearance of the rooms, but also completely change the style. In the photo you can see many options that can be used in your work.
Advice: when choosing a film, pay attention to what surface you will use it for. For example, for antique furniture, transparent self-adhesive is suitable, which will help get rid of scuffs and minor scratches without changing the color and structure of the wood. Mosaic patterns are perfect for glass.
Caring for self-adhesive film is very simple. Usually, warm water and detergent are enough for this. It is undesirable to use powdered cleaning substances, as well as solvents - they will damage both the structure of the film and its color. If the stains are quite persistent, use ethyl alcohol.
Which film should I choose?
First of all, you need to look at the thickness of the material and the manufacturer. German “self-adhesive” tapes are of good quality; their price depends on the thickness.
Dutch and Italian manufacturers have proven themselves to be excellent. You can choose something from budget series or take a closer look at exclusive products, but then the price will be quite high.
The most inexpensive are Chinese adhesive decorative materials from unknown manufacturers. However, low price should not be the main selection criterion, otherwise a beautiful kitchen decorated with self-adhesive vinyl film can quickly lose its appearance.
Not all adhesive materials intended for promotional products can be used in the interior. Some of them are designed for short-term use. Choose high-quality decor, and then the restoration will be durable, and a simple kitchen cabinet will become an interior decoration.
The color can be any. If you want to take a creative approach to kitchen design, place photos of fruits, vegetables or flowers on the facades, thereby decorating ordinary old furniture. The drawing can also be applied using photo printing.
Technology of pasting furniture with polymer films
If you decide to update your kitchen furniture using self-adhesive film, then first prepare the base. It should be understood that the decorative covering will not hide potholes and bumps, it will only disguise the stains, so all unevenness must be removed before pasting. A video with tips will simplify the workflow.
12 rules for working with self-adhesive tape
- The fittings and doors must be removed, and each kitchen cabinet (facades and frame) must be inspected for the presence of depressions and bulges.
- If there are defects on the furniture, all irregularities are filled with putty and sanded well.
- To calculate material consumption, you will need measurements of all parts of the kitchen unit. You need to carefully measure all the parts that you plan to paste over.
- All dimensions are transferred to the back side of the film. It is usually made of white paper, on which the drawn lines are clearly visible.
- When cutting, you should always leave a margin of about 1 cm. This will help in your work: if you start gluing the vinyl at the wrong angle, the margin will make it possible to correct the situation. All excess is easily cut off with a breadboard knife.
- Decorative self-adhesive film is cut with a stationery knife, curved lines are cut out with scissors.
- Then you need to degrease all the surfaces to be decorated so that the “self-adhesive” does not come off over time. Window cleaning liquid or other products are suitable for this. Grease stains need to be treated especially carefully so that the decorative finish does not come off.
- Pasting of kitchen units is carried out on a dry and clean surface, otherwise the “self-adhesive” will begin to bubble and peel off from the base.
- The film must be applied evenly.
- The backing is removed in several stages: first, only a few centimeters are peeled off, after gluing them, a little more is removed, and so on until the entire panel covers the part to be decorated.
- Smooth out the plastic decor from the middle to the edges. Air bubbles must be removed during operation. It is convenient to work with a plastic scraper, stroking the surface with a soft cloth.
- Small air inclusions are removed with a needle. The finished part can be processed through the fabric with a warm iron.
How to update furniture with film?
The replacement technology is very simple: in fact, you just need to remove the film from the paper and apply it to the facade or body of a floor or wall cabinet. In fact, there are also some nuances here that should be taken into account.
Most often, vinyl film is used to update kitchen cabinets, since it is not only resistant to moisture, but also does not fade in the sun, and this is important for the kitchen. It is very easy to work with it; it is possible to replace the appearance of facades made of chipboard, MDF, wood and even plastic panels. It should be taken into account that the self-adhesive film will mask stains or abrasions on the facade, but it cannot hide unevenness or deep scratches.
- The first stage of cabinet restoration is removing uneven surfaces. To do this, the facades are removed, the sashes and frame are inspected, and all detected irregularities are puttied and sanded. If pasting is carried out on facades laminated with PVC film or veneer, which are already peeling off in places, then the old finish must be completely removed.
- Then measure the parameters of all parts that need to be pasted over. When making calculations, it is worth leaving a margin of 1 cm around the perimeter. If vinyl film is accidentally applied at the wrong angle, then the stock will correct the problem. Excess decorative film is simply cut off with a breadboard knife.
- The film is marked by size and cut. As a rule, there is a centimeter grid on the back side of the material, which makes marking easier.
- When cutting, you need to take into account that the material with a pattern or image must be cut from the front side , so that later you can combine the fragments. The decorative film that reproduces tiles must be cut at the seams.
- The surfaces to be glued are degreased so that the film does not come off later. For MDF or chipboard, regular glass cleaner is quite suitable. Metal or glass surfaces are moistened with a soap solution, otherwise the film will not hold.
- After the sash has dried, the material is glued. To do this, remove a layer of protective paper from the top edge of the fragment - about 5 cm and glue it to the edge of the facade. Then the next 5–10 cm are released and glued again. In this case, hold the film with one hand, and smooth the pasted film with a soft towel with the other.
- The completely glued material is smoothed again with a soft cloth from the middle to the edges. If air bubbles appear, you can pierce them with a needle. If necessary, you can iron the cabinet door through a layer of fabric.
When finishing MDF facades with trimming, that is, gluing the end, it is necessary to use a heat gun. When cutting, take into account the tolerance on the ends and cut the workpiece at the corners. First, the material is laid on the surface and then glued to the ends.
The following videos demonstrate updating an MDF kitchen unit using decorative film.
Pasting with film is the easiest and most affordable way to update kitchen furniture. The durability of this solution is, of course, lower than when facing with acrylic panels, but it is much more varied and lower in price.
Difficulties in work and their solutions
Problems often arise with processing the ends and shaped parts of kitchen units made of MDF or other material. An industrial or household hair dryer will be a good helper in this case.
The restoration will go faster if you work together: one person stretches the material by heating it with a hairdryer, the other carefully glues it to the base.
It is easier to apply the self-adhesive tape evenly on a damp surface. To do this, lightly moisten cabinets and doors with a spray bottle. Water will not allow the material to immediately grasp the surface and will provide an opportunity to correct the work.
When cutting the material, you need to make allowances on each side. For parts with ends, do not forget to make cuts in the corners. First, they paste over the part itself, and then proceed to the ends. The rounded ends of MDF facades are treated with a hairdryer for a better fit.
Restoration of facades with decorative film
The appearance of the kitchen largely depends on the cladding of the facades. If your kitchen has smooth doors without a relief made of chipboard, then they can be easily covered with vinyl film.
Updating kitchen MDF facades with convexes will be easier if you use an industrial hair dryer. Only a well-heated film can take the desired shape. If there are decorative details on the facades, they must be removed before pasting.
Replacement of the old film is carried out only after removing the previous layer. Remember that decorative film is only applied to prepared surfaces.
It should be taken into account that in production, MDF film facades pass through a special press, which makes it possible to obtain a smooth surface without flaws. At home, MDF can only be covered with self-adhesive.
Interior renovation using film
Designers love polymer films. They have good plasticity and decorative properties; with their help you can quickly update almost any surface. Material suitable for decoration:
- tiles in the bathroom or kitchen;
- wall panels;
- doors;
- different furniture.
Films are available in different colors, with and without patterns. With their help, you can update your kitchen set and change old furniture in your home without extra costs. After all, the price of even the most expensive film will be cheaper than a new headset.
What will you need?
First of all, you will need your creativity and a suitable idea.
Decide which surface is right for you. Experts advise using matte furniture for rooms, and glossy furniture for bathrooms and toilets. But you shouldn’t take this as a rule - show your imagination and look for unusual solutions. The following tools are worth stocking up on:
- Scissors or stationery knife,
- Pencil,
- Roulette,
- Soft fabric,
- Spray,
- Sandpaper,
- Primer.
First, calculate how much film you will need. Using a tape measure, measure the surface area that will soon begin to transform. Do not forget to buy film with a small supply, because no one guarantees error-free and meticulous work (especially if you are doing pasting for the first time).
What to do if the film comes off?
It will take time to reupholster kitchen MDF facades. And I don’t really want the film to come off after a month or two and the film on the headset or cabinet to peel off. If you follow the gluing technology and operating rules, this should not happen.
But if in some places the film moves away from the base, it can be glued. You will need a syringe and glue (for example, “Moment” or “Titan”). It is inserted under the film and pressed into the restoration site.
With the help of adhesive-based films, you can give a new breath to MDF kitchen facades and kitchen units made of any material. An ordinary, neatly papered cabinet and set looks quite aesthetically pleasing. Follow the instructions and enjoy the results of your work.
Source: idealkuhnya.ru
How to remove film from glass
The process of removing film from a window itself can be long and labor-intensive, so you need to stock up in advance not only with all the necessary tools, but also with time and patience.
Soaking method
To remove window tint film, you will need a bowl of water, a flannel cloth, and dish soap. The process itself looks like this:
- Dishwashing detergent must be added to the water. The liquid should become quite soapy.
- Now you need to moisten a flannel cloth in this water (you can take a simple diaper) and stick it to the glass for 2 hours. If during this time the fabric dries out, it needs to be moistened with soapy water, for which you can use a spray bottle.
- After 2 hours (the fabric can be kept longer), the solar film needs to be lifted with something, for example, a spatula or scissors, and its edge pulled down 2 cm. If it doesn’t come off well, then spray soapy water into the gap between it and the glass and try again after 10 minutes.
- Remove the self-adhesive film from the glass completely, periodically wetting it during operation, which will make the process easier. In this case, you absolutely cannot rush, since there is a risk of tearing the film, and then you will have to start all over again.
- Finally, wash the window with a solution of ammonia.
Steaming method
You can remove the sun protection film from the window using a steam generator. To do this, a jet of hot steam is first directed at the top of the glass. Processing should be carried out for at least 7-10 minutes, until the film begins to easily peel away from the glass. After this, you can move to another area. So gradually you need to clear the entire window of the tint film.
After this, you need to process the already freed glass. Wash the window with soapy warm water (you must first dissolve dishwashing detergent in it) or a solution of ammonia (50 ml of ammonia per 10 liters of water).
Heating method
Tint film is most often made from polymer materials. This means that it cannot withstand high temperatures, so it can be removed by heating.
You will need a tool capable of heating the stained glass film to +50°C, which will allow it to become more plastic, which means it will easily separate from the glued surface. A hair dryer works best for this task. You need to keep it at a distance of 10 to 15 cm from the window. Heating of the surface should be as uniform as possible - if this rule is ignored, the glass may crack due to overheating.
After treating the entire surface, a stream of hot air should be directed to the upper corner and held in this position for several seconds. Then remove the hairdryer, pry off the film with a sharp, but non-metallic object (for example, a plastic spatula or toothpick), and then gradually remove the coating, warming it up if necessary.
This method of removing tint coating (as well as the method using a steam cleaner) is only suitable for the warm season. This precaution avoids possible temperature changes and damage to the glass.
How to cover furniture with self-adhesive film: master class + tricks and tips
Self-adhesive film is a simple and affordable way to quickly update furniture and hide its defects (scratches, abrasions). Of course, in terms of resistance to external influences, the film cannot compete with, for example, wood or natural stone, but with proper care it can last for quite a long time, and besides, it can be quickly changed.
Painting furniture: 5 main rules and master class
What is self-adhesive film and how to choose the right one
* Self-adhesive film, also known as self-adhesive film, is a film with a decorative design on one side and an adhesive layer on the other side. To protect the adhesive layer from dust and damage until use, it is covered with a paper backing. When gluing, the paper base is removed, and the film is glued to the surface to be decorated with the adhesive side.
Wood-effect film on a coffee table
* The top layer of self-adhesive can be different: it can be made of glossy or matte vinyl or plastic, it can be dense or translucent, metallized or paper. Plastic and vinyl films are usually the most durable and can be wiped down and washed frequently. Metallized is usually more susceptible to water, its top layer can be damaged, so it is better to use it on those items that will get dirty less and be wiped less often. It is generally better not to expose paper film to water.
It is better to use metallized film to cover surfaces that are not very exposed to external influences.
* The base most often has markings - this is convenient.
* Thick film is usually used to cover furniture, window sills, doors, while translucent film is used for glass and mirrors. There is also a special colored translucent stained glass film for creating a stained glass effect on glass.
Translucent matte film on glass
* In terms of color and texture, the film can be very different - for different types of stone, wood, fabric, leather, plain, with a pattern, patterned, textured, glossy, matte, velor and so on.
* The film can also be protected from ultraviolet radiation - this means that, when exposed to direct sunlight, it will not fade or change its color.
* The choice of film also depends on the surface you are covering. For a surface that is not completely smooth, it is better to choose the so-called cast film. It is somewhat more expensive, but more flexible. If there are protruding heads of screws, rivets, or nail heads on the surface, it is also better to use cast film. The so-called clandered film is usually cheaper, but not so flexible: it is better to use it when you need to cover large, flat surfaces.
* Textured, textured, patterned film will help hide flaws and unevenness of the original surface. And smooth, metallized, glossy, on the contrary, will emphasize them.
*Usually, water, a cloth and liquid detergent are enough to clean the film. Do not use abrasives or acetone.
How to paint a carpet (and why to do it): master classes + ideas
How to work with self-adhesive film: master class
To understand the stages of work, let’s look at a simple project: covering the top of such a bedside table with film.
You will need:
— self-adhesive film;
- scissors;
- breadboard knife;
- ruler or measuring tape;
- to smooth the film - an unnecessary credit card, a plastic spatula, a dry soft cloth;
— degreaser (alcohol);
— depending on the condition of the surface, you may need medium and fine-grained sandpaper, primer and putty.
Step 1
First you need to prepare the surface. Wash it, dry it and degrease it, wiping it with alcohol. If the surface has significant unevenness, it may be necessary to fill the holes and/or sand it first with coarser sandpaper, then with fine sandpaper. After sanding, carefully remove all dust and degrease the surface. In some cases, you can apply a layer of acrylic primer (if the surface is not perfectly flat, if the pasted item will be subject to mechanical stress and you need particularly strong adhesion to the film). It is better to cover a wooden surface without varnish with a layer of polyester or primer varnish.
Step 2
Try on how much film you need to cut. For a small surface, simply apply the film, measure the larger surface and transfer the dimensions to the film.
Step 3
Cut the film with a margin of several centimeters.
Step 4
Peel off a section of the paper base from one edge and apply the film to the surface to be pasted.
Step 5
Press the film, starting from the middle, and smooth it to the sides.
On wide surfaces, glue the film in the sequence shown in the photo: from the center to the sides.
Step 6
Do not glue all the film at once. Gradually separate it from the paper base, glue it and smooth it with a card or spatula. If the film lies unevenly, you can peel off a piece and re-glue it.
Step 7
Having reached the corners, cut the film as shown in the photo...
...and glue the pieces one on top of the other, overlapping.
Step 8
Glue the film on the end sides in the same way, first by hand, then smoothing it with a card or spatula. If there are excess pieces of film remaining, cut them off with a breadboard knife.
Step 9
Finally, for the best fit of the film, walk over it with a soft cloth, pressing well.
Ready:
Photo and source: anikasdiylife.com, homedit.com, roguevalleyguide.com
How to remove film using detergents and cleaning products
Special chemicals will also help to remove sun protective film or foil from glass. But in this case, compliance with safety measures is required, for example, you need to work in rubber gloves, tight closed clothing, and a respirator. In addition, the room should be well ventilated, and children, animals and plants should be removed from the room.
The following remedies are effective:
- Soap solution. You can make it from any soap, which you need to grate (if it’s a piece) or immediately dissolve it in water (if it’s liquid).
- Cleaning products for glass-ceramic kitchen stoves, for example, Domax, Sanita, Master Clean or any other that you have at home.
- Preparations for cleaning tiles: Schumanit, Titan, Domestos, Cif and many others.
- Dishwashing detergents.
- Solvents, for example, turpentine, solvent, white spirit, Toluene, Orthoxylene. They need to be applied a few drops into the gap between the film and the glass (make sure that the product does not get on the rubber seal). The effect should be visible immediately - rainbow stains appear at the site of application of the product. If they are not there, then you can try another option.
- Window cleaning products.
If the coating does not come off well after treatment, you can help yourself with a scraper.
All products cannot be considered universal, since everything depends on the film material used, the method of applying it to the glass and the duration of its stay on it.