How to cover a closet with wallpaper and photo wallpaper: do-it-yourself decorating instructions, video and photo
To transform the decor in your home, you don’t have to buy new furniture.
Instead, you can update old items by changing their appearance, for example, you can refinish an old cabinet. Moreover, this does not require any special knowledge or skills. You can give your furniture a new look with wallpaper. The only thing is that you should familiarize yourself with some of the nuances of the work in order to complete it with the highest quality. Therefore, next we will look at how to decorate a closet with wallpaper.
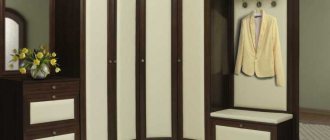
Wardrobe before and after wallpapering
Video: How to remodel a closet. We glue the closet. We update furniture. Very simple!
Everyone has experienced apartment renovations at least once in their life. One of the important details is the decoration of the walls. The most preferred material is wallpaper.
They can be used to decorate walls and even cover various furniture; it is only important to know how to do it.
The article discusses in detail the nuances of selecting suitable wallpaper, describes a step-by-step algorithm for the procedure, including for a wardrobe, and provides a video with a visual analysis of the process of wallpapering a wardrobe.
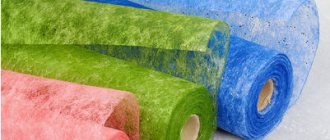
Wallpaper selection
Using wallpaper is the simplest and at the same time cheapest way to decorate furniture. However, high-quality material should be used for this, otherwise all the work will be done in vain. As for the choice of color and texture, it all depends on individual preferences and the interior of the room.
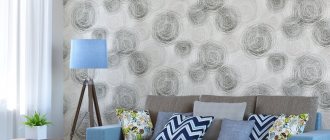
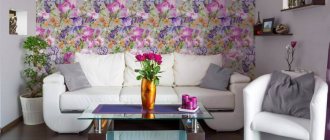
If the walls are decorated in light colors, then it is advisable to choose brighter wallpaper for the closet. In this case, the inner wall can be covered with material to match the wall covering. If there is a pattern on the walls, then it is better to decorate the furniture in a single color.
Wardrobe decorated with wallpaper in a children's room
Often, furniture is covered with the same wallpaper as the walls or part of the walls in the room, using this finishing option as a special design technique for interior design. You can also use canvases with a marble, wood or other material pattern.
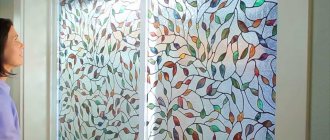
An interesting and unusual solution is to use photo wallpaper on the closet. Moreover, you can purchase self-adhesive sheets, which will greatly simplify the pasting procedure. Of course, the choice of design in this case depends solely on your imagination.
When choosing a material, you should also think about its performance qualities. It is advisable that it can withstand wet cleaning, especially if you are going to refinish your kitchen cabinet. Ordinary paper wallpapers should not be considered as an option, as they will quickly become unusable if they are not varnished.
Advice! If the furniture has defects, it is best to use a rich color coating with small patterns or designs. This will hide the unevenness.
In the photo - an option for decorating a closet with wallpaper
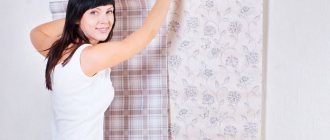
Nuances that may appear when using self-adhesive film
Pasting smooth surfaces will not cause problems for those who are faced with such work for the first time. Difficulty may arise when gluing corners. And here you can use a trick.
To make it easier to bend the corners of the sheets, you need to take a regular hand-held hair dryer and heat the material with it.
It is also difficult for a person who is encountering self-adhesive film for the first time to compose sheets of material. To prevent a gap from forming, the sheets must be glued so that the next sheet overlaps the previous one by 1.5 cm. Then we apply a ruler to the central part of the allowance along the entire length. And along it, using a sharp knife, we make an incision.
Remove the unnecessary strip. The joint will be perfect.
Lighting is important when working with this material. If it is not enough, then it is easy to overlook minor flaws. They will become visible against the general background or in bright light.
Using film you can create unique interior and decorative solutions.
If you purchased a self-adhesive film that sticks to the surface too quickly and is difficult to work with, use powder or talcum powder.
Sprinkle the surface with powder over the entire area and you will not experience any difficulties when adjusting the sheets.
Wardrobe pasting
Required tools and materials
To decorate a closet with wallpaper yourself, in addition to the coating itself, you will need the following materials and tools:
- Sandpaper;
- Ruler and pencil;
- Scissors;
- Putty knife;
- Wood primer;
- Wood putty;
- Brush for applying glue;
- PVA glue.
Advice! In order for the furniture to really look like new, it is necessary to replace its fittings - handles, locks, etc. Even if the price of the parts is relatively high, it still makes sense to purchase them. For example, modern handles completely change the perception of even the oldest furniture.
Wardrobe covered with photo wallpaper
Preparation
This work consists of several stages and begins with preparing the surface of the product for pasting.
It is performed in this order:
- First of all, you need to remove all old fittings from the cabinet, moldings, if any, dismantle shelves, etc.
- If the cabinet is varnished, then it is necessary to remove the varnish layer. This can be done using sandpaper. If you have a hair dryer available, then with its help things will go much faster.
Cleaning the surface with sandpaper
In this case, the varnish is heated with a hairdryer and scraped off using a spatula. However, at the end of the work, the surface will still have to be sanded to remove any remaining coating.
If the furniture is not varnished, then it is enough to simply give the surface a matte finish by “walking” over it with sandpaper.
- Then the surface must be cleaned of dust. To do this, you can wipe it with a damp sponge and dry it.
- Next, you should carefully inspect the furniture for surface defects. All chips and cracks must be repaired with putty. If the chips or cracks are deep, then it will have to be applied in several layers.
- After this, the putty areas must be sanded with fine sandpaper.
- At the end of the preparatory work, apply a primer and dry the surface thoroughly.
Required materials and tools
You will need:
Sea adventures: the best ideas for decorating a boy’s nursery
The smart car system from MTS is already at the development stage
Annual royal hat parade Royal Ascot: the best images of Elizabeth
- a long spatula for pushing paper into corners;
- wallpaper glue;
- wall cleaner before wallpapering;
- plastic film to cover the floors and protect them from glue drops;
- brush for applying glue;
- brush for smoothing wallpaper;
- roller;
- wallpaper or colored paper.
Tools such as a brush or roller will really come in handy in your work. Not only will they help eliminate air bubbles and smooth out wrinkles on the paper, but they will also push out excess glue, which can then be wiped off with a damp cloth.
Conclusion
Wallpapering a closet requires, first of all, accuracy. However, as we found out, there is nothing complicated in this work. Therefore, every home craftsman can update furniture in this way; the main thing is to choose high-quality material and follow a certain sequence of actions.
From the video in this article you can find out additional information regarding decorating furniture with wallpaper.
1 Materials offered by the market 1.1 Traditional coatings 1.2 Environmentally friendly 2 Fashion trends 3 In conclusion If there is a question on the agenda.
1 Making a choice 1.1 Types of wallpaper 1.2 Choosing an ornament 2 Selection of an interior 3 Conclusion Today there is a huge assortment of wallpaper. Arriving at
1 Types of material 1.1 General characteristics 1.2 Paper products 1.3 Non-woven trellises 1.4 Fiberglass 2 Painting technique 3 Conclusion When finishing.
© "Lux Standard" Construction of houses
The essence of the problem
Unfortunately, we often encounter the fact that furniture, once modern and serving faithfully, becomes outdated, loses its appearance and simply begins to spoil the entire interior of the room. At the same time, the very basis of such furniture, as a rule, remains quite strong, and it is simply a pity to throw it away. At such moments, an interesting idea arises: what if we try to update the closet (that’s what we’ll talk about in more detail today), table, chairs, armchair, etc.? How to wallpaper a closet; is it possible to correctly apply decor to its doors, thereby transforming the design? Let's try to figure it out in more detail.
To decorate a cabinet with wallpaper, you can use any color and even combine different fabrics.
First of all, it is necessary to note the fact that restoring a cabinet with wallpaper will significantly reduce the cost of purchasing new pieces of furniture. Why throw away something that can still serve well for at least several years? Today there are many ways to accomplish this. Here are just the most common of them:
- Using wallpaper.
- Using photographs.
- Painting with paint.
- Update using mirrors.
- Fabric finishing.
- Mosaic decoration.
Of course, each of these methods has its pros and cons. Let's just say that they are all worthy and interesting solutions that will help preserve what, as it seemed, could not be restored and should be replaced. Thus, you manage to reduce material costs, which, as you yourself understand, will save quite a decent amount of money. In any case, before you start decorating, you will need, first of all, to decide which method you will use for this. But since we have decided that this article will be devoted to how to update a closet with wallpaper, then let’s focus on this technology.
Peculiarities
Initially, this technique was used to decorate smooth glass and ceramic products. Therefore, its use as furniture decor has its own characteristics.
Interesting decoupage wallpaper from the inside
In general, the basic principles have not changed. So, its essence is to transfer the design to the surface using napkins. The original uses special napkins, ordinary paper, or thin paper, on which you can print any image you like. It is soaked a little, leaned against the glass, covered with several layers of solution (water with glue), then allowed to dry and varnished. The general principle is this. Now about the changes.
For any set, wallpaper is used instead of napkins. Moreover, not every type is suitable, and this technique is not suitable for every subject.
Simple decoupage of a closet with large pieces of wallpaper
What furniture can be decorated
Decoupage from the inside of the cabinet echoes the main color scheme of the room
There are a few rules to follow to avoid any unexpected surprises during the decor making process. It is desirable that the furniture be:
- varnished or sanded, because the paper will lie better on a flat surface;
- flat, this means that not the entire product can be decorated, but only some parts; creases and empty spaces can form on the bends;
- without damage, any chips, dents or other flaws will adversely affect the appearance and durability of the decor.
In general, any furniture can be decorated, but not all of its parts, and it must meet the criteria described above. Now all that remains is to choose the right material and get down to business.
What wallpaper to use
Wallpaper for decorating furniture using decoupage technique
There is a huge variety of wallpaper on the modern market: paper, non-woven, textile, vinyl, self-adhesive, silk-screen, etc. But not all of them are suitable for decoupage.
The first rule is that the base should be paper and easily soaked, so textile and silk-screen printing, not to mention liquid, fade into the background. The most commonly used are ordinary paper, vinyl, photo wallpaper and self-adhesive ones.
You can use the entire canvas with the selected print, or a separate part of it. Experimenting with small sizes is, of course, easier. But if you decide to decorate the cabinet door, you will have to work hard. Before we begin, we will select the appropriate type of equipment.
There are several options for performing decoupage. They vary depending on the base used.
Elements for classic cut-out decoupage
Can be used for any plane. This method relies on first principles: a canvas with a pattern is applied, covered with water and glue, then varnish. Mainly paper and vinyl bases are used.
Decorating a cabinet using classic decoupage
- Art
Notebook cover made using artistic decoupage technique
The technique of execution is no different from the previous one. The only difference is that in this case, decoupage is part of an existing composition and must be adjusted to its laws.
Chest of drawers decorated using artistic decoupage technique
- Back
Decorating the tabletop on the reverse side using the reverse decoupage technique allows you to put anything on it without fear of scratching the varnish layer
Suitable for glass surfaces (cabinet doors). The operating procedure is the same as in the original technique. In this case, the creation does not need to be varnished.
Reverse decoupage is a good way to decorate glass furniture, allowing you to mask its minor defects
- Decopatch
Decopatch is a good way to update old furniture, because scraps of variegated paper can cover all defects.
A style similar to patchwork. They have one thematic basis: for decoration, the product is pasted over with various pieces of paper in a chaotic order. The method of execution is no different from the classic one, only the appearance and materials will differ.
Sideboard in ethnic style, decorated using decopatch technique
- Volume
Volumetric decoupage is the most interesting way of decorating
It contains admixtures of the “cutting” technique - creating three-dimensional paintings using paper. It is more difficult to implement, requires more materials, and is not suitable for every direction and product.
Volumetric decoupage of bedroom furniture
We will take as a basis the classic version using paper wallpaper, and consider the principles of doing the work.
How to choose the right wallpaper
Despite the fact that wallpapering is the most affordable, and also, perhaps, simplest way to cover an old cabinet, you need to understand that an important step is the correct choice of material, which must be of high quality. At the same time, the choice of texture and color is not limited by anything other than the imagination and desire of the apartment owner.
Advice! In any case, despite the fact that you can choose shades based on individual preferences, there are certain basic design laws, following which will ultimately help you get an attractive interior.
Here are examples of what you need to consider when decorating cabinet doors or its body:
- If there are certain designs and patterns on the room wallpaper, it is desirable that the furniture be finished with a single-color coating.
- Photo wallpaper can also be used to decorate this piece of furniture. In this case, it is advisable to use narrow options.
- In cases where the wallpaper in the room is pastel or light, it is best for the cabinet to be hung in richer and brighter colors.
- At the same time, the surface that is inside the cabinet may be a little brighter.
- Self-adhesive wallpaper for closets is also of increased interest, since their use helps to complete all restoration work at a faster pace. In addition, in this case it is much easier to do the gluing yourself, with your own hands.
Preparatory work
First of all, you need to completely empty the closet of all things. Often, one or more wooden shelves are installed at the top of the wardrobe. In this case, if possible, it is recommended to temporarily remove these shelves, as well as the hanger bar. Then you need to wash the walls inside the cabinet.
Now it’s time to tackle the paper or wallpaper. Lay out several sheets to determine whether you need to match the pattern or whether your color allows you to glue the wallpaper without matching patterns. If you are wallpapering, you will need to cut the pieces to fit your cabinet, using a pattern as a guide if necessary. It is for this reason that it is useful to have more paper than you need.
99-year-old front-line artist Rodion Shutenko painted a painting about coronavirus
What did the Roman fishermen's boat look like? Scientists have created a 3D model
Soviet Aladdin had unearthly beauty. How did his son grow up (photo)
Simple decoupage from wallpaper: decorating old furniture
A master class on decoupage techniques can easily be found on sites with similar topics. The decoration of wooden cabinets, tables, stools, chairs and even the floor is described in detail and filmed.
What you need to turn an old piece of furniture into a work of art:
- Sandpaper with a rough abrasive surface;
- A piece of wallpaper;
- Old furniture;
- PVA glue;
- Alcohol;
- Primer;
- Water;
- Paint for wood.
To get into the decorative scheme using the decoupage technique, below is an algorithm using the example of decorating the top shelf of an old chest of drawers.
The decoupage process is as follows:
- First you need to sand the surface that you intend to decorate with sandpaper, removing the entire top layer. Particular attention should be paid to furniture with a varnished surface. The varnish must be removed completely without leaving any gloss. Otherwise, the wallpaper may not stick to the surface.
- Then, using alcohol and a napkin, degrease the entire working surface of the shelf;
- The next step is to apply a coat of primer and paint;
- Next, you need to prepare a piece of wallpaper: place the wallpaper in water for better attachment to the work surface. Place the soaked wallpaper on a paper napkin.
- Apply glue to the surface of the chest of drawers and to a piece of wallpaper without removing it from the napkin.
- Next, carefully place the wallpaper with glue on the surface of the shelf and only after that, remove the napkin, being careful not to tear the piece of wallpaper;
- Remove excess glue with the same napkin or dry cloth;
- The final stage is the application of paint or furniture varnish, which is not necessary, but furniture varnish will give the chest of drawers and the picture on it a finished look.
How to cover furniture with self-adhesive film
One of the advantages of this material is the ability to work with it yourself. There is no need to look for specialists and pay for the service. You can easily cope with this task yourself.
You can successfully use self-adhesive film to protect tables, window sills in any room, countertops and furniture in the kitchen.
The most important stage in facade processing is preliminary surface preparation.
- It needs to be inspected for defects, dirt, loose layers of paint or varnish, protruding pieces of glue, etc. must be removed.
Use sandpaper. It is necessary to clean the base from dust, dirt and uneven surfaces. - After treatment, the surface can be primed and wait until it dries.
Rough and porous surfaces must be primed before gluing the film. - Some craftsmen advise pre-coating the area to be covered with varnish.
But if you choose a high-quality self-adhesive film, this is not necessary. Ideally, the surface should be wooden and varnished.
After cleaning the surface from contaminants, it must be degreased. Thanks to this procedure, you can avoid the appearance of wrinkles during pasting.
Any detergent or alkaline solution is used as a means to degrease the surface.
After preparing the surface, we proceed to cutting the material. Sheets need to be cut with a margin. This makes them easier to stick to the surface. If you need to take into account the pattern, then a margin of 2-3 cm is required. Without it, it will not be possible to accurately adjust the drawing. Excess pieces are carefully cut off after pasting the furniture.
To make cutting the material easier, manufacturers print a centimeter scale (grid) on its back side.
Sticking the self-adhesive film is not difficult.
- You need to take a piece cut from the roll and separate the paper from its upper part.
The paper should not be separated completely, but by 5–7 cm. Try to pull the paper evenly. - Place the adhesive side of the sheet against the surface and smooth out the contact area.
Carefully smooth the film, it should lie well and no defects should be allowed. - Now slowly pull the paper down.
We remove it completely. The film will adhere smoothly and neatly to the surface. To prevent the appearance of air bubbles between the surface of the furniture and the material, you need to smooth it by hand during the gluing process.
If it is not possible to eliminate bubbles, they can be easily removed by piercing the lining with a thin needle. After gluing, the puncture site will not be visible.
DIY decoupage: vinyl wallpaper as a three-dimensional pattern
Vinyl wallpaper with three-dimensional ornaments and patterns will help to add an unusual decor to furniture. The remaining piece of wallpaper should not be thrown away, because it will help when decorating old furniture and interior items. The result will help turn ordinary cabinet doors into an element of style.
In addition to the basic items for decoupage, you will need spray paint with a metallic effect, such as gold, copper or silver.
Having prepared the cabinet doors, you need to place a piece of wallpaper on them, pre-coated with glue. At the same time, there is no need to soak it in water, as is the case with a chest of drawers and paper wallpaper. It is enough to thoroughly coat the desired side with glue, as with normal gluing during repairs, and leave a piece of wallpaper with the glue for 15-20 minutes so that the wallpaper absorbs more glue. To prevent the glue from drying out during this time, simply fold the wallpaper in half.
Decorative decoupage with wallpaper: master class
A decorative and beautiful look can be given not only to the closet. By choosing several patterns from one piece of wallpaper, you can decorate kitchen wooden stools. The technique is the same for all furniture.
You will need:
- Several cut-out wallpaper fragments;
- 4 wooden kitchen stools;
- PVA glue;
- Sandpaper;
- Water;
- Furniture glue;
- Alcohol;
- Paper towels;
- Textile;
- Primer and paint;
Sand the stools, removing excess paint and surface unevenness. Apply a coat of primer and paint. Soak the cut out wallpaper fragments in water. Apply glue to stools and wallpaper. Place the wallpaper fragments in the desired place on the stool, remove excess glue and reapply the glue in a thin layer for stronger adhesion. After the glue has dried, you can apply varnish or use a large-pore sponge to spread a little paint around the design.
You can complete the kitchen ensemble by decorating the doors of kitchen cabinets, window sills or countertops using the same technique and style.
How to update an old polished cabinet with wallpaper sheets?
- First roughen the surface by sanding it with sandpaper. Then apply a primer to prevent the coating from coming off in the future. When the soil is dry, you can start gluing.
- Take measurements from the surface of the cabinet that you will update.
- Unscrew handles and locks. Remove, if any, decorative trims.
- Transfer the required dimensions to the back of the self-adhesive.
- Now you need to make soapy water in a flower sprayer. Spray it on the cabinet where the film will be glued.
- Separate the wallpaper from the base at one edge by 5 cm. Bend the paper slightly and apply the sticky side to the door or side wall. Take a rag or spatula in your hands. Carefully smoothing from the middle to the edges, expel the air from under the film.
We invite you to watch a video that shows how to update a polished cabinet with wallpaper:
Next in the photo you will see how cabinets covered with wallpaper look in the interior.
Children's wallpaper: decor in decoupage of a toy box
When a baby arrives in the house, the apartment gradually becomes overgrown with many toys. And these are not only cute soft bear cubs and bunnies. These are construction kits, small parts, cars and a lot of little things that often fall under your feet, causing a lot of trouble. Nowadays there are many different plastic containers for storing small toys.
But making such a container with your own hands, and even together with your baby, is a useful and educational activity. Having a wooden box, adapting it as a place to store toys is not a difficult task. And decorating it, attracting a child, is a fascinating procedure.
What you will need:
- Wooden box with removable lid;
- PVA glue;
- Children's wallpaper;
- Water;
- Furniture glue;
- Sandpaper;
The process is similar to any decoration using decoupage technique. Prepare the box for gluing pictures: sand 4 sides of the box and the lid. Cut out pictures from the wallpaper - these can be heroes of fairy tales or cartoons that the baby likes. Or just bright flowers. Wet the cut out fragments with water and place them on a paper napkin to absorb the moisture. Apply PVA glue to the box, lid and wallpaper. Place the pictures in the right places, remove excess glue with a napkin or cloth. Then apply a thin layer of glue again. The box is ready. For gloss, you can varnish the box, although this procedure is not at all necessary.
Beautiful decoupage of furniture with wallpaper (video)
The decoupage technique is a simple task at first glance. Give the interior an updated look and turn the room or kitchen into a room in the same style, perhaps with the help of simple tools and a few pieces of wallpaper. The creative process will give you many pleasantly spent hours without extra costs. There are no restrictions in the decoupage technique. You can decorate using old newspapers, paper napkins or any paper material suitable for working using the decoupage technique. It is enough to spend a little time and the result will exceed all expectations.
Which style will highlight
Furniture decorated in this way is suitable for a limited number of styles. Because after this treatment it will have an aged appearance. Decoupage is also often used with various techniques that give the product an antique look. Thus, deliberately aged and shabby creations will take on Provence, vintage, retro, art deco.
Original decoupage cabinet in Provence style
Provence loves antiques, natural shades, various pieces of furniture and kitchen utensils. The latter can be decorated using the proposed technique. It is better to choose rustic motifs as a design: flowers, cockerels, chickens, images of the sun and herbs.
Beautiful chest of drawers after restoration in vintage style
Vintage things are the very charm. To decorate the interior, use various boxes and pieces of furniture processed using decoupage. To do this, use images of flowers, romantic silhouettes, and various plant motifs. Add some twine, burlap, white paint, and your perfect vintage design is ready.
Any type of furniture decoupage with wallpaper is perfect for a retro style. This trend will do well with aged items, especially if it is done with an exquisite method. Here you can use various lines, checkered prints and other retro motifs. It is better to choose dark colors.
This is how, with the help of decoupage, you can give old furniture a new life, give it a new original image, and create a new interior design.
Decoupage a coffee table with wallpaper under glass - quick and easy