80448
In order to hide scratches and defects received during the use of furniture or to renew the surfaces of facades and panels, a special film is used. It is durable, has an attractive appearance and a rich color palette. To figure out how to glue self-adhesive film to furniture, you need to consider in detail its features and application methods.
Physical properties
If you want to quickly and efficiently restore your furniture using self-adhesive film, you should take its choice seriously. It is necessary to check what material was used to make it. In the construction market there are often cheap analogues of high-quality products made of polyethylene or polypropylene. They will not be able to cover large furniture.
The best option in this case is to use polyvinyl chloride, which is used to produce high-quality self-adhesive film.
It is necessary to find out whether the material has an additional protective coating. For example, covering a kitchen table will require a lot of strength, since this piece of furniture is the most frequently used. It is constantly exposed to aggressive substances and mechanical stress.
If this requirement is ignored, the film will lose its attractive appearance and protective function after just a month of use. After a short time, only ugly scraps will remain from it.
The material, which has sufficient strength, can be used to cover a table in a children's room - it can protect the surface from paints and inks, as well as other aggressive pollutants.
When choosing a cheap self-adhesive film, many buyers notice that after a couple of months, the colors lose their brightness. In this case, furniture requires pasting with new material. This requires additional time and money.
This problem can be avoided if you choose a coating model that has an additional protective layer. It is able to withstand ultraviolet radiation. Such protection is often found on transparent products. They are used to cover household appliances to prevent harmful radiation from entering.
Expensive models have several layers. Products with moisture-resistant properties have been developed for rooms with high humidity. It is better to apply pasting near heating devices with a thermally stable polymer.
Types of material
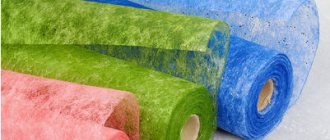
The film is sold in a wide variety of colors and patterns:
- The stained glass option is perfect for decorating a door - it can be easily glued to the glass. The disadvantage of the material is that it should be glued to the wall, avoiding the appearance of bubbles, because after a while, even with minor defects, the film will begin to peel off. The color and design of the film depend on the surface being pasted. For example, individual elements in the form of pictures or films with multi-colored parts are suitable for furniture. This will help revive an old piece of furniture.
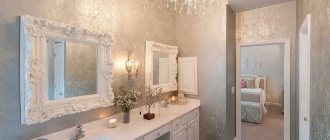
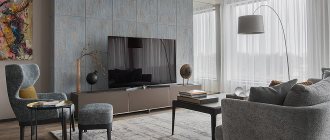
- For bedrooms and living rooms, self-adhesive patterns are selected that match the design of the walls.
One of the main advantages of self-adhesive film is its resistance to water. It can be used to cover walls in the bathroom and kitchen, or the most dirty areas. It’s quite easy to remove dirt from the film - you can pick up any product and wet the sponge with warm water. In case of serious contamination, alcohol should be used.
You should not get carried away with scrubbing stains from the film, or use concentrated cleaners and powders. It is so easy to damage the outer layer of the material.
How to glue self-adhesive film to the wall
films on furniture, doors, walls
Glueing self-adhesive films on furniture, doors, walls
If you know how to apply self-adhesive film, you can transform the interior of your apartment while spending a minimum of money.
Self-adhesive film became popular not so long ago, but quickly gained recognition because... You can use it to decorate literally any surface: you can stick it on furniture, doors, wallpaper, windows, etc.
From the article you will learn about the features of self-adhesive film, which film is best to choose for different surfaces and the rules for working with this material on different surfaces.
Instructions and videos will help you transform the interior of your apartment using this material.
Features and types of material
As already mentioned, self-adhesive film is produced for a wide variety of surfaces.
All types of film are almost the same and are made using adhesive tape technology, which makes this material both similar to duct tape and wallpaper.
Self-adhesive film has the following characteristics: resistance to moisture and high temperatures, ease of working with this coating, a large selection of colors and patterns, ease of maintenance and low cost.
The material is suitable for almost any surface: it can be glued to ceramics, wood, plastic, wallpaper, plywood, glass, etc.
Most often this coating can be found as a decorative element, which is applied to furniture, wallpaper and doors.
If we talk about complete or partial peeling off of walls, then this is relevant for the bathroom and kitchen in the work area.
This choice is explained simply: dirt does not stick to the film, it is very easy to clean and is quite moisture resistant, which is ideal for the bathroom.
Sometimes you can find the coating in children's rooms, because... in this case, you don’t have to worry that the child will ruin the wall covering.
Of course, it may be somewhat inferior to wallpaper in terms of decorative properties, but with a wide variety of colors and patterns on the material, this problem can be avoided.
Stained glass film will be an excellent decoration for a door - especially since it is not at all difficult to glue it to glass.
Its only visible drawback is that the material must be glued to the wall or furniture completely evenly so that there are no bubbles or unevenness, because... This will not only make it look unattractive, but will also worsen its adhesion to the surface, and soon it will begin to come off.
Before buying and gluing the material, you need to decide on the surface on which it will be located. The design and color of the film largely depend on this.
For example, only individual elements are often glued onto furniture - for example, pictures, or multi-colored parts of the film, which can “revive” old furniture.
Another option is to protect furniture - for this you will need a transparent film. If you are going to glue material to windows, then stained glass with a mosaic pattern will suit you.
For living rooms, bedrooms and children's rooms, you can select self-adhesive designs that match the main wall covering and can add originality to the interior.
Since one of the main advantages of the material is easy care and resistance to moisture, in the bathroom and kitchen you can cover the walls with it completely, or only those areas that are most susceptible to contamination.
Removing dirt from the film is very simple: you can use any detergent and warm water, and if the dirt is severe, then ethyl alcohol will help.
It is not recommended to rub the film vigorously or use highly concentrated chemical powders and cleaners, as... they can damage the outer surface of the material.
Pasting material
To work with this coating you will need the following materials:
But before you start gluing the material, you need to put the surface in order. First of all, remove the old coating and the glue that is under it.
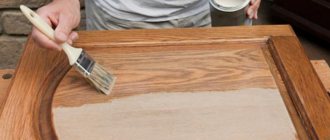
The wall must be cleaned very thoroughly, and then degreased with gasoline or alcohol and dried well. The material will adhere best to a smooth varnish coating.
If the surface is matte or rough, then before pasting it can first be coated with a primer or polyester varnish or methyl glue.
If you glue the film to plywood, wood, chipboard, fabric or plaster, then any of these surfaces must also be prepared - cleaned of dust and dirt.
You can also treat the surface with a primer or putty for better adhesion to the material.
If the film is glued to glass or metal, the surface needs to be slightly moistened, otherwise the coating will not stick to it.
Since it is often glued not in sheets, but in small parts, there are markings on the back with centimeter increments.
Almost all materials are equipped with such markings, however, if you bought the film without it, then you need to do the markings yourself so that you can cut it correctly.
It is better to cut with a special knife or scissors. When cutting, leave 1-2 cm of margin.
How to cut the material correctly depends on its pattern: if the picture consists of tiles, then you need to cut along the seams, and if the pattern is with a repeat, then you need to cut from the front side.
Gluing the material in general is not difficult, but you need to be very careful and take your time so that the coating lies evenly and does not bulge.
Get ready for the fact that covering, for example, the entire surface of the bathroom walls with film will be more difficult than applying it to glass, doors or wooden furniture.
After you have prepared the pattern, carefully separate the material from the backing and apply the sticky side to the surface.
You don’t need to glue it tightly right away, first just apply the film and see how its size and shape fits the selected surface (at first you only need to glue the first 50 mm).
If everything is in order, then carefully spread the film over the surface, immediately smoothing it with a dry, soft cloth.
It’s better to watch the whole gluing process on video if you’ve never done this before.
To prevent the material from bubbling, you need to smooth it from the center to the edges, just like you do when gluing wallpaper.
If you notice that the film is swollen, then immediately level it over the surface before it completely sticks to it.
If you are gluing the film in the bathroom and the work area is large, then you need to apply it to a prepared wall, smeared with wallpaper glue. Apply the film until it is dry, and then smooth it with a cloth rag.
Stained glass film, as well as shaped picture films, which are applied to glass, doors and furniture, stick to the surface very quickly, however, they are much easier to glue, the main thing is that the material is placed evenly. Video:
To prevent the coating from sticking too quickly, you can treat its surface with talcum powder or powder.
Stained glass film can only be applied to glass or metal moistened with water. You can also add a soap solution to the water - this will make it easier for you to correctly adjust the film to the surface.
Afterwards, the glass or metal with the film applied is wiped in the same way with a dry cloth.
Self-adhesive film adheres well to wallpaper. Most likely, you will select small drawings for them, rather than a full-fledged canvas. You need to glue the material onto the wallpaper following the standard instructions.
Self-adhesive film for walls in different finishes and its characteristics
Self-adhesive film in the interior of the room
Protective film on walls has recently been used more and more often. It has different characteristics and applications.
It all depends on the base material and the result you want to achieve. Today we will look at this particular material, you will find out what it is made of and where it is used. It will also be explained how to glue self-adhesive film to the wall, because this has its own characteristics and subtleties.
Principles of material classification
Self-adhesive film for walls is a fairly diverse and versatile material. This material also has its own classification; each material has its own parameters and properties. When choosing a self-adhesive film, these properties should be given priority attention.
Properties of self-adhesive film:
- The structure of the material;
- Material manufacturing components. For this purpose, the seller has instructions for use and there is a composition there;
- Surface type;
- Purpose;
- So does decorative design.
Attention: Self-adhesive film is not that expensive, so anyone can buy it. The price may vary depending on the type and brand of manufacturer.
This line of materials also includes a heating film for walls; it is used for finishing walls when installing heating devices. It perfectly reflects heat from the plane.
There is also a membrane film for walls on sale; it is used for waterproofing and is very useful in construction.
Types of film by material used in production
Self-adhesive wall film is made by combining manufacturing components. The final characteristics depend on this.
The base substances used are:
Attention: In production, not only basic substances are used, but also a combination of plasticizers and stabilizers. Quite often paper and various fabrics are used.
Classification of self-adhesive film by structure
The structure of the web of self-adhesive films can be single-layer or two-layer:
Single layer film version
To make a single-layer self-adhesive film, multicomponent solutions are used, which consist, among other things, of polyvinyl chloride (PVC) resin and various plasticizers.
- To give a certain strength and the desired design to a product, additional materials are used: stabilizers and pigments. All substances used are mixed so that a homogeneous substance is obtained. The resulting mass is then “squeezed out” (this process is called extrusion) or treated with high temperature to obtain the final product - a film.
- Depending on what plasticizers were added during manufacturing, the film can turn out to be rigid or elastic; its other properties also depend on it.
To make a two-layer self-adhesive film, two separate different canvases are made - the base and the cover.
- The base, as is customary, is made of fabric or paper. The covering layer consists of polyvinyl chloride resin of a certain structure. To produce such a film, methods of calender or deposit molding, extrusion, and caching are used.
- Ultimately, a two-layer film turns out to be much more flexible compared to a single-layer film, and this means it is easier to work with. However, the two-layer self-adhesive film is inferior in terms of technical characteristics.
Attention: Before purchasing self-adhesive film, think about where and how it will be used. Based on the findings, select a film structure that suits your needs. This is necessary in order to increase the possible duration of operation.
By surface type
Also quite an important point. It is important to choose the right self-adhesive film according to the type of surface. The type of surface determines how well the film will harmonize with surrounding objects.
Types of films by surface type:
Suitable if you want to create an unusual effect.
Attention: As mentioned above, the choice of the type of film surface must be taken seriously: the appearance of the room will depend on it. If you are in doubt about your choice, it is better to consult with professionals. It’s better to play it safe once again than to later observe bad taste in the room.
Decorative options
Self-adhesive film for walls is available in large quantities in retail chains. It can be used for finishing many surfaces. For one manufacturer, the number of different interesting types of canvases can number in the thousands. Which, in turn, creates the opportunity to choose for any need for every taste and budget.
The first option is the standard one. In this direction, there are many structures that imitate natural materials:
- Veneer coating, and quite often people prefer imitation of valuable wood species;
- Natural stone finishing is also in demand;
- For kitchens, many people choose a tile finish (see Wall decor in the kitchen: interesting ideas);
- There is also just one for canvas;
- There is a covering for various fabrics;
- For the bedroom, some choose a tapestry finish;
- Children's stories are also popular.
Attention: Design styles of self-adhesive film can contain either just one tone or a combination of different shades.
The sales line also includes materials that have a special purpose:
- Velvet styling;
- Imitation of cork fabric;
- Metal coating (here gold or silver coating);
- Special thick films to protect furniture or work surfaces.
Attention: There is also often a special material on sale on which you can draw whatever you want and then wash it. Of course, you can do this as much as you like.
Where is self-adhesive film used?
Self-adhesive wall film is used in various types of premises. It is often used for all kinds of indoor and outdoor advertising. However, where you really can’t do without film is in design and construction. In these areas, film is naturally used wherever possible.
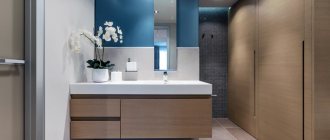
Self-adhesive film for bathroom walls. The material from which the film is made, by its nature, does not allow moisture to pass through and prevents the formation of mold, and therefore is an ideal option for wall decoration. Among the design solutions, it can be noted that finishing with a mirror cloth will visually increase the space of the bathroom, and finishing with a holographic one will simply look beautiful and fresh.
Finishing all bathroom walls with self-adhesive film
Bathtub film can also be attached to the walls in separate fragments, as decorations for different sections of the walls.
Selecting the necessary parts of the room
Self-adhesive film for furniture. Here you can do whatever your heart desires. You can use a film with a pattern that imitates wood, stone or fabric, as is fashionable now.
We finish individual elements to look like natural wood
Each design option will bring something new to the interior or give a special style to the room; for example, gold or silver film is often used in high-tech rooms. Interestingly, film can both highlight the shade of recently purchased furniture and update old ones.
Changing the structure of furniture using film
Film for work surfaces. Work tables and kitchen areas are under constant load and are also exposed to all sorts of foreign sharp objects.
A large surface area cannot withstand such practices for long, which leads to damage. However, the film, which, as they say, takes the blow on itself, helps to extend the life of surfaces. A beautiful and cheap solution to the problem.
We use the material to finish the working part of the kitchen
Film for children's room. They are used so that the child can not embarrass himself in his creative impulses, painting not the wallpaper, but the film, from which everything can then be easily erased. In addition, the covering can be with thematic designs, which can be easily and easily changed to suit interests as children grow.
Self-adhesive film for decorating a children's room
You can also decorate the furniture in the children's room. It can be bright and attract the baby's attention.
Finishing furniture with film in a child’s room
Film for wooden door surfaces. Exactly the same beautiful solution to the problem as with film for work surfaces. The film will protect the door from scratches and chips, and, importantly, will not allow moisture to deform it. Again, with thousands of design options, you can find the best shade for your door and room.
Self-adhesive film for door trim
Self-adhesive film for windows. Essentially, window surfaces are tinted to protect the sun's rays.
Of course, the degree of darkness varies, so everyone can choose their own. This item also includes self-adhesive film for window sills. The same thing - the film prevents the window sill paint from cracking and crumbling, and this frees the user from constant maintenance of the surface, which results in very good savings.
Windproof wall film with reflective effect
Film for transparent surfaces. This film also provides good protection from external influences. Interestingly, you can cover the entire glass plane with self-adhesive film (including colored film), or you can stick it in separate fragments.
Nowadays this practice is very popular among professional designers, because... The film and large open surface provide a huge selection of combinations of different shades and patterns.
Application of film in transparent stained glass windows
Attention: Since PVC film is an exceptional material, expert advice will help you better understand all its capabilities.
Parameters of self-adhesive film
Naturally, a huge selection of design styles is not the only thing that specialty stores are famous for:
- The convenience of self-adhesive film is also that it comes in convenient forms. This was done in order to use all the material, leaving nothing extra for the trash.
- As a rule, the film is sold in rolls of 15 meters in length, but the buyer chooses the width himself. General recommendations when choosing:
- For large surfaces, rolls 90 cm wide are usually taken;
- If the goal is to update or protect furniture and suitable surfaces, then the roll width should be from 450 to 675 mm;
- If the film will be glued to a small surface or used to decorate small elements, then the width should be from 53 to 106 mm.
How to properly apply self-adhesive film
As mentioned above, the biggest advantage of self-adhesive film is its ease of use. You can easily cope with this and can do everything yourself. Therefore, you can calmly come up with and try all sorts of sticker options. No one will bother you here, the only limitation is your imagination.
The procedure for working with self-adhesive film (in order for everything to turn out beautifully and in good quality, you just have to follow the instructions and there will be no problems):
- The surface is being prepared. It must be cleaned of dirt, dust and grease. A special solution is used for each type of surface. If the film is glued to unvarnished wood, then before starting work it is necessary to prime the base (see Types of construction primers and their scope).
Cleaning and priming the walls
- The film itself is prepared for stickers: shapes or patterns of a certain size are cut out of it. The protective film layer is removed.
Removing the protective layer
- The film is glued to the surface (it is important here that there are no air bubbles under the film). Advice: if the film is glued to the wall, you can do it much more reliably by additionally using wallpaper glue. To make the film more flexible (may be needed for gluing round shapes), you can warm it up with something, for example, a hairdryer.
We attach self-adhesive film to the walls
Summarizing the above, it becomes clear that self-adhesive film on walls is not only protection of walls and objects from damage and old age, but a beautiful design move. However, versatility is not its only advantage.
Such a film is resistant to damage and any external influence; it also, as they say, “lives a long time” and has enormous color transfer capabilities. Self-adhesive film adheres perfectly to any type of surface and is practically impervious to moisture. If you watch the video in this article and photos, then you can do everything quickly, efficiently and without problems.
Graduated from the Faculty of Architecture of the Penza State Institute of Architecture and Construction. For the last ten years, he has been a leading specialist in a large construction company in Penza, engaged in the construction of multi-storey residential buildings. Total work experience in the specialty is 18 years. Consults on design issues, selection of materials for interior and exterior decoration, and technology for finishing work.
How to glue self-adhesive film to bathroom walls?
To apply film in the bathroom, you need to make sure there is no whitewash or paint on the walls. In this case, the film will not stick. We covered the entire bathtub, and it adhered well right away. And in the morning we came in and it all fell off. The self-adhesive film does not stick to paint or uneven surfaces. Such walls need to be thoroughly cleaned of dust and grease before being glued to them. Treat with a primer if you need to level the surface with putty. And then coat it with primer as well.
the system chose this answer as the best
add to favorites link thank
more than a year ago
With the help of self-adhesive film, your bathroom can be transformed beyond recognition.
The only problem is actually with gluing it, very often after gluing it just falls off. There may be two reasons for this problem:
In the film itself, or rather in the adhesive composition with which it is processed, it may simply be old or of poor quality. I myself still haven’t figured out how to check the expiration date, especially if the product is ordered from China, but in the store the seller should show you the documents for the product, and on the label, if it hasn’t been re-stuck, there should be a release date.
Walls, or rather their surface. Self-adhesive film sticks quite well to any objects if they are clean. Therefore, before you start gluing, first clean the wall of debris with a stiff brush; if necessary, you can use a brush with metal bristles.
Next, the walls need to be thoroughly washed with detergent; apply the product directly to the brush and rub it along the wall to clean even oil stains.
After washing with the product, rinse thoroughly with water and dry the wall so that there is not even a hint of moisture.
Now we move on to washing the wall with a solvent; it is better to apply it through a dispenser and wipe with a cotton rag without lint and threads. Dry the wall after using the solvent.
Next you can glue the film. To do this, first attach it to the wall and look at the dimensions and design; if necessary, then cut it according to the required parameters.
It’s best to glue from the bottom, it’s easier for me, but it can be done from either side. Tear off the edge of the protective layer and, while gluing, slowly pull back the protective layer, and an assistant should smooth the film from the place where the film is already glued in the direction of gluing with a rubber roller so that bubbles do not form. Then, in order to remove them, you will have to damage the film itself with a needle, no matter how sharp the needle is, but traces remain.
add to favorites link thank
Self-adhesive film has many advantages; it can be safely used in bathrooms; it is not afraid of moisture and high temperature. One minus, the surface on which the film is glued? should be even, smooth, clean. It is advisable to glue the foam onto a surface that has been well puttied beforehand and sanded after drying. Then apply a moisture-proofing primer, dry thoroughly and then just glue the film. But first, mark a vertical line on the wall for the first sheet of film.
Self-adhesive film is very convenient for cutting sheets (strips) of the desired size; a mesh is applied on the back of the paper backing. Cut with a small margin. If the film has a pattern, then it is cut from the outside so that the pattern on the canvas matches when gluing.
And on the reverse side there is information on how to properly work with self-adhesive film. Carefully detach the backing from the film by 3-5 centimeters and lean it against the surface at the mark where you start working. Carefully glue the edge, then slowly peel off the backing in small strips, and with the other hand level the film from the center to the edges of the film. You can level it with a special felt squeegee. It is important to get rid of air bubbles. If small bubbles appear somewhere, carefully pierce them with a needle and smooth them out with a squeegee. It is advisable to heat the areas around the edges, in the corners, and heat the joints with a hairdryer and smooth them out well again.
add to favorites link thank
The main requirement when gluing film in the bathroom is the preparatory process. The walls must be smooth and clean.
If the surface of the wall is not plastic or tile, but putty, then it is necessary to first clean it and treat it with a primer.
If the surface is smooth and glossy, then for better adhesion, without bevels, you can use a soap solution to treat the surface to be decorated.
To ensure that there are no air bubbles left under the film, you need to use a hard wallpaper spatula when gluing. If bubbles remain, then it is enough to pierce them with a needle and expel the air.
add to favorites link thank
The work is not much different from wallpapering walls.
There are some nuances. Self-adhesive film, unlike most wallpapers, is glued overlapping.
Take this into account when starting work, that is, glue in such a way that the seams are not visible from the entrance, from the door.
First, we remove everything from the bathtub, including mirrors, shelves, and hooks. sink and so on.
You don't have to take a bath.
Next, we inspect the walls and make an important decision: if the walls are smooth (the film is quite thin and the evenness of the walls plays an important role), then they need to be washed and degreased, then dried.
If you need to putty and level, then we do it (the job is for craftsmen; only they can putty properly in two layers).
After puttying, sanding and priming. Almost all manufacturers of self-adhesive film recommend using acrylic primer; we buy a deep-penetrating acrylic primer, prime it, and dry it.
Next, cut the film according to size (ceiling height, plus allowance for undercutting).
Now we beat off a vertical line, maybe with a plumb line, maybe with a level, mark the line with a pencil.
By the way, on the back of the film there are detailed instructions on how and what to do.
Next, we begin gluing, tear off (separate from the base) the protective layer of the film by about five centimeters.
Then we apply the film to the wall, gluing it from top to bottom.
That's all, smooth it out, or with a spatula like this,
or a sponge or a rag, as convenient.
Gradually separate the protective layer from the film and slowly go down.
We expel the air to the edges, the film does not stand up instantly; you will even have time to peel off and expel the air (if necessary.
In principle, you can pierce the “bulk” with a needle, but this is an extreme case.
That's all, if necessary, you can use a hairdryer to go around the corners and perimeter, as well as along the joints.
Applying self-adhesive film requires, first of all, preparing the walls for pasting. As you understand, you need to clean all the walls in the bathroom from objects, then fill up all the holes and cracks that exist and let them dry for a day. Then take it and thoroughly rinse all the walls from dust and other impurities, let them dry thoroughly for another day or two, and you can glue the film on the walls. For better adhesion, you can use a hair dryer. After applying the sticker, be sure to use a hairdryer to go over the entire film to remove air.
add to favorites link thank
- How to apply self-adhesive film to a door How to apply self-adhesive film to a door correctly? How to stick film on doors correctly? In order to…
- How to properly putty a wall How to properly putty walls Properly puttied walls are the key to any quality repair Puttying is a process...
- How to stick self-adhesive film on glass." The main thing is that there were no bubbles. somehow Kolka and I took two bubbles...
- Installing sockets in a concrete wall Instructions for installing sockets in a concrete wall Preparatory work Installing a socket in a concrete wall Creating…
Appearance
Depending on the purpose of gluing, different types of film are chosen. Before work, you should complete a sketch. This can be done in any graphic editor by processing an existing photo of the room.
To visually expand the space of the room, it is worth sticking a mirror film on some pieces of furniture. This will give the room an original look and increase the psychological comfort of the residents. Typically, pasting will be done using matte film. If you choose an option that is too bright, it will draw attention to itself, overshadowing other parts of the room.
For those who love natural materials, the market offers many film options that imitate:
- tree;
- stone;
- various fabrics;
- ceramic surface.
However, it is used on furniture only in cases where the product is of high quality. If you buy a cheap film that has an unaesthetic appearance, you can ruin the interior.
It is better to pay attention to products from trusted brands. This will allow you to get a high-quality result and not overpay for repeated repairs. There are many glossy products on the market that have a rather original appearance. They are used for rooms with insufficient lighting. The gloss is suitable for a corridor or hallway.
The office, kitchen and bedroom should be covered with matte film. If you choose a high-quality model with a high level of light reflection, it can be used for pasting the ceiling.
If you wish, you can purchase an original film, which is a unique work of art. This material is usually in the form of a polymer coating.
Preparation
Before work you should prepare:
- scissors;
- ruler;
- pencils;
- knife;
- construction hair dryer;
- putty knife.
However, before gluing, you should remove the old coating and glue. The material will stick better to a smooth varnish surface. If there are many rough spots, the furniture is treated with a primer before pasting. When gluing wood, plaster, chipboard or plywood, the surface is cleaned of any contaminants. When gluing metal or glass, the surface is first moistened. Otherwise, the film may peel off quickly.
The main condition is that the film should be glued at a sufficient level of illumination in the room. Otherwise, you may not notice defects, which will then be very difficult to eliminate.
Important! The surface of the furniture must be smooth and free of any damage. It is necessary to seal large cracks, eliminate paint drops and burrs.
It is better not to paste over furniture that is of artistic value. As a result, she will suffer irreparable damage. The last stage of preparation is degreasing the surface of the furniture. Without such a procedure, the base will shrink, resulting in depressions and folds.
It is necessary to glue the film onto cleaned furniture. If there is dirt on it, the new coating may quickly peel off. After completing all preparatory procedures, you should proceed to cutting the material.
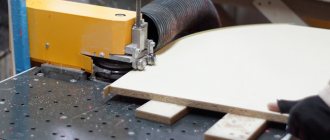
How to properly cover furniture with self-adhesive film
Self-adhesive can be applied to any furniture and other surfaces. This decorative coating serves as an excellent tool for restoration and is a good thermal protective coating. Depending on the material of the item and its purpose, the type of film is chosen. Transparent oilcloth covers minor scratches well; a coating with a mosaic pattern is suitable for glass. Pasting work is easy to do with your own hands, just familiarize yourself with the methods and features of applying decor.
Required tools and materials
If you decide to use decorative material to give a new look to old furniture in the kitchen, nursery or bedroom, you should prepare the tools for the job in advance. Self-adhesive is sold in rolls and comes in different densities. No glue is required to secure it to the surface. You need to stock up on the following items:
- Primer to improve adhesion of both planes;
- Solvent;
- Pieces of soft fabric to smooth out wrinkles;
- Foam roller to remove air;
- A utility knife or thin scissors.
Furniture surface preparation
Any adhesive-based products should only be applied to well-cleaned surfaces. All dust must be removed from the countertop in the kitchen, table or cabinet in the living room, degreased with an alcohol-containing liquid and dried. Additional grouting will be required for wooden, fabric surfaces and chipboard items. A layer of primer or special putty will allow the film to remain on the base for a long time.
To improve the adhesion of the film to metal or glass surfaces, additional moisture is used. Paint and remnants of old decor must be removed. Concrete elements cannot be covered with film. Such surfaces must first be coated with oil paint. Cracks and chips must be repaired with plaster.
Mixtures for filling cracks and leveling surfaces should not contain latex. Vinyl films do not stick to materials with this composition.
Preparing and cutting the film
Self-adhesive rolls of various widths are produced. On the back of the protective layer of each unit there is a special square marking that makes cutting and fitting easier. It is convenient to use this method if the canvas is of the same tone. It is better to cut film to look like a tile or with a pattern on the front side so as not to disturb the outline of the image.
For cutting, use a stationery knife or well-sharpened scissors. To get a perfect line, use a long ruler. It is not recommended to crease and bend the film for ease of cutting; it will then stick poorly.
Applying self-adhesive to the surface
There are several options and ideas for applying film to the surface. The choice of the appropriate one depends on the type of base and the vinyl roll itself. The simplest method is to simply remove the protective layer and gradually press the film onto the part. The freed part is placed on the surface, pressed and the air is expelled. The most effective movements are from the middle to the side, from the center forward. When part of the coating is fixed, the remaining paper is pulled out and the air removal operation is repeated.
If air bubbles form after gluing, make miniature cuts in these places and press the material to the base. If the format of the elements is large, you need to constantly monitor the correct joining. Cracks should not form in these places. In case of accidental shifting or bending of corners, the film is glued overlapping. The excess strip is cut off with a stationery knife along a metal ruler.
Features of decorating corners with film
A complex gluing method is used to finish rounded corners. In this case, you cannot do without heating. At the fold, heat the film with a hairdryer and stretch it to sufficiently fit a convex corner or correctly position it in a concave corner. Good quality vinyl material can be stretched loosely over a standard table corner. In this case, you won't have to make any cuts. It will be enough to carefully remove the excess with a knife.
If there is no possibility of heating, you can stick the film on round corners. To do this, you need to attach the vinyl to the sides and fold the fabric down. At the very corner, the film is cut and a small indent of a few millimeters is made.
Mistakes to Avoid
To get an excellent result, when applying self-adhesive film to furniture, you should take into account some nuances. It is important to avoid the following mistakes:
- The material should be cut with a small margin;
- So that after pasting no defects are visible. Any surface must be carefully prepared;
- The film can only be applied to a perfectly clean, grease-free and dried surface;
- It is recommended to separate wide rolls only according to the internal markings. If there is a 3D print or drawing on it, you need to make marks on the front side in advance.
How to care for a covered surface
Furniture covered with film is wiped with a damp cloth or washed with soapy water. You can use rough sponges, but not those with a metal base. The use of aggressive household chemicals is prohibited. It is also not recommended to press hard or rub the surface when cleaning.
Complex stains are removed with ethyl alcohol. The glue protruding along the edges of the film is removed with a soft sponge soaked in warm water. Velor decorative coverings require the most delicate care.
Pasting procedure
You just need to cut a piece of the required size and configuration. It is worth outlining its shape in advance. If you don’t have a ruler, you can use the markings on the back of the film in the form of squares. After cutting, all that remains is to carefully glue the film, starting from the top. Gradually going down, it is worth smoothing the material, releasing excess air from under it, which can cause significant defects.
It is better to cut the material with scissors or a special knife. When doing this kind of work, you should leave 2 cm as a margin. When cutting film with pictures, you need to cut along the seams. If there is a pattern, cut it out from the front side of the covering.
Pasting the material does not require much effort. However, such work will require care and patience. This is necessary to eliminate the risk of unevenness. You should prepare for possible difficulties if you plan to apply film to the walls of the bathroom - such work will be more difficult than finishing wooden furniture.
Features of pasting:
- After preparing the pattern, the material is carefully separated from the backing. Having tried it on the desired object, the film is applied to it with the adhesive side.
- You shouldn't stick everything on at once. First you need to apply the film and inspect the product. The shape and size of the piece must match the furniture being pasted.
- Afterwards the film is distributed over the surface. To do this, you will need a dry cloth to smooth the surface.
- To prevent the formation of bubbles, the material is smoothed from the center towards the edges.
- If bubbles appear, the coating should be immediately leveled until the material is completely stuck.
When covering a large area, the material is applied to a surface greased with wallpaper glue. First you should stick the entire piece, and then start smoothing it with a dry cloth.
Gluing pictures is much easier. It is important that they look harmonious. To prevent gluing too quickly, treat the surface with powder. The film is easy to apply to wallpaper.
What to do if the film comes off?
It will take time to reupholster kitchen MDF facades. And I don’t really want the film to come off after a month or two and the film on the headset or cabinet to peel off. If you follow the gluing technology and operating rules, this should not happen.
But if in some places the film moves away from the base, it can be glued. You will need a syringe and glue (for example, “Moment” or “Titan”). It is inserted under the film and pressed into the restoration site.
With the help of adhesive-based films, you can give a new breath to MDF kitchen facades and kitchen units made of any material. An ordinary, neatly papered cabinet and set looks quite aesthetically pleasing. Follow the instructions and enjoy the results of your work.
How to remove film
After a while, many apartment owners want to update the design, which requires removing the old film from the furniture. This type of work involves several methods, all of which are based on thermal effects. When heated, the adhesive layer loses its properties and lags behind the surface. To avoid damaging a piece of furniture, you should stick to one of three simple options:
- Hot water. She needs to wet the film. When the material becomes damp, the spatula comes into action. It is better to use a plastic tool - this way no defects will appear on the wooden surface. With a spatula it is easy to remove both the film itself and the entire sticky layer.
- Construction hairdryer. You can also take a regular one. It should be brought to the surface of the furniture and warm the surface. The glue will quickly come off and can be easily removed with a spatula.
- Heat fan. It is often used in winter to heat rooms. The device is also useful when removing old film from furniture. The hot stream should be directed at the product and wait until the finish peels off.
After the PVC coating is removed, you will notice traces of glue that can be easily removed with ethyl alcohol.