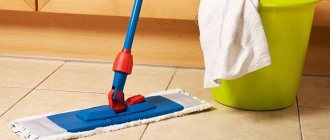
Ceramic tiles have become an integral attribute of almost every bathroom and are actively used in the kitchen. Since this material is the most durable, very often interior fashion dictates new rules and you don’t want to change the entire coating for a new look. In this regard, the question very often arises: is it possible to paint tiles on the floor? With modern paints, the tile can be painted entirely, a pattern can be applied through a stencil, or a three-dimensional design can be made.
Below we will look at how to paint tiles correctly, what tools are needed for this, and what you can use to cover the tiles on the floor to preserve the paint or pattern.
For your information. If you need to paint tiles on a surface that is not exposed to heat or steam, you can use regular acrylic paints, after wiping the tiles with a dry cloth. If the tiles are located on the floor in the bathroom or kitchen, then the technology for applying and protecting the paint will be more difficult, since the surface is constantly exposed to abrasion and moisture.
Tools for painting tiles
Tools for work when painting tiles
Before painting ceramic tiles on the floor, you need to prepare the entire set of tools and consumables, the availability and quality of which directly determines the quality of the work performed. To work you will need:
- Sandpaper, preferably fine-grained;
- Epoxy based primer;
- Two rollers, foam rubber and rag with fine pile;
- Container for diluting paints and varnishes;
- Small round brush;
- Masking tape to protect nearby surfaces;
- Water-based tile paint and protective varnish;
- Detergent containing alcohol or regular ammonia from a pharmacy.
Important. Before painting the tiles on the floor, you must protect your hands with rubber gloves and be sure to wear safety glasses and a respirator. It is also advisable to ensure ventilation of the room. While painting and drying the paint, do not use electric heaters or air conditioning.
Purposes of coloring
The choice of paint for tiles must be approached with the utmost seriousness, since the quality and beauty of the new design will depend on this. Therefore, before purchasing, it is recommended to consult with a specialist who will tell you which coating will be optimal for a particular room.
The choice of coating largely depends on the reason why the owner wants to change the design. Goals can be of the following nature:
- Aesthetic considerations - old tiles installed in the kitchen or bathroom look unpresentable or faded. If you don’t have money for new tiles, ceramic tile paint comes to the rescue.
- For waterproofing purposes, the paint will reliably protect the floor or wall covering from moisture and ensure complete sealing of the seams.
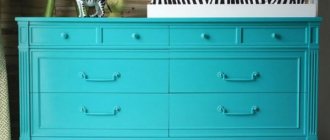
- Change of style - painting floor or wall tiles will help you radically change the interior, while emphasizing the overall palette of existing shades, and you can also add new elements.
- Decoration – the ability to create various images, unobtrusive patterns and ornaments.
- Repair - if the furniture and interior items are updated, it is not at all necessary to change the tiles. The coating can simply be painted.
If the tiles have a beautiful appearance, it makes sense to use sealed grout for the joints, after removing the old one. It is also worth remembering that even the most durable coatings will still peel off over time when exposed to temperature changes and high humidity.
Paint for painting tile surfaces
The best option for painting tiles would be acrylate-latex paint TikkurilaLuja.
A very important question is how to paint old tiles on the bathroom floor, since not every paint is suitable for this surface. Oil-based paints are considered the best option, since they stick to the surface very well and, with proper preparation, can last up to 20 years, but take a very long time to dry.
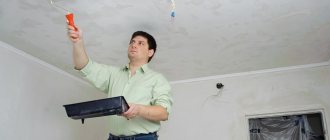
How to paint and how to update foam ceiling tiles
Epoxy or latex based paints are also often used. When creating stencil designs, designers usually use automotive water paints that can withstand extreme operating conditions. When painting large areas, white or colorless paints are usually used, to which the desired dye is added to obtain the required tonality.
Important. Before painting tile floors, it is important to remember that the quality of the paint depends on the quality of the surface preparation. It is strictly forbidden to use any type of water-based paints, as their service life will not be long. How can I paint floor tiles to achieve better quality? The best option for this would be TikkurilaLuja acrylate-latex paint or Samtex 7 paint from the manufacturer Caparol.
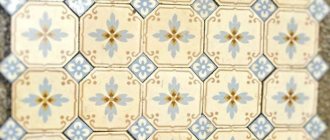
Types of paint
You can paint the floor using a stencil and several colors at the same time
The peculiarity of the compositions is that they must have good adhesion to the surface, even if it is a glossy tile. Helmets in cans are convenient; this option is suitable for a beginner and will help create an even coating without drips. When spray painting, no additional tools are needed.
Types of paints used:
- alkyd enamels;
- epoxy compounds;
- polyurethane;
- water-dispersed with the addition of latex.
Any composition includes several components. Pigments create color, while tinted paints are called chromatic, and black and white materials are classified as achromatic. Resins, oils, polymers, and hydrocarbons are added to form a durable film upon drying.
Using solvents, the viscosity of the mixture is coordinated, and their chemical composition is selected in accordance with the binder. During production, modifiers are added to improve performance properties. With their help, they increase adhesion, wear resistance, fire resistance, and achieve color uniformity. The paint dries from several hours to one day, after which you can use the bathroom.
Alkyd enamel
Before applying alkyd enamel, it is necessary to prime the surface of the tile
Used for interior work. Available in different colors and shades. Forms a glossy layer after drying. For dilution before work, take turpentine, white spirit, solvent. Consumption is 80 – 130 g/m² when applied in 1 layer.
Properties of alkyd enamels:
- weather resistance, no reaction to fats, detergents;
- stability at temperatures -50 – +60°С;
- water resistance, strength, elasticity, light fastness.
To increase the protective characteristics of the enamels, they are applied to primed areas. All painting techniques are used for application.
Enamels retain their shine and properties for 4 to 6 years, and on internal surfaces they last up to 10-12 years.
Varieties of alkyd compositions are produced:
- PF - 115, 133, 223, 253, 266 - pentaphthalic alkyd;
- Extra;
- PF – 1126 – pentaphthalic with the inclusion of synthetic mastics;
- TEX-COLOR SEIDENMATTLAK - based on synthetic resins;
- KO 168, KO-112 - organosilicon;
- NTs-132 - nitroglyphthalic.
The drying time of the enamel depends on the chemical composition and type of thinner. In paint, varnishes, fluorides, and metal oxides are used instead of drying oil, which slows down the formation of the film.
Polyurethane
Polyurethane paint hardens within 2 days
Manufactured on the basis of polycondensation resins. They produce one-component and two-component formulations. The first type immediately contains all the ingredients, and the second is mixed before work from two components.
Properties of polyurethane paints:
- reserve of wear resistance and strength;
- compatibility with different materials and surfaces;
- environmental cleanliness;
- elasticity;
- resistance to aggressive environments.
Polyurethane paint using organic thinners is a conventional composition modified with polyurethane copolymers. Xylene and toluene act as solvents; pigmenting components are added.
The layer hardens under the influence of moisture from the atmosphere, which reacts with the ingredients of the mixture. Dry air slows down setting, so you should not dry polyurethane paint with hot air hair dryers. The coating gains strength and is 100% waterproof within 48 hours.
Water-dispersed compositions with polyurethane filler are not used to paint floor tiles; they are used for treating walls and ceilings.
Epoxy
Epoxy paint does not react to aggressive substances in detergents
Paints are produced from resin and hardener (two-component), aerosol, and powder. In everyday life, products containing epoxy resin are used for cold curing. They form a durable film within a day without additional effect on the surface.
There is epoxy paint for floor tiles, which is produced in production conditions using the hot method. Such compositions are made as one-component formulations that are used immediately after opening the can. The difference is that in two-component paints, the polymerization of molecules in the film is weaker, and the bonds are not as strong as when using a one-component composition.
Properties of epoxy paints and varnishes:
- anti-corrosion resistance;
- neutral reaction to aggressive detergents, chemicals, atmospheric factors;
- used as waterproofing due to impermeability to water;
- excellent adhesion to ceramic, concrete and other surfaces.
Mineral particles are added to paints to create different textures; the color palette is varied, so there are expanded possibilities for decorating an original interior.
Latex water-dispersion
Latex paint hardens within 2 hours
The compositions include organic or synthetic latex, and also include water, pigments, and resins, as in traditional water-dispersed mixtures. When drying, the latex grains join together, which is facilitated by the evaporation of moisture from the surface of the layer.
Qualities of latex compounds:
- durable layer, wear-resistant and durable;
- resistance to aggressive chemicals and atmospheric influences;
- no pungent odors during application and operation;
- quick drying (from 25 to 120 minutes);
- strong adhesion to ceramics, mosaics, porcelain stoneware;
- withstands up to 2 thousand times of washing with a hard brush using household chemicals.
There are compositions for outdoor use that can withstand multiple freezing and thawing cycles. Paint for tiles on the floor is not subject to this effect, so you should not overpay for these qualities, but take compositions for internal use.
Before painting, the surface of the floor tiles is treated with an antiseptic against fungus and mold.
Almost all paints are sold in the form of a thick mass, which is diluted with water to the level of working viscosity before use.
The procedure for painting work
Before painting the tiles, they must be repaired.
Before painting begins, it is necessary to replace or repair all damaged tiles, if any. The painting process itself is quite simple and consists of several steps:
- Surface cleaning. Before starting work, the tiles must be washed with detergents and degreasing agents and passed over the entire surface with a metal sponge. You can use regular sand, sprinkling it on a sponge and wiping the surface. Sand or a metal sponge will create small scratches on the glaze, which are necessary to increase the adhesion of paints and varnishes.
- Surface grinding. Even the best tile paint will not adhere to a smooth glaze. To remove the glaze, sandpaper is used, which is used to rub the surface of the tile until it is matte. Ideally, you can use a grinder or grinder. Also carefully sand the seams between the tiles, as this is where dirt accumulates.
- Primer of tiles. After sanding, wipe the surface with a damp cloth, allow to dry and apply a layer of primer using a brush. Monitor the quality of the primer application and avoid drips, especially at the seams, if you are priming the wall surface. Use an epoxy-based primer; after hardening, sand the surface again with fine sandpaper.
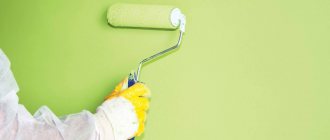
- Surface painting. The final step is to paint the floor tiles using the paint of your choice. It is better to apply the paint with a roller, squeezing it thoroughly in the bath. If the paint contains little coloring pigment and it does not cover the old color in one layer, then the first layer is applied with a rag roller, and all subsequent layers with a foam roller.
Use masking tape to protect nearby surfaces from accidentally getting paint on them. Scotch tape is also used when painting in several colors to create a clear outline or complex geometric shapes.
What determines the price of ceramic floor tiles
Preparatory work - how to avoid mistakes?
Proper preparation of the base is important.
- First you need to remove furniture, appliances, and equipment from the room that are interfering with the work.
- It is necessary to thoroughly degrease the surface of the tile (get rid of greasy stains and deposits, which can lead to deterioration of the adhesion of the paint layer). You will need water with added detergent and a sponge.
- The seams need to be cleaned. All traces of mold must be removed. For cleaning, special anti-mold products are used.
- Finally, the surface is washed with plenty of water.
Now it's time for renovation work! They include the following steps:
- All scratches, cracks, and cavities must be filled with a special waterproof tile repair compound, which will allow you to achieve a better aesthetic effect. Thanks to grouting, scratches are not visible after painting, walls and floors are effectively protected from moisture penetration.
- For this reason, it is necessary to repair the damaged seams (cracks are filled, grout is applied again). Excess solution is removed.
- The surface is polished and leveled.
- Cleaned from dust.
After protecting the edges of the furniture (if it is impossible to disassemble it), and the places where the tiles meet the wall and floor with masking tape, you can begin painting.
Advice: if possible, you need to dismantle, unscrew, unscrew everything that is possible before painting. This will avoid additional work! Otherwise, after removing the masking tape, you can get the result as shown in the photo below.
Varnishing the tile surface
Varnishing is carried out only after the paint has completely dried.
The question is often asked: is it possible to varnish the tiles on the floor to protect the paint? Floor tiles must be varnished, since even the most resistant paint will not withstand the loads and moisture that occur in a bathroom. Varnishing is an important step and is carried out only after the paint has completely dried.
It is very important to choose the right varnish to cover the tiles on the floor. If you need to preserve the color of the paint exactly, then you can use a regular water-based glossy parquet varnish, since it remains completely transparent after hardening and does not change color. You can use oil-based varnishes, but this varnish turns a little yellow after hardening and interior designers actively use this effect to create depth of color.
From the proposed material, we learned whether it is possible to paint tiles on the floor, how to do it correctly and how to protect the surface, and to consolidate knowledge, we recommend watching the video clip at the end of the article.
Choice of enamel
There is a wide variety of options here. However, in order for the paint coating to last a long time and not begin to peel off, the paint for covering the tiles must meet the following criteria:
- was resistant to high humidity;
- The coating must have high adhesion;
- it is desirable that the enamel is intended for painting difficult areas;
- it must be resistant to abrasion and withstand temperature changes well.
Alternatively, you can use oil-based floor enamel - this is a proven method. However, today there are other types of coatings. For example, epoxy would be a good solution. They are characterized by:
- quick drying;
- strength and durability;
- resistance to mechanical stress.
Most often, these compositions are made two-component. That is, they are supplied in the form of a base and a hardener. Working with them is quite simple - a hardener is added to the base, then everything is thoroughly mixed and the composition is applied to the surface.
Important! The paint should be prepared in batches - otherwise it may dry out, since the diluted composition is usable for 6-8 hours.
However, before preparation, you should carefully read the instructions and add the hardener strictly in proportion. Since its deficiency, or vice versa, excess, will lead to the fact that the enamel will not gain its technical properties and will quickly peel off the tile.
Applying texture
Another option is to use automotive enamels. They are specially designed to work in harsh conditions and are characterized by durability and high strength.