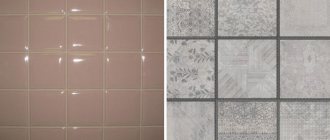
The vast majority of apartments, especially those built during the Soviet period, were equipped with wooden floors. But for rooms with high operational load or high humidity - such as corridors, kitchens, bathrooms, showers - tiled floors are more suitable. Ceramic tiles (tiles) are superior to wood in durability and practicality. It is much easier to keep it perfectly clean. But will the tiles fit on a wooden floor if you don’t want to disassemble it? Or is it not possible to do this?
What are the problems with laying tiles on wood?
The installation of tiled floors requires a perfectly flat, stationary base. Wood is sensitive to changes in the microclimate of the room: it swells with excessive humidity, dries out and shrinks when used at high temperatures. This type of base is not suitable for tiles: they will crack or begin to “walk”. When using small tiles, cracks will appear along the seams between the floor elements.
In turn, wood is also uncomfortable under the ceramic layer. Wooden parts deprived of natural ventilation will deteriorate much faster under the influence of dampness and microorganisms.
But modern materials and appropriate technologies make it possible to create an intermediate layer that allows you to lay tiles on a wooden floor.
Is it possible to lay tiles on a wooden floor in a kitchen?
The durability of ceramic flooring is determined by proper preparation of the base, which must be perfectly flat, static and strong enough to support the weight of the tiles. Using certain technologies, you can turn an ordinary plank floor into a surface suitable for laying tiles.
In this case, the task comes down to creating a damper layer that absorbs the mobility of elements made of wood. The static hard part of the gasket serves as a substrate for the ceramic, while the elastic part is turned towards a more mobile material.
As we have already found out, laying tiles on a wooden floor is possible, and sometimes necessary. It is only necessary to take into account the features of the original design. When laying tiles, craftsmen have to deal with two types of floors: relatively new or with a high degree of wear.
The technology for installing the floor covering in both cases will be the same, the only difference is in the volume of operations performed during the preliminary preparation process.
If the floor is in satisfactory condition
When you have a wooden floor in very good condition as a base, you can lay a screed underlay made of aquapanel, OSB, chipboard or plywood sheets directly on it. This will allow you to level the base, reduce the number of joints, and additionally secure the floorboards.
The old floor covering must first be cleaned of existing paint using sandpaper or a sanding machine. It is important to note that ceramics cannot be installed on new wooden floors. The material must be given at least 2 years to undergo an intensive shrinkage process.
Revision of old coating
Before choosing a method for preparing the base for laying tiles, you need to conduct a thorough inspection of it. The sequence of future work will largely depend on the condition of the old floors.
Under no circumstances should it be installed on newly constructed wood floors. They need to be given at least two to three years to shrink. So in new buildings you cannot lay tiles on wood. You must either wait or completely dismantle the floors and construct a fundamentally different base, for example, a concrete screed.
It should be noted that the tile covering is laid for a very long time. Therefore, you need to be absolutely sure that the elements of the old coating will last no less. There is no point in fussing with the tiles if they will soon have to be opened due to rotten elements of the base.
USEFUL INFORMATION: All about joining linoleum: planks, thresholds, gluing seams
Professionals insist on a complete overhaul of old floors to find and replace all defective elements.
Be sure to check the condition of the joists and the distance between them. It should not exceed 50 cm, otherwise the base may not withstand the weight of tiles, glue and other materials.
Strong boards that do not have visible defects can be used, but first they must be freed from the old coating: paint or varnish. This can be done in different ways:
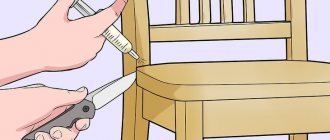
- Mechanical - clean the coating using an abrasive tool: sandpaper, grinder, grinder with a special attachment.
- Thermal – heat the paint with a hair dryer. It will swell and be easily removed with a spatula. Some craftsmen manage to use a regular blowtorch for these purposes, but we must remember about the possibility of fire.
- Chemical - remove varnish or paint using various reagents. But wood, once saturated with them, will emit unpleasant odors for a long time, so this method is used very rarely.
Leveling the surface
After the antiseptic has dried, you can proceed to leveling the working surface. The wood should be cleaned of old varnish, paint and other coatings. Professional craftsmen offer three convenient ways to remove old coating:
- Exposure to hot air. A hair dryer set to a temperature of more than 200 degrees is suitable for this purpose. As soon as the paint and varnish begin to swell, they can be removed with a construction spatula. The main thing is not to overheat the wood so that it does not deteriorate.
- Mechanical cleaning with a spatula or sandpaper takes a lot of time, but is suitable for beginners.
- The use of chemicals quickly and effectively removes old coating, but is not cheap.
After leveling the surface of the board, you should inspect it again for damage.
Plywood or chipboard
Before you begin repair work, you should familiarize yourself with the tips on how to lay a wooden floor made of DSP correctly:
- Before laying the tiles, it is necessary to secure the DSP sheets. The joints of the plywood should not coincide with the joints of the joists, otherwise the wooden base will fail under the influence of the weight of the ceramic tiles. The suitable distance for plywood sheets is 25-30 cm.
- All seams must be treated with a special solution and then sanded well.
- Apply the adhesive solution to the surface of the plywood and the tile itself on the back side.
- The level of the tiles should be determined using a building level.
The main advantage of DSP is the ability to create a perfectly flat surface. A rough base will be required.
Moisture-resistant drywall
Moisture-resistant drywall requires special preparation. The material is quite fragile, so before laying the tiles you will need to construct special guide strips, the distance between which should not be less than half a meter. Otherwise, the tiles will begin to sag and damage the base.
On both sides, drywall is treated with a primer solution to increase strength.
Dry screed
Dry screed is suitable for moisture-resistant plasterboard and fiberboard panels. It should not be used in rooms with high humidity: bathrooms, kitchens, since expanded clay absorbs air well. Dry screed is prepared from various types of dry materials: expanded clay (has good characteristics), perlite, vermiculite.
Main advantages:
- Does not require drying.
- Production speed is about two days.
- It retains heat well, which is provided by expanded clay.
- High level of sound insulation.
Wet screed
Wet screed is prepared from cement-sand mortar. It dries out in about 2-3 days, during which time all repair work will have to be postponed. Fiberglass and glue can be added to the wet screed mixture to increase the strength and elasticity of the cement mortar.
It is important to fill the screed with an even compound to facilitate the process of laying the tiles.
Sealing cracks and joints
Laying an insulating layer allows you to seal all the cracks and joints. It is better to choose non-hygroscopic materials to prevent moisture from appearing and further weakening of the wood, as well as to protect the material from infection by fungus and bacteria. The material should be lightweight to prevent the material from sagging.
The most suitable option is extruded polypropylene foam of synthetic origin or mineral wool. The material is not cheap and does not allow air to pass through well, otherwise its properties correspond to the type of repair work. The insulation is laid on top of the waterproofing layer.
Preparing the base
So, you should carefully disassemble the wooden floors and assess the condition of the joists. Replace defective ones, add additional joists if necessary, securely fasten them and level them.
All elements of the wooden floor structure must be treated with an antiseptic. After it dries, you can update or replace the insulation. This could be a layer of expanded clay, mineral wool slabs or another type of thermal insulation. When laying, the recommendations for using the selected material must be followed.
It is necessary to leave a space of 5 cm between the subfloor boards and the insulation to create natural ventilation.
When installing the flooring back, you should not pack the boards tightly, but leave a gap of a few millimeters between them so that the wood can breathe. A 10 cm gap is left between the floor and the walls. Then it can be sealed with polyurethane foam.
The progress of further work depends on the chosen method of preparing the base. The main ones are the device of a lightweight screed, the use of plywood or polyurethane adhesives.
USEFUL INFORMATION: Waterproofing floors in an apartment under screed
Board base
- The boards are impregnated with a latex-based waterproofing solution. Without waiting for it to dry, lay a painting reinforcing mesh on the floor. In the future, it is additionally fixed with self-tapping screws.
- A layer of solution consisting of sand (2 parts), liquid glass (2 parts) and water is applied to the floor surface. All components must be thoroughly mixed.
The tiles are fixed with two-component polyurethane adhesive. It retains its plasticity after hardening, so it will not only ensure reliable fastening of the tiles, but also compensate for slight vibrations of parts of the subfloor.
Lightweight screed
The point of this method is to create a solid and level base that is not connected to walls or wooden floors. This floating structure will ensure the integrity of the tile covering. The optimal thickness of the screed is 30 mm: a smaller thickness will not provide sufficient strength to the base, a larger thickness will significantly increase the weight of the floor.
- A layer of waterproofing is created. This can be rolled material: glassine, bitumen paper or even thick polyethylene. Waterproofing mastics or heated drying oil are often used. In this case, reinforcement with fiberglass mesh is used.
- Damper tape is glued along the perimeter of the room between the floor and the wall.
- A thin metal mesh is attached to the waterproofing layer with self-tapping screws.
- A screed with a height of 30 mm is poured.
You can use a regular solution of cement and sand, but it is better to use self-leveling mixtures: they dry much faster and are more convenient to work with.
- After hardening, the screed is primed, and then the tiles are laid in the same way as on a regular concrete base.
Wooden floor
If the gap under the 2-meter rule is no more than 4 mm in all directions, and it does not hang on the tubercles, then everything is in order - you can lay the tiles using the appropriate elastic adhesive , allowing a layer thickness of 2-6 mm.
In order not to have to worry about laying the tiles, holes up to 4 mm can be leveled in advance with glue, smoothing them with a spatula, and the excess can be removed with a long lath. The surface ruffled by the lath does not need to be smoothed too much with a spatula - the main thing is that in the end there are no large gaps under the lath.
In the case where the difference in floor height is within 30 mm and the thickness does not meet with objections, then it is possible to make a self-leveling self-leveling floor . In this case, the cracks in the base should be sealed, and the corners between the floor and walls sealed with waterproofing tape.
With an interval of about 1.5 m you need to tighten the screws at the level of the screed - they will be good beacons when pouring the floor (then you need to unscrew them). You can put a fiberglass mesh on a dry, clean floor and spread small piles of glue over the mesh - it will pass through it well and stick it to the floor. The doorway must have a threshold at or above the screed.
Plywood base
To create an even and durable base for the tiles, sheets of plywood with a thickness of at least 10 cm are used. It is better to cut them into 4 parts. Installation is carried out following the following recommendations:
- After impregnating the base with an antiseptic and laying the waterproofing layer, the plywood is fastened in a checkerboard pattern.
- A compensating gap of 5 mm is left between the individual elements. In the future, it can be sealed using sealant or foam.
USEFUL INFORMATION: Features of the dry screed device
Plywood is also subject to thermal expansion, which is why a compensating gap is needed between the individual sheets. A 10 mm wide gap is also left around the entire perimeter of the room.
- The plywood is fastened to the base using wood screws, recessing the caps deep into the material, in increments of 15–20 cm.
- The resulting surface is processed with a grinding machine along, across and diagonally. Then it is primed.
- A waterproofing layer is formed from latex impregnation, paint mesh and liquid glass solution.
- The tiles are attached with polyurethane glue.
Plywood can be replaced with slabs of moisture-resistant plasterboard or gypsum fiber. The technology will not be much different, but it is worth using components designed specifically for these materials.
Log repair
If, after opening the wooden floor, it turns out that the joists have reliable support, but are not aligned in the same plane, or some have dried out and bent, then the matter can be corrected with even overhead boards. They can be attached to joists with nails, self-tapping screws, and for those who find this not enough, then with bolts and large washers.
Everything can be leveled at the highest point by pulling the cords in a horizontal plane. If there is a large gap between the lags, then you will have to install additional lags .
The end result is a great timber floor which can be enhanced by adding 15-20mm moisture resistant plywood In this case, it needs to be cut crosswise into 4 parts and screwed with self-tapping screws at intervals with a gap of 3–5 mm. We lay the tiles in the usual manner using elastic adhesive on primed plywood.
Laying tiles
Tiles are laid on wooden floors in the same way as on a concrete base:
- Laying begins from the middle of the room or from the far corner opposite the entrance.
- For lightweight screeds or gypsum boards, it is recommended to use cement adhesive mortars; for plywood or boards, use two-component polyurethane adhesive.
- The glue should be prepared in small quantities and in strict accordance with the manufacturer's recommendations.
- The correct installation of each tile is immediately checked by the building level.
It is better to use mixtures containing silicone as grout. This will increase protection against moisture on the wooden base.
Excess glue or grout is removed from the surface of the tile immediately with a wet cloth. Don't let them dry out.