Making an extendable table with your own hands is more difficult than a regular one, but sometimes it is necessary. Yes, for the average family a small table with up to four seats is usually enough, but the problem arises when guests arrive, who, of course, should be seated at the table. It is in such a situation that a sliding structure comes in handy.
A similar product can be purchased at any furniture store, but it is much more exciting to make a table with your own hands. Where to start, which table to choose for manufacturing, step-by-step instructions - you will find all this in our text today.
DIY extendable table
Design Features
Sliding tables have tabletops divided into two parts exactly in the middle. There is a special compartment at the bottom where an additional element is stored. If necessary, the sides are moved to the sides, and the hidden part is inserted into the middle. The popularity of furniture is due to a significant increase in the dining area. To lay out the table, you need to follow the algorithm:
- Move the halves apart.
- Remove the central hidden part and place it in the grooves.
- Move the sides to firmly fix the insert.
Table opening algorithm
Folding tables come in various shapes. Round models are equipped with winged edges, which can be removed if necessary. The structure with a diameter of 1.1 m can accommodate up to 6 people and can be expanded by adding 2-3 more seats. Advantages of the round model:
- Versatile, the table is suitable for small and large rooms.
- Safety and ease of use.
- A harmonious combination with an interior in modern style.
Disadvantages: low stability; in large products the central part is often empty.
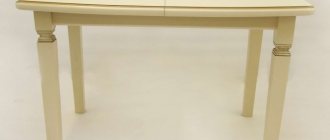
A rectangular kitchen table is a classic option, it can be extended using an additional element or by moving the legs, increasing by about 0.5 m. Capacity – up to 12 people. Advantages:
- Strength.
- The relevance of the table for spacious and small rooms.
- Space saving.
- Harmonizes with various interior styles.
The disadvantage is the risk of injury due to sharp corners. It is not recommended to use a large, massive dining table of this shape in a small room. It will take up all the free space, which is inconvenient and impractical.
Round
Rectangular
Small table, big possibilities
Compared to a bulky dining table with a limited set of functions, a folding table has many advantages.
- Compactness. The ability to change the size of the tabletop and the height of the table depending on the currently selected function and the area of the room;
- Ergonomics and ease of adjustment, which even a child can do;
- Safety to use;
- Height adjustment allows it to be used by a person of any height;
- Saving room space;
- Multifunctionality.
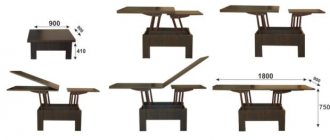
Transformer coffee table
A coffee-dining table can turn a cozy living room into a dining room in a few seconds.
Purchasing a folding table and a sofa will allow you to save on the purchase of at least one item. When folded, it takes up minimal space and serves as a compact coffee table, and the folding sofa-couch, when unfolded, also doubles as a sleeping place. By adjusting the size of the tabletop, you can get a full-fledged dining table for the whole family or a small company. The table can be equipped with shelves and wheels, made of different materials: wood, metal, glass and other materials.
Folding tabletop
A folding tabletop can change its proportions in the blink of an eye and almost double in size. This happens due to retractable side panels. The design may consist of a base (or be frameless), tabletop (lid), supporting elements, synchronized or non-synchronized mechanisms. Saving space when folded, it allows you to receive guests, organize children's games, holidays and other wonderful events without the slightest effort.
The size of this table can be adjusted depending on the number of people.
The reliable design is designed for repeated folding. It is worth paying attention to the material from which the frame is made. The best option is metal or wood. Such a table should not be too cheap. Excessive cheapness indicates the unreliability of the mechanisms.
The frame, made of plastic, is not very strong. This means that the table will not last long.
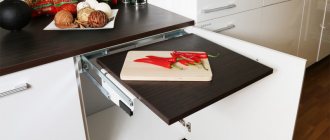
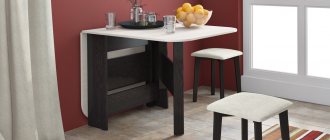
Wall mounted
They are very compact and belong to the console segment. The reliability of such models depends, not least of all, on the quality of the fittings, since the design involves fastening the back of the tabletop to the wall. Structurally, it resembles a bar counter. A movable bracket can be used for mounting.
Butterfly
An interesting solution for a small kitchen. When folded, it takes no more than 30-32 cm in length. The design allows you to increase its size by more than 5 times. The main advantages are compactness and versatility. This is perhaps one of the most successful solutions for arranging a dining area in a small kitchen.
The stability of the model when unfolded is ensured by supports with constrictions that move when folded.
Another option is a folding table with a cabinet. When folded, it is a small cabinet that can be placed in any convenient place.
Other options
- Transformable models designed for children are very beneficial. As a little person grows up, the table changes its parameters and angle. It can be adjusted in length and height according to the size of the child;
- Tabletops built on the edges, the central part of which is removed from the under-table space;
- Collapsible tabletops. Elements that are not currently needed are removed or pushed under the shelf.
Benefits of DIY
Just a few decades ago, extendable tables were made exclusively of wood, so the work could only be done by experienced carpenters. Today, high-quality mechanisms are available for sale, which greatly simplifies the process. Even beginners can handle the production; it is enough to have basic skills in using a jigsaw, drill, or screwdriver.
The advantages of making sliding tables yourself include:
- Control of each stage. You can always check the strength of the structure and the reliability of the screwed elements.
- Materials and fittings are selected based on individual preferences.
- When designing a kitchen table, you can think about creating the entire environment in the same style.
- Easy to assemble. The work does not require special knowledge or experience.
- Saving money. In terms of costs, it will be several times cheaper compared to purchased models.
The main advantage of assembling a table yourself is the opportunity to realize your own ideas. The flight of fancy is not limited to anything.
Control of each stage
Materials and fittings are selected based on individual preferences
Easy to assemble
Saving money
Preparation of the drawing
You can freely find ready-made drawings for making an extendable table yourself. When choosing them, you should pay attention to:
- design features;
- suitable materials;
- recommendations presented.
Otherwise, the quality of the table will suffer. When adapting to your own size, you should take into account the height and build of household members, and the number of seats. If necessary, these parameters are increased or decreased.
The standard width of the additional element is 50 cm. When unfolded, the length of the table reaches 230–280 cm. When assembled, the dimensions are reduced to 120–180 cm. The height of the product is usually 70 cm.
To perform detailing, you must specify the parameters of each element. For example, to make a folding table from laminated chipboard you will need:
- Tabletop parts (2 pcs.) – 45 x 70 cm.
- Removable element – 40 x 70 cm.
- Sidewalls of boxes (4 pcs.) – 42 x 12 cm.
- End parts (2 pcs.) – 60 x 12 cm.
If desired, the circuit can be completed independently. To do this, you need to draw a circle on whatman paper using a compass or by tracing any round object. Thus, the table parameters will meet the user requirements.
Preparing for assembly
The instructions for assembling the kitchen table are simple. The first stage is preparatory. It starts with . First you need to decide how many people the table will be designed for. One seat is about 60 cm. Thus, the length of a table for 4 people will be about 1.2 m. The width depends on the area of the kitchen. For small rooms it can be 75-80 cm.
For professional assemblers, including tables, will depend on the type of structure. It’s easier and faster to work with ready-made furniture supports. In this case, all the work will consist of marking the fasteners and installation. It is best to use adjustable legs. Such supports can be adjusted to the desired height after leveling the tabletop. These legs are suitable for those who have uneven floors. Alternatively, you can make the table on two supports. They are sold in furniture stores.
Step-by-step DIY manufacturing algorithm
You can make a round extendable table with your own hands from any material: plywood, wood or chipboard. All actions are carried out in accordance with step-by-step instructions:
- The base of the round product and all the necessary elements indicated in the drawing are cut out from the selected material.
- The sliding circle is cut in half, and the surface of the elements is carefully polished.
- The parts are fixed with glue and, after drying, with self-tapping screws.
- The easiest way to make table legs is from beams; you can purchase ready-made metal ones.
- A mechanism is attached to the central part so that the semicircular parts can be moved apart and the area of the table top can be increased.
- The table is turned over, the legs are screwed in and secured with hinges.
- The product is varnished. When using paint, the structure is pre-treated with putty, special attention is paid to the joints.
In order for the table to serve for a long time, it is necessary to keep it clean. For frequent use, the folding model is covered with oilcloth or tablecloth.
For beginners, it will be easiest to make a table from wooden parts. The material is easy to process and does not cause problems with cutting and alignment.
The base of the round product and all the necessary elements indicated in the drawing are cut from the selected material
The sliding circle is cut in half, and the surface of the elements is carefully polished.
A mechanism is attached to the central part so that the semicircular parts can be moved apart and the tabletop area increased
The table is turned over, the legs are screwed in and secured with hinges.
The product is varnished. When using paint, the structure is pre-treated with putty, special attention is paid to the joints
How to make it yourself
Very often the question arises of how to make an extendable table for everyday use and for a large feast. A sliding model is somewhat more difficult to make than a regular table.
Use professional tools to create a table.
You need certain skills, abilities, necessary materials and tools. Specialized stores offer a large selection of different materials and accessories, and you can assemble the table yourself.
Use quality wood to make the table.
There are a number of advantages to making a model with your own hands:
- you can take into account your preferences, the style of the set and the interior of the room, the number of household members and possible guests;
- the ability to independently select only high quality materials;
- saving money. Assembly and materials will cost less than when ordering from specialists;
- the manufacturing process itself is enjoyable, it is pleasant creative work;
- the product is not only original, but it can turn out even more beautiful and interesting than one made at the factory (made diligently and with soul).
Selecting a product type
The model is selected taking into account the size of the table; the shape and style are important. This takes into account:
- kitchen area, interior;
- material of all kitchen furniture;
- color scheme of the interior of the entire kitchen;
- number of seats at the table;
- its aesthetic significance. Selected tastefully and in accordance with the interior, kitchen tables can perfectly transform any room;
- performance properties, items must be functional, comfortable, with a durable coating, stable and with reliable connection of parts. Important! When choosing a round table, pay attention to its diameter. Excessively large round tabletops are inconvenient. The ideal option is no more than 150 cm. Otherwise, reaching for food at the table will be problematic.
Creating a diagram and drawing
They begin working with a sliding table with their own hands by making a drawing and drawing up an assembly diagram. Before starting work, it is advisable to draw a general outline of the table. Then make a visual drawing of its design to scale.
Create a drawing before making the table.
You will need to indicate all the exact dimensions of the two tabletop blanks, inserts and legs. Also indicate the location of the insert and the overall dimensions of the table.
Equipment, materials and tools
How to make a round extendable table from wood with your own hands.
High-quality fittings are the key to long-term use of the table.
What you will need for manufacturing is mainly:
- block board for ease of work;
- two semicircles and an insert for the tabletop, with dimensions according to the drawing;
- beam for legs - 4 pcs. or a beautiful single wooden leg;
- plywood ring - the connecting link between the table top and the support;
- plywood reinforcement strips for stability;
- 4 aluminum corners with a length of at least 50 centimeters;
- a pair of telescopic guides of at least 50 cm (coincident in length with the corners).
There should be no unevenness on the surface of the wood.
When choosing a material you should consider:
- Wood is the most beautiful, strong, durable, and moisture resistant. No special care required. However, the tabletop is quite heavy and the material is expensive;
- Chipboard is the lightest and cheapest material, but short-lived. Its optimal and durable coating is laminate. It tolerates dampness and temperature changes well;
- MDF is a safer material (there are no formaldehydes in the composition), but it does not tolerate contact with water;
- Tempered glass is used in kitchens with a modern style and a small space. It does not require constant care;
- The tabletop looks original when combined with wood, MDF, and chipboard. It is durable, but quite heavy.
Note! A round wooden table will always look smaller and lighter if it has a thin tabletop and graceful legs.
A drill will help you in making a table.
The most necessary tool:
- electric or hand saw;
- electric drill;
- screwdriver (screwdriver);
- bolts, nuts, self-tapping screws;
- tape measure, ruler;
- glue;
- materials for finishing the edges of the tabletop.
Preparing the Basic Elements
All elements must have the dimensions indicated in the drawing. When assembling the table, you must strictly follow the assembly sequence.
Consider all the features of the material from which you will make the table.
Build process
The transformer must be assembled in the following sequence:
- cut out parts according to a drawing prepared in advance;
- drill holes in the corners;
- lay parts of the guides to the corners, mark holes and drill;
- screw the movable side to one part of the tabletop, the fixed side to the other;
- attach a lock to each side of the table with self-tapping screws;
- install the legs using self-tapping screws.
Final stage
When making a countertop from chipboard, it is usually covered with laminate. Then, after special treatment, you can paint it. After installation, the ugly end of the tabletop is sealed with edge tape. The wooden surface can be sanded and painted.
You can decorate the folding table according to your taste.
You can add images of flowers or other designs to the black background of the table. A folding table can be turned into a work of art.
How to assemble a factory product
The set of factory furniture includes a tabletop, a drawer, a pair of guides with a lock, legs, and a central insert. The product is complemented by a special mechanism, fasteners: screws, washers, barrels, as well as a hex key and shock-absorbing bearings. The structure must be assembled according to the following algorithm:
- The packaging is removed from all elements, the tabletop is laid face down on cardboard.
- Fasteners are sorted for ease of use.
- The legs are mounted and secured with screws and washers.
- Furniture is overturned.
- The mechanism is checked, the tabletop halves are held in place, and the lock is removed.
- The additional insert is placed in special grooves; you must ensure that the part fits evenly.
- Parts of the table move. They should fit snugly against each other, forming a smooth surface.
The furniture set always includes diagrams to facilitate the assembly process. They describe in detail each element, attachment points, and sequence of actions.
A table that can be expanded is a universal option for spacious and small spaces. An excellent solution would be to make furniture on your own; you just need to choose the appropriate drawing, materials and tools. Experienced carpenters and beginners can handle the job.
