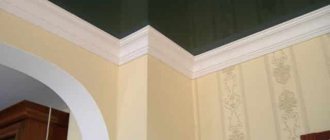
After installing the stretch ceiling, a small gap remains next to the wall. And if a two-tier structure is being built, gaps appear between different levels. To make the room look more aesthetically pleasing, the joints are covered with finishing. One of the methods, relatively new and original, is decorative edging. Let's consider the advantages and disadvantages of this option. We will also tell you how to choose and install this type of finish correctly.
What is decorative cord
Kant is a rope woven from fibers. The composition includes both natural (for example, cotton) and artificial (polyester). Decorative cord has long been used for tying curtains, finishing furniture, etc.
Recently, edging has had another use - masking the gap between the suspended ceiling and the walls. It is also installed at the joints between different levels of multi-tiered structures and next to plasterboard boxes.
Decorative cord is combined with all types of wall coverings and ceiling textures. The edging is attached to both horizontal and vertical sections (for example, along a plasterboard box or the lower tier of a two-level ceiling). The insert becomes a bright and modern accent in the interior.
Why do you need a rope for suspended ceilings?
In addition to covering the distance created when installing coverings, decorative rope for suspended ceilings is used:
- when finishing certain types of furniture;
- to make edging for curtains that will look good against the background of the decoration on a suspended ceiling;
- for decorating curtains;
- during final finishing after installation of a multi-level coating to eliminate gaps formed at the joints between different levels;
- when decorating the surface of the walls, for example, if a combined type of wallpaper was used when pasting the room, rope edging can be used at the joints.
Decorative cord is suitable as a replacement for rope plinths for suspended ceilings and consists of artificial (polyester) and natural (cotton) fibers connected together into a rope.
Attention! When choosing a decor option for finishing a room, builders recommend paying attention to the width of the product and its color. A rope that is too narrow will poorly hide the joint boundary, and an excessive width of this element will visually make the structure heavier. The color scheme should be chosen either for the decoration of rooms with any architectural compositions, or impressive in terms of the tone of the wall covering.
Advantages and disadvantages of this finish
In addition to the edging, the gap between the wall and the suspended ceiling is covered with a ceiling plinth or masking tape. Decorative cord has the following advantages compared to other options:
- It bends easily and takes any shape, so it is suitable for all types of structures and shapes.
- It fits tightly to the ceiling and leaves no gaps even on uneven walls.
- Thanks to its small width, it does not distort the proportions of the room.
- Tolerates temperature changes and high humidity, so it is used in any room.
- Easy to glue (in a room of 20-25 square meters, installation takes about 40 minutes).
- If necessary, cleaning or replacement can be quickly removed.
- Resistant to sunlight (does not fade over time).
- Available in a variety of colors and fits into almost any interior.
- It has been used in this capacity recently, so the finish looks fashionable and modern.
- It's inexpensive and you can install it yourself.
There are also disadvantages, but they are few:
- Collects dust (the disadvantage is compensated by the fact that the cord can be washed or cleaned with a vacuum cleaner).
- Due to its small thickness, it is not able, unlike plinths, to close large gaps. That is, it is not suitable for very curved walls.
Rope instead of plinth: how to hide a technical gap
In addition to the decorative cord, there are other types of TLP ceiling inserts. Some popular solutions are baseboards and masking tape. Each of them has advantages and disadvantages.
Ceiling tape or elastic is a soft and flexible material that can hide defects where the ceiling comes into contact with the walls. The advantage of this type of insert is the possibility of reusable use and ease of installation. There are several types: T-, L- and F-shaped. The first option is suitable for smooth walls and hard surfaces (for example, tiles or porcelain tiles. The second type of tape is more elastic, the third is attached to plastic panels.
Disadvantages: masking tape is invisible, cannot become a bright element of interior decor, additional lighting cannot be mounted under it
A plinth is a wall finishing element. It performs protective and decorative functions. The plinth can be made of various materials.
For tension surfaces they offer:
- Wooden products, incl. from valuable species;
- Cheap foam options;
- PVC inserts.
Wooden skirting boards look beautiful and noble, but have a high cost. Foam products are fragile, inelastic and short-lived. The corners of the room will be the main problem during installation.
Elements made of polyvinyl chloride are more flexible, environmentally friendly, easy to install, and resistant to external influences.
Skirting boards, as a rule, are lightweight, which is a plus when installing them. However, this type of insert, unlike a cord or masking tape, is not attached tightly to the wall and hides the space. This wall edging is higher in cost than other options. To install a skirting board, you need smooth walls, and it is almost impossible to remove it without consequences for the wallpaper.
Decorative cord or rope has all the advantages of masking tape. But its range on the market is wider. Rope instead of plinth is used in low rooms, so as not to visually lower the ceiling in the room even lower. With its help, any technical gap can be hidden.
The disadvantage of this type of insert is the dust that accumulates on its surface. But this problem is easily solved, because... The edging can be quickly dismantled without affecting the surface and cleaned of dirt.
Varieties of decorative edgings
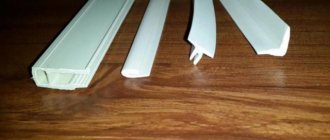
Cords differ in composition, external finish and thickness. The basis of the rope can be:
- metal wire (the most durable option);
- rubber band;
- or cotton core.
The outer layer of the edging is made:
- wicker;
- twisted (easier to style, since the ends don’t get frizzy);
- knitted.
The thickness of the decorative cord is available from 8 to 20 mm. The optimal diameter that fits most ceilings is 10-12 mm.
The edgings can be plain or with a combination of two or three colors. The palette is very diverse, there are both light, bright and dark tones. The combination of canvas and edging can be contrasting or, conversely, complementary.
Cords with woven lurex threads (gold and silver) look expensive. The most commonly used are white, beige, all shades of brown and pastel colors.
Types of decorative cords for stretch ceilings and their features
Masking openings is the main task performed by the insert for suspended ceilings. Decorative cord closes the grooves in aluminum and plastic baguettes. It is often used to design the transition from one ceiling level to another.
Kant differs in:
- Blossom. It can be one-color or several colors, with or without the addition of gold or silver thread.
- Diameter. There are options from 3 to 25 mm. The optimal diameter for a stretch ceiling is 10-12 mm.
- Weaving. The cord can be twisted, braided or knitted.
- Material (fabric, rope).
The tape is easy to install. Installation does not require the help of specialists.
The classic options are white and black ceiling edging. It is better to decorate small rooms with elements of light colors. Dark options highlight the border between the walls and ceiling, focusing attention on it.
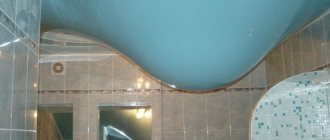
The main advantage of the product is its flexibility. Made from synthetic fabrics, the edging can take almost any shape, making it suitable for uneven surfaces. If the plinth is difficult to install in curved areas, then such problems will not arise with a decorative cord. There are even artificially illuminated products that give the room a sense of sublimity.
A bright edging is used only when there are smooth walls, otherwise the shortcomings of the room can be emphasized.
How to choose a decorative cord
It is important to consider the following parameters:
- the size of the technological gap (affects the suitable thickness of the edging);
- the style of the room (the appearance, including the color scheme, is selected to suit it).
The thickness of the decorative cord should match the size of the gap between the ceiling and the walls or be slightly wider (a few millimeters). Then the trim fits easily into the gap and does not fall out.
The appearance is matched to the interior. For example, in a lush decoration, a edging with gold thread or mother-of-pearl shine looks good. And in minimalist styles, plain cords are used.
The shape of the room is also taken into account. An edging matching the color of the stretch ceiling visually expands the space, making it suitable for narrow rooms or corridors. Finishes that match the tone of the walls are used in low rooms. This will make the ceiling appear higher.
Various color variations are possible. A cord that matches the tone of the ceiling, walls or combines their shades looks good. But such a coincidence is not necessary. Modern interiors are decorated with contrasting variations. This technique looks impressive if there is a photo print or pattern on the ceiling. But the walls must be perfectly smooth; any curvature due to the bright edging will be noticeable.
Peculiarities! To visually unify the interior, the same cord is used both to mask the joints and to decorate the curtains.
The type of outer layer (woven, knitted or twisted) is chosen according to your own preferences, taking into account the style of the interior. But the latter option is more common and there is a larger assortment, so it’s easier to choose.
Cords
Previously, decorative cord was used for finishing furniture and curtains. Now this finishing element creates a colorful border for suspended ceilings. The edging cord is ideal for sealing gaps between the wall and the tension structure of the fabric ceiling. It should be used exclusively on flat surfaces or by first leveling the wall.
Decorative cord for fabric stretch ceiling
The decorative cord should be in close contact with the ceiling structure and the wall. Otherwise, the cord will not completely cover the technical gap and may fall out or come off. If the design of the stretch ceiling includes curved lines, then the cord is well suited for edging due to its flexibility. The main advantage of twisted cord is the abundance of color and texture options.
Decorative cord for suspended ceilings
Prices for suspended ceilings
suspended ceiling
Popular options for decorative cords for stretch ceilings
Now manufacturers offer to purchase types of cords of various structures:
- with single-color or multi-color embossed braiding;
- with special inserts made of metal threads;
- with rubber veins or inserts;
- with a thematic pattern;
- Lurex is an imitation of silver or gold threads.
Original masking cord, lurex
According to thickness, cords are divided into:
- thin – 8 mm;
- thickened – 12-20 mm;
- standard – 10 mm.
Decorative edging solves practical problems and acts as a decorative element not only for masking gaps between the wall and the ceiling structure, but also for decorating technical joints in multi-level stretch ceilings.
The process of installing decorative cord
The edging cord is quite easily dismantled for replacement with other types of plugs or for carrying out repair work inside the stretch ceiling structure.
The disadvantage of the material is excessive dust collection. But, given the simple dismantling procedure, the cord can be cleaned regularly during general cleaning of the room.
Edging cord for suspended ceilings
The cord is installed only by hand; no spatula is required. Manipulation of such objects may result in damage to the ceiling. The bookmarking process itself is extremely simple and looks something like this.
We apply sealant under the base of the strip where the ceiling is tucked in. We start applying from one of the corners, if there are any.
The viscosity of the sealant is high, and the specific gravity of the cord along its length is not so significant. These factors allow you to secure the cord in place without any additional operations. In fact, simply straightening the cord along the applied sealant. So we apply the sealant and straighten the cord from one edge of the cord to the other, that is, along the entire perimeter. If your cord consists of several segments, then it is better to connect it again in the corners.
So, we straighten the cord and when we reach the corner, we measure the length and cut it according to the measurement.
Prices for slatted ceilings
slatted ceiling
Carefully insert the cord end-to-end to its beginning.
How to properly glue edging to a suspended ceiling
The decorative cord is fixed last, after the canvas is installed and the wall decoration is completed. The wallpaper is glued close to the ceiling, the maximum distance to the film or fabric is 0.5 cm (otherwise the cord will not be able to cover the joint).
To determine the amount of edging required for a single-level ceiling, measure the perimeter of the room. For complex structures, take into account all the joints where the masking cord will be located.
Decorative edging is supplied in 25 meter reels, from which the required length is cut. Like other finishing materials, it is recommended to buy the cord with a small margin (0.5-1 meter) for undercutting or errors in calculation.
Additionally you will need:
- hot melt adhesive (sometimes replaced with sealant);
- a special gun for him;
- extension;
- stepladder or stool;
- sharp knife;
- “superglue” or “cosmofen” for finishing edges.
Before installation, the furniture is moved away from the walls to create a free passage. To start laying, choose the least noticeable corner or the most curved section.
Peculiarities! Sealant is available in different colors. White is universal, but you can choose another one that matches the ceiling or the product itself.
Working technology:
- The beginning of the decorative cord is filled with “cosmofen”, and after hardening it is cut with a knife. This will prevent the edge from falling apart into fibers.
- Lay out the edging on the floor next to the walls.
- Using a hot-melt gun, apply glue to the wall into the gap near the edge of the stretch ceiling.
- Press the cord along the gap. There is no need to press hard so as not to damage the canvas.
- Having reached the corner, they turn and continue to install.
- Carefully trim. The ends of the rope are secured end to end. There should be no noticeable gap or overlap.
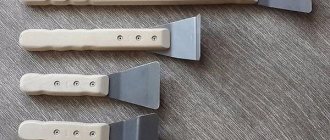
Important! It is not recommended to use a spatula or other sharp tool for installation - you can damage the canvas.
Original stretch ceiling edging: tips for attaching the cord
It is easy to insert furniture edging into the opening between the wall and the ceiling.
To work you will need:
- The cord itself;
- Sharp knife;
- Acrylic sealant to match the ceiling surface;
- Glue.
The installation of the cord begins from the place where the bends are located near the ceiling. Usually this is a corner. It’s great if the junction of the segments is located there. This will allow you to hide the connection of the sections. The cord is attached to the sealant around all the perimeter. The end of the edge is smeared with superglue to prevent “fluff” from forming there.
Despite the simplicity of decorative installation, there are several nuances that should be taken into account when carrying out the work.
Tips for attaching the edge:
- The edge is cut off in the corners so that no bumps form. The ends of the element should fit snugly against each other.
- The tape is pressed in carefully, do not use sharp tools (spatula, knife, etc.) so as not to damage the product and the film.
- The thickness of the edging may be 0.2 cm greater than the slot.
- If you plan to have backlit edging, you can choose a sealant that matches its tone.
- The shade of the cord can be matched to the curtains.
The work should end where it began, i.e. angle. Excess rope is cut off.
How to insert piping into a gap without glue
This installation method is used for narrow types of edging. The width of the decorative cord should be slightly larger than the gap. During installation, the rope will compress slightly, then straighten out and will not fall out.
As in the first case, installation occurs at the final stage of finishing. The edge is processed.
The edging is applied to the gap and pressed inward. Use your hands or a spatula (but with great care). The end is cut so that it fits evenly to the beginning.
Advice! If furniture cord is purchased in small pieces, which are not enough for the whole room, it is better to make joints in the corners. This way the connection will be invisible.
This method is more labor intensive. But the trim is easy to pull out to clean it from dust or replace it with another one.
How to insert a plinth into a suspended ceiling: installation recommendations
If there are no problems with installing the decorative cord in the corners, then when installing a regular plinth in a suspended ceiling, some difficulties arise.
The gap between the baseboard and the ceiling will remain in any case, because... This type of insert is not glued to a tension structure, but is attached to the wall. Before starting work, you need to stock up on tools and materials such as a miter box, meter, pencil, glue, and sealant.
The glue selected is colorless and does not leave marks on the surface. It should not darken over time and stain the walls and ceiling.
Installation of the baseboard is carried out at the penultimate stage if you plan to wallpaper or paint the walls. The product can be glued to tiles or tiles.
The wall corner is the place where the installation of the baseboard begins. Markings are made, the plug is applied to the surface to check the correctness of the joints. Then glue is applied to the inside corner of the baseboard and pressed tightly against the wall. The element is left to dry. Some people attach the corner with tape to be sure, but this must be done carefully so as not to damage the coating. Next, you can start gluing the baseboards themselves.
After the work is completed, the baseboard is painted. If there is a gap between the ceiling and the element, it can be sealed with sealant. But you need to work with it carefully, since this material can leave marks on the tension structure.
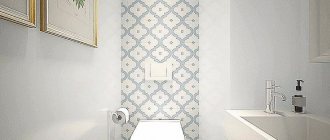
Photos of suspended ceilings with edging
A decorative cord is used instead of a plinth to hide the technological gap when installing suspended ceilings. The edging is easily attached and, if necessary, removed and reinstalled. The choice is quite wide, so the textile edging can be selected to suit any design.
Types of tapes
Masking tapes for stretch ceilings can be of 3 types:
- T-shaped. They are used for installation in gaps next to smooth walls.
- L-shaped. This type is used for walls with unevenness, so all models are made of flexible material. During installation, they follow the relief of the wall.
- Connecting tapes are used when it is necessary to hide the gap between the joined strips of a stretch ceiling.
- Ribbons of different shapes. Such products repeat the bends of the stretch fabric.
Alternative to ceiling plinth
When decorating your interior design, you can use rope instead of ceiling plinth. With the help of such an element it is possible to hide the gaps between the PVC sheet and the wall of the room. In addition to practicality, the material used has an attractive appearance, as a result of which the advantages of the room can be emphasized without much effort.
In the production of rope edging for PVC sheets, high-quality synthetic threads are used. Such threads may differ in thickness, color, and additional inserts may be included. Such products allow you not only to hide existing defects, but also to become an independent part of the interior design.
The most important thing is that the cord material is not exposed to temperature conditions during operation. It is resistant to moisture, as a result of which such elements can be used in any room, regardless of their purpose. Since cords of any diameter can be found on sale, if necessary, it is possible to mask gaps of any size. When choosing edging, it is recommended to take into account the color palette of the room.
Attention! Due to the fact that decorative cords are quite flexible, they can be given any shape and used even for rooms with uneven walls.
Installation of corner masking tape
To install a simple corner plug you need to take:
- a stationery knife, scissors or a sharp kitchen knife;
- stepladder;
- roulette
Remember that the procedure for laying the tape in the opening is performed without the use of any tools, especially sharp ones, so as not to damage the fabric.
Scheme of fastening a stretch ceiling with masking tape
Attaching different types of masking tapes is practically no different. All types of plugs are mounted at right angles with special connectors.
Prices for corner masking tape
corner masking tape
Some craftsmen advise lightly gluing the insert for a more durable connection with the wall and the stretch ceiling structure. But this cannot be done to avoid damage to the canvas.
Step 1. Before purchasing masking tape, you need to take a tape measure and take measurements of the room, as well as the width of the technical gaps. It is advisable to purchase a tape plug with a margin of several meters.
Ceilings without decorative inserts
Step 2. Already at home, you need to take the selected insert in your hands, without cutting it, climb onto a stepladder and, with your hands, carefully insert the masking tape into the technical opening between the wall and the stretch ceiling frame or into the hole between the connecting sheets.
Laying a decorative insert for a stretch ceiling
Here you can already use a spatula, but you need to act with extreme caution
Step 3. Having reached the corner of the room, you need to take a knife or scissors and cut the tape so that its edge goes into the very corner. Next, the plug is carefully inserted into the groove until all technical gaps are closed. It is advisable to use such an insert not only in single-level stretch ceilings, but also in multi-level ones to close the joints between the sheets.
What should happen in the end?
We found out what a special insert is for hiding technical cracks in suspended ceilings. We figured out the main types of tape plugs and the specifics of their use. Now it is clear that there is nothing complicated in installing inserts for suspended ceilings. You can install the masking tape yourself.
How to wash a matte stretch ceiling?
The answer to the question can be found in this article with step-by-step instructions and useful tips. You will also be interested in learning how to cut skirting boards for the ceiling (corners).
Tips for choosing the color of the tape plug
Using polyurethane plugs of various tones, you can not only get rid of technical openings, but also decorate the interior in any style. With the help of the right color insert, you can visually transform the room. The modern market is saturated with plugs of various shades or ribbons made in several colors at the same time.
Prices for stretch ceiling kits
stretch ceiling kits
Selecting a decorative insert
When choosing the color of the ribbon insert, you need to consider the following rules.
- A brightly colored insert should match the tone of some decorative component or interior items.
- An insert with a touch of wall decoration makes the room visually taller.
- The tape to match the ceiling covering visually expands the ceiling.
- Installation of an insert whose color differs from the color of the walls and ceiling is carried out only on smooth walls. Otherwise, the tape will make even minor unevenness of the walls and ceiling noticeable. It is advisable to use a contrasting plug to decorate curved elements of a stretch ceiling structure.
The color of the masking tape is of great importance for the interior design. For example, an insert to match a stretch ceiling visually increases the visible part of the ceiling. The tape matches the walls visually making them taller. The contrasting color of the cap will create a clear boundary between the walls and the ceiling, but the walls must be perfectly smooth.
If it is not possible to choose a plug of a suitable color, then you can paint it in the chosen tone yourself. This must be done a day or two before installing the insert. For painting you need to use only acrylic paint.