When installing a stretch ceiling, you definitely need special spatulas to thread the canvas into the baguette. Their shape and dimensions differ from conventional construction ones. Manufacturers produce many varieties of blades.
They are difficult to navigate for a novice installer or a home handyman who has decided to install the ceiling in his apartment on his own. In this article we will take a detailed look at all types of spatulas, their purpose and selection rules for specific tasks.
What blades are used for installing PVC suspended ceilings
A spatula for a stretch ceiling is a spatula made of high-strength steel with a wooden or plastic handle. The tool is used to insert PVC film into a baguette when installing using the harpoon method. Unlike conventional construction spatulas, the working part is much stronger, since the blade must withstand a lot of pressure exerted on it when the blade is tensioned. Thin metal will bend and may even burst, damaging the walls or material.
A spatula is a mandatory tool for installing suspended ceilings; it cannot be replaced with anything else. However, one is not enough.
To thread the web in corners, hard-to-reach places and curved areas, different types of blades are used. They differ in the length of the handle, the shape and number of bends of the working part. Each is used for specific tasks. There are many variations of spatulas for suspended ceilings, let’s look at the most common ones:
- Straight is the main tool for installing film coverings, which every master must have. Suitable for all types of profiles with a harpoon fastening system. The blade has a trapezoidal shape and is curved at an angle of 45º. The handle is made in different sizes. The medium one (14-17 cm) is universal, in narrow places the short one (7-10 cm) is more convenient, in hard-to-reach places the long one (38-40 cm), for example, in niches where it is impossible to reach with a shortened spatula. The length of the handle also affects the weight of the tool, which directly affects the ease of use.
- The goose is a universal spatula that replaces most other spatulas. The working surface is made in the form of a trapezoid with two Z-shaped bends. This is very convenient, since when threading the canvas, your fingers do not touch the wall, which avoids abrasions and injuries. The shortened handle is used where the middle handle cannot be reached. In other places, so as not to have to stretch, they use a large one, which, despite its size (40 cm), has a small weight - only 260 g. The spatula is convenient to work with, your hands do not get tired, and the shape of the spatula allows you to tuck the blade in almost any area.
- Over-eaves - has a trapezoidal working part with a 90º bend (one or two). It is used for filling film into stepped baguettes or plasterboard boxes when installing multi-level structures with hidden lighting. A spatula with a medium handle (24 cm) and two bends is used for floating ceilings when the gap between the wall and the profile is very small. The extended handle (40 cm) with one bend is well suited for cornice baguette.
- Angular - a spatula with a pointed triangular blade. Used for installation at the junction of structures in an open profile. Allows you to quickly tuck the canvas in the corners, but you can get by with a regular straight spatula.
- Feather - has a long narrow working surface. The spatula has a curved, pointed shape and is only 2.8 cm wide. It is used in narrow, hard-to-reach places, for example, behind gas or water pipes running close to the wall. A model with a short handle (about 9 cm) is used for threading fabric in sharp corners of niches and boxes.
A plastic spatula is used to insert the masking tape. It is suitable for any type of decorative plug, the surface glides easily and does not scratch the material. This is an optional tool, but using it greatly speeds up the process.
The fabric differs in its qualities and installation technology from the film, so different tools are required. To thread Clipso and Descor fabrics into the “clothespin” profile, use a spatula with one corner cut and smoothed. The fan-shaped version is also common - convenient when going around pipes. The working surface of the spatula is rounded, noticeably larger than the handle, has no bends and becomes thinner towards the edge.
Unlike PVC film for fabric stretch ceilings, one tool is used; it is universal and allows you to thread the canvas both in straight areas and in corners. The blade is inserted into the profile all the way at an angle of 45 degrees, then rotated, as if rolling the fabric into a baguette.
To install fabric ceilings using the glazing bead method, a plastic spatula is used. You can use a wooden wedge. The main thing is that the tool has sufficient rigidity and does not have sharp edges that can damage the blade.
Some installers use an electric spatula to insert the bead into the molding. It makes sense for a professional team to purchase such a tool so that the work goes faster. And for those who want to install suspended ceilings at home, this is a waste of money, since an electric spatula is not cheap.
When choosing a tool, first of all, you need to make sure that the blade does not bend; it must withstand the pressure when the blade is tensioned. Poor-quality or too thin metal can burst, and a slipped hand can damage the walls or ceiling. Convenience during installation is affected by the material, shape of the handle and the overall weight of the tool.
You have to work with your hands raised. You won't be able to do this for long with a spatula that is too heavy. But a lightweight one will not cope with the elastic film and may even break.
Handles are made of wood or plastic. The first option is heavier, but fits better in the hand as it does not slip. If necessary, the wooden handle can be sharpened to a more convenient shape.
Large paddles are sometimes specially designed with a plastic handle to lighten the weight. Although the service life of such a tool is much shorter.
The shape of the handle is selected individually. A spatula for suspended ceilings should fit comfortably in your hand; this is very important during long-term work. It is recommended to take the tool and try to make various movements that are performed when threading the canvas.
In most cases, craftsmen prefer spatulas with a wooden handle, but this is an individual choice for everyone, here it is worth focusing on personal feelings. It is not recommended for novice installers to buy the entire set at once; it is enough to purchase 2-3 main blades and then buy the rest, making sure that the choice is correct.
The average price of a professional tool is about a thousand rubles per piece. Moreover, you won’t be able to do it alone, especially when installing complex structures. To save money, you can make a spatula for suspended ceilings with your own hands. If the tool is required only for repairs in your own home, then this is the best option.
[custom_ads_shortcode1]
Types of suspended ceilings
There are two types of ceiling material of this type:
— matte (a more profitable and good option in terms of hiding the shortcomings of a seamed stretch ceiling, imitation of a perfectly smooth coating)
- glossy (mirror-like, spectacular appearance of the room. Disadvantages include: inability to hide flaws in the suture material, higher price than the previous type).
Advantages of stretch fabric:
- safety (the material is coated with anti-allergenic substances, due to which such repairs can be carried out even in children’s rooms)
- pleasant appearance (gives the room neatness and sophistication)
- the ability to hide flaws in the ceiling surface (all irregularities and roughness)
- effective presentation of the most complex room lighting options
- quick assembly (installation of suspended ceilings takes about two hours)
- durability (the manufacturer provides a guarantee for this material for about 15 years)
- minimal care required (light cleaning with a vacuum cleaner or a cloth in a mild soap solution)
- protection of furniture from sudden flooding (makes it possible to retain water and then, with the help of specialists, carefully drain it)
However, suspended frame ceilings also have disadvantages:
- cannot withstand low temperatures (they simply cannot be done in unheated rooms, since such ceilings burst at temperatures less than 5 degrees)
- in spacious rooms, when stretching the canvas, you can observe deflections of the material (sometimes even more than 4 cm)
- suture PVC - the material spoils the visual image of the room (since the seams stand out very much and attract attention)
What you will need
The easiest way to make a mounting blade for PVC film is from a regular construction spatula. The store selects a tool with a comfortable handle and a working part of a suitable size. In most cases, the optimal width will be about 7 cm and a thickness of 0.8-1.5 mm.
A narrow angled or feather spatula can be made from an old kitchen knife. To make a semicircular spatula for fabric ceilings, you will need a stainless steel plate 0.5-1 mm thick and a beam for the handle.
Tools you will need:
- grinder, hacksaw or metal scissors;
- marker or pencil;
- ruler;
- file, whetstone and sandpaper;
- vice;
- drill.
[custom_ads_shortcode2]
Handle material
Handles can be made from various materials. There are wooden and plastic models. Wooden models are most often made from oak trees, which distinguishes them with high strength and wear resistance.
Plastic is a less reliable material, but lighter, so professionals choose it because when doing a large amount of work, it makes their hands less tired.
Dimensions and drawing
The main straight spatula for film ceilings has a working part length of about 9 cm, a width of 7-8 cm and a 45° bend 5-6 cm from the edge. A spatula for fabric of a different shape. It is wider and square, and one of the corners is cut off and rounded. The spatula measures approximately 12x12 cm.
Note! The dimensions shown here are approximate and are based on factory products, but may be adjusted based on individual preference.
[custom_ads_shortcode3]
Features of application
Installing a tension product is not so difficult, especially one made of polyester fabric, which is tensioned without heating. You will need to purchase the necessary material and a set of high-quality installation accessories. Then apply markings for installing the molding on the upper parts of the walls around the perimeter of the room.
The profiles are fixed to the plane of the walls with self-tapping screws and dowels. In the corners of the room, the panel is secured to the baguettes with special clamps (clips) and its middle part is tucked into each baguette installed on four sides of the room. Then a wide workpiece is used, which pushes the edges of the material into the profile cavity, starting from the middle and gradually moving to the corner.
Here they already use a blade with an angular bend, carefully processing the corner areas of the structure. The remaining sides are processed in the same way until an even, stretched coating is formed without sagging or creases.
Manufacturing instructions
A shovel from a construction spatula is made like this:
- Using a hacksaw or grinder, the working part is cut to size.
- The edges are carefully processed with a file, all burrs and irregularities that could damage the blade are removed. The corners are rounded.
- The working part is clamped in a vice and bent at the required distance from the edge. The tool is ready.
A spatula for fabric ceilings is made as follows:
- The drawing of the blade is transferred to a metal sheet and then cut out.
- The edges are smoothed.
- Two holes are drilled at the bottom for attaching the handle.
- Then a wooden block is taken and ground to a convenient shape. After this, a longitudinal cut is made on one side along the thickness of the metal plate to a depth of about 1 cm.
- A spatula is inserted into a wooden blank and tightened with self-tapping screws.
- The handle is varnished. The tool is ready.
Summarize. To install a stretch ceiling, several types of mounting spatulas are required. They are bought in specialized stores individually or in sets. For personal needs, you can also use a homemade tool.
A step-by-step description of how to make a spatula from a regular spatula for installing fabric ceilings (analogous to Clipso and Descor spatulas).
If you need to make a beautiful ceiling and want to do it yourself, then the easiest way is to install a fabric stretch ceiling. To install the ceiling you will need a special spatula. Original spatulas from Clipso or Descor cost from 1,500 to 2,500 rubles.
If you are professionally involved in installing such ceilings, then of course you need to take the original tool. But if you need to install one or two ceilings, then there is no need to take such an expensive tool; you can make a similar spatula yourself. The homemade one is less convenient and beautiful than the original one, but its cost is less than 100 rubles and 1 hour of work.
“grinder” marker 0.5 mm ruler sandpaper (P1000 and P2500) stainless steel spatula 0.5-0.8 mm thick
- It is not necessary to repeat the exact shape of the original spatulas. The principle of operation of the spatula is to push the fabric into the clip (wall profile) by rolling. Therefore, we need a part with a large radius, a small linear part and an element with a small radius to install the fabric in the corners.
- You need to cut leaving the markings, in smooth transitions. Make the cut only perpendicular to the spatula plate.
- We process the edges of the spatula with sandpaper. First with coarse P1000, then with fine P2500 abrasive. It is necessary to obtain rounded edges so that they do not tear the ceiling fabric. After processing, the edge should be perfectly smooth, almost mirror-like.
- When working with a spatula, it is necessary to periodically lubricate the edge with baby soap.
I decided to try it, I’ve seen how before, but I haven’t done it myself, to work you need: 1. The ceiling consists of PVC canvas, baguette, masking tape2. Tools included: hammer drill, drill, screwdriver, narrow and regular spatulas (mm 40-50), two crocodiles from wires for lighting, heat gun (gas, electric, diesel, options are possible), miter box, hacksaw with fine teeth, level ( options are possible)3. Desire to learn) so let's start:
None
Full size screw the baguette, aligning it along the bottom edge according to the markings
We file the full size corners at 45 degrees on a miter box, scroll the edges additionally
We glue the full size of the joints of the baguette with tape, moving the tape inside, so that the stretched film is not damaged by the edges of the baguette. I did not take further photos before stretching, because worked alone. You need to glue the contours for the pipes with contact glue, make cuts and cutouts, put the corner on the pipes, seal the cuts on top (on the wrong side of the ceiling), and you can fix this corner in the baguette. I spun around the pipes with a narrow spatula, and did the rest as usual (both spatulas need to be carefully sharpened from burrs with a file, I also rounded the edges a little. Next, we heat the room with guns (I have a 20 kW diesel kerona, and two 2 kW electric heaters). We hang the corners of the canvas on the tied ones. to the screws in the corners of the crocodiles on a wire (I tied them so that by pulling, you could tear the crocodile away from the screw). We heat it so that the temperature reaches about 60-65 degrees, make sure that the ceiling does not touch any gun and that it does not burn out anywhere. it got so hot :) first we tuck the corners, and then we divide the remaining parts in half, tuck it, again in half - tuck it, this will help avoid squeezing.
I didn’t tell you about the mortgage for the chandelier, but it’s just a piece of wood aligned flush with the baguette until the canvas is stretched. After stretching, we feel the embedment by touch, and to make a cutout, we glue a thermal ring on the outside. then we make a cutout and release the cable.
in general, I’ll say this - if you have the desire and the tools, then you can do it yourself, even with one person, although it would be more convenient to work with two people. I saved 3 thousand rubles on this room.
I will save about 20-22 thousand rubles on the entire apartment.
A suspended ceiling is a structure whose installation requires special tools. Some of them, such as a hammer drill or a screwdriver, are familiar to everyone who has dealt with repairs at least once. But there are tools that are used exclusively for installing tension structures.
These include various spatulas, functionally different from the classic spatulas used for leveling surfaces. A spatula for a stretch ceiling is a tool with which the canvas is tucked into the profile. It has a special design that allows installation to be carried out quickly and efficiently.
[custom_ads_shortcode1]
Preparing for installation
You can install a stretch ceiling in a few hours. But preparation, as well as connecting lighting, sometimes require even more time. So let's begin.
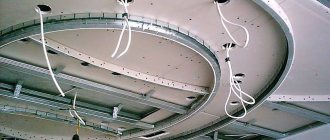
First, we clear everything that might fall from the ceiling. This is very important for aesthetics. Everything after the ceiling is stretched can be seen through.
Ceiling prepared for installation: everything has been cleaned, lighting fixtures have been installed
If the film is white or light, dark spots, if any, may be visible through it. The same problem exists in a log house: the dark ceiling will be visible. In this case, you can pre-sheath it with some material (plywood, plasterboard, etc.) and cover it with white paint. As an option, shoot some white material (at least a vapor barrier).
At what stage of repair should I install
Installation of suspended ceilings is carried out after the main “dirty” stages of repair have passed, and the walls are leveled. You can do it before wallpapering, or you can do it after. Both options are imperfect. And that's why:
- If the walls are already covered with wallpaper, they will get dirty when installing the baguette. To avoid contamination, you have to close the walls, and this is extra time.
- If you glue wallpaper after installation, you need to work very carefully: the films (if they are stretched) tear very easily. And during such work it is very easy to tear it.
What is the lesser evil for you - choose. In other periods this is not possible.
Mount the ceilings after all the dusty work is done, on flat walls
Where and at what height is it mounted?
There are two types of profiles - for the ceiling and for the wall. Ceiling ones are used in cases where for some reason it is impossible to screw a supporting structure onto the walls (wiring running in the required place, very unstable material). In other cases, a baguette is mounted on the walls.
At what height is the baguette attached? If there are no distortions, at a level of 4-5 cm below the junction with the ceiling. Why not at the very top? Because the higher the strength of the wall is reduced, it can crumble. Loads when using PVC films are created decently, so load-bearing capacity is important. In addition, wiring is often laid in this place and it can be damaged. So be careful with the wiring, designate the area where it is located. This height reserve also allows the use of a wider range of lamps. As you can see, there are enough reasons.
You need to attach the baguette to flat walls, retreating 4-5 cm from the main ceiling
If the walls in the room have not been leveled, but you want to install a suspended ceiling, level the area in which the molding will be attached. If this is not done, it will bend, which will be clearly visible from below.
On walls made of foam concrete, a beam is mounted to the wall, and a baguette is attached to it. The tension created in this way is transferred predominantly to the beam, and the wall experiences less stress.
For normal ceiling tension, it must be stretched in a strictly horizontal plane. Therefore, they find the lowest point of the ceiling, set aside those same 4-5 cm from it, and then beat off the horizontal along all the walls. So relative to the existing ceiling, the height difference may be different.
The difference relative to the main ceiling may be uneven...
It is most convenient to apply a line using a painting cord (a thin cord “stained” in loose dye such as blue).
If you decide to make a two-level stretch ceiling, it is attached to a plasterboard structure. If the fastening is on one of the horizontal guides, everything is fine and there are no problems. If lower or higher you need to add gain. This can be a profile fixed in the right place or a strip of plywood 5-6 mm thick. Both methods have been tried and work well.
When installing in a room whose walls are tiled, attach the baguette 2 cm below the edge of the tile. It is important that there are no voids underneath.
Electrical wiring and fittings for lamps
Since lower-power lamps are used in suspended ceilings (no more than 40 W for incandescent lamps and 35 W for halogen lamps), a larger number of lamps is required. In addition to the main chandelier, peripheral lighting is also provided in the center. In this case, built-in lamps are usually used.
It turns out that there are a lot of wires running along the ceiling. They must be well and correctly secured. If a suspended ceiling is made in a wooden house, all electrical wires are laid in fireproof pipes, a special corrugated hose or mounting box. In other cases, it is enough to secure them to the ceiling with mounting tapes or using clips.
Reliable way to secure wiring
For the installation of lamps in a suspended ceiling, embedded elements are made. Their design depends on the type of lamp and is selected separately each time. It is only desirable that the lampshades be either directed downward or located no closer than 40 cm from the ceiling. Otherwise, after a while, yellowish spots from overheating will appear on it.
Perhaps the best solution when choosing lamps for a suspended ceiling would be LED ones. They produce a powerful stream of light, last a very long time, draw very little electricity and practically do not heat up. The downside is the high price. But it is justified quickly - by saving on electricity.
Design features of the tool
The spatula for installing tensile structures looks like a classic tool for plastering surfaces. It consists of a blade that is rigidly attached to the handle. The blade is usually made of stainless steel. For ease of use, almost all blades have a bend. Thanks to this, craftsmen can work with structures at an angle. High-quality spatulas should not bend. This factor is very important when choosing a tool. The fact is that the blade has considerable elasticity when tensioned, putting a lot of pressure on the tool. If the spatula blade bends, then under the influence of the load it will simply bend or burst. If you are going to install a suspended ceiling yourself, the spatula should be selected based on the design features of the ceiling. In some cases it is necessary to use a tool with a narrow blade, and in others - with a wide one. Professional installers usually have a whole range of spatulas of different widths and configurations. The handle of the spatula for threading the web can be short or long. It is made of wood or plastic. Wooden handles are very comfortable to use and can be adjusted to the master’s hand by turning. Spatulas with plastic handles are lightweight, however, they do not always fit comfortably in the hand, which can cause discomfort during long-term work. When choosing a tool, it is recommended to hold it in your hands to understand whether you can work with it for several hours.
[custom_ads_shortcode2]
Profile installation technology for fixing tension fabric
The work of fixing profiles on the walls is carried out in the following order:
- Correct installation of profiles for a suspended ceiling begins from the most inaccessible corner of the room. The prepared baguette is applied to the wall exactly along the marking line. Drilling locations for plastic dowels are marked through the profile holes.
- After preparing the holes and driving dowels into them, the profile is attached to the wall using self-tapping screws. Their length should be 30 mm, with a diameter of 6 mm. Screws of this size will ensure strong fastening of the baguettes and will not allow them to bend or come off the walls when the ceiling sheet is tensioned.
- After securing the first corner profile, you can attach the next element. It is mounted exactly end-to-end with the previous baguette with careful horizontal adjustment. Successful joining of profiles for suspended ceilings should not have protrusions or deviations from the marking line.
- Having reached the inner corner, it is necessary to determine the location of the profile cut. To do this, you need to turn it outward with the back wall so that the groove for fastening the blade is at the bottom. Then one end of the profile needs to be rested against a corner, and the other end must be directed along the marking line when overlapping onto the fixed baguette.
- At a distance of 10 mm from the planned joint, a mark is placed with its shift towards the corner. The back wall of the profile is cut along it. Then it is bent along the notch, repeating the inner corner of the wall, and attached to it with dowels and screws.
- Having reached the outer corner of the room with the line of baguettes, one end of the profile needs to be rested against the end of the fixed baguette and a line should be drawn on its back wall along the corner of the room. This will be the first cut.
- Then in the direction of fastening you need to make the next mark, 20 mm from the first line. There will be a second profile cut here.
- Next, along both marks, cuts should be made to its back wall, and the baguette material between them should be removed. For a plastic profile this operation can be performed with a construction knife, and for an aluminum profile with pliers. Then the baguette needs to be folded at the corner in the center of the recess and secured.
After attaching the profiles, their joints should be sealed with tape. Instead, gray household tape purchased at a hardware store is often used.
Types of spatulas
The modern market offers a wide range of spatulas for threading tension fabrics into profiles. They differ in quality, shape and width of the blade, as well as the length of the handle. Professional installers of suspended ceilings should have spatulas of different designs in their arsenal. Let's look at the most popular ones.
- A large spatula with a spatula bent at a 45-degree angle. The length of the tool handle is 40 centimeters. This tool is used most often by craftsmen. It is suitable for threading fabric into different types of profiles.
- A small spatula with the blade bent at a 45 degree angle. The tool handle is shortened, which allows you to insert material into hard-to-reach places.
- A large spatula bent at a 90 degree angle. Thanks to the trapezoidal blade and long handle, this tool allows you to easily cope with threading the web into a profile with a level transition and hidden lighting.
- A large, straight spatula with a 45-degree bend in the blade. This model is equipped with a narrow elongated blade, which simplifies the process of working with curved areas.
- A spatula equipped with a feather-shaped spatula. Its working part is straight, but quite flexible. The flexibility of the blade allows you to cope with filling the blade in places where pipes or other communications pass.
- Tools with an angled blade made in the shape of a right triangle. They are used for filling material in the corners of the room.
In addition, spatulas for suspended ceilings can have one or two bends, rounded thin edges, and a short or long handle. It is important to remember that the more spatulas the master has at his disposal, the easier it will be for him to install a suspended ceiling of any design. Each tool is suitable for performing a particular operation. It is highly recommended not to choose spatulas that are too heavy or inconvenient, as they will lead to rapid consumption of energy and problems with installing the blade. You should select a tool that suits your hand.
[custom_ads_shortcode3]
Recommendations for selection
When choosing a tool, first of all, you need to make sure that the blade does not bend; it must withstand the pressure when the blade is tensioned. Poor-quality or too thin metal can burst, and a slipped hand can damage the walls or ceiling.
Convenience during installation is affected by the material, shape of the handle and the overall weight of the tool. You have to work with your hands raised. You won't be able to do this for long with a spatula that is too heavy. But a lightweight one will not cope with the elastic film and may even break.
Handles are made of wood or plastic. The first option is heavier, but fits better in the hand as it does not slip. If necessary, the wooden handle can be sharpened to a more convenient shape. Large paddles are sometimes specially designed with a plastic handle to lighten the weight. Although the service life of such a tool is much shorter.
The shape of the handle is selected individually. A spatula for suspended ceilings should fit comfortably in your hand; this is very important during long-term work. It is recommended to take the tool and try to make various movements that are performed when threading the canvas.
In most cases, craftsmen prefer spatulas with a wooden handle, but this is an individual choice for everyone, here it is worth focusing on personal feelings. It is not recommended for novice installers to buy the entire set at once; it is enough to purchase 2-3 main blades and then buy the rest, making sure that the choice is correct.
Where to buy quality spatulas?
Spatulas for installing tensile structures are not found in all construction stores. Even if such specialized tools are present on the shelves, as a rule, they are not presented in a wide enough range. To purchase all the necessary spatulas for suspended ceilings in one place, we recommend that you visit the online store. We offer only high-quality tools, tested by experts on real objects. You can pick up your order at our warehouse in Moscow. We also offer delivery to all cities of the country using a transport company convenient for you.
Sources:
- potolok.expert
- foler.ru
- www.drive2.ru
- potolok-magazin.ru
Using an electric spatula
In order to reduce the effort that a master spends when installing a stretch ceiling, many use a special tool - an electric spatula.
An electric spatula for installing a suspended ceiling is a special device that transmits reciprocating movements to a metal blade. This electric spatula makes it possible to tuck the canvas into a stretch ceiling baguette much faster, without exerting any physical effort.
As a rule, electric spatulas are used for installing fabric seamless stretch ceilings, for example, Cerutti ceilings.
But even if you don’t have an electric spatula at hand, correctly selected and convenient spatulas for suspended ceilings will be of great help to you in installation. So pay serious attention to the choice of this tool - after all, the final result largely depends on it!
Did you like the article? Subscribe to our Yandex.Zen channel