Why do you need a plinth for a stretch ceiling?
Fillet (baguette, plinth) is one of the decorative elements of the room. Installing a plinth allows you to:
- give the interior a finished look: make the room stylish, elegant, cozy;
- hide mistakes made in work;
- mount decorative lighting based on LED strip without creating a special niche for these purposes.
Types of skirting boards for stretch ceilings
On sale, ceiling fillets for suspended ceilings are offered from several types of materials:
- gypsum;
- wood;
- PVC;
- extruded polystyrene;
- polystyrene foam;
- polyurethane.
However, stretch ceilings with their specific requirements leave home craftsmen the opportunity to work only with plastic, polystyrene, foam and polyurethane baguettes.
Styrofoam. The foam fillet is lightweight (sticks firmly to any wallpaper), easy to use, has a variety of textures and a low price. If necessary, you can paint with acrylic water-based emulsion (refresh).
The disadvantages include low elasticity, as a result of which on very uneven walls it will either break or leave large gaps, as well as the ability to melt in solvents, which excludes the use of adhesives containing acetone, gasoline, various alcohols, benzene, etc. d.
Polyurethane. Products made from polyurethane have a beautiful appearance - they can be cast with a surface of the most complex shape. The material is durable, yet flexible, which allows you to design walls of any curvature, including columns.
The main disadvantages: high cost and significant weight, due to which polyurethane fillets cannot be glued to wallpaper - they will not withstand the weight and will come off the wall (can be attached to self-tapping screws).
Plastic. Plastic fillets are made from polyvinyl chloride, which has many advantages:
- affordable price;
- can be pasted on wallpaper;
- moisture resistance, thanks to which you can finish the kitchen and bathroom with their high humidity;
- resistance to burnout;
- the ability to make joints in corners using special corners, which greatly simplifies the installation technology.
Among the disadvantages:
- begins to turn yellow over time;
- if handled carelessly, marks in the form of dents remain on the surface;
- PVC is an electrostatic material, which in practice leads to dust accumulation.
Extruded polystyrene. Polystyrene fillets have:
- budget price;
- large assortment selection;
- elasticity.
The disadvantages are not critical and are acceptable for the low price:
- easily damaged by sharp objects;
- dissolve in some types of glue.
Installation of ceiling plinth, photo and video instructions
Such a necessary piece of furniture as a plinth, also called a cornice, fillet, border, or molding, must be installed correctly. How to make the wall/ceiling joint invisible. How to fix the ceiling plinth?
Gluing technology, do-it-yourself installation, fastening features for plastic and foam products, for suspended ceilings, choice of glue, detailed video tutorials - this is what our article is about.
Stage 1. Selecting a product for the ceiling
When choosing a ceiling plinth fixed by gluing, you need to focus on the size of the room.
Note: The higher the installation room, the larger the area, the more massive the cornice is attached by gluing.
How to properly glue ceiling plinths with a variety of shapes and sizes
Laying a narrow ceiling plinth in a high room will not decorate the interior. A decorative item secured with adhesive will simply be “lost.” And a wide ceiling cornice, glued in a low room, will “press”, lowering the ceiling even more.
Types of products installed by gluing according to the pattern:
- smooth;
- “under stucco”;
- with longitudinal relief stripes.
Tip: You can follow your tastes and preferences by changing the standard. Select the ceiling product for mounting that is right for you.
Stage 2. Calculation of materials installed by gluing
It is necessary to divide the perimeter of the room by the length of one fastener - usually 2 m. Round the resulting number to the nearest whole value. Add 1-3 more baguettes to the resulting figure, because when fastening by gluing, you can ruin the edging element.
Stage 3. Marking the ceiling for installation
How to mark before gluing:
- Inspect the mounting locations for unevenness.
- Determine the places of fastening with adhesive, taking into account that it is better not to glue long baguettes to places with large curvatures, since they may break during fastening.
- It is necessary to secure the skirting boards of the same length with adhesive. The joint of installed products of equal length looks “more presentable” than fastening long and short ones.
Photo - how to stick a plinth on the ceiling
Tip: Marks for fastening with adhesive must be placed so that they are “hidden” behind the ceiling molding after it is fastened.
Step 4: Preparing for adhesive installation
List of tools for gluing installation:
- mounting gun;
- miter box for cutting at an angle;
- rubber spatula;
- pencil;
- roulette;
- sharp stationery knife;
- container for mixing putty.
List of fastening materials:
- ceiling plinth;
- corner mount;
- putty;
- glue;
- water-based paint;
- acrylic sealant;
- fastening strip.
Stage 5. Cutting ceiling fasteners
Cut the corner very carefully using a miter box - a device that allows you to cut the baseboard at the required angle.
Important: Follow the principle - corners are cut first. And then the ceiling product is cut.
Having even 90° angles on the ceiling at the fastening points, there will be no problems with cutting. Place the cornice in the miter box and cut it with a sharp knife at an angle of 45°. The cornice is placed on the bottom of the miter box with the side attached to the ceiling. When cutting, you need to hold the product straight and not allow it to move, otherwise you will end up with an extra gap, which needs to be sealed when fastening it with adhesive.
How to glue skirting boards to the ceiling - mark for cutting the corner before fastening
Attention: The ceiling plinth is often asymmetrical in cross-section. It should be taken into account that the long side is attached to the wall, the short side is attached to the ceiling.
Rules for cutting before fastening:
- at an internal angle, the front part of the cornice is cut off;
- at an external angle, the inner part of the fillet is cut off.
Before gluing the ceiling plinth, it must be cut correctly
Important: You need to start cutting the ceiling plinth from the outer corners. It is necessary to leave a few millimeters “in reserve”. The excess is then sanded off with sandpaper. The resulting gap at the inner corner is sealed with sealant.
How to cut a right angle?
- Install the first baguette to the wall. Use a pencil to draw lines to the corner on both sides.
- Perform the same operations with the second plinth.
- Mark the intersection points for the top and bottom lines.
- Transfer these points to the baguettes.
- On each cornice there are two marks through which a cut needs to be made.
Installing a plinth with your own hands - trying it on before fixing it
Criterias of choice
When choosing a plinth for suspended ceilings, you need to pay attention to a number of consumer characteristics of the product. Among the main selection criteria are:
- fillet weight;
- base width;
- top size;
- strength;
- flexibility;
- length;
- compliance with the interior;
- price.
Weight
Ceiling moldings are mounted on the wall with a technological gap of 3-5 mm between the upper part of the fillet and the stretched ceiling - this way the canvas is protected from damage and the formation of wrinkles. In this case, the entire load for fixing the fillets falls on the wall. And there may be wallpaper or putty (plaster) on it, which have different strength coefficients for tearing away from the base.
Therefore, it is not advisable to stick heavy polyurethane, wood or gypsum baseboards onto the trellises due to the high probability of sagging along with the wallpaper, if not immediately, then over time. Here you need foam material or extruded polystyrene.
Plaster can easily withstand polyurethane, but it is better to use wood and stucco with additional screws.
Base width
The width of the fillet base depends on:
- strength of connection with the wall, which is natural. After all, the larger the plane is smeared with glue, the higher the adhesion. There is one requirement here: the width of the adjacent part must be at least 25 mm;
- visual perception of the plinth. So, in small rooms, narrow fillets look better, as opposed to wide ones: they reduce the volume. In such cases, designers advise adhering to the following ratios: with a ceiling height of up to 2.5 m, you need to buy a narrow plinth - up to 4 cm wide; for rooms with a height of 2.5-3.0 m - 5-10 cm; over 3.0 m - from 10.0 cm.
Top size
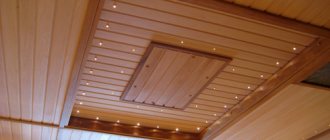
Since the upper part of the plinth hides the technological gap, its size should be sufficient to mask the gap between the sheet and the profile. In this case, one more factor needs to be taken into account: whether LED lighting will be mounted on the baseboard. If yes, then you need to buy a baguette with a wide top so that you can hide the LED strip.
Strength
When we talk about strength when choosing decorative elements, we mean their mechanical strength. Ideally, the ceiling molding should bend easily without breaking. Elastic polyurethane fully meets this requirement. Therefore, when purchasing products made from other materials, you must be careful during operation - such parts are less flexible and durable, especially polystyrene.
Flexibility
You need to pay attention to flexibility indicators only with uneven walls or existing convex (concave) curves. In this case, the choice is limited - only polyurethane. Polystyrene foam will crumble, extruded polypropylene will leave large gaps. Trying to go through a difficult section with the help of small scraps will not help either - the place will immediately catch your eye.
Length
The length of the fillets varies over a fairly wide range, although you can mostly find 2-meter ones on sale. Therefore, it is possible to optimize the size of the plinth and solve two problems at once: to minimize the number of joints on the wall and the amount of material waste.
Interior matching
Giving specific advice on the design of fillets is useless: everyone has their own concept of beauty. Therefore, all our advice is purely advisory in nature.
- If there are a large number of corners, it is better to buy a raised plinth - the connection between the wall and the ceiling looks more harmonious in this case.
- When finishing a two-level ceiling, a monochromatic baguette with a smooth surface looks better.
- For classic interior design styles, decor with stucco elements is better suited; for modern trends, smooth, not very wide fillets are better suited.
- Smooth, medium-width (6-8 cm) plinth looks good in all interior design styles and any design, from elaborate to simple.
- The white plinth together with the light ceiling visually expands the space.
- It is better to avoid skirting boards with a complex surface shape - difficulties arise when connecting in the corners of the room.
Price
If there are no special requirements for the baseboard, it is better to buy foam material. It is much cheaper with almost the same consumer properties.
Which ceiling plinth to choose
All types of borders, except plastic ones, are glued only to the wall. Therefore, for a stretch ceiling it is better to choose a light baseboard that has a wide vertical stripe. This will make the connection stronger.
When choosing the size of the plinth, take into account the height of the ceilings. With large fillets, a small room will seem even smaller. For a harmonious visual perception, you should focus on the following parameters:
- For ceiling heights up to 2.5 m, narrow fillets are attached - up to 4 cm.
- At 2.5-3 m, you can choose a plinth 5-10 cm wide.
- Above 3 m - a wide border, from 10 cm or more.
The choice of material depends on the room:
- If the walls are not too smooth or there are rounded areas, a flexible polyurethane molding is installed under the suspended ceiling.
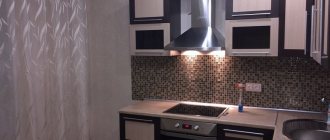
- For rooms with high humidity (kitchen, bathroom, bathroom), plastic skirting boards are best suited.
- Sometimes hidden LED strip lighting is installed around the perimeter of the ceiling. Then take fillets with a wide horizontal part. Some products even have a reflective foil strip to enhance the light.
- In other cases, when there is no particular difference in the material, they take the cheapest ones - foam plastic.
The appearance is matched to the interior of the apartment. If the wallpaper has a pattern, it is better to take moldings with or without discreet patterns. If the design of the walls and ceiling is simple, you can choose a plinth with complex patterns, imitation stucco, etc.
Often they choose white or paint the molding the same shade as the wall. The contrasting cornice looks interesting, but this solution is only suitable for modern interior styles. Imitation of other materials is also used: plaster (for classics), wood (country, Provence), metal (high-tech).
Calculation of the number of plinths
When purchasing finishing materials, it is always necessary to have some reserve for unexpected overruns. Therefore, the calculation formulas always include a correction factor. In the case of fillets, everything is very simple: the perimeter of the ceiling is measured and another strip is added to the result obtained (at a low price, you can do more, so that you don’t have to glue small scraps later - there will be fewer joints). This is enough to adjust joints in corners and to correct errors when cutting ends at an angle of 45°.
Installation instructions for skirting boards
The instructions on how to glue ceiling plinths to a suspended ceiling have several sections:
- preparation of the base;
- materials and tools;
- installation technology.
Preparatory work
To ensure good adhesion of the glue to the wall surface, the wallpaper is cleaned of dust, and the painted surface must be primed. If possible, it is better to glue the wallpaper after installing the fillets. But it is advisable to paint it in advance and let it dry thoroughly.
Materials and tools
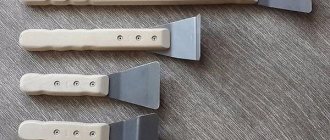
In order to attach the plinth under the suspended ceiling, you must take care of the following materials and tools in advance:
- fillets;
- adhesive (how to choose it correctly can be found in the material “How to choose adhesive for baseboards”);
- stepladder;
- sandpaper;
- cutting tool (construction knife, metal saw or wood saw with fine teeth);
- miter box;
- roulette;
- construction pencil or marker;
- spatula;
- ruler;
- a rag or sponge to wipe away any excess glue that has protruded from under the baseboard.
Advantages of skirting boards
Various words can be used to refer to a plinth: fillets, insert, tape. Apart from the name, everything remains the same; in any case, this is a product that is often made of PVC, and its installation is carried out with one click, inserting it into the existing gap.
The main advantages of plinth include:
- Possibility in the future to easily remove and reinstall the baseboard. This is very useful, because you will probably want to re-glue the wallpaper or change the covering of the stretch ceiling at some point.
- Ease of installation. You can install such a plug yourself in a matter of minutes. Such products often have a soft structure, which makes them easier to work with.
- A wide range implies the ability to choose the most optimal option for any interior, be it a business style design or a children's room. The plinth will look harmonious and, if you choose a color that matches the ceiling, it will even be invisible against its background.
There are only two shortcomings:
- Not everyone likes the simplicity of the baseboard; some designers like more style solutions.
- The products are able to close the gap between the ceiling and the walls, but they cannot hide the unevenness of the walls.
Installation technology
The technology for attaching fillets to walls with different finishes is the same. The difference is in small nuances, which we will consider separately. The work is performed step by step in the following sequence.
- The ends of the fillets are inspected - they must have a cut angle of 90o and a smooth surface. If the condition is not met, it is necessary to trim the damaged ends using a miter box and then sand them with sandpaper.
- You need to start gluing from the inner corners, all of them - this way there is less complicated adjustment. To do this, in a miter box, the ends of the plinth are cut at an angle of 45o. For those who do not know how to work with this device, we advise you to look at the work “How to use a miter box for a baseboard.” In this case, it is necessary to cut the left and right strips. You can see how to perform the operation correctly in the work “How to make a corner on a ceiling plinth.”
- After cutting the ends, the fillets are connected directly on the wall. This way it is checked how well the joints fit together.
- The cut areas are polished.
- Glue (liquid nails) is applied to the back side of the plank in accordance with the instructions printed on the package. At the same time, the adhesive is applied to foam fillets pointwise (they are the lightest), but often, on PVC - in a snake, and for polyurethane fillets, the back surface is completely processed. It is also advisable to apply glue to the ends at the junction.
- To prevent glue from accidentally getting on the ceiling, attach cling film to it with masking tape (other types of tape will leave traces of glue).
- The planks are pressed tightly against the wall and held there until the glue sets. The forced fixation time is indicated on the packaging. The foam baseboard can be secured with tape when attached to paint and with tailor's pins to the wallpaper.
- Using the same principle, the plinth is attached in all corners.
- Using a tape measure, measure the surface of the walls not covered with fillets.
- Using a miter box and a cutting tool, the plinth is adjusted to fit the free space on each wall.
- The cut areas are sanded, glue is applied to the reverse side, and the fillet is pressed against the wall.
For information: if there are problems with finances or lack of desire, a wall with a window, where a curtain rod is attached close to the ceiling, is not finished with a baguette - curtains or curtains will hide the technological seam. For those who still intend to complete all the work, we advise you to mount the plinth not on the wall, but in front of the cornice - it looks very impressive. To do this, a guide profile is attached to the adjacent walls. A ceiling profile is mounted to it, parallel to the cornice, onto which a narrow strip of plasterboard is attached with self-tapping screws. This will be the basis for fixing the fillet.
When attaching fillets to different surfaces, there are nuances that must be taken into account.
Wallpaper
To get an excellent result when gluing baguette to wallpaper, you need to take some advice from professionals.
- It is better to apply liquid wallpaper after fixing the fillets. If they have already been applied, then it is advisable to remove them from the places where the fillets are attached, especially since the removal process is simple and easy.
- The adhesive should be transparent, which will protect the wall from dark spots if it gets on the wallpaper.
- The released glue is immediately removed with a rag or sponge.
- The lightweight plinth is additionally fixed to the wall with tailor's pins.
Dye
How to glue a plinth to a suspended ceiling if the wall is painted? There is no need to invent anything new here. It is enough to exactly follow the step-by-step technology described above. The only point you need to pay attention to is the glue. It should interact well with the applied primer and not dissolve the base of the baseboard - this applies to foam plastic and polystyrene.
How to glue a ceiling plinth to a stretch ceiling: work order
Preparatory work
- Place the ceiling plinth on the floor along the walls. Place two skirting boards on long walls, and one on short walls. Place plinth pieces cut to size on the remaining spaces. Try to ensure that those parts that you cut yourself go to the corners of the room, and those that were cut in production are joined in the center - they will give a perfectly even joint.
- Cut the corner parts using a miter box so that they fit together evenly.
- Place the skirting boards on the floor again and check how accurately they fit in place. Make corrections if necessary.
After completing the preparatory work, you can begin installation directly on the wall.
Important: You need to start work from the corner located opposite the entrance to the room.
Installation
- Before gluing the plinth to the suspended ceiling, attach it to the walls without glue, check the joints.
- Mark the wall with a pencil, marking the joints and the bottom edge of the ceiling plinth.
- Use a polyethylene lining (cling film) between the ceiling sheet and the baseboard.
- Lubricate the wide side of the ceiling plinth with glue and wait a couple of seconds - this is necessary for the glue to begin to set.
- Place the baseboard against the wall, following the pencil markings, and press for a minute. After this, use a napkin to remove any excess glue that appears.
- The next plinth is glued in the same way; it is applied to the one already glued. In addition to the wide part, it is also necessary to coat the ends of the baseboards with glue.
- Continue gluing the baseboards around the entire perimeter until the work is completed. After the glue “sticks” a little, you can remove the film from the ceiling if you do not plan to paint the baseboards.
Important: You can start painting the ceiling skirting boards only after the glue has completely dried. See the adhesive packaging for drying time information.
After the glue has completely dried, you need to use sealant and a spatula to fill the gaps between the wall and the baseboard.
Alternative option
Ceiling plinths for suspended ceilings can be successfully replaced by plugs and decorative cords.
Stub
The plug is an elastic tape made of rubber, PVC or polymer materials 1-2 cm wide with a different profile, which is installed in special grooves in the stretch ceiling baguette along the entire perimeter of the room to mask the technological gap. It has several names: elastic band, masking tape, decorative rubber insert, etc. Available in several dozen colors and shades, which makes it possible to always match the color of the stretch ceiling fabric.
How to insert a plinth into a suspended ceiling? To fix the elastic, you do not need glue, any tools or experience. Installation is done by hand into a special slot connector, into which the protruding part of the profile is inserted. For complete fixation, it is enough to press lightly on the inserted sections so that the “spike” completely fits into the connector. The ends are joined at an angle of 90o along the entire perimeter.
It is held in the groove by teeth on its profile and on the back wall of the baguette, thanks to which it is mounted and removed easily and quickly.
The plug can be ordered together with the suspended ceiling. They are matched to the color of the canvas, as a result of which the technological gap becomes almost invisible. Easily fits into corners. Cuts with a construction knife.
This method is more popular among consumers than installing skirting boards due to the low price of the material, simple installation and speed of installation. However, the plug in many cases leaves the impression of unfinished walls and ceilings.
Decorative cord
The term decorative cord does not accurately reflect the essence of this type of decoration. It is rather a thick rope made of durable lavsan threads, although on sale you can actually find a cord for very small gaps. Available in plain or contrasting colors. Often metal threads imitation gold and silver are woven into the cord.
Fixed with glue. Thanks to its flexibility, it can be mounted on both straight and rounded sections of the wall. Looks good with satin and matte fabric.
Among the disadvantages, consumers note the ability of the cord to collect dust, which must be carefully removed regularly.
How to glue skirting boards to a two-level stretch ceiling
Installation of decorative cornices to the lower level of a two-tier structure is carried out in a similar way - the baguette is attached only to the wall. To mask the technological gap between the levels, a special decorative PVC insert is used, which comes in different shapes:
- a tube;
- fungus;
- oval.
A flexible cap is best suited for creating a discreet transition between tension surfaces, which are often curved in shape. The masking tape is easily inserted into the profile groove using a wooden or plastic spatula without the use of glue.
Interesting information! To create various visual effects, a decorative twisted cord is used as a plug. It is attached with glue and is used to mask the gap not only between levels, but also at the junction of the wall and ceiling.
Pros and cons of the alternative option
To understand how effective such options for sealing gaps between the wall and the ceiling sheet are, let’s analyze the strengths and weaknesses of the alternative option.
Among the advantages:
- no special tools are needed to close gaps;
- do not visually make the room smaller, so they are suitable for small rooms;
- The plug can be easily removed. There are also no obstacles to removing the decorative cord, although the process is more labor-intensive;
- both the plug and the decorative tape can be easily matched in color to the interior of the room;
- high elasticity allows you to design curved sections of walls;
- resistance to high humidity (can be installed in the bathroom);
- easy care.
Minuses:
- decorative cord collects dust, which requires frequent maintenance;
- wide gaps are difficult to hide;
- the cord emphasizes significant unevenness of the wall;
- fillets look more interesting in the interior.
Conclusion: if it is not possible to fix baguettes on the walls, plugs and decorative cords are an almost ideal replacement option.
Can a suspended ceiling do without a plinth?
Stretch ceiling without plinth - the reality of Russia and the CIS countries. In these areas, the technological gap is closed mainly with a plug. There are several reasons:
- low ceilings - baguettes look ridiculous in this case;
- price factor - plugs are several times cheaper;
- easy and quick to install with your own hands;
- Possibility to remove and reinstall.
This method of finishing looks simpler, but looks quite good in modern interior design styles. In addition to elastic and decorative cord, a new product is used - a gapless profile.
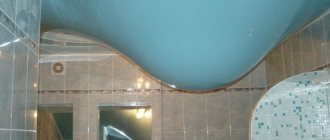
You can't leave the gap completely open. Firstly, the appearance of the ceiling is sloppy, and secondly, dust will begin to settle inside the ceiling space on the stretch ceiling, which over time can be seen through the stretched fabric, but cannot be removed.
Advantages and disadvantages of suspended ceilings with plinths
Practical and durable tension coverings do not lose their popularity. There are a huge variety of options for both minimalistic rooms and luxurious ornate rooms. For each occasion, you can choose the right accessories.
Most often, ordinary skirting boards - foam or polyurethane - are used for edging the canvas. The border can be strict - smooth and flat, or vice versa - dimensional, pretentious, decorated with fancy patterned carvings. The size range of baguettes is also very wide.
The main advantage of ceiling skirting boards is that they beautifully frame the ceiling, turning it into a work of design art.
When choosing a plinth, you need to focus on the dimensions of the room and its style. A large-format carved version will only emphasize the modest size of the room and visually make the ceilings lower. Such an accessory is equally unacceptable in modern and minimalist interiors. It will fit well into baroque interiors, but for high-tech style it is better to use flexible tapes that are attached directly to the profile and completely cover the technological groove between the wall and the ceiling.