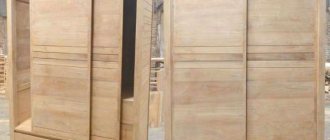
What can you knit an ottoman from?
Before you bring your idea to life, you need to prepare. The first step is to buy yarn. Experienced needlewomen say that you can knit the product you are studying with any knitting threads. However, it is better to give preference to denser and thicker wool yarn. And tape is also ideal.
In addition, many creative people knit studied interior items from old clothes. It should first be cut into strips the width of a finger, tied and twisted into a skein. You can also make a knitted ottoman with your own hands from twine, which is freely available at any hardware store. Or use plastic bags as material. They should be stacked and cut into rings 2-3 centimeters wide. Then fasten them together and also roll them into a ball.
In any case, the choice of material falls entirely on the shoulders of the needlewoman. Therefore, you can select yarn based on your own taste, the wishes of your household and the style of the interior.
About knitted models
All knitted ottomans differ from each other in:
- sizes;
- forms;
- knitting technologies;
- designs;
- color solutions.
Some models are small and compact, others are more voluminous. Their form can be:
- round;
- square;
- rectangular.
The advantages of knitted ottomans include:
- safety and environmental friendliness;
- multifunctionality;
- mobility;
- a light weight;
- various variations of execution.
Distinctive features of knitted ottomans are:
- lack of backrest;
- small height;
- presence of filler inside.
Help : these decorative interior items do not take up much free space. The absence of sharp corners makes them safe for children. They can be used as a chair, a footstool, or a stylish decorative element.
What tool are used to create ottomans?
Not all needlewomen are equally good at knitting and crocheting. Therefore, they do not dare to decorate their home with a hand-made knitted ottoman. However, a huge number of master classes compiled by professional knitters prove that you can realize your idea using any tool. But it is important to take into account that an iron hook and knitting needles are more suitable for ordinary knitting thread. The size should be equal to the thickness of the yarn. But to work with twine, clothesline or other dense yarn, it is worth purchasing a wooden tool.
What to put inside
Another important and difficult issue that novice craftsmen often fail to cope with concerns the filler. After all, we will only make a cover. Therefore, the question of how to fill a knitted ottoman will turn into a serious stumbling block for many. However, experienced craftsmen say that literally anything can be used.
Indeed, materials that can be purchased in the store can act as filler. Or outdated clothes, towels and other things made from fabric material. In addition, it is permissible to fill the ottoman with the contents of the pillow. And even a feather one. If you don’t want to burden yourself with complex questions at all, you can put an unnecessary blanket inside the cover.
What you need for work
A pouf is made from knitted yarn in the form of a cute colored ball or square. They look really cute in the interior. They give it a homey feel. They are knitted from coarse threads, ropes, and yarn. Of course, you can work hard and try to make yarn yourself from old sweaters. But this is only if there are enough of them and enough patience for such labor-intensive work. Therefore, it is better to look for material in specialized stores.
In addition, material for the cover is needed. It is better to make it from thick linen or cotton fabric. The filler is foam rubber, padding polyester, and hallofiber. You can buy them at a hardware store. Can be purchased in showrooms that sell fabrics for upholstered furniture. Our women's ingenuity suggested that they could buy two padding polyester blankets at a second-hand store and gut the contents out of them.
How to save on filler
Many needlewomen, thinking about what to stuff a knitted ottoman with, come to the conclusion that they cannot find the required amount of unnecessary things. Is it really necessary to abandon the implementation of the idea in this case? Professional knitters shake their heads. And they offer a rather original alternative. The idea is quite simple, but requires preparing twenty plastic bottles of the same size. The version shown uses two-liter Coca-Cola bottles.
Bottle ottoman
First of all, carefully cut off the necks of ten bottles. We put the remaining part on the whole bottle. As a result, we get ten “nesting dolls”. We expose them, forming a circle. Two pieces in the first row, then two rows of three and two again. Wrap the structure well with tape.
We take a box of suitable size from any equipment. We outline the ottoman on it twice, outlining the circles. Cut out and glue on the bottom and top of the structure. Then we wrap it in an old blanket and prepare a knitted cover for our product. So, we manage to make a knitted ottoman with our own hands!
We are used to looking at plastic containers as garbage. However, needlewomen prove that in experienced hands this material turns into a useful and original thing.
How to sew an ottoman bag with your own hands: photos and ideas
You can make an interesting product for your child. A DIY ottoman bag is perfect for creating a cozy place to spend your leisure time.
A soft piece of furniture can be made from two pieces of fabric, bean pellet filling and a zipper. This option is not suitable for small children, as the filler granules may fall out of the unzipped zipper. There is a danger of the child choking. If necessary, the zipper can be sewn up.
THE IDEA is that we sew like a bag - BUT we sew the OPPOSITE corners and get the design as in the photo
Determining the dimensions of the planned product
To knit an ottoman, you need to clearly define the dimensions. To do this, we calculate the parameters of our idea. If a frame of plastic bottles is prepared, measure the distance from the center of the upper circle through the side wall to the center of the lower circle. This is the length of the cover.
Then we determine the radius of the seat or bottom - from the center of the circle to the side. Thus, we find out the distance over which we will first need to make an increase and then a decrease. And you should also measure the circumference or circumference of the ottoman. This is the width of the cover. The manipulations described above must be performed for all “Do-it-yourself knitted ottoman” master classes, which explain the technology of doing the work using knitting needles and a crochet hook. If the needlewoman plans to fill the prepared case with soft filler, you can indicate the parameters of interest offhand.
Cylindrical pouf
And although in the photo there are poufs knitted with a smooth pattern, the pattern is exactly with embossed columns. (There was no photo for this pattern from a handicraft magazine unknown to me).
The difference between knitting a cylindrical pouf and a round one is only in its size: the diameter is smaller and the height is larger (40 x 50 cm).
Here it is enough to knit 8 rows of a circle according to the pattern, and then knit all rows without increases as the 8th to the desired height of the pouf.
Insert a rolled up roll of foam rubber into the resulting cylinder and sew a round leather piece at the bottom.
Knitting patterns for ottoman
As we mentioned earlier, you can knit the piece of furniture you are studying using either knitting needles or a crochet hook. Even professional knitters cannot say which tool is better. Therefore, in this article we will study both technologies so that the reader can choose for himself. Let's start by making a knitted ottoman with knitting needles. For this type of work you need to choose a pattern. Most often, craftswomen prefer simple stockinette stitch. When only knit stitches are knitted on one side, and only purl stitches on the other. Although, if desired, you can also supplement the fabric with braids and plaits. Products knitted with garter stitch, which involves knitting facial loops on both sides of the fabric, look interesting.
Knitted interior
You can add zest and perfectly complement the decor of any room in the house with the help of a knitted pouf:
- Sitting on a comfortable pouf, you can watch your favorite programs on TV in the living room;
- It’s convenient to sit down with friends and talk in the nursery;
- A pouf near the bed in the bedroom can become a bedside table;
- Comfortably rest your feet on a knitted ottoman, sitting on the veranda with a cup of aromatic tea and reading a fascinating book;
- Sit on a small pouf in the hallway and put on your shoes;
- For children, this is not only a safe interior detail, but also a play item;
- Your pet will be happy to sit on a soft and warm knitted pouf.
The interior can be diversified with other details knitted from knitted yarn. A lampshade for a lamp, flowerpots for indoor flowers, baskets, wall rugs or floor rugs will add coziness and warmth to your home.
Preparing a pattern fragment
Having decided on the pattern, we prepare a sample. To make an ottoman, a square with a side of ten centimeters is enough. After which we carefully count how many loops and rows we got. We denote the first parameter by the letter P, the second by R.
Divide the estimated width of the cover by ten and multiply by the value P. Write down the final number. Divide the radius of the seat by ten and multiply by the value of R. We also write down the total. And finally, divide the length of the cover by ten and multiply by the value R. We also record this parameter on paper. Using simple mathematical calculations, we manage to convert centimeters into loops and rows. Now we can get to work based on our parameters.
Knitting an ottoman
Experienced needlewomen note that making a crocheted ottoman with your own hands is a little easier than knitting. Because it will be possible to check with a centimeter from time to time. But novice craftsmen are convinced that by making calculations in advance, knitting is much easier. You can completely immerse yourself in an interesting or complex pattern and not be distracted by taking measurements. We advise the reader to try both technologies and then choose the one that is most preferable. Each version of the ottoman looks very impressive.
But let’s not get distracted and let’s get started with the step-by-step master class:
- The first step is to cast on a chain of five loops.
- Close it in a ring and just knit the first row.
- In the second, double the number of loops. After each loop, add an air loop.
- We subtract ten from the loops equal to the width of the cover. And divide the resulting value by the radius of the seat (in rows). So, we find out how many loops need to be added in each next row.
- After that we return to work again. We expand our canvas to the required size. Experienced craftsmen recommend recording each action, because by analogy you will have to decrease the loops.
- Then we knit a cover without increases or decreases, covering the sides of the ottoman.
- We put the cover on the frame or fill it with filler.
- And we complete the work based on our notes.
- There should be 10 loops left at the end.
- They need to be reduced to five.
- Break the thread and pull through the remaining loops.
POOF
This pouf will become a real decoration of your home and a favorite place to sit. It is made in garter stitch in short rows.
Dimensions
Approximately 50 cm in diameter and 35 cm in height (this depends on how much you fill the pouffe)
Materials
1. Bobbiny Cotton Cord yarn (420 g / 100 meters) or any other cord with a diameter of 5 mm, 4 skeins
- Circular knitting needles 8 mm, length 120 cm
- Hook 4 mm
- Threads and needles (for connecting threads together)
Garter stitch gauge: 8 stitches x 12 rows = 10 cm x 10 cm
Note: Bobbiny Cotton Cord is a soft, flexible and durable cord. It is made of polyester on the inside and cotton braid on the outside. The pouf can be filled with foam rubber or some old things, for example, blankets.
Garter stitch gauge: 8 stitches x 12 rows = 10 cm x 10 cm
Description
Work from one side to the other. Cast on 62 stitches on 8 mm needles.
Row 1: Knit all stitches, turn
Row 2: Knit 44 stitches, turn. [18]
Row 3: Slip first stitch on right needle, tighten working yarn, knit 25 stitches, turn. [18]
Row 4: Slip first stitch on right needle, tighten working yarn, knit 27 stitches, turn. [16]
Row 5: Slip first stitch on right needle, tighten working yarn, knit 29 stitches, turn. [16]
Row 6: Slip first stitch on right needle, tighten working yarn, knit 31 stitches, turn. [14]
Row 7: Slip first stitch on right needle, tighten working yarn, knit 33 stitches, turn. [14]
Row 8: Slip first stitch on right needle, tighten working yarn, knit 35 stitches, turn. [12]
Row 9: Slip first stitch on right needle, tighten working yarn, knit 37 stitches, turn. [12]
Row 10: Slip first stitch on right needle, tighten working yarn, knit 39 stitches, turn. [10]
Row 11: Slip first stitch on right needle, tighten working yarn, knit 41 stitches, turn. [10]
Row 12: Slip the first stitch onto the right needle, tighten the working yarn, knit 43 stitches, turn. [8]
Row 13: Slip the first stitch onto the right needle, tighten the working yarn, knit 45 stitches, turn. [8]
Row 14: Slip the first stitch onto the right needle, tighten the working yarn, knit 47 stitches, turn. [6]
Row 15: Slip the first stitch onto the right needle, tighten the working yarn, knit 49 stitches, turn. [6]
Row 16: Slip the first stitch onto the right needle, tighten the working yarn, knit 51 stitches, turn. [4]
Row 17: Slip the first stitch onto the right needle, tighten the working yarn, knit 53 stitches, turn. [4]
Row 18: Slip the first stitch onto the right needle, tighten the working yarn, knit 55 stitches, turn. [2]
Row 19: Slip the first stitch onto the right needle, tighten the working yarn, knit 57 stitches, turn. [2]
Row 20: Slip the first stitch onto the right needle, tighten the working yarn, knit 59 stitches, turn. [0]
Row 21: Slip the first stitch onto the right needle, tighten the working yarn, knit 61 stitches, turn. [0]
Repeat rows 2 - 21 (1 segment) until 201 rows are knitted (10 segments in total), bind off the loops loosely without tightening.
Cut the thread, leaving a long end for stitching.
Combine the knitted parts and form a ball in such a way that the first and last row of knitting is the vertical line dividing the sides of the pouf from top to bottom.
Assembly
Sew the first and last row with a mattress stitch, stopping in the middle.
Fold the filling so that it matches the size of the pouf and does not deform it. You can first put the filler in a bag. Place the filling in the pouf.
Next, sew up the pouf.
Note:
Because the working thread is thick, the usual method of knitting short rows is not used, because it will make a large loop.
Therefore, tighten the thread well enough to avoid creating unnecessary holes. print
We make a cover that can be washed
We decided what to stuff the knitted ottoman with. With our own hands we managed to bring the idea to life. However, now a new question has arisen. How to wash a cover that will certainly get dirty over time? Professional craftsmen recommend taking care of this in advance so that you don’t have to redo your creation in the future.
You just need to purchase a zipper, the length of which is equal to the circumference of the intended ottoman. After this, you need to knit the seat and sides of the desired product. And make the bottom separately. The technology is the same, but you first need to cast on a number of loops equal to the width of the cover. Then carefully sew the zipper to the bottom, and then to the main part. And finally, we put the cover on the frame or stuff it thoroughly with the selected material or unnecessary rags.
Crochet ottoman
If the reader is better able to control the tool noted in the title of the current paragraph, then we offer a detailed master class. However, first it is necessary to make a reservation that traditionally a cover for an ottoman is knitted with single crochets. Although you can also make it openwork. But in this case it is necessary to prepare a lining. Experienced needlewomen recommend making it in a contrasting color. Then the case will stand out advantageously, and the product itself will look even more original.
So, making a crocheted ottoman is very simple. But you have to start right. Therefore, we advise the reader to follow each step of our instructions. First of all, wind the prepared yarn on any two fingers of your left hand. As a result of such actions, we will get a loop that must be carefully removed and tied with six single crochets.
Next, carefully pull the initial tip and tighten the center of the circle. After completing these manipulations, we begin to implement our idea. You don’t need to be guided by strict technology or write down your every step. We will simply knit in a spiral, adding new loops from time to time, and forming an even circle. Having reached the desired size, we knit a “pipe” without adding or subtracting loops.
The final stage can be adjusted at your own discretion. If you want to make a one-piece ottoman, reduce the loops for the bottom. Or we make an ottoman from two parts, and then connect it with a zipper.
As you can see, even a novice craftsman can make a knitted ottoman with his own hands, crocheted or knitted, almost without difficulty. You just need to approach the task creatively, and then the process will certainly bring a lot of pleasure.
Materials, tools, knitting density
To knit a pair of covers for square poufs measuring 36 x 36 x 36 cm, you will need:
- Cotton-based blended yarn (50% cotton + 50% polyester, with a thread length of 72 m per 50 g):
- for case A 600 grams of sand shade + 400 grams of blue + 200 grams of orange and the same amount of green;
- for case B 600 g light gray + 400 g pink + 200 g yellow and the same amount of blue.
- The same yarn - 200 grams of white for each pouf.
- Crochet hook made of durable plastic No. 10.
- Two sample furniture poufs or 2 foam cube blocks of the required size.
The knitting density of the covers with the main pattern on a 10 x 10 cm piece is 7 pp x 8 pp.