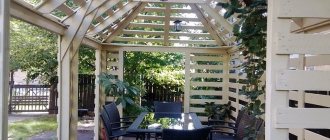
Roman blinds were borrowed from Roman sailors. And in those days and now, the Roman blind is made according to the same principle by which sails were made in those distant times: a piece of fabric that can be raised and lowered.
Moreover, this piece of fabric is completely straight, without any draperies.
Roman blinds are designed to either completely block out sunlight or, on the contrary, let it through, but at the same time reliably protecting you from indiscreet glances.
In the latter case, for Roman blinds you need to select translucent fabrics.
Sewing a simple Roman blind with your own hands is not particularly difficult. You just need to know how to do it.
A Roman blind can be made by purchasing a special curtain rod with a lifting mechanism from a specialized store, which will cost you quite a bit.
face curtains
face curtains
Now let's start decorating the top edge of the curtain. To do this, place the curtain on the table with the front side facing you and mark its final length (height) from the bottom edge of the curtain. We draw a line along its entire width:
DIY roman blinds
DIY Roman blinds
The bend should be 2cm (as in the pattern diagram). Iron by folding these 2 cm onto the wrong side of the curtain:
We place the soft part of the Velcro tape on this bend. We combine the top edge of the curtain with the edge of the tape, stitch first on one side of the tape, then on the other. The tape will cover the raw edge of the curtain because its width is 2.5 cm:
Master Class
At first glance, the design of Roman blinds is quite complex and contains many details, but in fact, anyone can make them.
To make classic Roman blinds, we will need the following materials:
- base fabric for curtains. Choose the right color and structure
- wooden beam that will be used as a cornice (length equal to the width of the curtain, width - 5cm, thickness - 2.5cm)
- finishing curtain tape
- Velcro tape (length equal to the width of the curtain)
- plastic or wooden rods with a diameter of 0.5 cm and a width slightly less than the width of the curtain (glazing beads can be used to attach window glass)
- one metal weighting rod, the same length
- plastic rings for the lifting mechanism with a diameter of about 12mm or ready-made tape with rings for Roman blinds
- screw ring (4-5 pcs. per curtain)
- nylon cord - 3 lengths equal to 2 curtain lengths + 1 curtain width
The most important stage is measuring the window and making the correct calculation for the pattern:
- measuring the window opening
- on both sides add 2.5 cm to the width of the opening for double hemming of the edges
- depending on the height of the window, we calculate the number of cascades when raising the curtains (the optimal distance between the waves is 20-30 cm)
- for the pocket for each guide rod of the cascade, add 2 cm to the height of the window
- if for the guide rods the braid will be sewn on the wrong side, then there is no need to add 2 cm
- In order to stitch the pockets for all guides as evenly and parallelly as possible, the fabric should first be ironed on the wrong side and marked with chalk or tailor’s pins
- To each pocket, on the inside, we sew plastic rings (2 pieces along the edges with an indentation of 5-10 cm and one exactly in the center). The rings on each pocket should be strictly opposite each other
- to the top of the curtain from the wrong side, sew the soft part of the adhesive tape along the entire length
- We attach the cornice beam to the upper, outer part of the window opening with self-tapping screws. Using a stapler or small nails, the hard part of the adhesive tape is nailed to the cornice, on top of the screws. Metal rings are screwed into the lower part of the beam, opposite the rings already sewn to the curtain
- a metal rod (weighting agent) is inserted into the bottom pocket of the curtain, plastic or wood into all others
A nylon cord is tied to the bottom ring and sequentially passed through the entire vertical row, and then brought out through metal rings to the edge of the cornice. The cords from each row of rings are brought out in one direction and then tied together with a knot. The result is a kind of lifting mechanism for your Roman blinds.
Under the lifting mechanism, screw the hook to the wall to fix the curtain in the desired position.
DIY roman blinds
do-it-yourself Roman blinds
This is what the wrong side of the curtain should look like:
How to sew different types of curtains, watch video master classes HERE.
The sewing of the curtain itself is finished. Now you need to insert slats and a weight bar into it and equip it with a lifting mechanism of your own making. And also make a homemade cornice on which our curtain will be attached.
For all this we need glazing beads for the slats, a block for the cornice, and for the weight strip I took a piece of cash:
materials for lifting mechanism
materials for the lifting mechanism
It is necessary to cut 64 cm pieces from glazing beads, cashing and bars. 1 cm less than the width of the curtain.
For this I used a jigsaw:
First, let's make a homemade cornice. To do this, we cover the block with fabric. Hot glue and a stapler will help us with this:
How to sew Roman blinds: sewing subtleties and recommendations
In execution, these curtains are very simple and do not require large expenses, because all you need is an even piece of material, straight and without drapery. Therefore, if you have a similar piece of fabric, an excellent solution would be to use it to sew Roman blinds. Moreover, the material consumption for such a curtain is relatively small, so you can purchase quite expensive textiles.
A classic that never goes out of style
It is necessary to choose the sewing material correctly to sew Roman blinds
In principle, you can build on your preferences and desires. For example, if you want Roman blinds purely for window decoration, then use translucent, weightless fabrics that will not block daylight. And if you want to get rid of the sun's rays, purchase dense materials.
But we want to give a few recommendations:
- Do not take knitwear or other stretchy fabrics under any circumstances. They will quickly sag and lose their shape;
- tulle also does not fit very well with the style of the Roman blind. If you want to take translucent fabric, then it should be quite dense - organza or tulle;
- for the kitchen . After all, any hood cannot completely eliminate steam, smoke and odors;
- Also, do not forget that the material must withstand washing well. You can opt for the classics - cotton or linen, but they require ironing;
- An excellent canvas can be called “black out”. It is impregnated with special mixtures that protect it from fading and do not allow the color of the sun to pass through. But at the same time, your favorite print will work;
- And the last piece of advice is that you shouldn’t take fabric that is too heavy. Otherwise, the structure simply will not withstand it.
Exquisite Beauty
The type of fastening also plays a role in the construction of Roman blind patterns.
There are several options for attaching a Roman blind:
- it can be attached to the outside of the window, that is, outside the opening. This is very convenient if they often come off for airing. In this case, it is necessary to take measurements based on the height of the cornice. And in this case, a little more material is needed for a Roman blind, with a reserve for window slopes - about 5-10 cm;
- There is another option - inside the window opening, but across the entire width of the frame. This method is suitable for complex windows or those that do not open frequently. The measurement is taken purely for the width of the frame, excluding 1-1.5 cm at the edges;
- and the most popular method is directly on each double-glazed window. That is, for each window frame separately, if there are several of them in one window. In this case, measurements should be taken based purely on the size of the window, plus 1-2 cm in width and 10-15 cm in length.
Mounting options
Necessary materials for sewing Roman blinds
In addition to the canvas itself and lining material, you will need the following additional equipment:
- slats with which you will form folds. These can be plastic strips, glazing beads or bamboo sticks. Their width should be approximately from 1 to 1.5 cm, and the total length should be 1.5-2 cm less than the width of the canvas;
- a weight strip that is inserted at the bottom of the curtain for evenness. It fits the width of the canvas, but may be a little narrower, about 1-1.5 cm. It is better to use either wood, a rubber bar, or dense plastic. It is important that it is heavy enough;
- a wooden strip for fastening at the top, up to 5 cm wide and 2 to 3 cm thick. Its length should be strictly equal to the width of the curtain, a maximum of 1 cm. This will be our homemade cornice, which will be attached to the wall or window frame;
- self-tapping screws with hooks at the ends – 3 pcs., for fastening the thread. The wider the curtain, the greater the number of them needed;
- the thread itself. It is better to take a nylon or nylon cord - it is quite strong and also smooth, which will ensure good glide;
- metal or plastic rings for attaching the thread to the fabric itself. Their calculation depends on the number of folds, multiplying everything by 3 (the number of hooks);
- adhesive tape 2.5 cm wide to attach the product to our cornice;
- tape for stitching on the wrong side to hide the slats. By the way, a special tape for tying curtains, which already has loops, is very convenient. Its width should be 1-1.5 cm larger than the slats. But this is optional material, below we will look at why;
- as an auxiliary tool, you may need a stapler, hot glue and decorative nails, as well as fasteners for the cornice itself. Scissors and threads to match the fabric are a given.
By the way, you can purchase a ready-made kit for Roman blinds, which will already contain all the components.
Necessary equipment
If you look at this curtain and understand how it functions, you will be convinced that making it yourself is a simple process. But making a Roman blind begins in any case with a pattern.
Making a Roman blind pattern
- We need a piece of material from the cornice to the window sill, and also take a margin of 2.5 cm for folding the fabric. If the cornice is on the outside, then add another 5-10 centimeters from the window openings.
- The weight at the end of the curtain should stretch it so that it hangs to the window sill, and does not lie on it. Based on these parameters, we make a piece of fabric.
Pattern and calculation of folds
- Next, we calculate the size of the folds on the Roman blind. You can try on a piece of paper - folding the folds to understand what quantity and size you like. In general, for a window height of up to 220 cm there are 7 folds, above that there are already 8. To simplify the process, it does not hurt to use the above table. And in order for the folds to keep their shape well, the fabric needs to be duplicated.
- It is also important to attach the solid strips to the material. The appearance of the entire curtain and the fabric consumption itself will depend on how you complete this stage. If you make a curtain with a lining, then simply leave the desired hole on both sides in the right places.
- If you just use one-sided fabric, sewing the braid at the back, then sew it in the right place with a horizontal stitch.
- As for the pockets for the webs, you can do it simply: stitch the fabric with a hem. It looks more interesting if they are in front. But more often the option with rear design is used. But in this case, it is worth taking into account the width of the strip, multiplying by 2. After all, the fabric is folded in half when sewing, and this will result in additional material consumption, which is worth calculating.
Option with braid
There are several methods for inserting slats
Getting started or sewing Roman blinds
Important: All seams must be ironed in order! Also, before the process itself, the material must be washed and ironed. This way the product will be clean and ready for use, and the material will also be tested for durability by washing.
- First of all, you need to process the side edges by tucking the fabric. Try not to make the seam too wide – up to 1 cm. Don’t forget to iron it well. If the fabric does not fray, then you can simply iron it with adhesive tape, but the seams provide more reliability and durability.
- stitches for your convenience to mark the lines of the slats. Regardless of the method you use to insert them.
- You wrap the material in the upper part of the fabric, but make the stitching a little further from the edge - about 2-2.5 cm. That is, make such an edging from flat fabric.
Pattern for sewing a Roman blind
- At the bottom, it is important to make a pocket at the required height of 7.5 or 10 cm. Use a regular stitch at the required height, tucking the fabric over the seam.
- Now you work with the pockets for the slats. Below we offer an option when you simply sew the fabric from the wrong side to the desired height (in this case, 3.6 cm, which was initially taken into account when measuring the fabric). You can simply sew on finishing tapes. But remember that the seams on the front side will be visible, so work on that side. But in any case, we iron all the folds.
Patterns and calculation of folds in the form of a pocket
Making folds
- Finally, sew part of the adhesive strip onto the top edge.
If you are working with lining material, then it is enough to stitch along the perimeter from the wrong side, leaving a hole at the bottom of the proper height. And then go through the finishing seam around the perimeter. You sew the pockets at the required distance, and then create a hole. Then work according to a similar scheme.
Making a cornice and assembling Roman blinds
- We nail or glue the second part of the adhesive tape to our block on one side with a glue gun .
- screws with hooks into the bottom part through which the thread will pass, which will regulate the length of the curtains.
- But before we pull the cord, we need rings, which we install on the curtain itself and pass the cord through them. solid elements or rings to the curtain using a hand stitch through which the cord is pulled.
- We tie a thread to the bottom ring. It can be secured with the same hot glue or simply burned with a match. But consider what kind of thread you have. Next, the cord must be threaded through all the ring mechanisms, to the top edge of the curtain to the hook on the beam. If it's convenient for you, you can work in the opposite direction. That is, lead the cord through the hooks and lower it through the rings.
Assembly diagram
- Do this manipulation with each line of rings. Please note - the wider the curtain, the more mechanisms are needed. 3 is enough for a narrow curtain, but if you are doing it, for example, for an entire window, then you already need 5 mechanisms.
- Then we bring the cords out along these hooks to one side. Don't forget to twist or braid the laces, or simply tie something at the top and bottom to keep them together.
Important: Check that all threads have the same tension. Otherwise, the curtain may become slightly skewed.
Don't forget to check the tension is even.
- After we have connected all these elements, we attach the Roman blind to the curtain rod using Velcro. By pulling the lace, parts of the fabric rise one by one, forming folds that gather at the top of the curtain.
- All that remains is to insert our slats and weighting material, and also secure the beam in the required place.
Important: Think about what you will fasten the thread to after lifting the curtains. Otherwise they will simply open up again. Therefore, it won’t hurt in the wall or on the windowsill; you can attach another self-tapping screw with a hook behind the armrest. In this case, it is better to cut the thread after “trying on” the curtain. And don't forget to secure a bead or a good securing knot to the hook.
Linen flounces will look interesting.
Finally, spray the curtain a little and open and roll it several times. This will help the material “sit” well in its place.
You can decorate as you wish
After all the manipulations have been completed, the Roman blinds are ready! As you can see, making them is very simple. Moreover, each time you can perform them according to a slightly different scheme, for example, according to the method of attaching slats, and you will receive a completely different creation. Good luck and creative success!
homemade cornice
homemade cornice
Hot glue the hard part of the Velcro tape to the bottom edge of the fabric-covered block. To be safe, you can go around in several places with a stapler:
I attached fasteners to the back of our block so that the block could be hung on the wall. But this method is only suitable if your curtain will hang outside the window opening. To fasten the bar inside the window opening, it is better to use corners.
If there are men in the house, they will figure out how to do this:
That's it, our homemade cornice is ready. And we will attach our curtain to it with Velcro tape:
Now we insert the weight strip and slats into the curtain pockets:
This is what the curtain looks like from the inside out now:
A little bit of history
As history tells us, we got a lot of useful things from ancient Rome: they were the first to use concrete, they invented plumbing, they created thermal baths - the prototype of modern baths. Well, if design historians are not mistaken, they also invented Roman blinds. However, some sources claim that the Romans used such curtains on ancient ships. And this version may be close to the truth: note how similar the principle by which this curtain is made is to the principle by which sails were made on ancient ships.
Although, it is quite possible that the authors of this interesting way of decorating a window opening were not Romans at all. However, this rather simple look, which, moreover, does not require spending a lot of fabric, is very popular both with those who decorate the interior and with those who then use the interior. And for many years now, these elegant but strict options can be seen in our homes.
Roman blinds will become a stylish design item
DIY roman blinds
DIY Roman blinds
from the face:
Now we place the curtain on the table face down and sew plastic rings in three rows to the pockets for the slats. The outer rows should be located at a distance of 2.5 cm from the side edges of the curtain:
Features of Roman blinds and description
People have always valued well-lit spaces. However, the sun's rays interfere with daytime rest and sometimes even work.
Curtains with a convenient design that lifts the fabric up appeared in Ancient Rome.
Today, this type of curtain is used not only for convenience, but also to decorate the room.
DIY roman blinds
DIY roman blinds
Layout of slats and rings on a Roman blind:
We place the curtain rod on the table and attach the curtain to it:
Determining the required amount of fabric
Correct calculation of the length and width of the material for the future product is the key to a good result.
Window measurement and approximate calculation of fabric for Roman blinds
Before sewing a Roman blind with your own hands, you should determine the amount of fabric so that there is not a lot of excess left, but there is enough for a full-fledged product. It is recommended to use the following algorithm when taking measurements:
- determine the width and height of the window opening;
- add another five centimeters on all sides to the resulting measurements.
For example, if the window opening is 50 cm wide and 120 cm long, you will need to purchase fabric with a width of 60 cm and a length of 130 cm.
In addition, it is necessary to take into account the method of attaching the curtain itself (you can add another ten centimeters to the required length). Today, there are different options for fastening and decorating Roman blinds. Such curtains can be attached in the following ways:
- directly inside the window opening;
- standard installation option on the wall above the window opening;
- on the window frame.
If the choice falls on one of the first two options, then you can build a cornice at home, or purchase a ready-made factory one.
Fabric calculation table for Roman blinds
The decor of Roman curtains is based on the taste and imagination of the needlewoman.
On a note! Most often, decoration is done using ropes or ribbons.
how to sew roman blinds
how to sew roman blinds
We turn the curtain along with the curtain rod with the wrong side facing us and on the curtain rod we mark the location of the iron lugs, which we will screw into the bar from its lower side to attach the curtain lifting mechanism:
For the ears, I bought these hooks at the store and bent them into rings with pliers:
There should be 4 lugs screwed in: three opposite the rings and one from the edge of the block through which you will remove the lifting bolt. I chose the right edge of the curtain.
Bar with screwed ears:
Here is a diagram for clarity, but there are only 3 ears on it:
According to this diagram, we will make a lifting mechanism for our curtains. To do this, take 3 pieces of cord. Each segment should be equal to: two heights of the curtain plus its width.
I took the cord I had. You can buy in the store in any other color:
Types of mechanisms
An important design feature of Roman curtains is the various options for their control. That is why the mechanisms that do the main work also differ. Main types of mechanisms:
- Cordova. The main feature is that this mechanism was first used by the Romans, so it can rightfully be considered the most reliable, having passed the test of centuries. The work is carried out by a system of cords and rollers, which some users create themselves. Disadvantage: this system will not support more than 4 kg. The number of eyelets is predetermined by the manufacturer.
- Rotary with chain. There are 2 main elements in this system - a chain through which the curtains move, as well as a special block. In fact, this system differs from the previous one only in that instead of cords, a chain is installed here, and this significantly increases the durability of the product. The rotary chain mechanism can withstand loads of up to 7 kg.
- Motorized. The modern principle of automation and product processing is used here, which is why the motorized control mechanism is most often chosen by manufacturers of Roman curtains. There are practically no disadvantages, with the exception of the complex design, which is quite problematic to repair on your own. An important advantage is the possibility of remote control.
how to sew a roman blind
We thread the cords to the top row of rings. You need to repeat this with all the cords. Then we bring the cords through the ears to one side of the curtain. In our curtain, we draw it to the right (from the inside to the left):
When all the cords are brought out through the last eyelet, we secure them together with a knot:
Then we continue to fasten our cords together, weaving them into a braid of the length we need:
I attached a ring from a round cornice to the end of our braid:
That's it, the curtain is ready:
ready-made roman blind
ready-made Roman blind
Scheme of the finished curtain:
For clarity, I hung it on the wall, just like I sewed for a lesson:
DIY roman blinds
I'll tell you about one more small nuance.
In order to fasten the curtain in a raised state, you need to attach to the wall near the window in a place convenient for you, a hook for attaching the cord, on which it will be wound in the position when the curtain is raised:
But since I didn’t have such a hook, I simply screwed a screw into the wall:
OK it's all over Now. Now you know how to sew a Roman blind with your own hands.
And this Roman curtain is sewn using the same technology, only a single piece of fabric is taken and the bottom of the curtain is decorated with a figured strip:
How to sew Roman blinds on a purchased cornice, see HERE.
Do you want to make roller blinds from wallpaper? Like these ones:
Then check out THIS ARTICLE.
If you understand this master class, then you can easily sew a type of Roman blind - London blinds, which have the same lifting mechanism:
The principle of sewing such curtains, see HERE
I would like to draw your attention to some of the shortcomings that can occur when sewing Roman blinds.
Here is a photo of a curtain made by one of the visitors to my site for this master class:
It turned out to be a nice curtain, and the main goal was achieved - darkening the room and there was no need to sew a curtain.
However, when you lift the curtains, you get these uneven folds:
This may occur due to the fact that the tension of the threads in the lifting mechanism is different. Or maybe the curtain just behaved this way when it was first raised. After sewing, you can hang the curtain, spray it with a little water from a spray bottle, lift it, lay the folds evenly and let it dry in this state. This way the folds will take the desired shape.
And another tip, do not attach the cord of the curtain lifting mechanism to the battery, as was done in this embodiment:
It’s not beautiful or convenient, especially since this is not just a master class. You have to deal with this inconvenience every day in your home.
Sewing supply stores sell very nice and inexpensive hooks that are used for hooks. The price is reasonable - 30-50 rubles. And screwing it to the wall takes five minutes.
This is the hook I used to attach the cord of a Roman blind (color: silver, cost 40 rubles):
Moreover, you can just make a few turns around it and not even tie knots, as shown in the photo with the battery. The curtain holds up perfectly and the cord does not unwind, despite the fact that it is heavy, double and made of curtain fabric on both sides:
ROMAN BLINDS AND TIPS FOR ITS MANUFACTURING OF SITE VISITORS WHO TOOK PLACE OF THIS MASTER CLASS:
Olga Sokolanski:
Today (03/29/14) I received an email from a visitor to my website:
Olga Sokolanski Here's what she writes:
"Good afternoon.
Thank you for the master class..
The windows of my apartment face west and in the summer the sun shines strongly and ordinary curtains are not suitable, and buying a good branded Roman blind is expensive for me.
I sewed a double curtain 140cm wide from cotton fabric that I found at home,
To reduce the weight of the curtain (due to the fact that the fabric is double and the curtain is wide), instead of glazing beads, I bought light and durable bamboo sticks, such sticks are sold in a flower shop:
In order for the wide curtain to rise well and fit neatly into the folds, I increased the number of lifting cords to five.
The curtain fits directly onto the cornice and to tighten it I sewed an additional drawstring and inserted a stick.
I calculated the number of folds and the width between them in my own way, guided by the length of the finished curtain and the number of sticks... according to this calculation: from the lower end of the curtain a distance equal to half the width of the fold, and then set aside the full width of the fold.
Thanks to your master class, I finally managed to sew a Roman blind!!! Hurray!! and now in the summer my curtain will reliably protect the room from the sun!
I wish you great creative success."
I thought it wouldn’t be amiss to post Olga’s ideas in this article. Maybe they will be useful to someone.
And here is the curtain sewn by Olga:
Vorobyova Natalya:
Hello, Galina!
Thank you again for the master class! As promised, I am sending photos with a short description.
I really love designing various interesting things, so the need arose to sew curtains for the kitchen. The main difficulty was that the window sill is quite spacious and there are some household appliances on it. Therefore, for convenience, I needed some special option rather than simple curtains, and following your master class, I got such a functional and comfortable curtain.
I would like to note some points:
1. A huge question arises in terms of materials for the weighting material and strips. I used metal thresholds for the weighting agent (sold in hardware stores, they are used to join linoleum, I took 30mm wide). And as strips I used a cable channel, or rather its top cover, size 15 mm.
2. For better glide, instead of cords, a 4mm thick fishing line was used. Thanks to this, the mechanism moves like clockwork through the rings.
3. To thread the plastic strips through, on the reverse side I sewed a satin ribbon reinforced with non-woven fabric to match the color of the reverse side and stitched soutache, onto which I hooked the rings.
4. To also adjust the height of the curtain, I braided several rings along the cord, the cord itself is attached to a lifting line.
Everyone who sees it is simply delighted!
I hope that my advice will help someone.
And today, November 23, 2014, another visitor to my site, Yulia Belyavskaya, sent me a photo of her work, which she completed in this master class. In my opinion, everything turned out very neatly and beautifully, in the spirit of minimalism. Such curtains emphasize the refined nature of simplicity and conciseness in the interior:
This is what Julia wrote to me in a letter with these photos:
Galina, I want to express my gratitude to you for the master class on sewing Roman blinds. THANK YOU!!! Everything is written out very clearly. I’ve been planning to sew it for a long time, probably about a year, but finally the Roman blind flaunts on my window in the kitchen :) I’m on the 4th floor, so the curtain is needed not to hide from prying eyes, but, as I wanted, translucent, for beauty. I sewed it single (since it is translucent), the slats were bamboo sticks from a flower shop (I took the advice of one of your students), I sewed the rings only in two rows (since the curtain is thin and narrow and I thought that this would be enough), My husband nailed the cornice bars directly to the window; I didn’t cover it, but I nailed Velcro tape directly to this cornice with tiny nails. Everything else is exactly according to your instructions. Thank you for your master class! Sincerely, Julia.
And another visitor to my site, Elena Shamshurina, sent me a photo of a very nice Roman blind she made.
Hello Galina! My name is Elena. I took advantage of your master class and it’s very beautiful, I think I managed to sew a curtain according to your recommendations…. Thank you very much!!!
Advantages and disadvantages of Roman blinds
The mere fact that over their centuries-old history, Roman blinds not only have not undergone significant changes in design, but have not lost their popularity at all, eloquently demonstrates that they have a number of undeniable advantages. Among them:
- Versatility. Correctly selected type, material and color design allow you to use Roman blinds in almost any interior and in rooms for a wide variety of purposes.
- Practicality. The curtain rods of such curtains can be fixed in the most convenient place: above the window opening, directly on the frame, or even on a separate sash. In this case, the configuration of the window itself is not decisive.
- The possibility of non-standard fastening, in which the curtains will not open from bottom to top, but vice versa.
- Compatibility. When implementing complex design ideas, Roman blinds are perfectly complemented by light tulle, thick curtains and original lambrequins.
- Compactness. Roman blinds on windows require a minimum amount of space, which allows you to decorate even the smallest rooms with them.
- Easy to use and maintain.
- Wide selection of materials for manufacturing, textures and colors.
Despite a significant number of positive characteristics, Roman blinds also have disadvantages:
- In the case where the curtains are not attached to the window sashes, but above it or directly on the frame, in order to look out into the street or ventilate the room, they will need to be lifted, and sometimes completely opened.
- Since adjusting the height of Roman blinds involves a lifting mechanism with a system of laces or chains, to give them the desired position, you will have to spend a little more time than with conventional curtains.
- In rare cases, when lifting the blade, not all assemblies immediately take the required position, which is why they have to be adjusted manually.