Inconspicuous, hidden behind what will be placed on shelves and in niches for hangers, the back wall of the cabinet plays an important role. Many people believe that its main function is to protect everything stored from dust, which will accumulate in the cracks when the body of the three-door or two-door cabinet itself is not tightly connected to the wall. This is why they insist on installing back walls on built-in wardrobes and walk-in closets.
Why do you need a back wall in cabinets?
In fact, the main function of the back wall is to maintain the correct geometry of the cabinet body. With its help, the diagonals of the assembled box are “caught” and fixed in this position for the entire period of operation of the furniture.
In fact, the back wall of the cabinet (also called the back) serves as additional rigidity, which prevents the entire structure from warping and loosening. After all, the simplest cabinet is an extremely uneven alternation of niches of different heights and lengths. The load on the shelves is also uneven: some store light items, while others store bulky and heavy items.
A cabinet without a back wall must be firmly attached to the wall (as is done with all built-in and partially built-in furniture). Otherwise, it will very soon lose its original shape. And this will also affect the facade: swing doors will begin to sag and warp along with the body, and sliding doors will have difficulty moving along the guides, falling out and sliding to one side.
Filling the wardrobe
The filling of a sliding wardrobe can be varied and mainly depends on the financial capabilities of the customer. These include simple hangers, shelves made of chipboard, various elements of mesh filling or more expensive elements - pantographs, pull-out shelves for shoes, linen, backlit bars, including smart lighting options.
Filling the wardrobe
The filling of a sliding wardrobe is what is inside the sliding wardrobe. The task of filling a closet is to ensure optimal storage of numerous things, linen, outerwear, read the article.
What is the best material to make the back wall of a cabinet from?
The most common material from which the back walls of cabinet furniture are made is fiberboard. Its advantages are obvious:
- Due to the fibrous structure, the fiberboard board holds its shape well under tensile and tensile loads.
- Thin enough to maximize the functional depth of the furniture. In the manufacture of cabinet back walls, fiberboard with a thickness of 3 or 4 mm is used, rarely - 5 mm.
- It has an affordable price (in fact, fiberboard itself is the cheapest material possible for use as a back wall).
- Universal. In production, they use non-laminated fiberboard sheets of a standard grayish-brown color. So laminated, painted white, black or lined with film to look like light or dark wood (beech, cherry, walnut).
- The dimensions of the fiberboard sheet (width 1220-1770 mm with length 2440-3050 mm) allow the production of solid back walls. However, manufacturers prefer to lay the backs of cabinets in sections - this simplifies the assembly of furniture and transportation of parts.
Other materials are also used:
- The back wall of the cabinet made of laminated chipboard is mandatory for narrow-depth and tall bookcases. Through it, the rack is rigidly attached to the wall to prevent it from tipping over. It is also recommended to make laminated chipboard backs for cabinets in children's rooms with subsequent fastening to the wall. This will protect the child from possible injury. During active play, unstable, light furniture can tip over and crush the baby (especially if the structure has drawers).
- Backs for cabinets are also made from plywood, OSB, hardboard, HDF and other sheet materials. In terms of rigidity characteristics with a comparable thickness (6-8 mm), they are not inferior to fiberboard, but are more expensive.
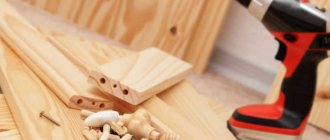
How to do it?
Material cutting
The main advantage of this material is its easy workability. Smooth sheets are easy to saw, sand, and join. There are a number of recommendations that will allow you to get a much better result:
- Before cutting with household saws, you can stick thick masking tape or screw thin plywood onto the cutting line. The saw teeth are capable of chipping wood fibers, and the cut will be “ragged.” If the fibers are pressed, the cut will be clear, the fibers will not chip;
- Marking lines should be as thin as possible. You can use a marking cord or a finely sharpened pencil. The cut is made so that the line remains visible from the side of the finished part;
- If you have a ready-made project, it is better to cut the plywood on a sawing machine in a specialized company. When designing, you can think about how the parts will be cut out - this will save the usable area of the sheets, and will also allow you to avoid troubles when purchasing, when you have to buy a whole sheet for the sake of a small shelf;
- Tenon or miter joints can be sawed either manually or using CNC machines. Inquire about the presence of enterprises with such equipment; cutting on such a machine will improve the accuracy of the part and make any curved cuts;
- the ends after cutting can be sanded, rounding the edges, or processed with a manual milling machine if desired;
- in places of future fasteners on thick parts, you can make “plugs” from wood or anchor compounds. A place in the end is drilled out, a soft dowel lubricated with glue is hammered in, or liquid polyurethane anchor compound is poured. The hole should not exceed 1/3 of the thickness of the plywood. This technique will increase the strength of the perpendicular joint; it will be possible to put a larger load on the shelf.
Assembly
Having a detailed drawing will make this stage much easier - you can only keep simple dimensions and parameters in your head .
Before assembly, you should lay out the parts on the floor and sign them with self-adhesive paper and a felt-tip pen.
As a rule, assembly begins from the main perimeter - load-bearing walls, ceiling and bottom. If there are several walls, be sure to assemble them at once. The help of a partner, clamps, and a jig for adding holes will help make assembly easier.
After assembling the perimeter, be sure to check the perpendicularity of the surfaces; if it is rectangular, you can check the diagonals. We secure it with temporary bevels on the back side.
We “clog” the structure with shelves and nests for cupboards. After this, we attach the back wall - it will give shear rigidity.
We put the cabinet in place, assemble the cabinets, shelves, hang the fronts and other planned fittings - mirrors, hooks, handles, legs, plugs.
Important . The cabinet should stand level, not swing on its legs, and the doors should open and close easily.
Finishing
To finish the cabinet, you will have to disassemble it again - remove drawers, fronts, hooks, mirrors and shelves.
Surfaces are sanded manually with sandpaper or sanding machines. It is better to do this in several stages, reducing the abrasive grain by 50%: No. 180 - No. 240 - No. 320. The movements of the sandpaper when sanding by hand should follow the grain of the wood - this way, scratches from accidentally trapped grains of sand and coarse abrasive are less noticeable.
Plywood with thick face veneer can be fired or wire brushed. This will add a vintage feel, making the coating “older” and more prominent. This treatment is suitable for finishing hardwood veneer - oak, ash, hornbeam, birch.
The smooth surface of plywood can be coated with various coloring compounds:
- oil-wax .
Gives a natural look and withstands tinting. Not suitable for saturated colors, used in designs that preserve the appearance of wood. The oil impregnates the top layer of wood, protects it from moisture, but the wood itself will absorb mechanical loads (scratches, abrasions). It is practically odorless and can be used when working “on the balcony” or in an apartment. Easy to apply and rub in with a rag. It is important to know that it is better to burn rags after oil, otherwise they can spontaneously ignite at any moment; - tinting + varnish . Suitable for “glazing” wood while maintaining its natural appearance. It is better to use tinting based on solvents with a high dry residue - nitrobes. They give a uniform, rich color, do not raise the pile, and are easy to apply. Minus - pungent odor during application, if there is no workshop;
- opaque enamels for wood .
They create a protective film that completely covers the grain of the wood. There are different types of materials that differ in properties and application technology. Oil-based pentaphthalic paints are popular, but they are short-lived. For furniture, it is better to use nitro enamels or acrylic varnishes - they are absorbed into the upper layers of wood and do not “snap off” over time. Impregnation will help reduce paint consumption - impregnation of plywood with inexpensive compatible bases (primer, drying oil, oily solvents); - combined options . Using masking tape, you can finish unpresentable ends with opaque paint, and treat beautiful veneer surfaces, for example, with oil or clear varnish. The “game” of imagination when using different colors adds uniqueness to the product.
How to attach the back wall of a cabinet
The design of the furniture and the material of manufacture largely determines the method of attaching the backdrop. If you don’t wonder how you can decorate the back wall of a cabinet, then you can distinguish three radically different ways.
Overlap fastening
The most common way to attach the backdrop is to overlap the frame on the back of the cabinet. At the same time, the dimensions of the rear wall are reduced by 2 mm relative to the body so that the edges do not protrude and become “frizzed” (if we are talking about fiberboard).
Important nuance! It is strictly not recommended to nail the back wall of chipboard furniture. The structure of particle board is such that a nail is not able to provide proper adhesion. If you move the cabinet (because of this, its body will move a little) and the back wall on nails may simply move away from the body.
Therefore, on cabinets made of chipboard, the fiberboard backing is screwed onto self-tapping screws (screws) 3x16, 3.5x16 or 4x16. The recommended fastening step is 10-15 cm, starting from the corners of the body. For furniture made of plywood and solid wood, you can use nails: the fibrous structure of the materials “holds” such fasteners well.
Recommendations for fastening the back wall of a fiberboard cabinet:
- Life hack for furniture made of chipboard: you can fix only the key “points” on the back wall with self-tapping screws to maintain the rigidity of the cabinet. We are talking about corners, the center of partitions and stationary shelves. In all other places, fiberboard can be secured with small nails.
- It is more convenient to “catch” the diagonals to properly secure the backdrop when the cabinet is lying down. In this position, you can actually fix the geometry of the furniture to provide additional rigidity.
- A solid backdrop works better. However, the dimensions of the wardrobe, especially if it is a compartment, can be quite large. In this case, the rear walls are divided and attached separately for each section. Two sheets of fiberboard are joined on one internal partition; it is important to carefully screw in the screws so that they do not “crawl out” beyond the thickness of the partition. Use washers to expand the screw head area and increase adhesion. Or special ties for the rear wall - they make installation much easier.
- Some manufacturers of cabinet furniture can find a version of a prefabricated back wall made of fiberboard with a vertical seam hidden by a special profile. The connector is a narrow plastic strip with two grooves, available for sale.
Groove mount
This fastening method is used to install the back wall in wall kitchen cabinets. This is due to the design of the adjustable canopies: with a recessed rear wall, the cabinet is better “pressed” to the wall when hung and is easier to adjust.
You can also find the installation of fiberboard in a groove on free-standing furniture. For example, on compact wall-slides, buffets, sideboards, which are supposed to be placed in the center of the wall in the room. For reasons of aesthetics, the back wall is “hidden” inside the cabinet so that its edge is not visible from the sides.
Fastening the rear wall into the groove is more labor-intensive than other methods and requires preliminary preparation:
- At a depth of about 10 mm, a groove 5 mm wide and 5 mm deep is milled along the sides of the cabinet, its roof and bottom. In this case, the internal design must take into account the peculiarity of installing the backdrop: all inset shelves (if any) are recessed before it.
- At the stage of assembling the cabinet, when connecting the sides and bottom, the fiberboard backing slides into the grooves and is finally fixed by the top roof. It happens that the edges of the back wall have to be turned a little (cut with a knife) if the width of the groove is somewhat narrow.
In the form of an internal insert
The main disadvantage of screwing the back wall overlapping onto the cabinet with self-tapping screws is the inconvenience. Often, the assembly of large-sized furniture takes place in cramped and narrow spaces; it is simply impossible to unfold the cabinet to catch the notorious diagonals. And when assembling furniture in a “standing” position, it is quite labor-intensive, and an unevenly padded back wall will lead to deformation of the cabinet over time.
There is only one way out - to use inset rear walls. In this case, a material that is more rigid than fiberboard should be used, because rigidity will be ensured not due to the action of “tension”, but of “compression”.
Therefore, laminated chipboard is used as inset back walls. If you can use a thickness of 16 mm, then fastening does not cause any difficulties: the backdrop is attached in the same way as the stiffeners, on confirmats. But the cabinet itself turns out to be expensive and heavy.
Some manufacturers (for example, Mr.Doors) use an 8 mm thick laminated board as the backing of the wall inserts. It literally “slides” into already formed niches - sections of shelves. The support for large openings is provided by special fasteners that will not allow the backdrop to fall beyond the side walls.
Also, for large openings, it is recommended to use a seal that frames the perimeter of the backdrop insert.
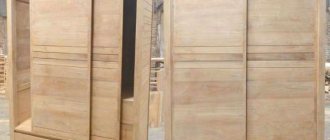
Wardrobe body
The body of a sliding wardrobe , to put it in a language understandable to any layman, consists of a roof, sides, partitions, bottom, shelves, base, and rear wall.
We can talk about a full-fledged case if we have a sliding wardrobe, which is called a cabinet, but if it is built-in, then the bottom may be completely absent and the bottom rail will be attached directly to the floor, and the side walls will be just narrow panels made of chipboard 100 mm wide.
In short, chipboard is glued crushed wood coated or laminated with a protective decorative coating in different colors.
Sometimes, the average person cannot even distinguish chipboard from furniture made from furniture panels, it is so similar to wood furniture.
The vast majority of cabinet furniture in Russia is made from chipboard. In the USA, chipboard is not favored, and if you like American TV series, then you are unlikely to see furniture made from chipboard in your home.
Sliding wardrobes made from solid wood or from panels covered with veneer of expensive wood species are priced in the expensive segment of furniture; for such sliding wardrobes there is even a special profile covered with veneer or a textured PVC film imitating wood, read more about profiles for Holz sliding doors.
Holz profile for the manufacture of compartment doors and interior partitions
Holz and Soft-L profiles for the manufacture of compartment doors and interior partitions. Radius and straight compartment doors, interior partitions, we study the profile.
Cabinet back wall decor
A classic technique for decorating the back wall of sideboards and glass display cases is the use of a mirror insert. Due to the reflective effect, the internal space of the shelves acquires a fascinating depth and allows for a more aesthetically pleasing placement of decor and items of pride of the owners for everyone to see.
The mirror can be attached to the provided strips in various ways: using double-sided tape, special clamps, or with through fastening. Mirrors framed with a narrow frame also look beautiful.
By analogy with kitchen aprons, you can decorate the back wall of the cabinet using frosted glass with diffuse lighting. Also in similar options, glass with photo printing, acrylate and translucent plastic are used.
Wide decorative possibilities are provided by MDF panels with various embossing and patterns, under PVC film and painted with enamel.
You can decorate the back wall of the cabinet with any sheet material and decor panels. To emphasize the sophistication and originality of the chosen solution, use contrasting combinations and do not forget about additional lighting: the lighting built into the open niches will benefit from the reliefs and make any design expressive.
When choosing a wardrobe there is no point in paying attention to which back wall is installed. In ready-made cabinet options, a standard solution is offered - overlapped fiberboard. But when ordering a built-in wardrobe, you can discuss the optimal solution.
How do the elements of the wardrobe body connect?
The elements of the sliding wardrobe body are connected to each other using mounting angles (the most common option), confirmations, different types of ties, it all depends on the technical equipment of the manufacturer, although not always.
| Rice. 5. The sliding wardrobe is assembled on mounting angles |
In most cases, preference is given to hidden fastening of parts, that is, on the front parts of the case you will not see what connecting fittings were used.
| Rice. 6. Assembling a sliding wardrobe on confirmations |
How to choose the right plywood for the job
Plywood is a natural material, made up of several layers of wood and impregnated with glue, used to create furniture items. Some manufacturers suggest considering sheets that are resistant to moisture and water. Any tree is deformed by these two factors; for those types of plywood that are resistant to them, a special type of glue is used.
Plywood consists of sheets of natural wood impregnated with glue.
Slightly soluble glue can be of different brands and this becomes a determining factor in the types of plywood. There are 3 of them: FC, FBS and FSF. The first type is best suited for working with furniture and creating interior parts. The remaining two cannot be used in these cases; they are used in automobile, aircraft and shipbuilding, as well as in construction.
The parameters used in working on the cabinet, sheets are selected with different thicknesses depending on the location and purpose. The case will be durable if you use a plywood sheet equal to 18 mm. A small width of up to 12 mm is used for the facade.
If a wall cabinet is provided, then it is better to use 6 mm plywood, no more. It is important to consider different timber widths to balance the size and weight of the structure.
For wall cabinets, thinner sheets are used.