A microwave oven is a necessary item in the kitchen, with which you can quickly heat up food at any time. Over many years of use, the microwave has become a common appliance in the home, but there is not always free space in the kitchen to install it. To save space, the device is installed using special fasteners, one of which is a microwave shelf on the wall. More information about making such a shelf with your own hands will be discussed in this article.
Microwave shelf on the wall
“Hide” under the countertop
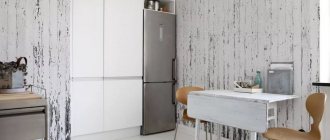
To prevent the microwave oven from taking up useful space on the work surfaces, it can be moved down and placed under the countertop. To do this, you need to replace one of the lower cabinets of the kitchen unit with a niche for a microwave.
It is best to initially include such a change in the project - then it will harmoniously fit into the overall design and will look neat and stylish. But you can also refurbish an existing space.
This placement also has its disadvantages. The microwave is located very low, which makes it difficult to use, especially for tall people. Be sure to think carefully about this option if there are small children in the house. Given their omnipresence and curiosity, this can be dangerous. In addition, frequent leaks and stains on the facade of the device cannot be avoided; it is necessary to more carefully monitor its appearance.
Classic: put on the countertop
This is the most popular and logical option - placing the microwave on the countertop.
The advantages of such placement:
- She is always “at hand”;
- Located at a convenient height for use;
- Nearby is a work surface where you can place the dish before cooking and calmly arrange it or, conversely, place it after heat treatment;
- Convenient to clean;
- The entire case is freely accessible - you can easily track and fix the slightest problems;
- It can be moved to another location without any problems at any time.
There is essentially one minus, but a significant one. If you do not have a spacious kitchen and a large countertop, the microwave will “steal” a fairly large area of the already insufficient work surface. Therefore, this option is optimal only for spacious rooms.
Don’t forget about the “half-meter rule”: you cannot place this household appliance no closer than 50 cm from the sink and stove.
Necessary tools for installing the microwave on the bracket
To hang this kind of shelf on the wall, you don’t need many special tools. For clay walls, a hammer and a screwdriver are sufficient. Concrete walls require the use of a more powerful tool - an electric drill or a hammer drill.
In the case of frame walls, it all depends on the material from which the supports are installed. You will need a drill and a drill bit for metal or wood.
For marking, you need any writing object; it is most convenient to use a simple pencil - it writes clearly on most surfaces and is easy to wipe off if something happens. A measuring tape and a building level will be useful for correctly marking.
For dowels you will need a hammer.
Stylish: built into the kitchen set
This is a fashionable, beautiful and convenient way to place a microwave. Naturally, you should dwell on it even before you order a kitchen set. Decide in advance at what height and next to what kitchen equipment you would like the microwave to be.
And tell the designer your wishes. He, in turn, can offer you standard options or develop an individual project to suit your requirements.
It is advisable to decide in advance on the model of the household appliance. Modern microwave ovens can vary significantly in size.
When placing, keep in mind: ideally, the countertop should be located no further than arm’s length from the microwave. And from the point of view of classic placement, it is considered most effective to install it next to the refrigerator.
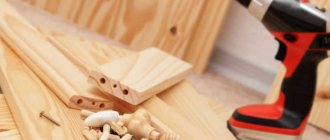
DIY microwave bracket on the wall
This part of the article is devoted to how to make a microwave bracket for the wall with your own hands.
The easiest way to do this is with a jigsaw. The edges are rounded by marking the corner with a plate, giving a suitable shape. Using the resulting marking, a corner is cut out with a jigsaw. Sand the corners with sandpaper. Next comes the preparation of the bars to serve as the angle of support. A similar radius is made on the block using a plate in order to subsequently saw it. After preparation, begin to assemble the structure.
This is done using hexagon anchor screws. Drill holes in the side where the screws will be screwed in. Insert the screws and screw the self-tapping screws into them using a hex key.
It is important here that the screws fit into the end that is not covered with laminate. The corner fasteners are also screwed in. Corner fasteners must be secured on both sides. Next is cutting out the screed. This will bring the two corner support bars together.
First mark it according to the size obtained from the distance between the corner strips. Subsequently, the plank is sawn and inserted. Afterwards, all ends can be covered with trim tape to improve the appearance of the product. Attaches both to dowels and to other types of fasteners to the wall.
Using corner space
This method helps save precious kitchen space. The deep angle can rarely be used effectively. Installing a microwave oven there is one of the most acceptable options for filling it.
Another advantage is that the device faces the kitchen and is easily accessible for use.
However, it must be remembered that this does not completely fill the corner - voids will remain in any case.
Don't forget to provide a separate outlet for a microwave oven in the corner.
We put it on the shelf
This method saves space on the countertop and is a cheaper alternative to placing the microwave at the top of the kitchen unit.
It is best to install a shelf in the work area, because the device is often used for different stages of cooking. However, when choosing a place, you need to remember the safety rules.
Ventilation ducts must not be blocked. Under no circumstances should you hang a shelf on drywall. If we are talking about a completely plasterboard wall, you will have to forget about this option.
If the brick or concrete surface is only leveled with plasterboard, you need to select dowels so long that most of them fit into the base. You can install the shelf yourself or invite a specialist.
Now “two-story” shelves are becoming increasingly popular - for a microwave and an electric kettle at the same time. This frees up even more space on the countertop.
How to hang a microwave on the wall: procedure
The microwave oven is attached to the wall in two ways. It is fixed directly on the wall surface or built into a kitchen cabinet, in which it will also take up little space and can function normally.
The installation procedure begins with the selection of the element to which the fastening will be made. Most often it looks like two metal or plastic supporting parts parallel to each other, on which the fixation takes place.
It is possible to mount the supports on a beam for stronger mounting and support of a microwave oven with a large weight.
To select the type of fastening, you should compare the weight of the microwave with the technical parameters of the fastener on which it is installed.
To carry out installation work, you will need a drill or hammer drill, which will be used to drill holes for dowels. But, before that, it is recommended to take measurements of the product itself and the wall on which it will be installed. Draw a preliminary installation location with a pencil in order to attach the microwave evenly and efficiently.
Install the dowel into the base that is drilled for it.
When attaching a plastic dowel, use your hands; if it is metal, you will need special equipment in the form of a dowel gun. Next, place the part in the form of a microwave bracket on the wall and hammer it in with nails. Check the connection strength.
If you are concerned that these fasteners will not be able to support the weight of the microwave oven, it is better to replace the nails using anchor bolts.
If you plan to install a microwave oven in the design of a kitchen cabinet, you will need to purchase a special frame that can secure it in the cabinet.
To save on buying a frame, make it yourself using metal corners welded or bolted together. Paint the structure to match the color of the cabinet. Fix it to the wall surface using dowels or anchor bolts, as in the first option.
1. The first option for building a microwave shelf on the wall involves the use of purchased materials in the form of a furniture panel of the desired color and size.
For example, with a standard cabinet width of 60 cm, the bottom shelf is equipped on three sides. To provide additional space on which the microwave oven will be installed. Among the disadvantages of this type of construction, the following should be noted:
2. The second option is to install the microwave oven on a TV shelf. Their acquisition will not be difficult, and installation work is carried out very quickly.
3. The most optimal option for mounting a microwave oven is the installation and preliminary construction of a free-standing shelf. Among the advantages of this type of installation we highlight:
A standard microwave oven has a size of 50x41x30, we will focus on these numbers. If your microwave is larger or smaller, you may need to adjust the shelf size.
In the areas indicating the horizontal plane, mark the points at which the flange connectors will be attached: 3x3 cm from each corner. For the middle shelf, holes are drilled with a diameter of 2.2 cm. A rod will be installed in this hole.
But first you need to attach flanges to it. To do this, use self-tapping screws. To fix the rod on the surface of the panel, use the clamping screw, which should be turned towards the wall to avoid damaging the appearance of the shelf.
To obtain a shelf of the correct shape, you need to cut off four equal sections from the main rod, measuring from 60 to 70 cm. To assemble the shelf, just install the rods in the shield and connect all the other parts.
Installing brackets
This is a more modern and laconic option than a shelf for placing a microwave oven on the wall. The bracket is safe if attached to a wall made of concrete or brick. Maximum reliability if secured with a support beam.
How to install the bracket yourself:
- Carefully make markings in the selected location (most often, the work area);
- Using a hammer drill we make the necessary holes;
- We drive the selected dowels into them;
- We attach the bracket and fix it with screws.
At the end of the work, it is necessary to check the strength and evenness of the structure. After this, you can install the household appliance.
The advantages of this option are the same as when using a shelf.
Making a shelf for a microwave oven
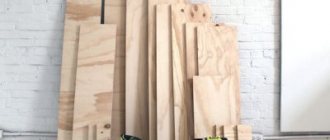
You don’t have to spend money on buying a ready-made shelf, because you can make it yourself. To do this, you need to prepare all the necessary materials and tools. The main material can be either a wooden board or a thick plywood sheet. If desired, these materials can be combined. Next, everything is done according to a pre-prepared drawing of the future product.
How to hang a microwave?
Tools and materials
To make a wooden shelf you need the following tools:
- electric jigsaw or regular hand saw;
- plane;
- ruler, tape measure or other measuring device;
- a simple pencil;
- template for making a workpiece;
- electric drill;
- a special device for drilling material at certain angles;
- carpenter's clamp;
- safety glasses and work gloves.
What tools may be required
Prices for popular models of jigsaws
Jigsaw
Most tools can be found in the garage, with the exception of the bevel drill. But many masters manage without it. You also need to prepare some materials for work:
- boards or sheets of plywood;
Plywood
- small nails, self-tapping screws;
- wood glue;
- sandpaper with different grain sizes;
- varnish;
- a means for darkening the surface of wood (for example, stain).
Wood glue
Once everything you need is at hand, you can get to work. The process of making a shelf is simple if you strictly follow the recommendations and follow all the rules. Below are step-by-step instructions, following which anyone can do the job.
Instructions
Step 1. Decide on the dimensions of the future product. To do this, you need to take measurements of the microwave and the place on the wall where the shelf will be installed. After this, cut the blanks with a jigsaw to get the details as in the photo.
Diagram of necessary parts for the shelf
Step 2 . Drill holes in the left wall at an angle using a special tool. Corner holes are hidden because they disguise fasteners, giving the wooden structure a more aesthetic appearance.
Holes in the left wall
Step 3. Repeat all manipulations with the other sides of the shelf. All holes must also be angled. When working with an electric drill, be sure to wear safety glasses.
The base of the future shelf
Step 4 . Once all the holes are ready, connect the bottom of the wooden structure to the side walls, after pre-treating the tangent surfaces with wood glue. Then carefully press the pieces of wood using a special clamp.
Side panel
Step 5 . Place the top panel of the shelf on the glue and press it to the main structure with the same clamp. After the wood glue has completely dried, additionally attach the parts using self-tapping screws, carefully screwing them into the corner holes. This will make the structure more durable and reliable.
Top panel installed
Step 6 . Place the back panel against the base and secure it with self-tapping screws. In this case, all the holes are straight, so you won’t have to tinker with the back wall for a long time. In addition, it can be cut from plywood, not wood.
Back panel secured
Step 7. Cut two curved templates from the board, as in the photo. You can set your own sizes. Once the elements are ready, treat their surfaces with sandpaper to eliminate any unevenness or burrs.
Curvilinear templates are cut out
Step 8: Attach the curved templates to the sides of the front of the structure. The fixing procedure is similar: the parts are placed on glue and pressed with special devices.
Curvilinear templates are fixed with clamps
Prices for clamps
Clamps
Step 9. After the glue has dried, screw in the required number of screws so that the structure is solid. As you can see in the picture, the templates need to be glued simultaneously to the side and bottom of the shelf.
The result should be a solid structure
Step 10 . Polish the surface of the finished product using a grinding machine, making the surface perfectly flat and smooth. Then cover the shelf with stain and, after it dries, with several layers of varnish. After the shelf has dried, it can be attached to the wall. Of course, to do this, you need to screw special lugs into the back for fixation.
Ready-made microwave shelf
Note! Thanks to the use of a combined fastening method, the finished structure will have increased strength. This is an important indicator, especially when placing such a heavy item as a microwave oven.
Stylish tandem: above the oven
Placing the microwave above the oven is convenient for the homemaker and gives the kitchen a professional look. Especially if you pick them up in one strength. However, it must be taken into account that in the end the oven will be located below the usual level.
Before implementing such a project, you need to determine exactly what height each of the appliances will be and whether it is convenient for you personally, since you will have to use both the oven and the microwave every day. A kitchen should be, first of all, comfortable, and secondarily beautiful.
If you do decide to combine them, it is better if the microwave and oven are the same width and, preferably, made of the same material. For example, stainless steel.
Selection of materials
Materials used:
- hardware (their choice is determined by the type of walls) - anchor bolts or dowels;
- construction tape for collecting waste;
- corner shelf if you decide to hang the microwave oven in the corner;
- brackets.
The brackets are a structure consisting of two L-shaped holders. On one side of the holder there are holes for attaching to the wall; the other side of some models extends, increasing the usable area for placing the microwave. In some cases, the structure is equipped with additional cross members.
When choosing a bracket, pay attention only to models that are designed specifically for microwave ovens.
Criterias of choice:
- Size. The width of the bottom of the bracket should correspond to the depth of the microwave.
- The maximum weight that the brackets can support. As a rule, this parameter is indicated on the packaging. To correctly calculate the required load, add 5 kg to the weight of the microwave itself (tolerance for dishes and prepared dishes). Choose a bracket with a significant margin of safety.
- Retainers. The brackets must be equipped with rubberized inserts or special clamps so that the large stove does not slip off the holders.
Please note that the color of the bracket matches the microwave and the interior of the kitchen. Standard colors are black, white, gold and metallic.
Advice. If the stove is small, pay attention to telescopic bracket models. Their advantage is that later it will be possible to install a larger microwave. The telescopic stand makes it possible to move the device away from the wall, which is important when cleaning.
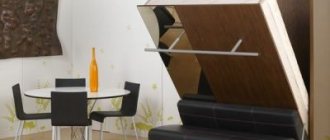
Placed in a special wall niche
An interesting and stylish way to place the stove. However, you need to decide on it before starting renovations in the kitchen. Because in a design project it is necessary to take into account such a niche, elegantly fit it into the overall interior and make it as accessible as possible.
This option is also very convenient for those who do not often use the microwave. In this case, it can be placed away from the actively used area and not occupy useful space.
To avoid visible cords, it is best to install the socket inside a niche - do not forget this point when drawing up a design project.
Advantages of placing the stove on the wall
A microwave on the wall is convenient and practical. You place the oven at the optimal height and do not have to lean towards the viewing window during cooking, as is the case when installing it on a worktop.
Other advantages of this microwave oven arrangement:
- Free space on the countertop. This is especially true if you have a small kitchen and every centimeter of work space is precious.
- Safety. As a rule, we hang the microwave at eye level of an adult, which means that you don’t have to worry about leaving your child alone in the kitchen.
- Durability of the oven. A device hung on the wall will last longer, since it will not come into contact with other objects and overheat.
If you install the stove on a shelf suspended from the wall, your storage space will increase.
Microwave on refrigerator
This is one of the most popular ways to place a microwave. And one of the most dangerous. Any refrigerator vibrates from time to time, which causes everything on it to vibrate. In our case, a microwave oven, which can become faulty from such regular vibrations.
In addition, most modern refrigerators have an impressive height. It is simply inconvenient to place a device that is often used on them.
If the refrigerator is not tall, it is best to install a shelf about five centimeters above it and place the microwave on it.
Shelf-shelf
Another type of microwave shelf that can be made at home. It is distinguished by its convenience and original design. The advantages of a shelf-shelf include the following:
- high-quality ventilation of the microwave, which is why there is virtually no chance of the mechanism overheating;
Shelf-shelf has its advantages
- the shelf fits perfectly into different interiors;
- it is great not only for the microwave, but also for other useful items in the kitchen;
- If desired, the finished structure can be rehanged at any time.
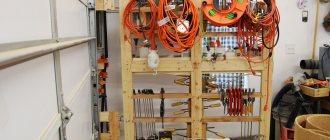
Metal corner
To make your own shelf-shelf, you need to prepare the following:
- small corners made of steel;
- steel flanges in the amount of 16 pieces;
- small metal rods;
- furniture boards, which can be found in hardware stores. A total of three standard boards are needed.
Tools need to be prepared in advance
Prices for popular models of screwdrivers
Screwdrivers
The process of making such a shelf is simple. You just need to follow the instructions below:
- make markings on the surfaces of the furniture pieces, marking the places where the flanges will be attached. The recommended distance between the corner and the flange is 30 mm;
- Using an electric drill, drill large holes in the middle shelf. The diameter of each of them should be 22 mm;
- attach the flanges to the middle shelf by screwing in the screws using a Phillips screwdriver;
- cut 4 identical pieces from the rod. The length of each cut piece should be from 65 to 70 cm;
- secure the rods using a special clamping screw;
- attach the shelves to each other using wood glue and self-tapping screws;
- Attach metal corners to the back of the structure.
A shelf or small wall rack is also a good option for installing and storing a microwave oven
Stand with two shelves (above the microwave)
At this point, the process of making a shelf-shelf can be considered complete. All that remains is to coat the product with varnish and, after waiting for everything to dry, hang the finished shelf to the wall using self-tapping screws and dowels. Of course, the dimensions of the shelf and the number of shelves can be changed if desired.
We use the window sill
Placing a microwave oven on the windowsill is a completely reasonable solution from the point of view of space ergonomics. The window area is rarely used to its advantage. A microwave is a fairly large appliance, and by placing it on the windowsill, we free up a significant part of the working area on the countertop.
But it is necessary to take into account that this requires a fairly wide window sill. Not only should it accommodate a microwave oven, but there should also be room for air circulation.
True, manufacturers disapprove of such placement. Temperature changes, which are felt most clearly on the windowsill, can cause damage to equipment. In winter, due to the cold, additional energy will be consumed, and in summer, the household appliance will overheat from the sun's rays. Changes are not scary if the window faces a loggia or terrace.
Cabinet in the kitchen interior - what role does it play?
A bedside table in the kitchen allows you not only to decorate the interior, but also to effectively organize the space. Such furniture can be used to store food, kitchen utensils, appliances, and sometimes kitchen appliances are built into it.
Typically, such a cabinet consists of a table top and a bottom, which are held together by the sides and the back wall. The cabinet under the microwave oven is distinguished by the presence of a niche where the device itself is located.
Place it on a bar counter or table
Installing a microwave on the bar counter is a very fresh and functional solution. Here it does not clutter up the space, is easy to use and always available. Fans of stylish kitchen design can order a box for it to match the color of the counter, walls or furniture.
Placing it on the table seems less preferable. This is not aesthetically pleasing and the device will take up a considerable area of the dining table.
It must be admitted that a microwave oven on a table or counter is the most convenient option, since it is most often used for heating food. And heating it right at the table is optimal for the user.
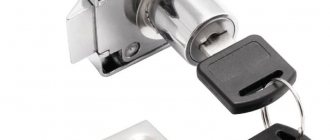
Microwave wall mount and its choice
You should approach the issue of choosing fasteners for fixing a microwave oven on the wall with special responsibility, because the quality of fastening and the safety of people in the kitchen depend on the quality of the fasteners.
Among the main parameters that determine the type of fasteners are the dimensions of the furnace and the total weight of the structure. In relation to the dimensions, the brackets are variable in length, so they are adjusted depending on the length of the unit.
They are selected to a certain, pre-measured length. But when taking into account the weight of the microwave, you should compare it with the material from which the wall on which it will be mounted is made.
For example, when fixing a microwave on a concrete wall, no problems arise and it is possible to use less durable fasteners than when installing it on a wall made of plasterboard. But, first, it is recommended to read the instructions or technical parameters of the fastener, which must indicate the maximum weight of the device that it can withstand. It is preferable to choose fasteners with a small margin of 0.5-1 kg.
Pay due attention to such elements as clamps. They are designed to prevent the stove from accidentally falling. Most modern fasteners are equipped with them.
The last, but quite important parameter for choosing reliable and good fasteners is the attractiveness of the appearance. Although the fastener is almost invisible in the kitchen, manufacturers still offer a large selection of these parts in different colors and textures.
Most often they are plastic or steel. A combination of these materials is possible, which fits well into any interior style.
Microwave on the cabinet
This option is similar to placing it on a table. And if the kitchen area allows it, it is quite worthy of consideration. This way, the microwave will not take up space either on the countertop or in the dining area, it will have its own place. You can arrange the cabinet according to your preferences and rearrange it if necessary.
A similar cabinet can be ordered together with a kitchen set. Then they will be made in a single design and it will be able to have additional options - a compartment for a coffee machine, oven or dishwasher. But most often the choice leans towards the cheaper option - using a regular bedside table for such purposes. In this case, you need to take into account its height - at least 80 cm.
Microwave stand on the wall: manufacturing instructions
To produce this type of supply you will need:
All the necessary elements are quite affordable, in addition, it is possible to replace the furniture panel with chipboard or MDF panels.
We suggest making a shelf with the following dimensions:
To cut parts into blanks, you will need to use a jigsaw. To carry out markings, you will need a ruler with one right angle, a pencil and a tape measure. Pay careful attention to the marking of parts, since lines or angles that are not too straight can significantly worsen the appearance of the structure.
When all the pieces have been cut, begin sanding them using a belt or vibrating sander. If this tool is not available, you should use regular fine sandpaper.
The final stage is the assembly of the entire structure. To do this, use wood screws and dowels.
Before you start screwing in the screws, pre-drill the holes for the dowels. This procedure will help prevent wood from cracking during operation. After assembling all the parts, attach a special mount to the back of the structure, with which it will be fixed to the wall.
Next, the shelf needs to be painted or varnished. If the second option is chosen, then the varnish must be applied in at least three layers, since the shelf is located in the kitchen and is constantly exposed to steam and moisture.
If necessary, the shelf is simply painted with a special paint designed for working with wooden surfaces. After drying, hang the shelf on the wall and install the microwave oven. Please note that when choosing a place to install a shelf, you should pay attention to the presence of an outlet or the possibility of installing it.
How to choose microwave brackets
A wall-mounted microwave bracket is a great opportunity to create an ergonomic design. But among all the diversity, it is very easy to make a mistake and make the wrong choice.
Where should you not place a microwave?
First of all, you cannot place a microwave oven, like any appliance, in close proximity to a fire, that is, a gas burner. The “half-meter rule” applies here. This rule also works with water - the sink is also not the best neighbor for a microwave.
If you install it under the stove, condensation may get inside the device, which will inevitably cause breakdown.
The TV should also not be placed near a microwave oven. Nothing will happen to her, but there may be interference on the TV screen.
We have already mentioned the refrigerator - vibration will not benefit the microwave. Let us add that it, in turn, can heat up the refrigerator, and therefore lead to its malfunction.
What types of wall mounts are there for microwave ovens?
The whole variety of brackets comes in two main types - fixed and telescopic. The first is a static structure made of metal profiles and pipes that does not change its size.
The advantage of a fixed bracket is its strength: the absence of sliding units strengthens the connections. Often the fixed mount for a microwave on the wall is monolithic, which is good with maximum weight.
The telescopic one changes size, both vertically and horizontally. This fact allows you to adjust the dimensions within the permissible dimensions and load of the bracket. The solution allows us to obtain much less strength, which is definitely not good for the owner.
If you decide to buy a microwave for a long time, then it is more profitable to buy a fixed bracket without risking its strength and health. If you need to change your microwave in the near future, buy a telescopic one - preferably with universal fasteners.
Microwave space in a small kitchen
Placing everything you need in a small kitchen is not an easy task. At the same time, every housewife wants to have a microwave, a meat grinder, an electric food processor, and a multicooker as assistants.
The main problem of a mini-kitchen is the small work surface area and a very limited number of storage cabinets. This means that a household appliance should not occupy either one or the other.
The most optimal placement of the microwave oven in this case is on the wall using a shelf or brackets or on a windowsill. That is, in areas not used for other purposes. In any case, it is necessary to take into account that there should be free space next to the microwave.
What requirements must a microwave cabinet meet?
A cabinet designed for a microwave oven must be durable. It must withstand the weight of the equipment. At the same time, it is worth remembering that there must be normal air circulation around the stove. The design of the bedside table should include an air duct, a grille, and in extreme cases, there should be technical openings. Sometimes ventilation is ensured by the complete absence of a back wall in a niche.