- Where to start gluing wallpaper in a room: tips and tricks
- Wallpapering a room: preparatory work
- Where to start gluing wallpaper on the ceiling in a room?
- Where should you start gluing wallpaper on the walls in a room?
- How to properly and where to start gluing wallpaper
- What wallpaper to choose: density, texture, color of material
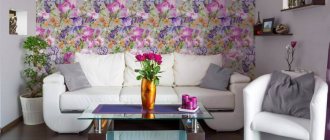
- Room design with wallpaper: rules for choosing products for different rooms and combining them
- Combination of technology and design: wallpapering of different types
- Where to start gluing wallpaper in a children's room, bedroom or living room
- Where to start gluing wallpaper in the hallway: tips and nuances
- Where to start gluing wallpaper in the kitchen, taking into account the specifics of the room
- Features of using wallpaper in room design: designers' recommendations
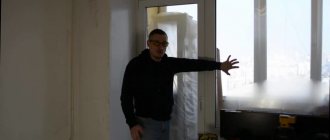
- Video: how to glue wallpaper complete guide
Where to start gluing wallpaper in a room: tips and tricks
When starting the final stage of renovation - finishing the walls, you need to decide where to start gluing wallpaper in the room , including in the corridor, in the kitchen. Each of these rooms has its own characteristics, which are manifested in lighting, the presence of corners, openings, niches or recesses. The layout of the apartment plays an important role, as does the type of wallpaper. The process of gluing non-woven, vinyl or paper sheets has its own requirements. All the nuances will be discussed in this article.
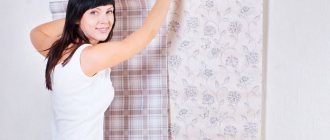
If you decide to glue wallpaper yourself, you need to clearly know how to glue wallpaper in a room and the sequence of actions to be performed.
Features of finishing corners
Let's look at how to properly glue wallpaper in the corners. Whatever landmark is chosen for finishing work, sooner or later you will have to glue the material from the corner. To carry out the process efficiently, you must follow the recommendations:
- The corner must be thoroughly coated with glue. You shouldn’t hope that the roller will properly process this area; it’s better to take a brush. If this is not done, the wallpaper, especially non-woven wallpaper, will peel off very soon.
- Some novice craftsmen try to fix the material in the corner with a single strip. This is very difficult to do, so don't even try. To create a corner, you should stick a strip on the adjacent wall with a slight overlap and move on from this guideline. In this case, it is important to correctly calculate the distance and bend part of the strip so that it lies strictly in the corner.
- Wallpaper is usually glued end-to-end, but if the corner is crooked or there is not enough experience to carry out such an operation, it is recommended to glue two strips overlapping, and then cut them with a utility knife along the joint line. Part of one fragment will remain free; it must be treated with a fixing compound and pressed against the wall. There should be a perfect joint.
Correct trimming of wallpaper in corners
On a note! When entering a room, a person first sees the far corner, so it is not suitable as a starting point; it is better to start pasting from a corner away from the doorway.
How to work in uneven corners
The problem of uneven corners especially concerns those who decide to purchase material with complex geometric patterns. In this case, it doesn’t matter where to start; once it gets to that angle, verticality will be very difficult to maintain. In this regard, experts recommend using a separate landmark for each wall. To join in the corners, you will have to use overlapping gluing.
You can glue thin wallpaper in the corners with a slight overlap
If we are talking about thin products, then the overlap of the strips on each other can not be eliminated, but denser ones, for example, textile ones, are easier to cut with a knife and form a strict joint.
Wallpapering a room: preparatory work
If you decide to independently carry out repair work in a house or apartment, even if it is just cosmetic repairs, you need to clearly define the sequence of actions to be performed. First of all, you need to properly prepare the room. The preparation stage includes:
The preparation stage includes: purchasing wallpaper, selecting tools, covering floors, cleaning walls.
- purchase of materials (wallpaper, glue, primer, edging, tools);
- selection of the necessary tools (scissors, tape measure, construction knife, brushes, roller);
- covering floors with protective material;
- preparation of walls and communications.
You should take care of purchasing materials in advance. It is necessary not only to calculate the amount of decorative finishing and adhesive mixture, but also to take care of how to apply the adhesive to the walls when wallpapering. It is most convenient to cover the floor with plastic film; plain newspapers will also do. For safety reasons, it is better to turn off the electricity, and for convenience, you can remove the lamps and outer boxes from the outlets. The room should be as spacious as possible, so it is advisable to remove the furniture or move it in the center and cover it with film.
The surfaces to be glued require special careful preparation. Walls and ceilings must be cleaned of old coating. It is necessary to putty, level and prime the surfaces. Before starting work, the room must be thoroughly ventilated, and then the windows and doors must be tightly closed to prevent drafts.
It is necessary to allocate a special place on the floor for marking and cutting sheets, as well as for lubricating them with glue. The features of gluing wallpaper of various types and in different rooms will be discussed in this article.
Walls and ceilings must first be cleaned of old coating.
What to do with switches, sockets, trims
In the process of gluing the trellises, you need to go through the area of switches, door frames and sockets. Before gluing, you should remove the protective boxes from the switches. Disassemble the sockets, and also unscrew the trim from the doors. After pasting, everything will need to be assembled in reverse order. It doesn’t matter where the sockets and switches are located: near a window or door, in order to properly hang wallpaper, it is important to be careful when working with electricians. Disconnect the apartment from power in a timely manner and, if necessary, insulate the wires.
The correct gluing technology is described in the article on how to hang wallpaper yourself.
Where to start gluing wallpaper on the ceiling in a room?
First of all, you need to decide where exactly you plan to hang the wallpaper. If such finishing will be done throughout the entire room, including the ceiling, then you need to start there. In this case, two methods of wallpapering are used (photos show the sequence of work):
- from the wall;
- from the center of the ceiling.
The first method is considered simpler, but it is effective in the case when the wallpaper is without a pattern. These are the types of fabrics that are most often used to cover ceilings.
On a note! Before you start gluing, it is recommended to watch a special video on how to properly glue wallpaper, where to start work and how to match the pattern on the ceiling.
Ceiling decoration has two methods of wallpapering: from the wall and from the center.
If wallpapering requires the need to follow patterns, then it is recommended to start working from the center to the sides - in this case an equal number of solid strips will be used. After pasting from the center of the ceiling, the pattern will be located symmetrically, which will ensure its correct visual perception, since the outer strips will be the same width, which will create a natural and harmonious look.
In case of gluing from the center, it is necessary to mark the entire ceiling. To find the central point, just break the ceiling diagonally with a thread. The intersection of the threads clearly indicates the center. From this point it is necessary to mark a distance equal to half the width of the strip. Usually this is 26.5 cm - half of a standard strip measuring 53 cm. The first strip will lie between the markings, and the rest of the pattern will “dance” from it.
If wallpaper is glued from the wall, then you need to draw a strip 50 cm wide, which should be clearly perpendicular to the window. The first canvas is glued along this mark, and the remainder near the wall is removed with a construction knife.
Where should you start gluing wallpaper on the walls in a room?
When decorating walls with wallpaper, there are several options regarding where to start gluing. The specific situation will tell you how to do this correctly. Be sure to consider the type of wallpaper used. Modern coatings are usually glued end-to-end in one of the following ways:
There are several options for wallpapering walls: from the middle of the wall, window, door, corner.
- from the middle of the wall;
- from the window;
- from the door;
- from the corner.
Before starting work, make marks perpendicular to the floor, which are applied using a level or plumb line. There is another gluing method - diagonally. To do this, using a stretched thread, draw a line from the top corner to the diagonally opposite one. The wallpaper is glued obliquely, following the intended line. It is better not to use this method for novice craftsmen, since only experienced builders can do it.
In cases where wallpaper with a pattern is purchased, difficulties may arise in all options for perpendicular pasting. You need to choose the most inconspicuous place, for example, above a window or door - this is where to start gluing the wallpaper correctly if it is difficult to join the patterns.
The method of wallpapering a window is quite simple. It is necessary to measure the height of the room, add 10 cm to the resulting value for allowances for each strip. Next, the canvases are cut (with a comparison of the pattern). The first strip is glued according to the perpendicular guideline. Subsequent sheets are glued sequentially, usually counterclockwise. The owners themselves decide where to start gluing wallpaper in the room . Video tutorials, of which there are many on the Internet, will help you do this correctly.
The method of finishing wallpaper from a window involves gluing it counterclockwise.
Features of choosing the starting point for walls
There are several options for gluing wallpaper - from a window, from a corner, from a door, from the largest opening or other object. Determining the starting point depends on the type of material and the characteristics of the specific room.
From the window
In Soviet times, wallpaper was thin, the strips were overlapped, and it was important to paste them so that the light falling from the window did not create shadows in the area of the seams. That is why the pasting began from the window. Today there are many options for thick, textured wallpaper on sale that can be glued end-to-end without fear of them coming apart. And it’s simply impossible to glue them overlapping - the seams will be too thick and sloppy. Therefore, when choosing a starting point, it is more advisable to focus directly on the features of the room itself. This gluing method is suitable for rooms with natural light - living room, bedroom, kitchen. This way, the light will fall on the joints and unnecessary shadows will not form. This will allow you to create a visually holistic canvas, which can easily be mistaken for seamless. If the room is elongated and the window is on a short wall, then when wallpapering with a pattern it will be easier to create a symmetrical design. The patterns will start from the corners of the long walls, and the curtains will act as a unifying accent.
From the corner
Pasting wallpaper from the corner is not the easiest way. It is used when window and door openings are so skewed that it is noticeable. Or when there is no window in the room. For example, in the hallway. It is convenient to glue wallpaper in this way only with perfectly even corners, but this is very rare for corridors. The same method is suitable for pasting cabinets that do not have a window, or if the wall stands out with contrasting wallpaper. In this case, this is the only possible option.
Working with a corner has the following features - the first strip should be fixed not directly at the line where the walls meet, but at a distance equal to the width of the wallpaper minus a couple of cm. At this point, a line is drawn, which becomes the initial guideline. With this approach, it is much easier to neatly and discreetly join the wallpaper in the corner.
From a larger object in two directions
When there are several door and window openings in a room, it is even more difficult to determine the starting point. In this case, it is better to follow this advice - choose the largest landmark and move from it in both directions.
If there is a bay window in the room, it is better to start gluing the wallpaper on both sides of the structural recess.
How to properly and where to start gluing wallpaper
It is recommended to glue combined wallpaper from the middle of the wall. The same method should be used in the case of making a wall panel from wallpaper, when it is necessary to maintain clear symmetry in the design. This type of pasting will be discussed in detail later in the article.
Helpful advice! It is better to glue wallpaper over sockets from which the casings have been previously removed. Holes of the required size are cut after the glue under the wallpaper has dried. It is also recommended to trim excess parts of wallpaper near slopes, above windows and in other difficult places after the glue has dried.
The approach to the door should be symmetrical, so the strip should be cut vertically in half to the height of the doorway and glued on both sides. Then the wallpaper is adjusted from above the door.
If, when discussing the question of where to start gluing wallpaper , a decision is made to start working from the corner, then it is important to take into account a number of nuances. Firstly, perfectly straight corners are very rare. You can check the evenness using a plumb line or level. You need to draw a straight line along the perpendicular in the corner and start finishing the wall from there.
It is recommended to glue combined wallpaper from the middle of the wall.
Secondly, experts do not recommend gluing a single strip in the corner, since after drying, distortions or folds may form on the canvas, which will subsequently lead to inconsistencies in the design. In order for the wallpaper to fit correctly in the corner, you must adhere to the following recommendations regarding its finishing:
- You need to choose the most inconspicuous corner in the room from where you should start gluing the wallpaper.
- The corners should be carefully coated, since this is where wallpaper most often comes off.
- Corners are a favorable place for mold to grow, so before you start gluing the walls, they need to be treated with special agents - fungicides.
Room with simple design
In this case, “simple design” means covering all walls with the same wallpaper, without dividing into zones or combining materials with different textures and colors.
Here, as in the case of the ceiling, the presence of a pattern and the position of the window/door are important.
Masters recommend starting to mark the walls from their center. But this only works well on walls without openings. If there is an opening - a door or window - then the first marking line is usually “beaten off” directly along the edge of the opening.
The diagram shows the sticker from the window counterclockwise (you can also stick it clockwise, it doesn’t matter). But this option is only suitable for a room with fairly even corners. But they usually do not please repairmen with their correct geometry.
To fit the strips so that they lie evenly in the corner, without tears or voids, it is better to trim the panel to the width and stick a separate strip in the corner.
Another way is to overlap the strip on both sides and join the cut panels in the corner.
However, despite differences of opinion, almost all craftsmen recommend finishing the gluing above the door.
So, the general sequence of work:
- mark the initial vertical line along the edge of the window slope (opening in the wall) or in the center of the wall;
- using a plumb line and tape measure, mark the position of the remaining strips, taking into account the overlap or joining in the corners of the room;
- mark shortened fragments above the door, under the window sill, and in other difficult places;
- stick the wallpaper according to the markings, taking into account the peculiarities of working with different types of wallpaper.
Important: for wallpaper with a vertical repeating pattern, pasting is carried out ONLY FROM THE CENTER! This is necessary to ensure that the corners have stripes of the same width. In this case, the wall looks symmetrical. If you start gluing from the corner, you may get the impression that the shape of the room as a whole is irregular.
For wallpaper with a large pattern that requires mandatory joining, it is advisable to either stick it “in a circle” (but only if the corners are even), or finish each wall from the center with as neat a joining as possible in the corners. However, in this case, the corners will most likely have to be masked with a baguette, furniture or curtains, and if this is impossible, a corner or decorative frieze tape should be glued over the joint. The same applies to joining different wallpapers at corners.
Pasting from the corner is recommended for wallpaper without a pronounced ornament (“for painting”, with an inconspicuous pattern, plain smooth) and with the correct geometry of the room.
What wallpaper to choose: density, texture, color of material
To decide on the choice of wallpaper for a particular room, you need to take into account a number of significant factors, among which are the following:
In dry rooms with smooth walls, it is permissible to use any type of wallpaper.
- purpose of the premises;
- condition of the wall or ceiling;
- room humidity;
- area of the room.
Based on the listed requirements, it is important to note that in dry rooms with smooth walls it is permissible to use any type of wallpaper. Only after the desired option has been selected can you decide where it is best to start gluing wallpaper. In rooms with high humidity and high traffic, it is better to use vinyl products.
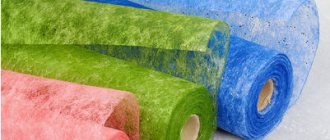
There are different types of wallpaper on the modern construction market, and each of them has its own characteristics:
In rooms with high humidity and high traffic, it is better to use vinyl products.
- Paper, which, in turn, are divided into duplex and simplex. They fit perfectly even on the most complex and hard-to-reach surface, so they can be combined with other types of wallpaper.
- Non-woven wallpaper has earned popularity due to its texture, reliefs with a dense structure, as they can perfectly hide unevenness on the surface. They have different external coatings.
- Vinyl wallpaper is a dense and very durable product, usually on a non-woven backing. They are glued to walls that are susceptible to all kinds of damage and contamination.
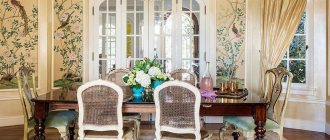
- Fabric or textile canvases are the most expensive type of wallpaper. They are perfect for a bedroom or living room, and will also help disguise minor mechanical damage on the wall.
- Liquid wallpaper in its structure and method of application is more similar to decorative plaster. They can be used in any room.
Non-woven wallpaper has earned popularity due to its texture and reliefs with a dense structure.
Room design with wallpaper: rules for choosing products for different rooms and combining them
When choosing wallpaper for a room, you must not only be guided by price and appearance, but also take into account their physical characteristics.
On a note! Finishing on a non-woven basis will not shrink after drying, and will also perfectly hide small unevenness. Another advantage of non-woven wallpaper is the ease of gluing, since according to the technology, the glue is applied only to the wall.
The walls of a bedroom or nursery should “breathe”, so the ideal option is paper wallpaper. Their main disadvantage is their short service life. An alternative to paper covering can be textile wallpaper, but they are much more expensive.
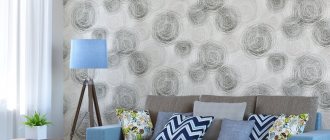
A good option for the living room is silk-screen printing. Its shiny surface will give the room respectability. The color should be chosen in accordance with the furniture; large patterns and bright colors are inappropriate here. It is better to choose calm shades.
A good option for the living room is silk-screen printing; its shiny surface will give the room respectability.
Vinyl wallpaper on a non-woven basis has increased strength and, as a rule, a water-repellent effect, so they are resistant to mechanical damage and all kinds of dirt. They can be cleaned and washed, making these products ideal for kitchens and hallways.
When creating a modern interior design, different wallpapers are often used in the room. Combining different coatings not only in color, but also in texture will help create a unique decor on the walls. By using different wallpapers, you can divide the room into different zones. Vertical or horizontal delimitation using companion wallpaper is also quite popular. The photos show the original version of their use in the form of inserts.
Variety of assortment
The most famous and easily accessible in cost is paper covering. Paper trellises are one of the currently fashionable clean environmental products, characterized by high air conductivity. The only drawback is that they absorb odors.
Equally popular is a product made on a paper and non-woven base coated with polyvinyl chloride, called vinyl wallpaper. This material does not absorb dust and odors. Excellent moisture tolerance.
Non-woven wallpaper is also considered in demand. The characteristics are identical to paper ones, but they are superior in strength and resistant to deformation.
Combination of technology and design: wallpapering of different types
Different types of wallpaper are glued differently. For example, it is better to glue paper sheets overlapping and start working from the window. To visualize where to glue the wallpaper from, you just need to stand with your back to the window. The wallpaper should first be glued on the right side (towards the doors), and then, by analogy, on the left. The light from the window will hide the overlaps, so they will be invisible when entering the room. In a room without windows, it is better to glue from the doors; if there are several doors, then from any of them.
If the chosen wallpaper option is non-woven or non-woven based, then they must be glued end-to-end. Where it is better to start gluing wallpaper in this case practically does not matter. You can start working from a window, from a door, from a corner or from the center of the longest wall. As an exception, wallpaper can be placed horizontally. This is a rather bold decision that will help create an original interior.
You can start gluing non-woven wallpaper from the window, from the door, from the corner or from the center of the longest wall.
Another option is combined wallpaper, where the lower part is glued horizontally and the upper part vertically. Thus, a fantasy pattern will come out, but in this case it is necessary to carefully select the color and texture of products of both types. This design is not only original, but also practical. For example, in a hallway the lower part is more susceptible to contamination, but with this method of pasting it can simply be replaced, leaving the top unchanged.
Why did gluing always start from the window?
Previously, and even now, having decided to update the interior, many people prefer to glue the trellises themselves. It seems that there is nothing complicated about this and any person who has nothing to do with construction or repairs can cope with this task. Before starting work, it was necessary to choose not only the wallpaper that would suit the room, but also a reference point from which to start gluing. As a rule, for several reasons it was a window.
The first reason is the need to glue the first strip as evenly as possible. This can be done using a building level, but not everyone has one in their house and not everyone knows how to use it, which is difficult to say about windows. They, unlike doors or corners, are least subject to deformation and help to glue the first strip as evenly as possible vertically.
The second point that influences the choice of starting point is that when gluing in a circular manner, the last strip does not always fit entirely. This can seriously spoil the drawing. It is much easier to hide such flaws behind a window curtain.
They also started gluing from the window because of the wallpaper itself. There are now a variety of materials that allow you to create seamless connections, but previously all trellises were made of paper. They were glued together with an overlap. At the same time, the edge of the overlap strip could create a shadow when gluing it away from the window, making the joints noticeable.
Of course, professional construction teams who know how to handle a level and work with modern materials that do not require pattern selection and do not form joints may not pay attention to these nuances. Those who prefer to do the repairs themselves continue to use the window as a guide when gluing the first strip.
Where to start gluing wallpaper in a children's room, bedroom or living room
Features of gluing concern not only the type of wallpaper, but also depend on where exactly they are glued. When deciding where to start gluing wallpaper in the room, you need to pay attention to the presence of any large landmark in the room and start finishing work from there. This could be a corner, window or door. It is important to determine the maximum and minimum height of the walls based on preliminary measurements in different places. The first strip must be glued taking into account the average indicator.
Helpful advice! The peculiarity of wallpaper on a non-woven basis is the thickness of the canvas, so gluing them overlapping is unacceptable - only end-to-end.
If the room has a balcony door, and the distance from its door frame is very small, then you can choose the most distant corner. Since there are practically no perfectly straight corners, wallpapering must begin after making vertical marks on all walls.
It should be noted that there is no single algorithm for decorating walls with wallpaper in different rooms.
It should be noted that there is no single algorithm for decorating walls with wallpaper in different rooms. A special approach in each individual room is important here. A particularly popular method among craftsmen is to start work from the entrance doors and glue the wallpaper in the room in two directions, or move clockwise and place the strips from left to right.
Thus, when gluing wallpaper in living rooms, it is necessary to follow the joining rules. Then the joints, even when exposed to direct rays of light, will not be noticeable, and the surface of the wall will take on the appearance of a solid canvas.
Why is it important
The first strip must be positioned evenly and neatly so that you can use it as a guide when gluing the remaining strips. Each time it is extremely difficult to find a new, even vertical for wallpaper, so the next canvas is aligned taking into account the previous one. It turns out that the wallpaper is glued in a circle, and the first fragment is considered the starting point. If you glue it incorrectly, this will lead to each part being applied with deviations. When the circle closes, the last element will not be able to properly dock with the first.
The correct joining of the last strip depends on the evenness of the first strip of wallpaper.
If we are talking about single-color roll materials, then correcting the defect is simple - you need to equalize the height of each sheet. But if there are drawings on the wallpaper, then you will have to re-glue everything or be content with a poor-quality result.
Where to start gluing wallpaper in the hallway: tips and nuances
When deciding where to start gluing wallpaper in the hallway, you must take into account that this room has a number of significant differences from other rooms. The main one is the lack of windows. In addition, there are more doors, openings and corners here than in any other room - both internal and external. Often the corridor is decorated with arches. Therefore, it is better to start gluing wallpaper from the farthest inner corner.
When the angles are straight, the work will go quickly and easily. Otherwise (which happens quite often), the order of work will be as follows:
For wallpapering in the hallway, it is advisable to use a special composition with increased adhesiveness.
- On the wall opposite the entrance doors, you need to make a vertical mark using a building level or plumb line at a distance of 10 cm from the nearest corner and stick the first strip.
- The next strip should be glued so that its edge touches the adjacent wall, where a vertical line is also applied.
- If the room has complex geometry, then a vertical line must be drawn for each strip.
To apply wallpaper in the hallway, it is advisable to use a special compound with increased adhesiveness, and the walls should be thoroughly primed beforehand. The adhesive solution is not applied to the wallpaper; they are applied dry to the wall so that their edges exactly coincide with the vertical mark. The edge is pressed and the canvas is lightly ironed in the middle with a special spatula. Next, the surface is smoothed in the direction from the middle to the edges in a Christmas tree pattern.
Important! Applying an adhesive composition simultaneously to walls and canvas can lead to complications during work. Bubbles and wrinkles often appear on the surface, which do not always disappear even after complete drying. It is best to follow the manufacturer's instructions that come with the wallpaper.
Applying an adhesive composition simultaneously to walls and canvas can lead to complications during work.
Basic principles of wallpapering
Let's look at a few more basic principles, knowledge of which will greatly simplify your work.
Applying glue and pasting flat areas
The type of glue depends on the type of wallpaper used. To stir the diluted glue, it is better to use a special construction mixer so that the mixture is lump-free and homogeneous.
To apply the glue in an even layer, use a medium-width fluffy roller and a special paint bath. The glue is distributed on the strip of wallpaper (you need to move from the middle to the edges), then, when enough time has passed for impregnation (this is usually from 5 to 10 minutes), the strip is folded in half inward with the front side, without bending, and pressed against the ceiling. You need to focus on a vertical line made in advance.
After pressing the upper half, the lower half is released down and pressed in the same way. Bubbles are removed with a wallpaper spatula (you also need to move from the center to the edges), and if you use embossed wallpaper, you need to go over them with a rag. Excess material from above and below is cut off, and the knife should be as sharp as possible.
Wallpapering corners
The main stages of finishing an internal corner are discussed below, but they are also quite suitable for an external one.
Table No1. Instructions for wallpapering an inner corner.
| Steps, photo | Description of actions |
| Step 1 | According to the height of the wall and the pattern, prepare 2 strips (one whole and the other 10-15 cm wide). Apply glue to the stripes and wall. |
| Step 2 | A solid strip is applied to the wall in accordance with the pattern. Press the wallpaper firmly, then cut off the free edge. |
| Step 3 | It is advisable to glue a single strip with a slight overlap at the corner. After that, cut it along the contour of the corner (even if the corner is curved). |
| Step 4 | Then glue another strip, bringing it to the corner, press it well against the wall, but do not go to the edge that is on the adjacent wall with a wallpaper spatula. |
| Step 5 | Go over the joint with a narrow rubber spatula and remove excess glue. That's it, you have a finished, perfectly glued corner! |
How to glue vinyl wallpaper in corners
Video - Gluing wallpaper correctly
Wallpapering near doors, windows and behind radiators
In such hard-to-reach places you will have to try. But don't despair, we'll tell you how to deal with it.
Table No2. Instructions for wallpapering behind the radiator.
| Steps, photo | Description of actions |
| Step 1 | Measure a strip of wallpaper whose height is equal to the distance from the floor to the window sill. If it is impossible to remove the battery, make cuts in the places where it is attached and where the pipe connections are located. Apply glue to the strip and wait the required time. |
| Step 2 | Paste a strip of wallpaper behind the radiator. |
| Step 3 | Carefully insert it behind the radiator and press it firmly against the wall. Smooth the material with a rag, moving outward from the center. |
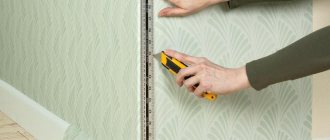
To hang wallpaper near doors/windows, do the following:
- prepare strips of the required length (from floor to window and from window to ceiling);
- apply glue;
- press the wallpaper to the wall, overlapping the slope/platband by a few centimeters;
- in the corner, make a cut at an angle of 45 degrees, cut off all excess, and push what is left behind the casing with a spatula;
- for the window, make a margin of a few centimeters around the slopes, then press the wallpaper well with a spatula. When the glue dries, carefully cut off any excess.
We glue wallpaper with our own hands near the doors
Making invisible joints
Gaps between strips are usually caused by too much glue. Because of this, the wallpaper becomes very wet, and its width increases by several millimeters. Then, when the glue dries, the wallpaper returns to its original size and, accordingly, a gap forms between the sheets. How to avoid this? Remove the facing layer from the unnecessary piece of wallpaper using sandpaper. Mix the resulting powder with PVA glue. You will end up with homemade grout that needs to be used to process the seams. Although, if you use plain wallpaper, you can also use paint.
Perfect joining of wallpaper sheets
Sometimes the seams are visible because there is glue on the front part. In this case, the problem can be solved with a special liquid for removing glue stains. If the liquid does not help, the wallpaper will have to be re-glued. Curled or loose edges of the wallpaper can be glued with a special glue for joints, and then re-rolled.
Where to start gluing wallpaper in the kitchen, taking into account the specifics of the room
The peculiarities of the kitchen space make the process of wallpapering a little more difficult. The following nuances should be taken into account:
- the need to equip the kitchen with household appliances;
- allocating space for a kitchen apron;
- taking into account the location of doors and windows;
- division of the room into working and dining areas.
For the kitchen, the most suitable wallpaper options are vinyl or special canvases for painting. The ability to change the color of wallpaper and the large width of the rolls are the main advantages of canvases for painting. By using different types of products, you can successfully zone your kitchen.
The procedure for carrying out the work is practically no different from the process of gluing canvases in other rooms. The wallpaper must be properly glued, since the walls in the kitchen are exposed to increased temperature and humidity.
For the kitchen, the most suitable wallpaper options are vinyl or special canvases for painting.
Certain gluing rules will help ensure reliable fixation. To do this, you need to apply glue to the wrong side of the wallpaper, then fold the edges into the middle and fold the strip again. Over the course of 10-15 minutes, the glue will be thoroughly absorbed into the surface, after which you can begin gluing. The first strip is applied to the vertical mark and smoothed using a roller or rubber spatula.
When can you open windows after wallpapering?
The time you need to wait before opening the window after the gluing process is no less than 12 hours. Sometimes you shouldn’t open the windows for a whole 48 hours. Wallpaper dries at a constant temperature, it should not be lower than +15. And the so-called wandering drafts can ruin all the work.
Related article: Roof gable: types and cladding options
After the wallpapering process, windows can be opened no earlier than 12 hours later
Also, for the first days after gluing, try not to drill, install or turn on the air conditioner. Stretch ceilings are also not installed the first five days after gluing. However, the installation of ceilings involves strong heating, which is unacceptable at the moment.
Features of using wallpaper in room design: designers' recommendations
Designers advise to be especially careful when choosing wallpaper, especially if they are intended to be combined in one room. When the wallpaper is chosen with taste, the house will acquire the necessary comfort and beauty. You can achieve the desired result by following the recommendations:
- Harmony in the design of a room can be achieved by combining light wallpaper with a coating of the same shade, but with a bright pattern.
- You can create a bright accent in the room by decorating one wall with wallpaper that will stand out in color, but not in texture.
- If you choose the option of horizontal zoning, then you must use separate borders, moldings or a wide edging.
- In a children's room, you can use a patchwork combination.
- Furniture upholstery, curtains and accessories must be chosen taking into account the color and texture of the wallpaper.
- It is better to buy wallpaper, materials and decorative elements in one place.
- Pasting corners with wallpaper in contrasting colors will help to visually even out uneven areas.
You can create a bright accent in the room by decorating one wall with wallpaper that will stand out in color.
If you decide to glue the walls yourself, then you need to take into account the following nuances:
- repairs should not be carried out in a hurry;
- calculations based on careful measurements will help reduce financial costs;
- proper organization of preparatory work will significantly reduce repair time;
- do not neglect the instructions that come with the wallpaper and adhesive mixtures;
- in northern rooms it is better to choose wallpaper in light and warm colors;
- It is not recommended to ventilate the room for 24 hours after wallpapering.
On a note! In the design of the walls, it is allowed to use no more than 5 colors, and in small rooms you should not glue wallpaper with a large pattern.
The design of a house or apartment must be approached with great responsibility. When starting to decorate the walls in any room, you need to carry out preparatory work, choose wallpaper and decide where to start gluing it. Following all the rules and instructions will help you avoid common mistakes and create comfort and coziness in your home with your own hands.