What you need to know about kitchen concrete countertops
We are used to the fact that concrete can be used to make a staircase or a foundation. But it turned out to be a universal material from which you can make garden furniture, a bar counter, and a tabletop.
If you follow the recommendations during the manufacture of the structure, you will get a reliable and durable product.
There are undoubted advantages to working with concrete material:
- Diluted concrete takes any shape. It is plastic, easy to correct and mold. Your possibilities are practically unlimited.
- Concrete can be painted, polished, sanded, and decorated with additional elements. Any processing changes its appearance. A concrete countertop can fit into the interior of any style, from classicism to loft.
- Concrete has heat-resistant properties. It tolerates temperature changes and mechanical pressure well.
- You will not find such a durable and reliable tabletop anywhere.
- Concrete is an environmentally friendly material that does not emit harmful fumes or other substances hazardous to humans.
- The cost of a concrete table is comparatively lower than that of wood or marble.
- You can combine concrete with other materials, such as glass or wood.
Concrete is a material that is practically not affected by external negative influences.
Among the disadvantages of a concrete countertop, several points should be noted:
- The surface should be protected from water and dirt. The porous concrete structure quickly absorbs moisture and dirt. It won't be easy to wash off.
- You cannot cut food or cut fabric on such a table. Scratches easily remain here and the attractive appearance is lost.
- If the structure is installed incorrectly, cracks or chips may appear.
- Not every cleaner is suitable for concrete. The composition of the washing liquid should not contain abrasive particles or aggressive components. Choose a product that is neutral in composition.
- Hot objects can leave marks on the surface that are difficult to remove. Use special racks for hot dishes.
Financial costs are small. Externally, the product is similar to a marble countertop.
Advantages and disadvantages
Modern design involves searching for the best combination of the appearance of the room with maximum practicality. Therefore, kitchens with concrete facades are gaining popularity.
The fashion for loft style elements in the interior dictates the need to search for materials that can embody the severity of forms, convenience, and durability of details that embody the post-industrial world. Concrete facades have a number of advantages over classic materials intended for finishing the dining space.
The main ones are the following properties:
- Strength and wear resistance. The concrete product has a long service life. Kitchen cabinets and countertops are not subject to wear and tear for a long time due to the low deformation rates and brittleness of the compounds included in the substance. Choice of shapes and textures. The high plasticity of the material makes it possible to implement non-standard design solutions. Using molds of various sizes, volumes and reliefs, you can cast non-standard kitchen details that will highlight the individuality of its owners. Environmental friendliness. The materials consist of natural components, which makes the products safe for humans. Price. The cost of concrete is much lower than solid wood or natural stone used for the production of kitchen furniture.
However, such facades have a number of disadvantages that complicate their use for finishing dining rooms and combined work areas for food preparation.
The main negative aspects include:
Limited choice of finished products. The fashion for concrete kitchens has appeared recently, so even in such a large city as Moscow, buying a set with a similar finish is problematic. Most often, the kit must be ordered, which increases its final cost. Low moisture resistance. Concrete deteriorates in high humidity conditions. There is a need for additional processing of products with special substances.
Limited color scheme and room design. Finishing a kitchen using concrete parts is only suitable for interiors designed in loft, industrialism or Chicago style. Dark shades of the material do not allow creating a bright palette of colors. Temperature. Concrete sets should not be installed in rooms with low temperatures. In this case, the cold material does not help maintain a comfortable microclimate.
Before making a decision in favor of concrete facades, you should think through the interior design as much as possible, create a design project, taking into account the advantages of the material and ways to reduce its disadvantages.
Currently reading: How to use a concrete mixer correctly
What tools and materials will you need to make it yourself?
A concrete table is made with your own hands using standard construction technology. Here it is important to be accurate in calculations, careful when mixing the composition and patience to watch several training videos on this topic. To prepare for work, you need to purchase:
- concrete class not lower than M400;
- river sand, but any other will do;
- gravel, crushed stone or marble chips;
- color, if you are planning to paint it like granite or other “noble” material;
- reinforcing mesh with cells 25*25 mm made of metal or fiberglass;
- Chipboard or laminated plywood;
- timber 30*50 mm
- self-tapping screws;
- metal corners;
- construction polyethylene in roll;
- concrete mixer or construction mixer;
- bucket;
- pencil, note paper;
- yardstick;
- building level;
- mallet;
- shovel;
- ladle for solution;
- putty knife;
- angle grinders and wheels;
- silicone sealant;
- liquid Nails;
- screwdriver;
- jigsaw
This is the minimum set of tools you will need to create a concrete countertop. Once you have purchased everything you need, it's time to start creating the project on paper.
Basic moments
The technology for manufacturing concrete products is very popular in private construction. A horizontal work surface made of concrete can be described as a stone of artificial origin, obtained by molding and hardening a mixture consisting of the following components:
- high quality cement (acts as a binder);
- aggregates of various sizes, selected according to color;
- low salt liquid;
- special additives that improve the quality of concrete.
For those who are planning to make a concrete countertop with their own hands, it is important to consider several important points. Operation of the product involves a large shock load on it, for example, during chopping of a meat carcass with cartilage, that is, reliable reinforcement is necessary.
When choosing a sink and hob, you should give preference to the overhead type . This design does not require special precision in the dimensions of the opening, while the installation side has sufficient width. Possible flaws will be hidden, and the product will receive a reliable fastening. As for mortise structures, their installation requires special equipment. Such work is carried out exclusively in a workshop.
A concrete countertop weighs a lot, so its base must be quite strong. To reduce weight, you should try to shorten the width without sacrificing strength. An important step is grinding, which is accompanied by a large amount of dust.
The tabletop is a decorative element, so it is important to think about its color design. If you use gray cement, the product will turn out to be of a similar color. Fortunately, today there is a wide variety of colors available to add to the mix, so you can choose the shade that suits you best.
Creating drawings and diagrams
To avoid possible mistakes in the early stages, take the most accurate measurements possible. Measure all parameters, including the location of the sink, outlets and other nuances available in the countertop area.
Creating a drawing will be required; this step will help to accurately manufacture the structure.
If you plan to make a hole for the sink, check the numbers several times. This is a case where every millimeter is critical. If the tabletop is of impressive size, it makes sense to first divide it into fragments and cast it in parts. It is more convenient to make the joining points at right angles. It is not recommended to make the tabletop thicker than 5 cm.
It is important to carefully measure the space where you plan to install the product with the countertop.
Preparing the formwork
To give the future tabletop a certain shape, formwork is made. To do this, take a plywood sheet and lay it on a flat, flat surface. Make sure that the plywood does not bend or warp anywhere. Install and secure a 50 mm high beam around the perimeter. This is the optimal value so that the finished tabletop is strong enough and does not collapse under its own weight. All joints are fastened on the outside of the beams with corners or self-tapping screws. Do not try to fit them tightly together at this stage. All cracks and unnecessary holes are then filled with sealant.
You need to install a sheet of plywood on a horizontal surface, which must be level. Place the boards on edge along the edges.
Then place plastic film in the formwork so that there are no creases or folds. Any unevenness will be reflected in the future concrete surface. You can lubricate the inside of the polyethylene with technical oil to make the concrete structure easier to remove.
Making a hole for the sink
If a sink crashes into the table, you need to prepare a hole for it in advance. Accuracy of measurements and accuracy in preparing the formwork are important here. Test yourself several times to be sure of the finished result.
If this is an overhead option, then you should take the sink and lay it upside down on a sheet and trace it along the side.
Manufacturing features for overhead models
If you plan to install an overhead model, make a preliminary drawing of it on paper. Trace it around the perimeter and transfer the outline to the plywood. Then measure the height and width of the sides so that the sink will fit into the finished hole after the concrete has dried.
How to do it for embedded
If the sink is built-in, make a preliminary drawing along its edge. Lay 50*50 mm beams along these lines. They are fastened together and fixed to the plywood using self-tapping screws. The beams inside the structure can be taken much higher than the outer edge. This is done to prevent concrete from accidentally flowing onto the sink hole.
For a built-in model, an outline should be drawn along the edge. Along the resulting lines, bars are installed, subsequently secured with self-tapping screws.
Reviews about concrete countertops in the interior
Although the production technology is simple, concrete countertops are difficult to purchase. There are few workshops offering such services. Those who managed to buy such coatings do not mention negative qualities in their reviews. Concrete countertops are an excellent alternative to artificial stone surfaces. For a dark set, you can make a light work surface, for a light one, a dark one. Many people are attracted by the opportunity to create unique decor.
To better understand how to make such a countertop yourself, we recommend that you carefully watch the video below.
Concrete is suitable for many interior styles: minimalism, country, Scandinavian, industrial. To make a work surface yourself, you first need to create the most accurate drawing possible. When constructing formwork, special attention is paid to holes for sinks and household appliances. It is advisable to coat the finished product with a composition that improves performance characteristics. Any design can be used, the main thing is that it matches the style of the interior.
Reinforcing frame and installation of supporting structure
The reinforcing mesh or cut wire is laid so that there is a distance of at least 25 mm from the edge of the formwork. It is unacceptable for pieces of the reinforcing frame to stick out from the finished product. Make sure that the height of the frame does not exceed the beams and does not rest against the bottom of the plywood. Otherwise, fragments of wire may remain on the surface of the finished product.
It has the form of a mesh, the cells of which have a size of 25x25 mm. You need to retreat 25 mm from the sheet and from the edges.
Stages of making your own countertops from cement mortar
No special knowledge or experience is required to perform this work. After determining the location and main parameters of the finished product, manufacturing is divided into separate stages. Our step-by-step instructions can help.
It is important to strengthen the formwork frame and choose the correct pouring method:
- shotcrete (spraying) - thickness can be from 1 cm, weight per square meter up to 30 kg (weight does not exceed that of a product of similar dimensions made of artificial stone);
- monofill - with a thickness of 3 cm, the weight of one square meter is 60 kg.
With the first option, there is no need to strengthen the frame.
Basic materials for making a concrete kitchen countertop
The main thing is concrete; it’s better to make the solution yourself.
In addition to white cement, the following is required:
- fillers (marble chips, sand);
- water (with a minimum amount of salts);
- dyes;
- reinforcing mesh (wire 2-3 mm);
- knitting wire;
- LDSP (MDF) or plywood (from 12 mm), boards 30x50 mm, timber 50x50 mm for formwork;
- self-tapping screws (for fastening formwork elements);
- sink pipe 50 mm with a cross section of 35 mm.
It is important to buy high-quality, durable materials.
Tools
Homes should have:
- roulette;
- pencil, ruler;
- metal bucket;
- concrete mixer (drill attachment, mixer);
- trowel;
- putty knife;
- level;
- wood saw;
- jigsaw;
- screwdriver;
- wire cutters, pliers;
- grinder (sandpaper).
You will need coarse and fine-grained sandpaper.
Drawing development
A kitchen countertop made of concrete will turn out to be of high quality if all parameters (dimensions of the working surface, location of the sink, dishwasher and other appliances) are taken into account as accurately as possible. The desired size of the drawing is natural or a template can be made from plywood or hardboard. When taking measurements, an accuracy of up to 1 mm is required.
If the working surface is large, to facilitate installation it is better to divide it (install partitions in the formwork with boundaries on the walls of the cabinets). In the corner version, the joint is placed on a support under the tabletop. It wouldn't hurt to measure the angle and level the walls.
Construction of formwork
First, the casting method is selected: direct or reverse. In the first option, the formwork is done on pedestals, with the front side of the finished product on top. In the second option, the formwork is assembled on a separate table, with the front side at the bottom. Backfilling allows you to make the front surface as smooth as possible and reduce the amount of work during finishing.
The drawing is transferred to laminated chipboard (plywood), 30x50 mm boards are attached to the edges (this is the best option, a board with a thickness of up to 50 mm will be too thin and fragile). To secure it from the outside, metal corners are screwed onto self-tapping screws. Next, a reinforcing frame is created with cells 20x20 mm (25x25 mm). The top edge does not reach the top of the sides by 3 cm. You need to lay a film on the bottom of the formwork (it is important not to create folds), then a reinforcing frame.
Sink hole
The location is indicated by sides, the height of which corresponds to the formwork parameters. There are nuances that distinguish overhead models from built-in ones.
- For overhead model. Overhead sinks have sides. To accurately determine the size of the hole, the product must be turned over and measured with the sides. Their width should be equal to the width of the formwork sides. This allows you to simply insert the sink into the table top.
- For built-in. With this option, the outline is created along the edges. 50x50 mm bars are attached to the inside of the line with self-tapping screws. An important element of built-in models is the landing chamfer, which is difficult to make. Therefore, for a concrete countertop for a DIY kitchen, it is better to buy an overlay model.
Processing joints
When you have the formwork ready, it’s time to process the joints, remove all the irregularities and gaps. It is convenient to do this with silicone sealant. It hardens quickly and penetrates into small cracks and cracks. The dried sealant can be further polished to give it the desired shape and smoothness.
DIY concrete furniture with rounded edges looks especially good in the interior. It is convenient and less traumatic in everyday life. The rounding of the edge is done at the stages of formwork and joint processing.
Carefully process everything so that the cracks and gaps are filled.
There are two ways to do this:
- A curved metal sheet is attached to the area where the boards join. Silicone is poured between the corner of the beams and the rounding of the metal tab.
- If there is no suitable template, you can take a piece of pipe or glass of the required diameter. Place it in the corner of the formwork, fill the resulting space with sealant and wait until it dries. Then remove the object and sand the silicone to the desired shape.
Concreting process
To prepare the concrete mixture you need to take:
- cement, 2 parts;
- sifted sand, 3 parts;
- plasticizer;
- water.
If you add color pigment to the composition, do it at the dry mix stage to ensure a uniform color. Dissolving the paint in water, add the composition to the concrete mixture. This is how you get beautiful “marble” stains.
There are several methods for pouring concrete mixture. In the first case, the formwork is completely covered. With the second method, concreting occurs in layers.
There is another recipe for creating a tabletop with your own hands:
- cement, 1 part;
- sifted sand, 2 parts;
- marble chips, 4 parts;
- water, 0.5 parts.
The formwork can be filled with concrete at one time or poured in layers. In the first case, the countertop has a single concrete structure. In the case of layer-by-layer pouring, expanded clay is added instead of crushed stone. It makes the entire structure lighter and more convenient for further installation.
Pouring and uniform distribution of concrete over the entire area of the formwork.
Application of tiles and stone
To decorate with tiles or stone, a concrete kitchen countertop is dried in the same way as for paint. After this, the product is removed from the mold, placed in its place and covered with decor.
Countertop under tiles
The reinforcement or hardened notch left under the foam and on the surface will ensure reliable fixation of stone elements or tiles.
Advice! If preference is given to tiled models, it is better to choose porcelain stoneware for the floor, which is most resistant to mechanical stress.
Decorative concrete
Provides the greatest scope for flight of fancy in choosing: how to cover a concrete countertop. At the final stage, you can choose a ready-made dry mixture from those offered on the market, there are a lot of options.
Decorative concrete
Or make it yourself using the same sand concrete with the addition of dyes, sea pebbles, quartz, marble chips, and any decorative elements. The only thing to consider when choosing inserts is that the decorative concrete countertop must be polished.
Advice! The composition of the ready-mixes includes additives that increase the hardness of concrete, facilitate grinding work and increase the service life of the surface until the next grinding. The best option is to choose a suitable color and texture from ready-made offers. It is better to entrust the assortment of inserts to your own imagination.
Inserts made of wood and artificial stones (right)
The final filling work must be carried out one day after filling with the base layer. The concrete in the mold should no longer be liquid, but not yet completely harden.
Having decided on the composition of the finishing layer, you need to remove the foam from the formwork. Decorative concrete is poured into the space freed up at the edges and up to the upper level of the formwork and the surface is leveled. The form is closed again for two days. After removing the film, allow the product to dry completely.
From this video you will learn how to properly make a concrete countertop with your own hands.
Grinding
The final stage is grinding and polishing the concrete countertop. Only an inveterate enthusiast can do this kind of work manually. The Chinese grinder will die halfway through.
Final tip! You can rent a good professional grinder. Over the course of the weekend, the fruit of the long labor will be completed.
Grinding
Self-production of concrete countertops is, although painstaking, but not difficult. The price of the product will be several times lower than what was ordered in the workshop, and the moral satisfaction will be just as many times higher, and it will also serve the grandchildren.
Decorative design
Before pouring the face layer, you can beautifully arrange decorative elements at the bottom of the formwork. Here, various beads, pieces of glass, horseshoes and even memorable souvenirs can be used as decorative elements. Try laying out a wire ornament as decoration. After pouring the concrete, wire fragments, glass or metal texture will appear on the surface of the countertop.
If no decor was used, then the front side is sanded.
When you place the decor on the surface of the plywood sheet, make sure that it does not move. To do this, glue each piece to the chosen place. This will ensure that you end up with the pattern you planned.
Concrete is not suitable everywhere
Concrete in the kitchen is increasingly appearing on the walls in the form of a monolithic surface, photo wallpaper or tiles stylized as it. Which shape you choose should largely depend on the style of the kitchen and the atmosphere of the room you want to achieve, but also, above all, on its size.
In small, cramped kitchens there will be little light for such a solution. If your kitchen is not spacious, you should abandon large concrete surfaces in favor of decorative elements made from this material.
Facing solution
For the face layer solution, mix cement with water. Then crushed stone, sand or marble chips are added, depending on the recipe. Stir thoroughly to avoid lumps. The peculiarity of the composition is that they use finer grinding of sand or gravel, without large fragments or sharp edges. Add a little less water than indicated in the recipe. This will help you avoid small holes on the surface of the finished product. For the front layer, the solution is poured to a level of no more than half of the formwork.
When laying the cement mortar, compact and shape it using a spatula. Do not allow air voids to form.
Concrete in the kitchen underfoot
When we talk about concrete in the interior, as a rule, the wall surface or concrete tiles come to mind. And this is probably right, because using such material above the countertop, next to the sink or stove, is not only glamorous and fashionable, but also very practical. Concrete in the kitchen, however, can also be successfully used in other areas. It is perfect for the floor. A floor made of polished concrete will not only be original and impressive, but also functional. It is easy to keep clean.
It is worth remembering that polished and treated concrete must be regularly and properly cared for so that it can perform its functions 100%.
Fill the base layer
The main layer is poured approximately 30 minutes after the front layer. This time is enough for the concrete to set and harden a little. Here the solution is created according to the classic recipe with consistent proportions of all components. After pouring, wait until the new layer sets. Then cover the countertop with film for a day. After the time has expired, the polyethylene can be removed and the concrete can be covered with a damp cloth.
A tabletop made from concrete mortar can look very original.
Final stage and decoration
Dismantling formwork requires care. Disassemble the entire structure, remove the sides. Turn the formwork over and tap the entire surface with a rubber hammer. This will allow the hardened concrete mixture to easily separate from the plywood sheet.
This table cover is suitable not only for the kitchen, but also for the dining room, living room or terrace.
After the concrete has completely dried and you have dismantled the formwork, you need to sand the surface. This will smooth out all the unevenness, remove glue and air pores, and prepare the tabletop for further painting or varnishing. The grinding process also reveals the decor embedded in the concrete texture. All small stones, glass and beads will not “sparkle” if they are not polished first. You can also cover the countertop with decorative tiles or make it look like natural stone.
After sanding, allow the tabletop to dry thoroughly.
Then the surface is leveled and smoothed using an acrylic-cement composition. Mix the mixture to a semi-thick mass and apply to the surface of hardened and polished concrete. This will fill all the cracks and microcracks. The mixture must be applied at least three times, allowing each layer to dry thoroughly. Between stages, sand the surface to avoid the formation of “waves” and unevenness. The last, third layer is not sanded, but left overnight until completely dry. Finally, the tabletop is processed with a grinding machine. Critically evaluate the finished work. Are there any cracks or pores left?
You can also process a concrete countertop manually using sandpaper. But this will require a lot of effort and time.
The polishing step adds attractiveness and smoothness to the countertop. Please note here that the polishing pad must be wet. Then apply primer varnish in one or more layers. Remember that each application of varnish must dry thoroughly. All that remains is to polish the tabletop with wax and, after hardening, clean it with a soft towel. Your tabletop is almost ready.
If you follow the consistency and rules of working with interior concrete, making a tabletop from it will not be at all difficult.
Successful examples in interior design
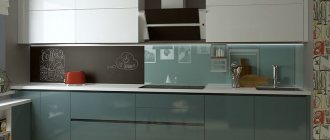
The use of concrete in kitchen design is justified if the material is in harmony with the overall space of the room. Light wooden upper facades look beautiful in combination with massive floor cabinets. Moreover, it is desirable that all surfaces be smooth.
A good option for kitchen design would be to play with color contrast. If you use a black concrete countertop, then the remaining planes of the set should be lighter or made of lighter materials.
In spacious rooms, a kitchen island finished in concrete looks good. At the same time, other elements are made from other natural materials. The combination of a white brick apron with dark concrete facades creates a harmonious loft-style space. In this case, you can complement the interior with a light ceiling to visually expand the room.
Examples of ready-made concrete countertops with your own hands
Once the tabletop is ready, completely dry and processed, it is time to assemble the furniture. To do this, assemble a frame from wooden or metal structures. Run electrical wires if this is a kitchen table and appliances will be installed on it. Install the sink and other necessary elements.
It not only has an attractive appearance, but is also easy to use, as it is resistant to most negative factors to which the kitchen is exposed.
Ideal material for the kitchen
The kitchen needs unique finishing materials. This is in many ways a very demanding room, so it is not surprising that the developers, covering all finishing materials, are looking for not only decorative, but also practical solutions.
Concrete meets many modern needs without any problems. This is a very durable, hard and moisture and high temperature resistant material. He doesn't care about any mechanical stress. It is also quite difficult to get dirty or scratched. It does not fade, does not deform, and can be easily scrubbed, although it does not require too frequent cleaning because it does not absorb dirt. In short, the ideal material for the kitchen world.
