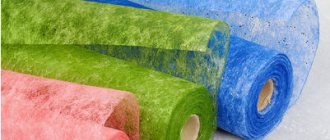
Materials
The main rule is not to buy anything on the market. In addition to the risk of purchasing counterfeit products of low quality, materials in such places are stored incorrectly. Water-based compositions freeze at low temperatures, and after defrosting they lose their quality.
To choose the right water emulsion, you need to pay attention to the following:
- Drying time. This indicator ranges from 2 to 24 hours. But it is important to remember that drying time depends on the humidity and temperature in the room. Optimal indicators: 18–20 degrees Celsius and air humidity not higher than 65%.
- Viscosity. This parameter reflects the degree of dilution of the material with water. If you plan to paint with water-based paint using a roller, then this indicator should be no more than 45. If the work will be carried out with a spray gun, then no higher than 25.
- Material consumption. Indicated in liters per square meter. Most manufacturers indicate consumption without taking into account surface absorbency, so it is recommended to add 10% when calculating.
The consumption of water-based compositions largely depends on the type of filler, the number of layers and the level of absorption of the base - Shelf life. This indicator is important if repairs are still planned, but the purchase of materials has already begun. Typically, the shelf life of water-based emulsions does not exceed two years.
- Covering power. This indicator reflects how well the composition covers the color of the base. If it is low, you will have to paint the walls in several layers.
You will also need consumables:
- Primer. Provides a high level of paint adhesion to the wall. In addition, thanks to the use of a primer, smudges will not appear on the walls. It must be made on the same basis as the paint. That is, for acrylic paint you need an acrylic primer, for silicate paint - a silicate one.
- Sandpaper. Required for grinding the surface before work.
- Putty. If there are a large number of defects, starting and finishing putty will be required. If there are few defects, then only the finishing coat is sufficient.
- Polyethylene film. It can be used to cover the floor and bulky furniture that is difficult to remove from the room to protect it from the composition.
- Masking tape. Serves to limit areas for painting and secure the film.
Some consumables, such as polyethylene or masking tape, are not required for painting, but it will be difficult to work without them
Which water-based emulsion to choose for walls
There are compositions called water-based paints with different properties - some can only be used indoors, and even then they quickly wear off and fade; others paint external walls and do not lose their appearance for years. For this reason, you need to choose a composition for specific tasks and purposes.
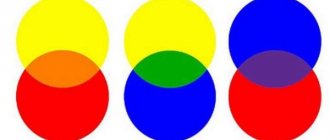
The basis of water-based paints is water, which contains polymer or mineral particles. When drying after painting, the water evaporates, and the polymers and minerals form a film on the surface. The properties of this film are determined by the type of polymer, therefore, when choosing, the composition of the water-based paint is of key importance. And they are:
- Mineral water emulsions. Made using lime or white cement. They have a low price, adhere perfectly to any surface, but quickly fade and are easily damaged - they are wiped off when touched. Therefore, despite the low price, they are becoming less and less popular.
- Silicate. This paint is based on liquid glass, which gives the composition high resistance to atmospheric agents. The walls remain vapor permeable. Can be used indoors and outdoors, service life is about 10 years.
Mineral and silicate water-based paints have different characteristics and purposes
- Water-based acrylic paint. Its positive property is that it lays flat, creating a smooth surface. It can heal small cracks (up to 1 mm), which means that preparing the surface for painting may not be ideal. Without additives, the film is hygroscopic and such compositions are used in dry rooms (living rooms). If you add latex to an acrylic base, it becomes water-repellent. Such water-based emulsions are called latex and are used in bathrooms and for painting walls in swimming pools. The disadvantage of this option is that it does not allow vapor to pass through (condensation forms on it). The price range is average, so painting walls with acrylic-based water-based paint is one of the best options today.
- Silicone water-based paints have appeared on the market quite recently. They create a dense film that closes cracks up to 2 mm wide. In this case, the surface can conduct water vapor; the paint does not change its appearance for a long time. The downside is the high price.
Acrylic and silicone water-based paints can heal small cracks
Having decided on the composition, you need to choose a manufacturer. No news here - it’s better to pay a little more, but get high-quality paint, than to repaint everything again in a few months. When choosing, pay attention not only to price and volume, but also to indicators such as consumption. It is indicated in grams per square meter and sometimes differs significantly. Moreover, expensive paints often have significantly lower consumption.
Required Tools
Most often, the compositions are applied to the wall with a roller. There are several types of this tool that are used to paint walls with water-based paint without streaks:
- Foam rubber. The simplest and cheapest type, but due to the fact that foam rubber absorbs a large amount of the composition, microscopic bubbles can form on the surface. It is better to opt for a roller with a high density.
- Velor. Such products are difficult to find in non-specialized stores. Velor is a dense material, so it absorbs a relatively small amount of paint. Thanks to this feature, the tool practically does not splash the composition, but it needs to be dipped in paint quite often.
- Fur. In this case, we are talking about rollers made of natural or artificial fur. There is practically no difference between them, only natural ones last longer. This option is considered traditional for painting walls.
With the help of a simple tool, you can create different coating textures.
It is also important to determine the size of the tool. In most cases, it is better to choose the longest possible rollers to make the painting process faster. But before buying, it is better to weigh the tool in your hand and take into account that paintwork will make it even heavier.
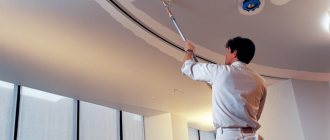
In addition, painting with water-based paint requires brushes for treating hard-to-reach places, a painting tray with a grooved surface, and a mixer for stirring the material. You also need to prepare a stepladder in advance if the ceilings are high, and work clothes.
Technology of painting walls covered with wallpaper
The best option for painting with water-based emulsion is non-woven wallpaper - they are dense, tolerate excess moisture well, without getting wet through. It is still better to cover glass wallpaper with latex paint. The main technological features are outlined below.
- When gluing the walls, do not allow glue to get on the front side of the trellises, after which they must dry completely in the absence of drafts.
- For new wallpaper, the color of the dye can be any color; tinting is done as described earlier. Protect unpainted areas, not forgetting window slopes.
- Textured wallpaper is painted with a long-haired roller; smooth surfaces are painted with a short-haired tool that absorbs the liquid solution well. The corners are treated with a roller nozzle 10 cm long, the rest of the surface with a 25 cm nozzle
- For the first (primer) layer, the paint is diluted with water - up to 10% of the total volume of the solution; the second time the trellises are coated with undiluted dye. Any type of wallpaper can withstand coloring 5-10 times (glass wallpaper is more durable in this regard). What paint to paint the walls after puttying? After this, they begin to lag behind the walls - then they are removed and new ones are glued on.
An interesting effect is achieved through special technology:
- wash off the paint with a sponge from the protruding relief of the already painted canvas - you get a play of shades;
- after a similar rinsing, allow it to dry, then apply a contrasting color.
Preparatory work
Before painting walls with water-based paint, it is necessary to prepare the surfaces. The fact is that this paint is not suitable for finishing walls treated with whitewash or oil paint.
Removing old whitewash and paint
If the layer of whitewash is thick, then it will be necessary to make many shallow cuts over the entire area of the wall, moisten the surface generously with water and leave for half an hour. After this, wet the coating again and wait until it gets wet. Then simply remove the whitewash with a spatula, and at the end wash the walls with a sponge. If the layer is small, then you can do without notches.
After wetting, whitewash can be easily removed using a metal spatula
If the walls were previously painted with water-based paint, then the process of removing it is the same as in the case of whitewashing. But if oil paint was used, it is more difficult to remove the coating. In most cases, a hair dryer helps: use it to heat the surface, then scrape off the material with a spatula.
If the paint is too old, a hair dryer may not help. Then removal technology is used using chemical removers. You need to open all the windows and doors in the apartment to create a draft, put on work clothes, rubber gloves and a respirator. Dampen a rag in the solvent, treat the surface with it, wait the specified time and wash the material off the wall. This process must be repeated until a clean base remains.
The safest way to remove oil paint in all respects is to use a hair dryer.
Also, before painting walls with water-based paint, it is permissible to use mechanical methods of removing paint. The simplest is sanding the surface manually or using a grinder. If you have the necessary tools at hand, you can use a drill with an attachment in the form of chains or a crown for drilling socket boxes.
Puttying and priming
If the walls are perfectly smooth and there are not a single crack on them, then you can skip this point. But, as practice shows, such situations happen rarely; more often preparation is required. It is necessary to tap the wall with a hammer to identify weak points, then inspect the surface and pick out cracks with a spatula to remove small fragments from them. If large potholes have formed, they are sealed with cement-sand mortar. Then the starting putty is applied to the entire area with a spatula; after drying, the surface must be primed and a thin layer of finishing putty must be applied. Finally, the walls are treated with sandpaper or a grinding machine.
Perfectly leveling walls with putty is a difficult task, so it’s better to hire professionals
On a note! The primer is applied using a roller mainly in two layers, and the second layer should be applied only after the first has completely dried. In addition to increasing adhesion, this material helps reduce paint consumption.
Painting technique
You can paint walls with a brush, roller or spray gun. There are technologies developed over the years for this.
Painting with a brush
For those nostalgic for the good old days, we recommend painting the walls with a brush. But we warn you right away. This takes a long time, is not of very good quality, and the paint consumption is a little higher (some will end up on the floor in the form of drops, some will remain on the wall in a thicker layer of paint).
Before starting work, the brushes (a large flywheel and a small corrective one will be required) are soaked in water so that no bristles remain on the wall during the work.
The paint is poured into a cuvette if the packaging is large, or remains in the jar. In the latter case, the water emulsion is stirred regularly, approximately every half hour, to maintain a homogeneous composition.
The brush is dipped about 1/3 of the way, after which excess paint is removed with light blows against the wall of the jar or tray. The coloring starts from the upper left corner and goes down in narrow stripes. The coloring composition is applied in a thin, uniform layer. The brush is held almost perpendicular to the wall, the pressure is light.
The application technique may vary, but experts advise first applying a vertical stroke, and then blending it with zigzag movements. This way you can ensure that the wall is free of smudges and streaks.
The second technique involves applying one layer with vertical movements, the second with horizontal movements, without shading. With this application, omissions are eliminated, but the likelihood of smudges and streaks increases.
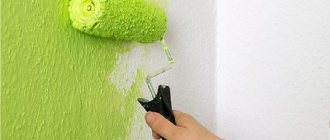
Roller
Painting the walls with a roller is carried out in the following sequence:
- paint is poured into the tray;
- the roller is wetted around its entire circumference. To do this, it is dipped into the paint and then rolled along the ribbed surface of the cuvette. And so on several times until the fur is saturated with the water-based composition. If you skip this work, there will be “unpainted” marks on the wall that are not visible when wet;
- wet the roller again and, rolling it along the edges of the ditch, distribute the paint evenly over the entire circumference;
Use a roller to paint in a W-shaped motion.
- you need to start painting from a corner, any corner. Lead from top to bottom according to a pattern reminiscent of the Latin letter “W”. The color stripe is about half a meter. The stripes are applied with an overlap of 5-10 cm;
- paint drips are removed with a used (dry) roller - the pile will absorb the drips. In this case, the movements of the roller should also be similar to the letter “W”.
How many times does a wall need to be painted with a roller? 2 layers are enough. The second layer of paint is applied to the dried first one.
Spray gun
Using a spray gun to paint walls not only gives excellent results, but also brings pleasure from the work - it is easy and pleasant. The technology consists of several steps.
- The paint is diluted (more than usual), mixed, and then filtered through cheesecloth (small particles can clog the nozzle).
- The supply of dye is regulated, for which an unnecessary object is dyed within a few seconds.
- After stabilizing the paint flow, the nozzle is brought perpendicular to the wall at a distance of 30-60 cm. The movement for the first layer is horizontal, for the second - vertical, at a speed of approximately 1 m per 5 seconds.
- Coloring starts from the top. Paint in sections. The next square is started after coloring the previous one. The pace should be even. Any delay leads to a thick layer of paint that begins to flow down. Therefore, it is better to underpaint than to overpaint - the next layer will hide the defect.
- Improved painting of walls with water-based compositions when using a spray gun is achieved by painting 3 times - three layers are applied.
Coloring
After completing all the preparatory work and purchasing materials and tools, you can proceed to the main stage. The following will describe how to properly paint walls with water-based paint.
Preparation of the composition
Immediately before starting work, you need to open the container with paint and add some water to it so that the paint is not so thick. Next you need to add color. To carry out this operation yourself, you need to have experience, so it is better to tint the composition in the store. It is better to mix the material using an electric drill and a mixer attachment, but if you don’t have a tool at hand, you can get by with any thin, long object. You need to prepare an amount of paint that is enough to finish one wall, so the difference in shades will be almost imperceptible.
On small volumes, white water-based paint can be tinted manually, but for large areas it is better to use automation, otherwise there will be discrepancies in shades
Applying paint with hand tools
Painting with water-based paints occurs as follows: the prepared material must be poured into a painting tray, dip a brush into it and paint hard-to-reach areas near the ceiling. Then you should wet the roller in the paint and squeeze it on the grooved surface of the tray. It is better to start painting from the top; to do this, press the roller to the surface and roll it over the wall. In this way, the entire surface is painted, and after it dries, a second layer is applied.
A paint cuvette with a corrugated spin field will significantly save paint.
Spray application
If you decide to use a spray gun for water-based paint, it is recommended to cover the floor with film so that paint and varnish does not get on it. The technology of work is as follows:
- The paint is poured into the container and the equipment is connected.
- Point the nozzle at an unnecessary sheet of plywood or cardboard and press the button. This must be done so that the paint flow becomes uniform.
- Then, pointing the nozzle perpendicular to the surface and placing it 30–50 cm from it, you need to press the button and move the device from top to bottom. You should work at a speed of 1 meter per 5 seconds.
- So you need to paint the entire wall, and after drying, apply a second layer perpendicular to the first.
The speed of painting with a spray gun is several times higher than the manual version, but such work requires a certain skill.
At this point, painting with a water-based composition with your own hands is over. If, after the material has dried, stains appear on the walls, it is necessary to apply another layer. If this does not help, you will have to remove the coating and carry out the entire procedure again.
Number of paint layers
According to the work technology, it is necessary to apply at least two layers of paint. This is primarily due to the fact that some of the paint will be absorbed into the surface, causing the base to show through. Therefore, you should not waste a large amount of material on the first layer. It is also important to note that the next layer is applied only after the previous one has completely dried.
When painting in multiple layers, each subsequent layer is applied perpendicular to the previous one, but the last layer should be located parallel to the light from the window
On a note! The number of layers also depends on the color of the base and paint. If the material is lighter than the wall, then at least three layers will be required.
Preparing the Paint
When opening a container of paint, its consistency is almost always much thicker than required for the job. Therefore, the paint is thoroughly mixed, adding water in small portions so as not to dilute more than necessary.
This operation is most conveniently performed with a screwdriver with a mixer attachment. If you don’t have a power tool, you can stir with any object, but it takes a long time and the quality is a little worse.
The easiest and fastest way to stir paint is to use a screwdriver with a mixing attachment.
If the wall design is creative and involves the surface shimmering under streams of light, it is at this moment that various sparkles are added to the paint. But such ideas come to owners quite rarely.
If small grains appear on the surface of the paint in the funnel, the water-based emulsion must be filtered through 3 layers of gauze.
Paint tinting
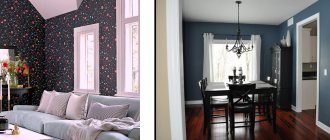
Giving paint a certain color and tone at home is carried out according to the following algorithm:
- The water emulsion is poured into a large container (usually a 10 liter bucket) so that it is enough to paint the walls in one room, since it is almost impossible to obtain the same color and shade again. As an exception, for a wall with a window you can make the paint a little lighter, as a result of which the room will visually appear larger;
- adding water in small portions, the paint is brought to the required consistency while mixing;
- Tinting pigments are added to the water-based composition, after which the paint is thoroughly mixed. If necessary, the resulting color is adjusted: new pigments are added or the number of those already added is increased. Everything gets mixed up again;
To see the final result you need to paint a small section of the wall.
- With the resulting paint, a small section of the wall is painted so that after about 2 hours you can see the real color scheme of the interior. If the result is not satisfactory, the tinting process continues.
Creating a textured surface
Very often, water-based emulsions are used to create a textured painted coating. For these purposes, you will need a viscous material that cannot be diluted with water. You will also need a roller with medium-length stiff bristles, a lint-free roller and a sponge. At the first stage, use a roller with a hard coat, apply paint to the wall and fill all the pores. Then the protruding parts of the texture are finished with a lint-free roller or sponge. Often, paint of a different color is used.
Simple fleecy rollers can produce quite interesting textures.
Creating texture using a coloring composition
To create a textured surface, you can use paint without first plastering the wall. If you only have a regular roller at hand, you need to dip it into the viscous material and quickly roll it over the surface. After drying, you will get a pattern with pores and textured stains. If you first dilute the composition a little, you will get a more blurry pattern. Along with the paint, you can use special rollers with flaps or cutouts.
Important! When creating a textured surface, a large amount of material is consumed.
The texture of the water-based emulsion can be applied either manually or with a special roller
Water-based paint for walls: characteristics
Technical characteristics of the paint: composition, consumption, viscosity, drying time - vary depending on the intended use.
By correctly comparing the desired parameters of coverage, finish gloss or matte, and coating strength, you can choose a paint that suits all points.
Water-based emulsion has a number of advantages that distinguish it from other paints:
- drying time from 2 hours;
- lack of specific odor;
- environmental friendliness (safety for humans and the environment);
- the ability to choose the desired shades;
- easy cleaning of instruments and skin swabs
Painting with water-based emulsion should only be carried out at temperatures above 5°.
Features of painting wet rooms
Water-based compositions are easily dissolved by water, so during repair work the question arises: how to properly paint walls in wet rooms? The main condition for painting with this material is the presence of high-quality forced ventilation. If we are talking about the kitchen, then you can paint only those walls that are located away from the countertop for cooking, gas stove and sink. It is better to tiled this area. After the material has dried, it is recommended to varnish the walls.
For wet rooms, washable water-dispersion compositions based on latex or acrylate are used.
As for the bathroom, it is better to use water-based emulsion only if a shower stall is installed. The fact is that even with good ventilation, a large amount of steam will form in the bathroom, which negatively affects the coating.
Painting walls with water-based paint yourself is a fairly simple procedure. For the result to meet your expectations, it is enough to follow the above recommendations and carefully read the label on the package. We also recommend watching the video.
Work equipment
You won't need too many tools, here's the full list:
- Pallet. It is desirable that it be equipped with a special ribbed platform, which is used to uniformly impregnate the roller and remove excess water emulsion.
- Roller. The best option is a nozzle with artificial fur or medium-length bristles. Professionals recommend using foam rubber and velor rollers in other cases.
- Telescopic handle. You may need it to work without climbing on a stool or stepladder.
- Masking tape. It will be very useful if the ceiling is already painted and needs to be protected from accidental brushstrokes. You can also use it to create simple and complex geometric patterns or to delimit areas that you plan to paint in different shades.
- Brushes. Wide (about 8 cm) and flat - for painting corners and joints of walls and ceilings, and a narrower brush, which is convenient for getting around sockets and painting hard-to-reach places.
- A special whisk or corresponding attachment for a drill. They are needed for mixing paint.
A good painting tool will make the job much easier.
Useful tips when working with water-based paints
Those who constantly paint surfaces have developed their own little tricks that make the job easier, and are ready to share them with novice craftsmen.
- So that the paint applies more evenly. Pour more paint into the cuvette, wet the roller well on all sides, and roll it back and forth along the ribbed part of the tray 6-7 times. This way the entire surface will be moistened evenly.
- Roll it dry again. When the bulk of the paint on the roller is finished, do not rush to wet it again - go back and forth over the already painted area with an almost dry roller.
- To make the roller and tray last longer. It is not difficult to use the tray several times with paint, even of different colors - just before starting work, just place it in a thick bag or wrap it in several layers of film, and then remove the shell. The tray will remain clean, you can pour the next portion of paint without long soaking and washing. It is better to keep the roller in a bag or several layers of film between painting stages. This way the pile does not dry out and does not require further soaking before applying the next layer of paint.