When repairing a floor, leveling is often performed before installing the finishing coating. A high-quality, level floor will ensure a good appearance of the floor covering, which will be used for many years. Leveling the floor can be done in different ways, the choice of which depends on the material used for the base and floor covering. Each of the technologies used has its own advantages and disadvantages, as well as implementation features. It is necessary to familiarize yourself with these nuances before starting repair work. More information about leveling the floor with your own hands will be discussed in this article.
Do-it-yourself floor leveling
What is it for
Many people prefer to do the repairs themselves so as not to overpay the repair team for the work. This is not surprising, because now you can find many useful step-by-step instructions for leveling the floor. But even if all the recommendations are followed, a novice master can make serious mistakes, for example, skip several steps of the work process or incorrectly mix the building composition. The end result when making such mistakes is sad - the floor surface turns out to be uneven, which is why it is impossible to install laminate or ceramic tiles.
Uneven floors threaten poor-quality installation
Note! To avoid serious mistakes, you must carefully follow the instructions for leveling the floor. High-quality work will save not only money, but also time, and the finished coating will decorate your apartment or house for a long period.
Methods for determining floor unevenness
It's no secret that additional leveling may also be required for wooden floors, especially if there are gaps or gaps between the boards. Even if the subfloor is strong enough to hold together, leveling may still be necessary. The procedure is also necessary when installing the floor on an old layer of screed, the surface of which becomes rough over time. Leveling the floor will help eliminate any unevenness.
Why do you need to level the floor?
Semi-dry screed
As a floor leveling specialist, I recommend this technology to everyone. The semi-dry screed is based on a semi-dry cement-sand mortar with a small water content. To provide the necessary strength, a metal mesh is used. Polypropylene fiber is added to the mixture.
Important! For semi-dry screed, inexpensive materials are used. In this case, the floor surface turns out to be monolithic, durable, and is not afraid of shrinkage and cracking. Moreover, you can effectively level thin floors without fear of liquid leaking onto the lower floor. Therefore, as a specialist in this field, I recommend the use of this technology.
For semi-dry screed, inexpensive materials are used. In this case, the floor surface turns out to be monolithic, durable, and is not afraid of shrinkage and cracking.
Another reason why I recommend semi-dry screed is its simple technology. The process of its creation is as follows. First of all, the base is prepared and cleaned of all kinds of dust and dirt.
If you are interested in high-quality work, then waterproofing and thermal insulation of the floor is a must. For waterproofing, you can use roofing felt or polyethylene film, and for thermal insulation, foam, polystyrene foam and similar materials.
To ensure the surface is perfectly flat, beacons are set:
At the next stage, a screed is made, which is leveled using the rule.
The last stage is grouting the semi-dry screed. Special equipment is used for this.
Advantages of the technology:
- During operation, a small volume of water is used. Due to this, a rapid drying rate is observed.
- Due to the minimum amount of water, leakage of cement laitance into the adjacent room is eliminated.
- Creating an almost perfectly flat surface.
- There is no shrinkage during the drying process.
- Eliminates the risk of cracks.
- The presence of reinforcing fiber makes the screed resistant to mechanical stress.
- Does not exert a strong load on the ceiling and load-bearing walls of the building.
- Speed of production due to the use of special equipment.
- Possibility of creating multi-level screed.
- After 12 hours the base is put into operation.
- The site is free of dust and dirt.
Disadvantages of technology:
- Reduced fluidity of the mixture requires the use of additional equipment when mixing.
- It is almost impossible to make a screed manually without special equipment.
- Semi-dry screed is afraid of moisture.
- If the compaction is poor, partial destruction or creaking of the floor may occur.
- Dependence on weather conditions. It's difficult to do in winter.
As for the cost of all work, per m2 it is within 450 rubles. In one day, my professional team is able to produce up to 250 m2 of semi-dry screed. I practice this method of leveling the floor in residential apartments/houses, offices and other similar premises.
Important! But there is one limitation. The weight of the finished screed per square meter can reach up to 500 kg. If the overlap is weak, then its production is contraindicated.
Types of alignment
If special fiberglass-based compounds are used to level a wooden floor, then for a cement coating you will need a quickly hardening mixture with the addition of some additives. As a rule, cement or dry screed, as well as a self-leveling mixture, are used to level the floor. Let's consider each of the varieties separately.
Ways to level a wooden floor
Leveling for different floor coverings
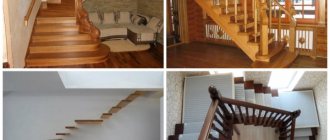
Depending on the type of floor covering, the technology for leveling the floor may differ. First of all, this can be explained by the characteristics of finishing materials, as well as their operational properties. Leveling the floor surface is most often used for coverings such as parquet, tiles and linoleum. Below are the main types of coatings.
Floor leveling for different floor coverings
Table. Types of floor coverings.
| Material, photo | Description |
| Parquet | It has high strength and good thermal insulation properties. Parquet consists of a large number of wooden planks that are interconnected into one large module. The material is durable, but at the same time it requires complex maintenance. |
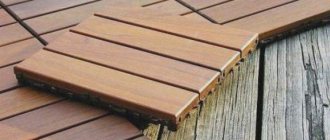
| Laminate | Another flooring material laid on a flat surface. Laminate consists of a base, paper and a protective layer. It is characterized by low cost and ease of installation, but at the same time it is afraid of high humidity. |
| Linoleum | Inexpensive roll covering made from artificial materials. Linoleum can imitate other, more expensive types of flooring. The material is durable, reliable and, most importantly, wear-resistant. In addition, it is resistant to high levels of humidity. |
| Ceramic tile | High-quality and practically wear-resistant material, installed mainly in the bathroom or kitchen. Installing tiles is a rather complex and time-consuming process, so the coating for this purpose must be perfectly smooth. |
On a note! Almost all the materials described above require floor levelness, so leveling must be done before installing the floor covering. Otherwise, the floor will be uneven or you will have problems with installation.
Instructions for leveling the floor
Leveling is most often performed using a self-leveling mixture, since this method is considered the most effective and reliable. The finished product can be purchased at your nearest hardware store. Below are step-by-step alignment instructions, which, if followed, will help even a novice master cope with this task.
Leveling the floor according to beacons
Step 1 . Regardless of the type of flooring, leveling the floor must begin with preparing the base. Remove all construction debris, as well as accumulated dirt and dust. For this purpose, you can use a construction vacuum cleaner. If the base is too dirty, then, in addition to a vacuum cleaner, wet cleaning may be required.
Preparing the subfloor
Step 2 . Thoroughly vacuum the entire surface of the base, paying special attention to any cracks that have formed—dust often accumulates there.
Cleaning the surface with a vacuum cleaner
Step 3 . Prime the base surface. This is necessary to improve adhesive properties. The prepared primer mixture is carefully applied to the surface of the base using a brush, roller, or simply poured. The primer layer must dry well after application, so further work can be carried out only after 24 hours.
Surface priming
Step 4 . Prepare a solution for the self-leveling floor. To do this, you need to mix the powder with water in one bowl in accordance with the proportions indicated on the package. It is strictly not recommended to deviate from the manufacturer's recommendations. Using a mixer, stir the mixture thoroughly. Make sure there are no lumps left in it.
Preparation of solution for self-leveling floor
Step 5 . Pour the finished composition onto the base. The mixture has a fairly high spreadability, but experienced craftsmen still pour it not in one, but in several places at once.
Pour the solution onto the base
Step 6 . Start leveling the poured mixture. For this purpose, it is better to use a special tool - a squeegee or a wide spatula made of metal. During the leveling process, you need to walk over the surface of the layer with a needle roller.
Smooth out the poured mixture
Step 7 . Wait at least 3 hours until the floor has completely dried. As practice shows, it takes approximately this long for the material to begin to gain strength. But if a non-fast-hardening mixture is used for repairs, then you will have to wait much longer.
Wait until the mixture dries completely
Step 8 . Check the levelness of the floor after it begins to harden. Use a rule or building level to check. If any irregularities were identified during the inspection, they must be eliminated using a grinding machine. If everything is done correctly and according to the instructions, then no problems should arise with this.
Evaluate the quality of the floor screed
Note! 4-5 days after leveling, you can begin installing tiles, parquet or other finishing floor covering. Just before this, it is necessary to clean the surface again.
Floor scraping
This method is used only and exclusively for wooden floors. Sanding is the removal of minor unevenness in the floor by removing thin chips from the surface. In this case, the layer removed can be tenths of a millimeter.
Looping is used in two cases:
- when an old but good wooden or parquet floor just needs to be cleaned of old paint;
- when it is necessary to level out small uneven floors in order to install a new floor covering on top of it.
Floor scraping can be done in two ways:
- manually using a cycle;
- using an electric scraper.
The manual method is rarely used due to the high cost of labor and time. A sanding machine is expensive, so it's best to rent one.
The sequence of work is as follows:
Floor preparation:
- The room is completely cleared of furniture, carpets, and curtains.
- Walking slowly across the floor with a heavy step, identify all loose boards or parquet planks. If there are sagging boards, then you need to remove them and find out the condition of the joists or beams (if the floor is wooden). If rotten elements are found, they need to be replaced.
- If there are gaps, then you need to plan out planks of suitable width and, smearing them with wood glue, insert them into all the gaps found.
- If there are traces of wood-boring insects on the floor surface, the floor must be treated with an insecticide.
- Frankly bad and split boards need to be replaced with new ones.
Cycling:
- During work, you need to use a respirator, safety glasses and gloves, as the process is very dusty.
- The door of the room must be closed tightly and the cracks plugged. Open the windows.
- You need to insert coarse sandpaper into the machine. In the first cycle, the machine is directed diagonally. Each subsequent track should slightly overlap the previous one. Then scraping is carried out in the transverse direction.
- After the first sanding, it is necessary to fill all the cracks and dry the putty. Only after this can you work further.
- The machine is equipped with medium-coarse sandpaper and the work continues, only along the boards.
- The process is repeated using fine sandpaper.
- Next, you need to thoroughly clean the floor, baseboards and all other surfaces in the room using a vacuum cleaner. After a day, you need to vacuum the floor again.
Further actions depend on why exactly the scraping was done. If the floor will be used as is. As it is, you need to rub it with white spirit, and then varnish or paint it.
If it is the basis for the finishing coating, then you can begin its installation.
Cost of repair work
If you do not have free time to level the floor yourself, then the work can be entrusted to repair teams, whose advertisements abound on the Internet. Specialists can do not only leveling, but also provide other repair services. But all this will have to be paid for. Of course, the cost of the work depends on the skill level of the master and the city in which the work is performed (prices for leveling in Moscow are much higher than in other cities).
Cost of floor leveling
Let's consider the average cost of work per 1 sq. m. So, the asking price:
- installation of plywood sheets on a base made of wood – 110-130 rubles;
- leveling with self-leveling floor – 150-180 rubles;
- dry screed – 400-500 rubles;
- leveling the floor with joists – 520-600 rubles;
- cement floor screed with installation of beacons - 600-650 rubles.
Leveling the floor: before and after
Leveling the floor yourself is a difficult job that requires patience and care. Therefore, if you doubt your abilities and are not sure that the leveling will be done efficiently, it is better to entrust the work to qualified specialists. Of course, you will have to pay a lot for their services, especially if the room is large, but the result is worth it.
Using the mixture to level the floor
Prices for self-leveling floors "Starateli"
self-leveling floors prospectors
↑ Leveling a concrete floor using a cement-sand screed (wet method)
This method of floor leveling is the most popular at the moment, because it will require a minimum amount of financial resources, although it will take quite a lot of time. Therefore, before taking any action, consider what is more important to you - saving money or saving time.
↑ Preparatory work
The first thing you will need to do is prepare the base. To do this, remove the old coating and carefully inspect what is underneath. If the old screed has defects, chips and unevenness, you will have to start “destructing” it. You can get rid of the “relic” either using a hammer drill, which is not advisable, since it may not be able to cope with such a load, or using a jackhammer - it will easily “find a common language” with the remnants of former luxury.
Having removed the old screed and the remaining debris, you can begin marking, which will help you correctly align the beacons. It is these elements that decide the fate of the entire floor, because the evenness and smoothness of the future concrete floor will depend on how carefully and correctly the guides were installed.
↑ Installation of beacons
Beacons are guides made of metal slats, thanks to which the mixture will lie smoothly and clearly during leveling.
There are quite a few ways to install beacons: some use a water level, some use a laser, and some prefer to do it by eye using a regular fishing line. But there is one method that allows you to set the guides quickly and correctly without much difficulty.
A laser level is ideal for these purposes, as it makes it possible to make marks on all the walls of the room at once. It needs to be placed in the center of the room and turned on.
Further. In one corner of the room, screw a self-tapping screw into the floor approximately to the height of the future screed. Place a rule or any rail that is at hand on it. Make a mark with a marker where the laser beam intersects the staff. Now you can move to the next corner, where you need to do the same thing, but... by screwing in the screw and setting a rule on it, you can see that the mark either does not reach the laser beam, or it is located above it. In this situation, you just need to tighten the screw a little to the desired level. This way you have to mark out the entire area of the room.
Having finished with the screws, you can begin placing the beacons, for which, as mentioned above, you need to take metal slats or special T-shaped guides. Pour a small pile of mortar onto each screw and place the beacon on top. Then press it firmly until it rests against the screws. Having fixed the guides in this way, you need to wait until the solution sets. If you start pouring work right away, the beacons may move and all your efforts will be in vain.
Placing beacons under a wet screed
↑ Pouring the solution
Having prepared several buckets of mortar and poured them at the far wall of the room, begin to level the floor using the rule. At the same time, you need to pull it not only towards yourself, but also from side to side, so that the solution lays down better and more evenly. In principle, although this stage takes quite a lot of time, it does not require any special knowledge or experience; the main thing here is patience.
Leveling the solution using the rule
Movements as a rule should be not only towards yourself, but also left and right
Find out about a convenient way to make a concrete floor in your garage.
↑ Caring for fresh screed
You now know how to level a concrete floor using a wet screed, but you probably don’t realize that even after all the work is completed, your mission is not over. Fresh screed needs special care. It needs to be moistened daily with a roller, and the first time this will need to be done the next day. Moistening is an important stage in preparing the base for finishing work, because this is the only way concrete can gain the necessary strength.