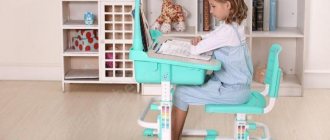
The child learns about real life while playing. Dolls imitate the adult world, preparing the girl for adult relationships. And for toy people, you need a house with all the attributes of a reduced size. The most important storage space in it will be a closet for doll clothes.
Furniture assembly classes will captivate you and your child, teaching your child order and creating a fairy tale atmosphere around him. Using our advice and the proposed master classes, you will assemble a full-fledged closet at home in which things valuable to your child will be stored.
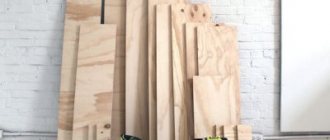
A doll wardrobe can be made from plywood if you have the right tools
Types of doll cabinets
If you're an adventurous and resourceful parent, you'll want to create the perfect play closet for your child. And here you can encounter an impressive selection of options. Let's look at what cabinets you can make with your own hands from scrap materials:
- Chiffonier. It stores outfits and accessories for dolls. Most often, such a cabinet has a rectangular elongated shape and is equipped with doors. Shelves or a crossbar for hangers can be placed inside. If you try, you can make several branches at once. Inside there is usually a mirror, small drawers, and secret shelves where the entire doll's wardrobe will be stored.
- Display cabinet. It is most often used when a child needs somewhere to place decorations or simply beautiful things. The showcase has transparent doors and, most often, transparent walls. If you try, you can make lighting elements inside, and put bags, beautiful shoes, accessories, and hair jewelry on the shelves.
- Dresser. It consists of a massive tabletop, under which there are drawers of various sizes. Most often they are located under each other and move forward. Clothes and accessories are stored in the chest of drawers.
- Hanger. It can be made from a wooden panel to which small hooks will be attached. The hanger is placed against the wall, creating the impression of a full-fledged hallway.
- Wardrobe for storing dishes. The sideboard has transparent doors, through which you can see what is at the disposal of the puppet characters.
- Wardrobe suitcase. This is a convenient, portable toy that you can take with you for a walk, on a trip, or to visit friends. In appearance, this is an ordinary classic suitcase, but inside there are a lot of compartments in which wardrobe items, accessories and even the dolls themselves can be stored in different compartments.
- Shoe cabinet. If your child’s dolls are real fashionistas, then you also need to provide a shoe rack for shoes. It looks like a chest of drawers with small drawers.
- Closet. It differs from a regular wardrobe with sliding doors.
The simplest option is a swing wardrobe
Design options
Cardboard makes good household items. With the help of this raw material it is easy to diversify the interior of your home; it is used to make your own dollhouse, tables and chairs for children. In addition, on the floor of the children's room you can place small shelves made of boxes, decorated in a fairy-tale style, in the form of animals or cartoon characters.
Properly selected material and technology make it possible to produce more functional items:
- kitchen sets;
- sofas, armchairs;
- chests of drawers, cabinets;
- coffee tables;
- cabinets;
- wall shelves.
Like any material, cardboard has its pros and cons. Among its advantages:
- Cost-effective - products can be constructed from cardboard boxes. They are taken free of charge at retail outlets or purchased at a wholesale base, which is much cheaper than new products made from expensive raw materials.
- Lightness - the furniture weighs almost nothing, it can be easily disassembled into its component elements, which greatly simplifies its transportation.
- Wear resistance - household items made of thick paper are characterized by sufficient strength and can last a long time. You just need to take a responsible approach to the drawing up of the drawing, the quality of the assembly, and the choice of fasteners.
- Safety - cardboard is an environmentally friendly product. It is made from natural raw materials, so it has no harmful effects on human health.
- Ease of processing - the cardboard sample is extremely malleable, allowing you to expand the boundaries of human imagination. By creating furniture products with an unusual design, you can dilute the interior with exclusive decor.
Tips for creating creative furniture at home with your own hands
The disadvantages of furniture made from cardboard are that it is not resistant to moisture and is a fire hazard. The product must be kept in a dry room, at a safe distance from sources of fire. This type of furniture requires special care. Also, the assembly process requires a certain precision; mistakes made can lead to early breakdown of the structure.
Low cost
Lightweight furniture and ease of transportation
Safety of raw materials and absence of harmful effects on human health
Wear resistance of household items with proper assembly quality and fasteners used
Ease of processing the material and the ability to create pieces of furniture with an unusual design
Sizes of dolls and suitable cabinets for them
Choose your wardrobe according to the size of your toys. The table contains this year's popular dolls.
| Doll name | Height (cm) | Chest (cm) | Cabinet height and depth (cm) |
| Barbie | 29 | 13 | 25-35 x 4-5 |
| Baby Born | 43 | 28 | 40-50 x 5-7 |
| Reborn | 53 | 30 | 45-55 x 6-8 |
| Monster High | 27 | 8 | 25-30 x 4 |
| Lol doll | 9 | 6 | 10-15 x 3 |
Once the size is selected, look at what materials are available and proceed to the appropriate instructions.
Paper doll cabinet
The easiest and fastest way to give your child a complete doll wardrobe is to use paper.
You will need:
- sample;
- remnants of wallpaper or whatman paper;
- old newspapers;
- PVA glue;
- press;
- water-based paint;
- door hinges;
- pens.
Step-by-step instruction
- To make the template, you need to cut out the back, sides, top and bottom panels, and doors. When marking the future cabinet, remember that it should be rectangular in shape.
- For each part, cut out 10 to 15 blanks according to the template.
- Then start gluing the layers together. Coat each part well with PVA glue and combine it with the previous one until all 10-15 pieces are in one glued stack.
- All elements of the future wardrobe must be placed under a press and wait until the pieces dry and harden.
- Then, using miniature door hinges and handles, assemble the cabinet. The sides that should not have loops on them can be glued together.
- To create a unique design, you can paint the cabinet with artistic paints.
- As soon as the patterned layer dries, coat the resulting cabinet with varnish.
- Secure the legs.
Cardboard computer desk
Step by step process for making a small computer desk. Pre-cut parts are shown with exact parameters and required quantity. Cardboard for strength is folded in several layers. To connect the parts, depending on the function, the author uses three types of glue: thermo-, “Athlete”, PVA. The process of strengthening the legs and tabletop with strips folded in the form of geometric shapes is shown in detail. The internal content includes more than 100 parts. The finishing touch is decoration with self-adhesive film with a marbled pattern. The video is without commentary and is soundtracked by a musical composition.
Wardrobe for dolls made of cardboard
Before marking the outline of the future wardrobe, check with your child which doll the furniture will be intended for. Based on this data, select the sizes.
For example, let's make a wardrobe for Barbie. Its height will be 28 cm, width 26 cm, and depth 7 cm.
The closet has two compartments. The compartment with one door will have three more shelves.
However, you can experiment with the interior decoration of the closet.
- You will need a large piece of cardboard, such as a pizza box or shoe box. And a stationery knife.
- Cut out two identical pieces that will be the top and floor of the wardrobe.
- Then make the side pieces to match the top and bottom.
- Mark the places for the folds. Leave allowances of half a centimeter on them in order to more accurately glue the elements together.
- Make through cuts at the folds and bend the cabinet along them.
- Glue the top, bottom and sides of the cabinet together.
- Cut out 3 doors. To determine the dimensions, you need to find out the perimeter of the through hole in the first and second compartments.
- The doors can be glued, but then they will not turn. Therefore, it is recommended to place them on special hinges.
- Once again glue the parts at the joints.
- After drying, the cabinet can be coated with acrylic paint and a layer of varnish to give it a finished look.
- Next comes decorative work. You can make handles and place sticks (for hangers) inside, simply by gluing them to opposite parts of the compartment.
- The outside of the wardrobe can be decorated with stickers.
An example of making a cardboard toy chest of drawers
Here we show how to make a small cabinet out of cardboard for a doll's small things. This is not a locker, but rather a chest of drawers.
How to make a doll closet with your own hands
Every owner of at least one doll has a dream that her beloved Barbie would have a real home with furniture, household appliances and, of course, a wardrobe.
Now Barbie dolls are sold with large sets of dresses and all kinds of outfits. Of course, they need to be put somewhere. You can buy a ready-made wardrobe for dolls at a children's store, but it will be much cheaper to make it yourself . It can be made from the following materials:
To decorate the finished cabinet you will need all kinds of rhinestones, stickers, wrapping paper, wallpaper, fabric and paints.
Wardrobe for dolls out of the box
Do not throw away Ahmad juice or tea packaging after use. They can be used as a blank. A shoebox or any other box will also work. It all depends on the dimensions of your future cabinet. It is more convenient to work with thick cardboard.
In addition to the box you will need:
- glue;
- scissors;
- sandpaper;
- sheets of wallpaper or colored paper;
- glue (for example, “Moment”);
- wire;
- pliers;
- stickers for decoration.
Let's get to work.
- When the cardboard box is closed, the so-called four wings are formed. You need to cut off two short wings and leave two large ones. This will be a blank for the future wardrobe.
- Make a thick roll of wallpaper with a diameter of 5 mm. Cut it into four pieces, each of which will have a height of 5 mm.
- Attach these blanks to the bottom of the cabinet, simulating legs.
- A short cut fender can be useful if you insert it inside and turn it into a stick or a special compartment for storing shoes.
- Carefully sand all cut areas, as well as existing irregularities, with sandpaper.
- Make handles from two small pieces of wire. They need to be bent two or three times each.
- Wind the thread around the shelf in such a way as to completely hide it.
- Make 2 holes in the cabinet doors and insert the remaining wire on the sides into the hole. Bend it with pliers so that the handle fits snugly against the door.
- Make sure all joints are well taped and in place.
- Paint or cover the resulting doll's wardrobe with colored paper.
- The last and most enjoyable stage is decoration. You can do decoupage, scrapbooking, or draw simple patterns on your wardrobe yourself. Here only your imagination comes into play.
What materials can it be made from?
Almost everyone has boxes of shoes or kitchen appliances collecting dust in their pantry for a long time. Without thinking that this “junk” might one day be useful, they throw it away. But it is precisely this that can become the basis for designer items and original works.
Such creations include a wardrobe for doll things.
It can be made from simple materials:
- cardboard;
- boxes;
- newspapers;
- paper;
- matchboxes.
And to decorate products, experienced craftsmen use acrylic paint, decoupage napkins, fabric and colored paper.
We use matchboxes
This method can be compared to children's blocks. A different number of matchboxes will allow you to make a stylish chest of drawers or a large three-leaf wardrobe.
Expert opinion
Tatiana Leontyeva
Professional housewife
Talk to your fashionista and find out what size doll storage to make. If it is a small bedside table, then 2-3 matchboxes should be placed one above the other. For a large chest of drawers with a lot of compartments, the boxes will be glued not only to each other, but also to the sides.
So let's get started:
- Glue the boxes together.
- Wrap the resulting chest of drawers with thick paper.
- Trim it and varnish the top.
- Decorate the retractable elements with paper, paint or fabric.
- Make handles from screws.
Then you can decorate and decorate the resulting chest of drawers at your own discretion.
Matchboxes - a convenient template for creativity
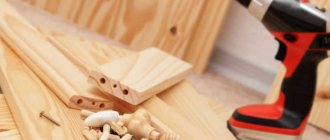
Wardrobe for dolls made of plywood
This is a rather complex master class. It is advisable to have experience working with wood. Thick plywood is not suitable for a miniature Barbie cabinet. A small child may be injured when playing with such furniture. Therefore, to assemble a doll cabinet from plywood, take a sheet 3 or 4 mm thick.
Before starting work, prepare a diagram with the parameters of the future wardrobe.
- Measure the length of the doll's clothes. The section in which the bar with hangers is located must exceed the size of the doll's outfits by at least 3 cm in height.
- Leave 1 cm under the legs. By adding up all the numbers, you will get the optimal height.
- In the same way, calculate the depth of the wardrobe. Measure the width of your doll's most voluminous dress and add another 1 cm.
- After you have written down all the dimensions, transfer the drawing from paper to a sheet of plywood. On the side parts you also need to draw grooves where the shelves will be inserted.
- Now you can start cutting. Construction scissors, a jigsaw or a miniature hacksaw are suitable for this. It all depends on the width and thickness of the plywood.
- Carefully cut grooves to connect the shelves to the cabinet walls. If they do not match each other, you will have to finish or redo the parts.
- After all the elements have been cut out, they need to be sanded well so that there are no burrs left. Treat this procedure with special attention, because your child runs the risk of getting a splinter.
- When the preparatory work is completed, you can begin assembly. Connect the side panels to the top and bottom planes. Glue the elements for additional fixation.
- After assembling the frame, install and glue the shelves inside.
- Wait for the glue to dry.
- Hang the doors on special hinges so that they can be opened.
- Take thin paper and roll it into a tight tube.
- Cut the tubes into even small baubles. These will be the legs that need to be placed on the glue.
- Decorate the resulting blank: paint it in any color you like or use stickers.
- The top can be varnished. Talk to your daughter – children have a rich imagination.
Invite your child to choose door handles. You can also put drawers in the closet so that the shelves don’t look empty.
To make a hanger rod, roll a regular A4 sheet into a tight roll with a tube. Carefully coat the inside of the tube with glue and leave to harden. After the tube has dried, cut to the size of the cabinet, leaving small overhangs for gluing. Paint it the color of the cabinet filling.
Doll wardrobe made from newspapers
A complex, but at the same time interesting way of making a doll’s wardrobe from newspaper tubes is not something that every mother can think of. However, this idea exists and attracts close attention. How to implement such an idea?
- To begin with, take as many newspapers as possible that have lost their relevance.
- They need to be twisted into tight tubes and pre-coated with glue.
We collect old colored newspapers and roll the sheets into tubes, coating them with glue. - Set the finished tubes aside and leave until completely dry.
- While the tubes are drying, prepare the material for the floor and ceiling. These should be two identical cardboard rectangles. Let's say the depth of the cabinet will be 6 cm, and its length will be 10 cm. The height of the cabinet will be adjusted with tubes.
- Take the part of the wardrobe that will be considered the floor. Glue one tube at each corner so that it is attached to the bottom of the cabinet and goes up when passing through the corner. And so on with all four sides.
Floor and ceiling installation looks the same - Begin gluing other tubes nearby, forming a dense wall.
- After the glue has dried, begin attaching the ceiling. The tubes should also go onto it from the reverse side.
- Remember to leave one side of the wardrobe open.
- Coat the tubes well with glue and leave to dry.
- Now assemble the doors. They must match the dimensions of the open side. You can make one or two doors. To do this, glue the tubes together and cut them to height.
It is best to place the sash on a wire. It should be very hard and thick. You will need a piece 5 cm long. Make holes in the doors and in the cabinet itself. Screw the wire tightly and trim the free edges.
We mount doors on wire
Now you can move on to decorating. It is best to cover such a homemade wardrobe with fabric.
Ready-made doll wardrobe covered with fabric
Handles can be made from buttons, screws or wire wrapped in thread.
Leave the cabinet until completely dry and after a day your child can play with it.
By gluing newspaper tubes together, you can make shelves and then place them inside the wardrobe.
Door decoration
Doors in classic cabinets come in single-leaf and double-leaf types. The second option looks more beautiful. Each sash should be the height of the wardrobe and half its width. They are identical to each other.
Doors are most often screwed onto dense and thick wire. To do this, holes are made on the sash, as well as on the top and bottom of the body. After installation, the free ends must be cut off.
Doors can be decorated by painting, pasting with paper or fabric. The easiest way to make handles is from wire pre-wrapped with thread. They are attached through the holes with pliers.
Exterior design of a toy wardrobe
Another way is to screw in screws and glue beads and other decorative elements on top. Otherwise, you can leave the cabinet without handles altogether.
How to make hangers
If you want to make your wardrobe more realistic, there must be hangers on the bar inside. The child will be delighted and will immediately start placing doll clothes on them with pleasure.
The easiest and fastest way to make hangers is from thick thick wire:
- Lay it out in one line and fold the edges.
- Wrap different sides around each other two or three times.
- Round one side and trim the other.
Making wire hangers step by step
In order to make the hanger more attractive and decorative, it can be decorated with beads along the entire length of the wire.
If you have the skill to work with a high-precision milling machine, then hangers can be cut from wood. But wooden hangers need to be well sanded so that the child does not get a splinter in his finger.
Wooden toy hangers
Filling for a doll's closet
The appearance of the wardrobe is important, but the inside is more interesting. To decorate the walls, print or cut out wallpaper from paper and stick it inside the closet. Each compartment can be decorated with a different design.
You can fold them using the origami technique or simply glue together small storage boxes from cardboard. Also don't forget about:
- hat boxes and separate cases for small parts;
- shoes on the lower shelves;
- dresses on hangers;
- extra clothes in small compartments.
Instead of wallpaper, you can paint the inside. Girls love pink colors. Apply acrylic paint to compartments, drawers, rods and let dry. Transitions between compartments can be beautifully decorated with lace, rhinestones, and glued beads.
Filling a doll's wardrobe with things
DIY coffee table
The author of the video suggests making a small table at home using a minimum of materials. In sheets of working material glued together for density, four circles are cut along the edges along the diameter of the bushings, which act as legs. If you do not seal it and leave the sleeves open in the upper part of the homemade tabletop, you will get something like a cup for storing office supplies. Decorated with colorful stickers. Can be used as a laptop stand, while drinking tea, or playing board games. When covered with self-adhesive film, you get a convenient stand for indoor flowers.
Tips for parents
Success in assembling a doll wardrobe yourself is guaranteed if you follow our instructions step by step. Take care of quality materials in advance. A paper or cardboard toy cabinet will break much faster than plywood furniture. So if you want to give your child a lasting gift, be thoughtful about it.
Treat your child, who has an impressive collection of dolls, with a unique handmade wardrobe. This will be the most favorite toy that will develop children's imagination and teach the child order.
Wardrobes for dolls - photo examples
If you don’t want to spend time making doll furniture, take examples in our gallery or look at the catalog of finished products.