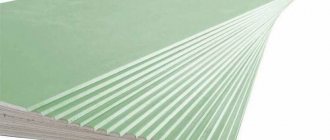
About MDF panels
MDF panels are a fairly popular material that many people know about, and those who don’t know about it will definitely get acquainted with it in the process of selecting coatings and compositions for wall finishing. MDF is a fairly thin and light type of coating that can be used to perform a number of jobs, which include finishing vertical surfaces. Panels are made from small particles of wood, interconnected into a single mass using high pressure accompanied by heating . The main component is lignin, a natural substance released by wood under the influence of high temperatures. And the main advantage of MDF panels is that they do not contain substances hazardous to human health (for example, phenol, which can be part of a number of adhesives used to create other derivative materials from wood residues). Although each panel still contains a number of third-party substances, in addition to lignin. This can be epoxy resin, which when hardened does not pose a danger to the body.
MDF panels for interior wall decoration
On a note! The abbreviation MDF stands for “fine fraction”.
What are MDF panels made of?
The panels created in production are then decorated. That is, they need to be painted, covered with a special film, and laminated. Only after this the panel can perform a decorative function. Often it can imitate various natural materials such as wood or stone, but it can also have a completely different, brighter and more creative color.
MDF wall panels for interior decoration. Beautiful and practical
MDF is used in various fields of human activity, but primarily for the production of furniture, doors, and materials used to decorate surfaces inside rooms. In the latter case, we can say that the panels are suitable for finishing vertical and horizontal surfaces, including ceilings; sometimes they are also used for decorating floors, but extremely rarely (much here will depend on the type of MDF, which will be discussed below). More often than not, panels can be seen on walls and ceilings.
Differences in the appearance of chipboard and MDF boards
Important! MDF panels, which do not have a specific treatment, do not like high humidity, so they can only be used indoors, provided that they are sufficiently dry and warm. Otherwise, the material will very quickly become unusable. But laminated panels can be used for finishing kitchens and bathrooms.
Wall decoration with MDF panels is environmentally friendly, reliable and beautiful
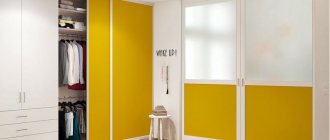
The coating fully complies with sanitary standards and requirements, which means that the panels can be used for decoration even in bedrooms and children's rooms, if desired. Panels are a great option to make walls smooth and pleasing to the eye in any room. The main thing is to choose them correctly.
MDF panels are an excellent solution for cosmetic finishing of walls and ceilings of any premises
Find out how to finish a toilet with PVC panels, and also read interesting ideas (photos) and instructions in a special article on our portal.
Types of panels
Not all MDF is created equal and can be purchased for all types of jobs. It is important to understand here that there are certain types of panels, and each is used only in certain cases.
MDF panels are not only a budget solution for wall decoration, but also the lightest
Table. Main types of MDF.
| View | Characteristic |
| Whole pressed | This is a standard panel, which is produced precisely during the process of conventional pressing and is a sheet of wood fibers. The material will have moderate strength, a smooth surface, and good thermal and sound insulation. This MDF is inexpensive, but environmentally friendly and safe. Compared to analogues, this is the cheapest option. But the material is not highly moisture resistant, does not have any additional processing, and the color of different slabs may differ even in the same batch. Typically, such slabs are used for finishing premises for various purposes. |
| Moisture resistant | This panel has increased resistance to moisture, it is denser than the previous version, stronger and resistant to mechanical stress. Such panels can be used to decorate bathrooms. |
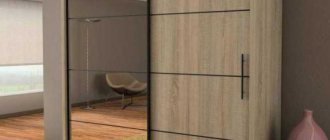
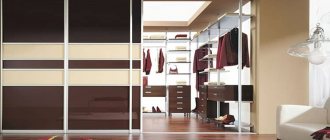
| Laminated | This is quite an expensive panel, but resistant to a number of influences. It is not afraid of water, since its surface is laminated and will not let moisture in. The panels are not afraid of abrasion, as well as exposure to a number of substances. Sometimes such panels, due to their stability, can even be used for outdoor work (the main thing is that they are not constantly exposed to water, so such panels should only be installed outdoors under awnings). |
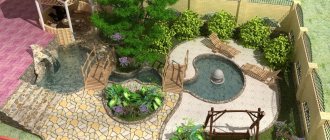
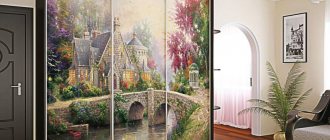
| Other special | In theory, a moisture-resistant panel also belongs to this category, but it is used quite often and therefore was described separately. And so there are also heat-resistant, flexible panels and materials with increased density. Flexible ones can be used for finishing arches and other curved structures; high-density panels can cope well with strong mechanical stress, but heat-resistant or fire-resistant ones are not afraid of fire and practically do not burn due to the content of a number of special substances in them. And they can be fixed in the area of fireplaces and stoves, as well as very close to heating boilers. |
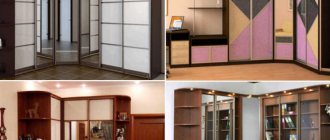
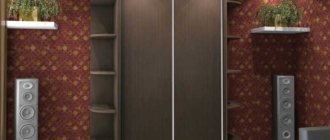
Photo of MDF panels for walls in the interior
Depending on how the MDF panel is finished, it is also divided into several types.
MDF wall panels
- Veneered , which resembles ordinary natural wood in appearance. Sometimes such a panel can hardly be distinguished from an ordinary wooden board. That is, the outside of the panel is covered with veneer - thanks to it, it is possible to achieve the desired appearance. Veneer is the thinnest layer of natural wood. This is the most expensive MDF option.
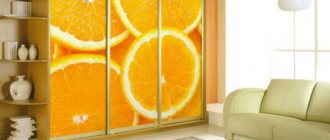
- The painted panel can have any color, which can be achieved by applying coloring compounds to the material. Moreover, MDF can be either matte or glossy. There is no imitation wood texture.
- Laminated panel is cheap and affordable, which explains its popularity. The outside is usually covered with melamine film. Such panels look beautiful, and they are not afraid of water. They are also quite easy to wash.
Laminated MDF panels with glossy surface
As for the format, the following can be used for wall decoration:
- slatted MDF, 2.5-3.8 mm long and 13-28 cm wide;
- square tile with a side width of 30-98 cm;
- sheet, with a length of one panel of 1.25-2.5 m.
In the apartment you can use both slatted and tile variations of MDF. But for finishing spacious rooms it is better to buy a sheet version.
If you decide to buy MDF panels, then do not forget to purchase materials for the frame
Prices for MDF panels
MDF panels
Technology for making curved facades with your own hands ↑
Sometimes kitchen design involves the production of bent structures, which are made at furniture factories using a molding press. To make a bent MDF facade with your own hands, you need to use the following technology:
- Take a 9 mm thick MDF sheet and cut two blanks from it - one for the outside of the facade, the other for the inside. Since the radius is larger on the outside, the outer piece needs to be slightly longer.
- Make a template for forming a semicircular facade. For this purpose, any design with a suitable bend radius can be used.
- Apply markings on the inside of the blanks for cuts that will allow you to bend the sheet. Cuts must be made only at the bend, the distance between them is 5 mm. The circular saw should be adjusted so that the cutting depth is 7-8 mm.
- Make a paste of medium consistency from a mixture of sawdust and wood glue to fill the cuts. You need to rub in the paste with a spatula, moving it along the cut from the center to the edge to eliminate air pockets.
- After filling all the cuts with adhesive paste, install the inner blank on the template.
- Place the outer structural element on top. Fasten the blanks together with small nails, which can then be easily pulled out. Attach the finished structure to the template with clamps and leave until completely dry.
Important components depend on the facade of the furniture: appearance, functionality and cost of the entire product. The area of the parts of the external front side of cabinet furniture, relative to the entire product, is small. But despite this, the production of furniture facades requires a lot of time and effort. This is the front side of the design, every flaw will be evident.
Advantages and disadvantages
We can say that MDF is one of the simplest, easiest and most convenient ways to finish walls and level them. But these panels also have a number of other advantages.
Characteristics of MDF
- Panels can protect walls from external factors.
- The price of the material is relatively low, despite the fact that it is quite environmentally friendly and safe for humans.
- Working with MDF is easy and convenient - they are light and easy to process, do not generate dust, and a minimum of construction waste is generated. And to cut the panels, you can use both a hacksaw and a jigsaw. To install the panels, you do not need to have any special skills; just read the instructions on the Internet. And you won’t have to level the walls first if the material is fixed onto bars.
- If necessary, MDF can be easily dismantled.
- Cleaning the panels is simple - dirt can be easily removed from them using a damp cloth.
- The material has a beautiful appearance, is able to imitate various surfaces, and also has heat and sound insulation properties. This judgment is especially relevant if the panels were attached to a wooden frame base.
Decorating the hallway with MDF panels
But it is worth understanding that there is not a single material that does not have disadvantages. And MDF has them too. So, the material (especially simple, not laminated) is afraid of high levels of humidity. Also, the panels are not durable, and if desired and as a result of carelessness, they can be easily damaged. That’s why, in fact, they rarely finish floors. MDF, in addition to being a fireproof option, burns well, and this is also its disadvantage. It is important to remember that when mounted on a wooden frame, the panels will take up some space and may narrow the room somewhat. So it’s not always worth installing them in cramped rooms.
MDF or chipboard
Find out what to use to decorate the inside of a wooden house, and also familiarize yourself with the options and installation process in a special article on our portal.
Production of solid facades
Solid front panels for the kitchen are made either from furniture board (chipboard) or wood. With slab materials, everything is simple: you need to measure the openings of the kitchen cabinets and order blanks of the appropriate size. Chipboard cutting companies will glue the edges for an additional fee; if you wish, you can perform this operation yourself.
At home, you will need an iron, a sharp knife, a block of felt, and a paper edge (the plastic edge will not stick with the iron). The edge strip is cut along the length of the side with a margin, applied and glued by running a hot iron along it. While the edge has not cooled down, pressing it, smooth it with a felt block, then cut it from the sides and ends with a knife, then go through the edges with a fine abrasive.
Solid wooden facades
For successful work, you will need a dry edged board (it is better if the material is calibrated in thickness, otherwise you will need a jointer with a thicknesser), PVA glue, stain, and varnish. Tools also needed:
- Miter saw (a jigsaw or hacksaw will do).
- Grinding machine (a block with sandpaper of different grits).
- Manual milling machine or full-fledged machine.
- Pencil (marker), tape measure, square, meter ruler, hammer, clamps.
- Screwdrivers, drill, screwdriver.
- Angle grinder (grinder).
- Brushes for glue and varnish, solvent, rags.
- To fit the sides of the boards, you need a jointer; if you don’t have one, you will have to do everything manually, with a regular or electric plane.
Note! Carpentry requires certain skills and care, especially when operating machines or using hand-held power tools.
The production of panel facades consists of the following stages:
- We take the dimensions taking into account the gaps for opening the doors (2-3 mm for the rebate). We maintain the same distance from nearby elements for kitchen drawers.
- From boards with a length equal to the height of the doors (+3 cm), we assemble panels for the width of the facade with a margin (2-3 cm) for subsequent processing.
- We adjust the boards with a plane so that there are minimal discrepancies between them (ideally without gaps at the top, bottom or in the middle).
Under the pressure of the clamps, the shield will bend, forming a mound. To prevent such deformation, place a load on top or level it with additional clamps, pressing it to a flat surface. When the workpiece is completely glued, you can cut it to the final size, then use coarse sandpaper to remove the differences.
The finished facades are hung on the kitchen frame, handles and other fittings are installed. Then everything is removed, the parts are sanded with fine sandpaper, tinted (if desired) and varnished.
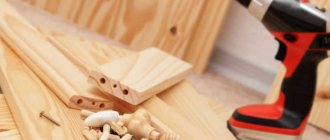
Where to start? Tools and materials
Working with MDF is easy and simple, but the craftsman will still need a certain set of tools and materials. So, this is necessarily a jigsaw or hacksaw for sawing, a screwdriver, a pencil, a hammer drill, and a tape measure. Of the materials in the required quantities, you need to purchase fasteners, the panels themselves, as well as wooden bars or metal profiles. If wires will be laid behind the panels, then it is advisable to purchase corrugation for them.
To install such cladding, it is not at all necessary to perfectly align the wall.
Advice! Determining the required amount of coating is simple - to do this, you need to take measurements from the walls and perform simple arithmetic operations. By the way, it is better to purchase panels with a small margin - during the work, some of them may be damaged, and there should be no gaps between individual planks. So some panels may need to be replaced.
The finishing corners will give the wall finished with MDF a finished look. It is worth purchasing them in advance and installing them after the installation of the coating is completed.
Universal corner MDF (MDF)
How can I secure the panels?
There are two ways to fix the material on the walls - using glue or a frame. The choice of method is usually made depending on the condition of the walls and the wishes of the master. Thus, the adhesive option involves installing panels using an adhesive composition such as “liquid nails,” but this method is only suitable if the surface of the walls themselves is not curved. This is the simplest method, but limited in scope of application. In other cases, only the frame method becomes relevant.
Liquid nails “Moment Installation”
The frame method of fastening MDF is the creation on the surface of the wall of a sheathing-like structure made of bars or metal profiles. A similar frame is created when installing drywall on walls, only the crossbars will be positioned horizontally. The step between the horizontal supports is 50 cm, and between the vertical bars that serve as support for the horizontal ones - about 3 m.
The panels themselves are fastened to the sheathing using clamps. They are installed from the end of the panel so that they will not interfere with fixing the next panel on the sheathing, but will perfectly hold on it the one that was fixed with their help.
Wall panels are a quick and inexpensive repair, and at the same time a neat and stylish appearance of the room
The process of installing panels on a frame
Step 1. First of all, you need to inspect the walls and identify the most protruding place on them. This is what you will have to focus on when creating the frame. On the wall surface, you can use a pencil to make marks for the sheathing (the distance between the horizontal parts of the sheathing is 40-50 cm). You need to take a 20x40 mm block and cut it into pieces of the required length (this is usually the width of the wall).
The timber must be cut into pieces of the required length
Important! The frame slats are always attached strictly perpendicular to the panels, so if their orientation is different, then the frame lines will be drawn in accordance with their orientation (for example, not horizontally, but vertically).
Step 2. Next, the bars need to be attached with self-tapping screws to the wall strictly horizontally. It is important to understand that if the wall is concrete, then you first need to mark the holes for the dowels, drill them, install the dowels, and then attach the slats to them.
Fastening the bars with self-tapping screws
Step 3. It is necessary to secure all the elements of the sheathing, observing a step of 40-50 cm. Above and below, near the floor and ceiling, you need to maintain a small distance - about 3-5 cm to the base.
Recommended distances must be observed
Step 4. Before further work, it is important to make sure that the slats are fixed level. This can be done using a level.
The slats are checked by level
Prices for building levels
Construction levels
Step 5. If the wall is not level, then you can level the slats by placing pieces of bars of the required thickness under the required places for support. These pieces of bars must be secured with self-tapping screws.
Alignment of slats
Result of work
Step 6. It is important to secure the sheathing parts both along the edges of the walls and in the area of the doorways.
Attaching the sheathing to the doorway
Step 7. Now you can begin installing the first panel. It starts from the corner of the room - you need to attach the first panel to the corner of the wall and use a level to check that it is level. If necessary, the panels can be cut to the required length.
Installation of the first panel
The panel is checked by level
Step 8. Next, the panel needs to be attached to the sheathing slats using self-tapping screws. They are screwed only along the edge of the panel. Moreover, only the first panel or the last one is additionally fixed with self-tapping screws (in places that will be covered by baseboards, corners, etc.).
Screwing the panel with self-tapping screws
Another photo of the process
Step 9. To fasten the remaining panels you need to use special fasteners - clamps. The clamps should be installed like this: slide them into the groove of the previously installed panel and secure them to the sheathing with a construction stapler or small nails.
Kleimer
Using a clamper
Then the stapler is used
Step 10. Next you can install the second panel and the next ones. You need to insert the ridge of the next one into the groove of the previously installed panel.
You need to insert the ridge of the next one into the groove of the previously installed panel.
Installing a second panel
Step 11. Then you need to fix the panel using a clamp on the sheathing.
Fixing the panel using a clamp
Step 12. All panels are fixed in the same way.
Installation process of MDF panels
Step 13. If the panels need to be cut, then this is how it is done. First you need to mark the panel - how much it needs to be shortened or narrower. And then just saw off the excess with a jigsaw or hacksaw.
Trimming the panel
Step 14. Once all the panels have been installed, you can install the fittings to give the wall a finished look. You need to apply glue to the folding corner on the wrong side, then fold it and glue it into the joint between the walls, pressing it tightly. Excess glue should be immediately removed with a cloth. The installation of the panels is completed.
Glue is applied to the folding corner
Pasting the corner
Screwdriver prices
Screwdriver
Video - Wall decoration with MDF panels
Nuances of performing work
Assembly
Cabinet assembly photo
After making all the components and edging, you can proceed directly to assembling the kitchen furniture. First of all, the holes intended for fastening are marked and drilled - here it is very important not to drill holes through, otherwise the panel will be damaged.
The structure is assembled according to the principle of assembling a box, when vertical elements are attached to the horizontals. After assembling the cabinet, it is advisable to immediately insert all internal elements to avoid confusion. When installing roller guides, be sure to use a level - otherwise the drawer will not fall into place.
The legs are attached to the already assembled cabinet upside down. After completing all the above operations, you can begin installing the front elements of the facade. All doors except corner doors are installed in the open position at an angle of 95 degrees. The final step is screwing the handles onto the doors.