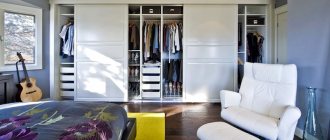
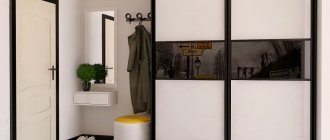
Cabinet furniture is not only one of the best options for storing things, but also a rather expensive element of the interior. Therefore, in case of renovation or moving, it would not be superfluous to dismantle the cabinet for subsequent reassembly. But the wardrobe has its own design features, which can cause certain difficulties during disassembly. Let's take a closer look at how to disassemble a sliding wardrobe correctly.
The first and easiest method is to call specially trained people who will professionally disassemble the furniture. It is important to take into account here that this service is not cheap, so we will dwell in detail on the do-it-yourself dismantling option.
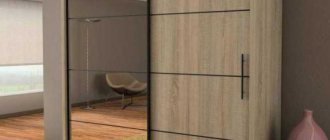
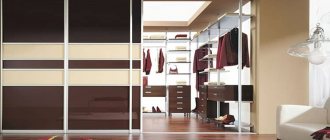
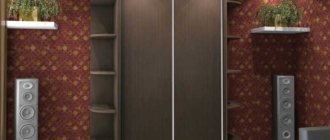
Types of sliding systems
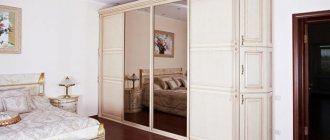
Before you start work, you need to inspect the mechanism to figure out what kind of sliding system is installed on your cabinet. Doors on this piece of furniture are installed according to two principles. The first type is more common and reliable. The design of the mechanism ensures that the door leaves move along the bottom rail. It takes on the main load created by the weight of the doors. The main part of it that carries out the movement is also located there. In this case, the upper guide serves only to guide the movement of the doors and prevent the doors from deviating from the line of travel.
The second option is cheaper. It is not as common and is inferior in quality to the first. We are talking about hinged doors installed in wardrobes. The main difference between this type of design is that the doors hang on the top rail. There are also rollers installed there that run along it, moving the doors. In the first version, there are rollers both at the top and bottom, which provides more reliable fixation and high-quality work.
Wall-mounted systems are installed on small cabinets, the door leaves of which are lightweight. The fact is that the hinged structure will not be able to work correctly if it is subjected to heavy loads. Another disadvantage is that when opening and closing the closet, the doors can catch on each other or on clothes. This also makes a significant contribution to reducing the service life of the cabinet.
How to replace the bottom rollers of a sliding wardrobe
The lower rollers of the sliding system are the most loaded element of the wardrobe. Doors of such systems usually weigh about 50-60 kg, but can be 100 kg or more. This depends on the design solution of the facade. Plus constantly opening/closing, impact when touching the side wall of the cabinet. All this together leads to gradual wear of the lower rollers and the need to replace them.
It should be noted that not all bottom rollers are the same. Budget class fittings have a lower price. Accordingly, the quality. The use of carbon steel instead of stainless steel for the body, the abandonment of bearings, the use of rubber instead of wear-resistant plastic, and the low accuracy of mating parts lead to faster wear of the fittings. But each product has its own buyer - often it is the financial component that is critical when choosing the configuration of a sliding wardrobe. Recommendations from Mebax employees on choosing rollers and stoppers can be read in this article.
So, the sliding system began to creak, you need to apply a lot of force to open/close, the door leaf periodically jams and jumps out of the track. The old fittings have served their purpose and need to be replaced. Read more about how to replace the lower rollers in a supporting (not suspended) sliding system.
Removing sliding wardrobe doors
To remove doors from a conventional wardrobe, you need to do a few simple manipulations. To work, you will need a flathead screwdriver and another pair of free hands.
Although the door leaves are not heavy, if plexiglass or a mirror is used as their filling, then any incorrect and careless movement can lead to irreparable consequences.
Disassembly must begin from the very first sash.
So, how to properly dismantle doors:
- Lift the sash a little and use a screwdriver to spring the rollers from below.
- Pull the canvas towards you. Do this carefully, without applying much physical force. If you do everything correctly, the rollers should easily clear the bottom rail. Do not extend the panel far from the cabinet so as not to bend the top guide.
- When you slide the sash out of the bottom guide, carefully lower the leaf towards the floor at a slight angle. The doors should come out easily from the top rail.
To remove all other sheets, perform the same operations.
It will be much easier to dismantle the doors if you involve an assistant in the work. Perform all steps extremely carefully and in order so as not to damage the structure.
To remove the hinged sliding door of the closet also does not require much work. Here you will need an open-end wrench and one assistant who will hold the blade while you unscrew the fasteners.
In order to dismantle, take the key and stand on the stool. This will make it easier for you to reach the clamping bolts. Loosen the clamping bolts and pull the blade towards you. When it comes out of the grooves at the attachment points, set it aside. Do the same with all the other doors.
Bottom cabinet rail
How to disassemble an old Soviet cabinet?
Wardrobes of the 70s and later periods of the last century were assembled mainly on eccentric ties, wooden dowels and screws. If you need disassembly and subsequent reassembly for moving, follow the instructions:
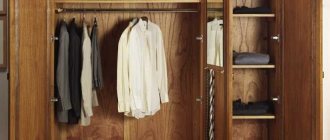
Stage No. 1: Shelves, drawers, handles
- Prepare the tools: rubber hammer, set of screwdrivers, screwdriver, chisel.
- Clear the floor near the cabinet so that it can be placed.
- Remove the shelves that rest loosely on the shelf supports.
Stage No. 2: Fasteners and mezzanine
Depending on the type of fasteners, remove them with the appropriate tool:
- The connection on the eccentric coupler is dismantled by turning a screwdriver inserted into the cross slot of the eccentric counterclockwise. The cylinder is removed by prying it off with a flat screwdriver. You can then quickly separate adjacent panels of the cabinet body.
Stage No. 3: Back wall, hinges, frame
- Use a chisel to pry up the plywood back wall and lift up the nails. Press the wall back down and remove the nails with pliers.
- Remove the plywood and the connecting strip, if any.
- Remove the fasteners in three corners of the box. Remove the released panels.
- Now disassemble the remaining fastening.
- Place the bottom with the support frame facing up. Remove the frame by unscrewing the screws.
- Also disassemble the mezzanine.
- In the Soviet wall, carefully remove the glass doors, freeing them from the hinge clamps. Then remove the loops from their sockets.
- All of the above also applies to Estonian-assembled furniture.
During disassembly, place the removed accessories in bags. Include sheets of paper with marks of parts belonging to them.
Disassemble the corner cabinet without changing the position of the cabinet. Due to geometric features, such furniture is stable and does not need to be tipped over to the floor.
Removing doors if additional elements are present
It is already known how to remove the door panels of cabinets of the simplest designs, but what to do if the design is complicated by additional elements?
Premium class cabinets are equipped with door closers, which serve for more accurate closing and soften the impact of the doors on the cabinet walls. If there are any in your piece of furniture, then first of all you need to dismantle them. There is no need to unscrew the door closers from the frame; it will be enough to remove them only from the doors.
Some mechanisms are equipped with latches that serve to prevent the rollers from jumping off the guide rail. To remove the door from the bottom guide, you will first have to turn the lock up 90 degrees. After this, you can remove the sash.
There are also designs in which a frame is additionally installed. With such an addition, the door leaves rest against it when closing. In this case, dismantling the doors is even easier. It is enough to remove the side fixing elements of the frame, after which you can easily roll out the sliding door with the guide.
Thus, it becomes clear that dismantling wardrobe doors is very simple. To do this, you do not need to have a builder's education or any special skills. It is enough to have a little free time and two pairs of free hands.
Types of breakdowns and ways to fix them
When a wardrobe with sliding doors breaks, there is no need to rush to call a repairman. Most often, you can find the cause and solve the problem yourself. In most cases, furniture repair is needed due to the following:
- elements of the body or its filling are broken;
- parts of the valve opening mechanism are deformed, worn out, torn off, or loose;
- glass and mirror elements of the facade are broken or damaged.
Premium sliding wardrobes are often decorated with carved decor and various moldings. If furniture is not used carefully, they chip, scratch, or break off. After this, their restoration is necessary.
Stages of making doors for a sliding wardrobe with your own hands, assembly procedure
Frame defects
During long-term use, the furniture body warps and becomes deformed. It begins to wobble and squeak when the doors move. Sliding door leaves and drawers open with difficulty or become completely jammed. The problem is a broken or loose fastener. Here you need to inspect the wardrobe box and find problematic screws, screws, bolts. Then replace or tighten them with a screwdriver or screwdriver. Additionally, it is recommended to securely fasten the frame iron corners fixed at the joints of the rear wall of the cabinet and both side walls.
The most common cases of failure of wardrobe filling elements:
- Deflection, breakage of shelves, formation of large cracks on them. The cause of these defects is excessive mechanical stress. It occurs if the base of the storage system is too wide and not reinforced with racks. Panels that are sagging or broken in half cannot be repaired; only their replacement is possible. The new shelf needs to be divided into two compartments and placed in the middle with timber supports to reduce the load.
- Chips and small cracks on shelves and drawer fronts. These small damages are restored. All defects are covered with wood putty, sanded with fine emery cloth and covered with paint to match the furniture.
- Deflection, separation from the walls of clothes rails. This happens due to strong mechanical loads. First you need to strengthen the pipe in the middle, this is done using a pass-through holder. It is fixed to the inside of the cabinet lid with screws. Then a rod is threaded through the fittings ring and secured with two flanges on the sides of the furniture.
When using the product, the filling elements break: hangers, hangers, hooks. The fittings also fail: handles, latches, awnings. One of the furniture legs may give way. When repairing wardrobes, these elements are completely replaced.
To prevent the shelves from sagging, you can install timber supports in the middle, which will reduce the load
Chips and small defects on the surface of the shelf can be covered with wood putty, treated with fine sandpaper and coated with paint to match the furniture
If the clothes rail breaks, reinforce the pipe in the middle using a pass-through holder
Damage to mechanical components
If the furniture door moves with difficulty, and there are gaps between it and the body when closing the door, this means that there are problems with the sliding system. They arise due to:
- dirt in the frame groove;
- unreliable fastening of the guide on the box;
- incorrect location of the stopper;
- deformation, wear of wardrobe wheels.
Schemes for organizing the filling of a sliding wardrobe with straight and corner configurations
First of all, the lower frame of the sliding system is inspected for contamination. If they exist, they are removed like this:
- First, dust is collected with a vacuum cleaner;
- then the stuck dirt is removed with a scraper;
- Lastly, the gutter is wiped with a rag soaked in soapy water.
Gaps often form between the doors and the frame of the furniture. This indicates deformation of the case or problems with the stopper. When a gap appears at the junction of the canvas and the central section of the structure, this indicates that it is overloaded. Sometimes the retainer falls out of the groove of the bottom guide, in which case it just needs to be inserted back into the profile. It is advisable to secure the stopper additionally. This is done using screws or Moment construction adhesive.
In some cases, the frame of the sliding system lags behind the frame. Here you need to remove the sash from the guide, then screw the profile with self-tapping screws to the body through new holes drilled with an electric drill. Next, the canvas should be put in its place.
Dirt accumulated in the groove of the frame can lead to problems in the operation of the sliding system
If the retainer has fallen out of the groove of the lower guide, then you just need to insert it back into the profile
If the frame of the sliding system lags behind the frame, you need to remove the sash from the guide, and then screw the profile with self-tapping screws to the body
Door deformation
A sash that creaks, rattles, or jams when moving indicates that the roller has become deformed or the rubber layer covering it has worn off. In this case, the wheel needs to be changed. Before doing this, you can try lubricating the sliding mechanism with technical oil. If this does not solve the problem, drastic measures are needed.
If the doors no longer close completely, are skewed, or deformed, the source of the problem is first determined. It may be that the furniture is overcrowded with things and some of them interfere with the door, so it is necessary to inspect the structure. If the assumption is not confirmed, the wardrobe is repaired with the replacement of rollers and guides. This is done as follows:
- Lift the door, pull out the lower wheels from the guide, then move the lower part of the canvas and pull it out of the upper profile.
- Turn the screw at the bottom of the facade using a hexagon.
- Remove the rollers and install new ones using a hexagon.
Features of sliding systems for sliding wardrobes, their varieties
Remove the door by pulling the wheels out of the guides
Using a hexagon, turn the screw at the bottom of the facade and remove the roller
Install new components
Return the door leaf to its place
The procedure to follow if gaps appear between the canvas and the furniture body:
- the buffer tape in the corner of the facade comes off;
- the screw rotates clockwise, thereby removing the lower gap;
- when the gap is at the top, the fastener rotates in the opposite direction.
Wardrobe doors may not close tightly due to a broken stopper or latch. If the latch falls out or moves, it is inserted back. To ensure reliable repair of wardrobe doors, it is mounted on quick-drying glue. A broken lock is completely replaced.
Retainer repair
Mirror replacement
Over time, fragile decorative elements of furniture facades are scratched, cracked, broken, and their amalgam is peeled off. In this case, the wardrobe mirror changes. The procedure is as follows:
- The sash is removed from the guide and laid on the floor.
- Using a screwdriver or screwdriver, the insert frame is disassembled. It is made from an aluminum profile and is fastened with four screws located at the end of the blades. Also, the frame is made of iron and is held in place by roller clamps, which are located on the inside of the sash.
- The dimensions of the insert are measured. This must be done precisely down to the millimeter.
- The part is ordered from a furniture shop or glass factory.
- When the item is delivered, they begin replacing the mirror in the closet. To do this, it is inserted back into the frame, which is screwed to the door.
- Lastly, the blade is mounted on the guide.
You must work slowly and carefully with the fragile insert. If handled carelessly, it may break. It is advisable to immediately stick a special protective film on the back of the mirror.
Despite the reliability, strength and rigidity, the wardrobe often fails during operation. If the breakdown is simple, then it is easy to repair it yourself. The main thing is to do everything according to the rules.
Disassemble the insert frame, measure its dimensions and order a similar part
Install a new mirror into the frame and install the door leaf on the guide
Main types of adhesives and their characteristics
- PVA: no toxicity, fast acting, unlimited shelf life.
PVA glue is in demand in the furniture industry, the manufacture of interior items, and, if necessary, to join any wooden parts.
Epoxy glue has become massively popular because it firmly bonds almost all materials and perfectly levels the surface.
BF-2 glue is suitable for gluing wood; it has an optimal range of qualities - it is not susceptible to fungus, oils, gasoline, and is waterproof.
Syndeticone glue is excellent for gluing wood and gluing various materials to it.
Polyurethane waterproof wood adhesive is considered the most resistant to stress and vibration.
How to pack a disassembled wardrobe for moving?
For high-quality packaging you will need sheets of cardboard, film for painting, tape, foam rubber or polystyrene foam. You can pick up empty used boxes from any store for free. So let's get started:
- Cover all panels and shelves with corrugated cardboard to prevent abrasions on the laminated surface of furniture parts during transportation.
- Fold long slabs first, then smaller panels.
- Cover glass or mirror sheets with bubble polyethylene film or foam strips.
- Wrap all stacks with two layers of covering polymer film for painting work. Pre-wrap the ends with foam rubber or corrugated cardboard.
- Secure the plastic cover with tape along both the length and width of the panels.
- Wrap drawers and cabinet bodies with film with foam or foam padding at the corners.
- Place bags of accessories in one box.
- Do the same with packing the back walls.
- Now, all this can be taken out and put into transport.