Drywall partitions quite often become a lifesaver in designing an apartment renovation. Just a few decades ago, walls made of brick or concrete were erected in their place, which was quite troublesome and required a lot of financial costs for the purchase of materials and the work of specialists. Therefore, the design of partitions was used extremely rarely, when it was really necessary. Nowadays, with the advent of such material as plasterboard, the construction of false walls has become completely commonplace, which you can cope with yourself. How to make a partition from plasterboard, as well as its positive and negative characteristics will be discussed in this material.
Where to begin
Before starting work, you need to draw up a project for the future structure and determine the consumption of materials that need to be purchased.
The design of plasterboard partitions is limited only by the owner’s imagination. This can be a strict, solid, rectilinear wall with or without a door, an arched structure, the partition may have openings for greater illumination or decorative holes, the edge of the partition can be made vertical, beveled, or any complex configuration. It all depends on the decision made and the purpose of the partition.
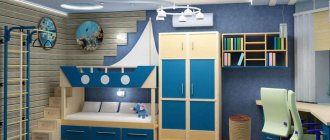
Partitions are often made to zone space, that is, not to cover the entire width or height of the room. In this way, the functional purpose of part of the room is emphasized. This technique is most effective in apartments with small rooms.
Structure thickness
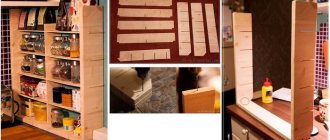
For partitions, a reinforced profile with a thickness of (50, 75, 100 mm) is used. If these are small decorative niches that do not serve as a load-bearing shelf, it is enough to take, for example, a 100 mm profile and make a frame for them. In this case, the width of the niche will be 125 mm (100 mm profile + 12.5 mm gypsum board sheets). In the case where the depth of the shelves is planned to be greater, 30-40 mm, you need to make a double frame and connect them with transverse bridges from profiles. The cost of metal structures increases at least twice.
Design of a partition with niches made of profiles If there is additional load on the niches in the partition, an aquarium, book racks or other objects with significant weight, it is recommended to reinforce the walls of the partition with timber, which is inserted into the profile.
Frame
Drywall sheets cannot be attached vertically directly to the floor, ceiling or wall. Therefore, a frame is first constructed, to which the sheet material is then screwed. The frame is made of a special metal profile.
First of all, the base of the future partition is fixed. It is placed on the floor and ceiling in strictly parallel stripes. The edges of the base profile should be on the same vertical line.
This is controlled using a building level; the best results are obtained with a laser tool. Fastening is done with self-tapping screws or dowel-nails, depending on the surface material.
A vertical profile with reinforced edges is inserted into the base. The structural parts are connected to each other with self-tapping screws. The distance between the vertical posts should not exceed 60 cm to ensure the necessary rigidity.
Finishing work
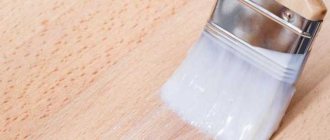
The final stage is finishing work. The following materials are needed: perforated corners for leveling the corners, serpyanka mesh (to seal drywall seams), two types of putty, starting and finishing. You will need: spatulas (large and small rubber), containers for diluting and applying putty. Finishing stages:
- Starting putty is applied to the corners of the structure, and a perforated corner (metal, plastic) is attached to it. The remaining putty is removed with a spatula.
- The seams of the joints of the gypsum board sheets are sealed with sickle tape, then they are puttied.
- Clean the putty with a grouting mesh.
- The walls are primed, allowing the composition to absorb and dry.
- Putty is putty in 2 layers, and before applying each subsequent layer the partition is primed and sanded.
- The last stage of preparation for finishing will be a layer of finishing putty.
The partition is ready for finishing, according to the design concept. This could be painting drywall, wallpapering and other types of finishing. The shelves will look more impressive if they are highlighted according to the principle of contrast. If you have certain repair skills, then try making a partition with shelves with your own hands.
Door and window openings
If you plan to make partitions with a door, then you need to attach a horizontal profile along the height of the upper edge of the door frame. The vertical posts and horizontal lintel are secured so that the solid side of the beam profile faces the inside of the opening. It is better not to install the lower base in place of the door, so that later you do not have to make a threshold.
A wooden block along the width of the profile is placed inside the profile along the perimeter of the opening. The door frame will be attached to these bars. To increase the rigidity of the frame in the area of the door, the horizontal jumper must be connected with additional vertical sections to the base on the ceiling.
Its good results are achieved by placing additional vertical profiles from floor to ceiling next to the main posts of the opening.
The frame for the window opening is arranged in a similar way, with the exception that the horizontal lintel is also made along the lower edge of the window frame.
Sheathing
After the base is completely assembled, they proceed to covering it with gypsum parts - this is done according to the standard scheme. The caps of the screws should not protrude above the outer plane of the attached element after tightening, but not damage the part. The order of fastening the front and horizontal elements is chosen based on the ease of installation and cutting the fragments to the required size - sometimes it is easier to cut the part right on the spot, after fixing it.
Important: jumpers must be placed at all joints of plaster parts so that the edges of the parts can be secured. In this case, the joints should run apart.
When the entire area of the composition is covered with gypsum boards, they proceed to puttying and installing perforated corners on the corner joints of the parts. They give strength to the connection and provide the corners with a beautiful and neat appearance. After the putty has dried, the entire structure is sanded and painted.
Electrical wiring in the partition
Often it is necessary to install sockets, switches and lighting devices on the partition. In the right places, holes are made in the sheet of drywall for installation boxes.
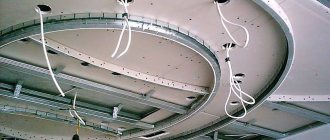
Electrical cables are laid inside the partition at the stage of constructing the frame. If necessary, holes are made in the profile for the cable.
Finishing the finished wall
Wall finishing is carried out in several stages:
- Construction finishing.
- Interior design of a wall for a TV.
Construction finishing
Reinforced tape is glued to the joints to reinforce the junction of the sheets. External corner surfaces are reinforced with perforated corners. Finished and primed plasterboard surfaces are leveled with Uniflot putty. Irregularities from self-tapping screws, joints and mechanical damage are eliminated using a spatula.
The process of puttying a plasterboard wall
After the putty has dried, the surfaces of the TV walls are treated with putty for the surface of Multifinish sheets. Having leveled and dried the putty, the walls begin decorative finishing.
Interior design of the TV wall
The TV wall cannot be the same in both the bedroom and the living room. Each room has an interior design. If you do not change the interior of the room, then the wall should be an integral part of the room.
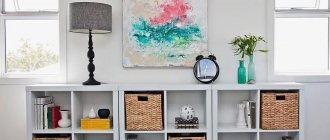
An example of the design of a plasterboard wall for the interior of a room
If we consider that drywall is a universal material for using various types of finishing, then it is necessary to determine the style and color of the TV, since the wall is for the TV, and not vice versa. Next, you need to decide on lighting and local spot lighting for various decorative elements, paintings on drywall, photographs and indoor plants.
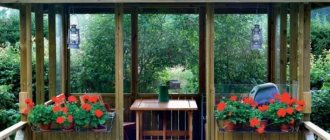
Wall decorations in the living room
Having decided on the place of the TV in the interior, it is necessary to prevent the presence of elements nearby that distract the viewer from watching programs. Shelves should have doors, the color of the coverings should be calm, not tacky, not saturated.
Design options for a plasterboard wall in the living room
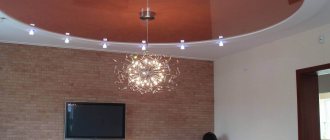
A TV niche in the living room should be interesting. It is possible to use water-based paint, wallpaper, fabrics and various decorative tiles and stucco moldings. The main thing is that the wall does not conflict, but complements the interior of the living room. Having finished finishing the wall, you need to develop a lighting design for the entire living room. Install accent and spotlights for a better perception of the beauty of the plasterboard wall for the TV at night and in the evening.
Wall decorations in the bedroom
The interior design of a bedroom is, in principle, no different from the design of a living room. Additionally, the age of the inhabitants of this room is taken into account. Let's roughly break it down into the following categories:
- children under school age;
- school age children;
- parents;
Plasterboard wall in the parents' room - grandparents.
If the decoration in the living room should be universal for all ages, then in the bedroom it is necessary to approach the occupant of the room individually.
As a rule, bedrooms are designed and built smaller than the living room. And one side is used for window openings, and the other with the entrance door; as a result, the smaller side of the bedroom is suitable for the wall.
Consequently, a plasterboard wall for a TV will be significantly smaller than in the living room and hall.
Option for decorating a wall for a TV on the attic floor
Design a niche for the screen, at the bottom or on the sides of the stereo speakers and next to it are plasterboard shelves for disks and a VCR or satellite dish receiver. To finish the color scheme, it is advisable to use soft, pastel shades and unobtrusive light. In the lighting design of the bedroom, use light in the format of spotlights, LED strips or garlands.
Options for lighting in a TV niche