Colored paper
One of the simplest ways to transform glass is to cover it with colored paper. You can create a beautiful picture both on the window and on the transparent insert of the interior door. Decorating glass with paper will not take you much time. Where should I start? Draw a sketch on an A4 sheet of paper, and then copy the drawing onto tracing paper adjusted to the size of the glass. Cut out the stencils of the parts of the drawing and transfer them to colored paper. When all the preparations are made, you can start decorating. To make your work easier, you need to glue a paper sketch to the back of the glass. Attach the paper using PVA glue according to the drawing. You can use a glue stick, but the likelihood that the application will fall off after drying is almost 100%. Therefore, it is better to use a more reliable adhesive substance. When the paper applique is ready, you can add a stroke to the resulting collage. Using a thick black marker, create separations between the details of the drawing. Outlining will help make the applique more neat.
Colored mosaic
A special mosaic - smalt - is suitable for decorating surfaces. But if it is not available, you can use colored broken glass. By the way, smalt is also made from broken glass; you can read about it in detail here.
To do this kind of work, you need to prepare:
- drawing, glass base for mosaic (or plexiglass);
- glass cutter, wire cutters and a special breaker for working with glass;
- colored glass from which the mosaic will be made;
- medical syringe, which is useful for applying the material;
- transparent silicone;
- tile grout (black).
Consider making a mosaic in the shape of a butterfly.
So, the finished drawing needs to be transferred from paper to a glass base. Using tools, we cut out wings from colored glass. Then we cut it out with a glass cutter.
After they are separated from the base, you need to lay them out on the prepared drawing .
The pieces of glass need to be coated with silicone, then glued to the glass base. For this you will need a medical syringe.
When you glue the fragments together, leave gaps between them. They will need to be filled with grout later.
The seams need to be rubbed only after the silicone has grown.
Be sure to wear rubber gloves. the grout itself according to the instructions located on the package with the substance. The result will be a mixture as thick as sour cream.
We apply it to the mosaic.
As you can see, it covered the entire surface of the product, and the seams are securely sealed. All that remains is to remove the excess mixture from the glass. This can be done with a wet sponge .
The procedure for creating any other mosaic is similar; the specifics of the work will vary slightly depending on the design.
Here is an example of another product made using the same technology:
As you can see, mosaic is a universal technique with which you can decorate completely different interior items using broken glass.
The main thing is to draw the contours in advance so that the resulting drawing looks organic.
Films
Decorating glass is an interesting process. The activity can be made fun if you use colored films rather than colored paper to decorate smooth surfaces. The result of your activity will be brighter, and the transparency of the glass will be higher than if you decorated the surface with ordinary paper. What is the process of decorating glass with film? You need to draw a sketch of the future application on paper. Break the drawing into blanks and transfer each part onto films. Cut out the parts and place them on the glass according to a pre-planned plan. Working with films is easier than working with paper. The process of creating an image will be similar to gluing colored stickers. Separate the colored part of the film from the backing and stick it in the designated area. The finished drawing does not need to be supplemented with anything. If you do not plan to peel off the self-adhesive film from the glass in the future, then you should heat the resulting image with a hairdryer to make the adhesion of the glue and the surface more reliable.
Crafts from broken glass
Let's consider two types of products: photo frame and panel.
To create a frame, prepare a fiberboard sheet of the required size, broken glass, paints (gouache/acrylic/ink), and glue. Prepare the background by painting the fiberboard, and once dry, insert it into the frame. Then draw the outline of the future design on the frame and stick the fragments along it.
By the way, not only ordinary pieces of glass, but also shards from glass toys are perfect for decorating a frame. The latter will look very original.
A glass panel is made with your own hands in the same way as a mosaic. You also need to prepare a template and base, prepare the pieces of glass and stick them on as planned.
Using a similar technique you can decorate mirrors, boxes, tabletops, etc. The main thing is to carefully calculate the number of fragments needed.
Toothpaste
New Year is coming soon and you want to decorate your windows? One of the easiest ways to do this is to spray a toothpaste solution on the windows. How to make a beautiful image on a window? To do this, you will need to draw or print a holiday-themed stencil. You can draw a snowman, Santa Claus or a winter landscape. Then you need to cut out some parts of the picture. The image should be as simple as possible and minimally detailed. When the stencil is ready, use tape to attach it to the window. In a small bowl, mix white toothpaste with a minimal amount of water. Now you can start decorating the glass. On an old toothbrush, take a little of the solution that was prepared and use a spraying motion to fill the voids in the stencil. The thicker your toothpaste solution is, the brighter the pattern will be. When all the gaps are filled in, give the drawing time to dry. After this you can remove the stencil. A beautiful picture will be ready.
Glass structures
Not much time has passed since technological engineers learned how to create large, but at the same time durable glass sheets. But large glass structures have already become firmly established in the design of modern offices, cafes, and apartments. To divide the space, making the most of the natural light in the room, designers are increasingly using frosted glass in the interior.
For example, they make partitions from glass, half transparent, half frosted. This preserves the confidentiality of your work or personal space. At the same time, the maximum amount of light enters it from the windows.
In addition to partitions, doors with transparent inserts, glass floors and even stairs are in fashion today. Of course, such structures can frighten people suffering from acrophobia (fear of heights). But in general, they create a unique design and fill the room with space.
Doors
To emphasize the individuality of the room, you can use decorative glass in the interior: colored, with a pattern, frosted, stained glass, with a sandblasted matte pattern and artistic carvings. Doors made of this material completely change the appearance of the room. At the same time, they can withstand loads and have soundproofing and decorative properties no worse than wooden ones.
Most often, when decorating the interior of premises, doors of this design are used:
#1 wooden with frosted glass, transparent embossed, transparent colored inserts;
#2 double sliding doors made of dimensional transparent sheets in a sandblasted pattern;
#3 sliding doors made of colored or stained glass;
#4 metal structures with stained glass inserts.
Partitions
Transparent partitions are in demand when zoning office space. This idea was first used by American designers. They removed walls from the entire production floor, leaving only supporting elements. We used light from a wall equipped with windows to illuminate the entire office space without interrupting it with dense partitions, but separating it with transparent glass structures. Thus, each employee received a personal workspace, but still felt like part of a single team.
In a small apartment, glass partitions will help maintain a feeling of spaciousness in the rooms. When remodeling an apartment into a studio apartment, the extra walls are demolished, combining the area. If necessary, separate the kitchen or living area using glass in the interior. If you need to protect your personal space - a bedroom or shower room - use a matted or tinted version. Even when using this option, light penetrates the room, maintaining a feeling of freedom and a single area.
Stairs and railings
It’s worth mentioning right away that for the manufacture of stairs they use not ordinary thin glass 3 mm thick, but durable triplex. This is a special three-layer glass with a layer of polymer film.
In addition, the following options are used for steps:
- transparent thick glass with backlight;
- wooden steps with glass railing made of impact-resistant material;
- the spiral staircase is equipped with colored transparent steps and metal railings;
- the metal frame is filled with matte steps and protective panels.
Note: opaque white, black or other glass is perceived as more tangible than transparent glass and looks safer.
Floors
The most exotic way to use glass in the interior is to make flooring out of it. It is best to use such a transparent floor in a multi-storey building, where from the height of the 4th floor you can clearly see what is happening on the first floor. In fact, this idea has already been embodied by designers in bold apartment interior projects in the style of minimalism, hi-tech or fusion. An important condition for transparent floors is that they are made in a common area, for example, between the living room and the hallway or the hall and the living room. Guests will appreciate and remember for a long time how they “floated” above the first floor of the house.
Gouache
Does your creativity tell you that you can paint complex images without a stencil? How to decorate glass with your own hands using gouache? You will need a glass pencil. Using a wax pencil, draw a sketch on the window. The topic can be any. You can depict anything - from a landscape to a portrait, from a multi-figure composition to something abstract. The image is ready, now you need to color it. Get out gouache and brushes of different sizes. You don't need water to paint glass. The paint will be applied in a thick layer, and in a drawing on glass it is very important that there are no gaps. Fill the outline of the image. Try to keep it in one layer. It is not advisable to apply a second coat of paint on glass. The bottom colored layer is deformed and drains. Therefore, immediately mix the desired shade and paint with confident strokes. Gouache should be painted in the same way as if you were painting in oil. Confident, broad strokes will give the drawing a unique flavor.
Stained glass paint
A good artist will not paint glass with gouache or toothpaste. He will pick up stained glass paint. Using this technique, you can decorate not only glass in windows and doors, but also household items. For example, glass vases for decoration or simple glass plates are great. Blanks can be purchased at specialized art stores or you can find dishes at a hardware store.
How to work with stained glass paint? The painting process is similar to decorating glass with gouache. You need to draw a sketch using a wax pencil, and then fill it with specialized stained glass paint. After the color pigments have dried, the artist must use an outline to separate the details of the drawing. This can be done before you start applying the color, but the thing will look neater if you apply the outline after the paint. The final stage is coating the product with varnish.
Decorative triplex
Decorative triplex - several glasses, between which there is a layer of textiles, colored film, metal, wood or other materials. By combining different materials under layers of glass, you can achieve very interesting effects. Therefore, decorative triplex can be matched to any interior.
Decorative triplex, like stained glass, is of particular value for interior windows and doors. Light transmission fades into the background, allowing the owner to fully enjoy the design of the glass.
In addition, thanks to its unusual design, decorative triplex makes the window more reliable. It is not afraid of deformation, color fading or external influence. Decorative triplex also perfectly protects against noise and maintains thermal comfort in the house.
Acrylic paint
There are different types of glass decoration. The main ones are drawing, bas-relief and appliqué. Another way to decorate glass with paint is to use acrylic. Universal paint can be used on various surfaces. It is great for ceramics, wood, plastic and glass. Acrylic goes well with acrylic paste. Using these two components, you can make not only a flat, but also a three-dimensional image. What will the work process look like? You need to draw a sketch on paper and then attach it to the back of the glass. After that, take acrylic paste and use a thick brush to lay out the volumetric parts of the drawing. Give the paste time to dry. When the substance has set, you can start painting. Apply light shades first and then layer darker colors. Do not mix layers of paint. Let the bottom coat dry first before applying the top coat. The finished image should be varnished.
Furniture and interior items
75 votes
+
Vote for!
—
Vote against!
By decorating glass surfaces at home, it is possible to create real masterpieces that will attract the attention of visitors to any home. There are several techniques for decorating glass. Some of them require the use of expensive equipment, while others require fairly basic items. We’ll talk further about how to decorate glass with your own hands.
Table of contents:
- Features of glass decor, photos and craft options
- Decoration technique with liquid glass: implementation features
- DIY glass decor on the door: instructions for implementation
- DIY glass decor without paints
Features of glass decor, photos and craft options
Glass is a natural material that is quite common in everyday life. There are several varieties of this substance:
- artistic;
- liquid;
- construction;
- porous, etc.
In addition, glass, in the hands of a craftsman, turns into a real masterpiece of art. Considering this material from the perspective of its structure, it is capable of changing shape when heated and solidifying immediately after cooling.
By making accessories from glass, you will receive an item with an aesthetic and everyday purpose. You can make various kinds of figurines, candlesticks, hearts, flowers, dishes, waterfalls, etc. from glass.
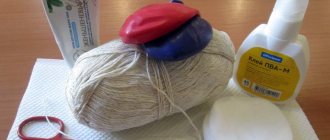
It is also possible to combine glass with other materials in the form of plasticine, polymer clay, and metal.
We offer several options for decorating glass:
1. Candlestick decoration.
To improve the presentable appearance of glass you will need:
- glue;
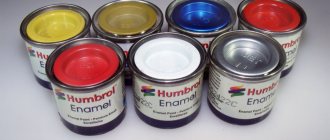
- acrylic or aerosol based paints;
- sea salt;
- not ground coffee;
- glass candlestick or an object resembling a candlestick.
In order to decorate a glass object, first, you should gradually glue each of the coffee beans onto the surface in a chaotic or previously chosen order. It is preferable to decorate either the top or bottom of the item.
Next comes the process of painting the opposite part of the candlestick using paint. To improve the visual effect, while the paint is still wet, sprinkle the surface with glitter.
Further use of the candlestick involves wiping it with a dry cloth. However, it is unstable to moisture.
2. Decorating glass products using sea salt.
This option is suitable for making photo frames. To decorate, follow the instructions:
- the outer part of the frame is smeared with glue, then the frame is dipped into a container with salt;
- wait for the product to dry completely, remove any excess that does not stick.
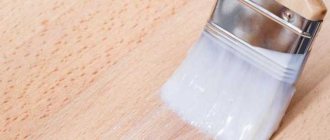
To ensure that the frame does not lose its attractiveness, we recommend covering it with a layer of varnish or, better yet, liquid glass.
To further decorate the frame, you can decorate it with paints and sprinkle it with glitter.
3. Decorating glass with plasticine.
This decorating method is great for working with children. With the help of this material it will be possible to create unsurpassed masterpieces of art. You just need to print out the templates for glass decoration with your own hands, then select the colors in relation to the drawing. Next, each color of plasticine is glued to a certain area of the drawing and a picture is obtained. By the way, it can be installed in a previously made glass frame decorated with sea salt.
The choice of pattern in this case is limitless. You can give preference to fairy-tale characters, paintings, landscapes, installations, decorative aquariums, etc.
In addition, you can create glass compositions inside. For example, having made fish, sea animals, or algae from plasticine, place them in a glass jar and decorate it with sea salt, which will imitate drops of water. Place pebbles and shells on the bottom, decorate the jar in a marine theme, and your decorative aquarium is ready.
DIY glass decor photo:
4. Option for decoration with broken glass.
By first breaking the glass and then gluing it together, it is possible to create real compositions that will decorate any home. In this way it is possible to decorate all kinds of vases, plates or even the most banal glass jars.
However, to glue glass you will need a special composition; PVA glue will not work in this case.
To decorate a glass vase, you will need to perform the following steps:
1. Prepare items in the form of acrylic paint, broken glass and glue.
2. Gradually, thinking through the order of the combination of glass, stick it on the surface of a vase or an ordinary glass jar.
3. Wait for the glue to dry.
4. Decorate the craft using acrylic-based paints.
In addition, some craftsmen create real paintings from broken glass. To do this you will need:
- plywood or any other base for the picture;
- drawn picture;
- many colorful glass shards;
- glue.
Gradually, by gluing shards of glass onto the canvas, it is possible to obtain a picture reminiscent of a mosaic. Please note that this will require a lot of time and effort.
In addition, any object made of glass lends itself to decoration. You just need to add a little imagination and additional elements, such as shells, beads, sparkles, paints, etc.
The idea of decorating crafts with broken glass is very original. However, during the beating process, the glass is kneaded into a powdery consistency. This powder can be applied to any surface previously coated with glue. Please note that gloves should be used when doing this, as there is a risk of injury. In addition, after the glue dries, the surface is coated with varnish. This method is suitable for decorating light bulbs, beads and any glass surfaces. And if you get multi-colored glass powder, you can even create a drawing with it. This spraying has a rich and chic color.
Decoration technique with liquid glass: implementation features
Quite popular among designers and creative individuals associated with handicrafts is liquid glass. This material is easy to work with and allows you to use it to decorate different types of surfaces.
To purchase liquid glass, you should contact a hardware or construction store. A good imitation of liquid glass is the use of silicate glue, but the texture of the glass is more durable and hard.
To decorate the surface in the form of the sea bottom, you will need:
- deep container;
- liquid glass;
- plastic shells or various types of sea decorations;
- sea fish;
- acrylic paints.
To begin with, you should decorate the bottom of a glass plate or container with blue, which will help imitate water. After the paint has dried, decorate the bottom with foil. Place shells, fish, algae, stones and other items in accordance with your wishes on the bottom.
Fills the entire container with liquid glass. We are waiting for it to harden. Next, if necessary, lay out other items and also fill the container. To complement the decoration, use polymer clay, which will be an excellent basis for sculpting sea animals. Using a toothpick, create waves that best simulate water.
DIY glass decor on the door: instructions for implementation
To turn an ordinary door into a real work of art, you should use one of the following methods for decorating this element of the room:
1. Using stencils for decorating glass with your own hands, you will be able to create excellent designs on the door, according to the given interior style. To do this, you will need to choose a design or create it yourself, make a stencil and apply it to the surface of the door, apply paint to the surface. At the same time, use paints for painting on glass. In addition, be careful when choosing the color of the picture; it is preferable if there is only one.
2. A fairly simple method of decorating glass on a door is gluing it with a special film for glass decoration. These films are distinguished by the presence of a variety of patterns, colors and shades, so if you choose this method, you will be able to decorate the door of any room. In addition, this method is one of the cheapest and fastest in time. Please note that when pasting the edges and ends, you should avoid skewing and bending the film. Do not allow bubbles or unevenness to appear on the surface.
3. Gluing photo wallpaper to glass will help create a real picture on the surface of your door. At the same time, the second part of the door should also be sealed with film or photo wallpaper. When choosing a pattern, take into account the individual characteristics of the room.
DIY glass decor without paints
We offer several options for making glass objects that will become a real decoration for any interior:
1. Creation of unusual glass bottles.
This bottle can be installed in any room. However, you need to choose paints for its design based on the style features of the interior.
To make a bottle you will need:
- glass bottle, jar or any container that has a lid;
- fine salt;
- food coloring;
- funnels;
- container in which the salt will be colored.
The first stage of work involves the process of painting salt. It is necessary to pour a little salt into the tank in which the dyeing will be carried out. At the same time, food coloring should be diluted in water, which is added to the salt and changes its color. Regular gouache paint will help replace the dye. Mix the salt and dye until the mixture becomes uniform in color.
Thus, the salt is painted in several colors, which are selected in advance. Next, it is poured into separate containers and remains there until completely dry.
Tip: To make the salt dry faster, we recommend using a microwave.
Place a funnel in a jar or bottle and gradually pour salt into it. If you don't have a funnel, make a regular bag out of cardboard or paper. Choose colors depending on your own desires and interior features. Fill the container to the top and cover the lid; use stones, shells, beads and other decorative elements to decorate it.
2. Creating an angel from glass.
This option for decorating glass with acrylic requires skills in working with a glass cutter. To make an angel figurine, you need to cut out certain parts.
Materials for glass decoration:
- ordinary glass;
- copper tape;
- elements for soldering;
- soldering machine;
- grinding machine;
- copper patina;
- soldering iron acid;
- composition for washing dishes.
The first stage involves creating a small stained glass window. To complete it, you will need to create a sketch of the future angel on paper. Cut them out of paper and use a marker to transfer them to the glass.
Use a glass cutter to cut out the necessary parts, and use tongs to extrude them. To grind the end sections, use a special grinding machine.
Copper tape is applied to the end sections of the glass to prevent cuts. Use a regular handle or plastic spatula to ensure a tighter fit of the tape to the glass. To connect individual elements, use small nails or special buttons. Go over the surface of the copper profile with a brush with flux. After heating the soldering device, go through these areas, working all the copper elements of the angel. We recommend installing copper rings on the wings.
To wash the product, use dishwashing detergent. After drying, the decorative angel is rubbed with a dry cloth.
Tip: To purchase the necessary materials for work, contact a specialized store.
3. Decorating a glass bottle with shells.
To perform the work you will need:
- an ordinary bottle of champagne or cognac;
- twine;
- glue;
- sand;
- stones;
- different fractions of shells;
- varnish to fix the decorative effect.
First, you should prepare the bottle. To remove the sticker, soak the bottle in hot water. After this, you should lubricate the bottle with glue and stick a rope onto its surface along the entire perimeter, almost to the top. After this, the bottle is lubricated one more time with glue. Place stones and shells in a sequence convenient for you. Try to alternate large elements with small ones. Create an additional decorative effect from sand and small fragments of shells by gluing them onto individual parts of the bottle. After the bottle has completely dried, the product should be coated with varnish. In addition, there is another option for decorating bottles, but it will take more time to complete.
To decorate a bottle in a marine style, follow these steps:
- the bottle should be covered with a special modeling paste;
- install the shells, choosing the desired order;
- remove the shells and coat the surface with glue;
- place each of the shells in place;
- sprinkle the surface with sand and shells;
- open the bottle with varnish.
Thus, to make an original thing with your own hands, it is enough to use simple improvised objects and your imagination.
Sea salt
Decorating window glass can be done not only with paint. Sea salt can be an unusual decorative coating for your window. How to use it in decoration? Draw a sketch of the design on paper. Glue the image to the back of the glass. Take PVA glue and draw the outline of the design with it. When the glue has set a little, sprinkle it with sea salt. If you want to get a color drawing, you will need to paint over the salt in advance using gouache. If you don’t have salt on the farm, you can use fine sand instead. But still, from a technical point of view, decorating with salt is safer for the window. When you wash off the image, the salt will dissolve and small particles of sand will scratch the mirror surface of the glass.
Greenhouse
Glass is often used in the construction of wooden or metal greenhouses. This is a classic version of greenhouse structures, which allows you to maintain the necessary microclimate inside .
If you have a lot of window glass leftovers, you can successfully use them to create a greenhouse.
Such a structure has walls and a roof made of glass, which provides a number of advantages:
- The greenhouse can be used all year round. The material retains its transparency, structure, appearance and thermal insulation properties.
- By connecting heating to it, you can grow plants in winter . In summer, transparent glass allows light to pass through, allowing plants to grow.
- Glass withstands abrasive influences and is easy to clean.
- The walls of the structure can be easily replaced in case of damage . Replacement is inexpensive, and used glass is suitable for this.
- Glass does not emit harmful substances or odors even when exposed to heat. This is an environmentally friendly material that is also easy to care for. Glass is resistant to chemicals used for cleaning.
- The reinforced or tempered type (thermal glass) can withstand large hail and other adverse weather conditions.
In addition to all these properties and an attractive appearance that lasts for years, this design has disadvantages :
- It is necessary to select a reliable frame and prepare a strong foundation (a strip foundation can withstand such loads), since glass is characterized by increased weight . You wouldn’t say so at first glance, but the material weighs a lot: for example, glass 4 mm thick in a square shape weighs about 10 kg, and the weight of a 6 mm layer is 1.5 times more.
- Building a glass greenhouse will not be cheap.
- The glass resists shock and mechanical impacts poorly.
- Glass has high thermal conductivity, so it heats up and cools down quickly . This is especially harmful to plants during daily temperature changes. Therefore, you need to take care of the system for maintaining the desired temperature inside the room.
- A glass room can only be built in the form of a house.
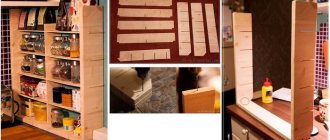
It all starts with preparation:
- Creating a drawing of the future greenhouse, determining its dimensions.
- Choosing a suitable location. It is necessary to take into account the level of lighting, orient the room so that the heat is distributed evenly.
- Taking into account the wind direction in a given area. It is best to protect the structure on the leeward side with some object (shrub or other small obstacle).
- Determination of soil and relief features. You need to choose a dry and level place.
- Calculating the distance of the greenhouse to the nearest source of electricity and water supply. The closer you get, the easier it will be to build a system for heating and watering plants.
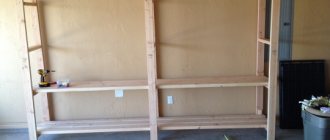
The following shows where not to place a greenhouse. If you make the wrong choice, the greenhouse may collapse or the plants being grown will grow more slowly.
A reasonable solution would be to create a wall-mounted greenhouse. This will save site area , reduce the distance to water and electricity and spend less money on construction.
Below is a typical drawing. If desired, it can be changed according to the desired dimensions.
Building materials are selected based on the drawing . The foundation must be at least 0.5 meters in height and have a strong frame - metal or wood (bars or profiles measuring 5 by 5 cm, the distance between the posts is up to 0.8 m, based on the size of the glass and the frame itself).
You can use different types of glass. The main thing is that they match the dimensions of the frame . Eg:
- single (2.5 mm thick) suitable for side walls installed in a small wooden frame;
- double (up to 3.5 mm) cannot be used as a top window;
- showcase (6 mm) will become a strong wall, but will need reliable fastening and supports;
- multi-layer will work in almost any part.
Select glass based on the purpose of the structure .
If the greenhouse contains tropical plants, it is better to use multi-layer glazing, which will reduce the cost of internal heating.
Regular glass is also suitable for greens and vegetables.
Double-glazed windows provide the best growth. There are several types:
- single-chamber;
- two-chamber;
- heat-saving;
- energy saving.
Double-glazed windows from old plastic windows are perfect.
You will need to prepare the following building materials :
- support corners;
- wooden beams or metal bases for each side of the frame;
- beams;
- polyurethane foam and hardware;
- glass or double glazing;
- sealant (for fixing and insulating glazing);
- door parts (handle, lock, hinges);
- corners on which wooden parts will be attached.
Cords, pegs, containers, buckets and shovels are needed for marking and preparing the foundation . A hacksaw, chisels, glass cutter, electric planer and construction level will be needed when assembling the greenhouse.
Now that everything is ready, we’ll tell you in detail how to make a greenhouse.
Assembly is carried out in the following order:
- At the selected location, you need to level the soil and remove vegetation. Make markings for the trenches by installing pegs and cords.
- We dig trenches according to the intended markings (depth 0.4 m, width 0.2 m). Let's plan the bottom of the pit, fill it with a 10-centimeter layer of a mixture of crushed stone and sand.
- We assemble the formwork and check the height of the edges. We lay welded mesh or steel reinforcement and attach anchors to the frame.
- We prepare concrete (a mixture of cement and sand 1:3 with the addition of crushed stone and water). Pour in the resulting solution and give it time to harden.
We lay two layers of roofing material directly on the surface of the foundation. They will protect the wooden frame from moisture. We treat wooden blanks with an antiseptic.
Screw the support bars of the frame to the anchors, then make holes in the bars on which the glass will be attached.
We fasten the racks and beams.
Make sure the structure is upright. Install the braces and secure all elements with metal corners .
Next, assemble the roof frame using rafters and beams. Then you can hang the doors. After cutting the glass, install the elements into the grooves of the beams. To do this, use sealant, putty or liquid nails.
Connect all the remaining elements together. Check everything first for cracks and gaps, then make sure the structure is strong . When it is clear that the greenhouse retains heat, bring all the plants into it.
Plasticine
Do you want to keep your child busy, but don't know how to do it? Let your child decorate glass using plasticine. This technique of decorating glass is not very popular. Many parents are afraid that their child will cut himself with the sharp edge of the creative base. To prevent your child from getting injured, immediately teach your child safety precautions, and also carefully monitor the process of your child’s work. How to decorate glass with plasticine? You can draw an image in advance, or you don’t have to. In the first case, you will need to put the sketch under glass, and in the second, you should start imagining. The work process will look like this: you need to tear off a small piece of plasticine, roll it into a ball, and then smear it on the glass. But you don’t need to smear the plasticine too hard to get a smear.
Photo frame
A more difficult operation will be decorating frames, panels and paintings.
Before making a frame with glass, you will need to prepare:
- a sheet of fiberboard of a suitable size (dimensions are selected based on the intended design);
- broken glass (transparent and colored);
- acrylic paints, gouache or ink;
- glue.
A thick layer of acrylic paint is applied to the fiberboard sheet. If desired, you can cover it with one or more shades . This is necessary to prepare the background. When everything is dry, the sheet needs to be inserted into the frame of the future product.
Then, on the future panel or painting, you need to apply the contours of the planned design using a stencil or by hand.
This is why ink or gouache was needed - to circle the outlined lines twice and glue the fragments along them.
Having pasted them in the background area, you need to let the product dry.
Liquid glass
Thinking about how to decorate a glass plate? Then pay attention to liquid glass technology. To work you will need beautiful decorative material. These could be shells, beads, beautiful stones, small toys or any other decorative elements. From the collected material, you need to lay out a composition at the bottom of the plate. If you want your product to have a background, then the bottom of the container must be covered with acrylic in advance. When the composition is ready, it should be carefully filled with a layer of liquid glass. All you have to do is wait for the glass to harden and the product will be ready.
Stained glass
Stained glass is a separate type of decorative art. The first colored stained glass appeared back in the millennium before last in Christian churches. You can admire the incredible creations of medieval masters, for example, in Notre Dame Cathedral.
Many people mistakenly believe that stained glass is only used in churches. In fact, stained glass can decorate any room, be it a classic design or a high-tech style. In the sun, stained glass shimmers in different colors and casts colorful reflections on the walls, creating coziness and softening the light.