Unique designer and unusual items are and will continue to be in high demand. It's all about their uniqueness - only with your own hands or the hands of a skilled designer can you bring to life something that no one else will have. Such things include a table made from cut wood, which you can make yourself. And despite the fact that many people have already brought this idea to life, such a table will still be unique and one of a kind, because nature will certainly not repeat the pattern of the inside of the tree.
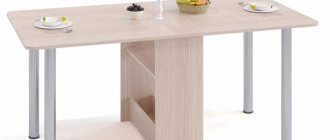
Table made from cut wood
Why made of logs?
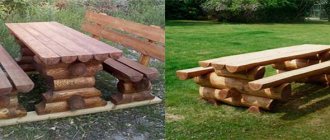
Probably every person has seen a wooden frame in the Russian style at least once in his life. From exactly the same logs you can make a beautiful table for a gazebo or even at home. Similar homemade furniture is used in the interior of a bathhouse. You can easily install it yourself. To do this, you need to acquire the necessary materials and tools.
Types of log tables
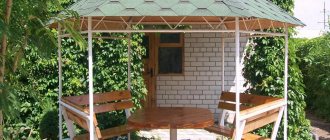
Furniture made from logs will ideally fit into the design of any garden plot of a country house. The table can be placed on the veranda of the house, under a canopy or in a gazebo. It will look cozy against the background of a log house.
Based on the shape of the tabletop, furniture can be divided into several types:
- rectangular structures are very convenient and functional, as a rule, they have enough area to freely accommodate all family members;
- furniture with rounded edges will suit the original interior of a room with interior decoration made of natural wood;
- a table made of rounded square logs is perfect for a small gazebo.
The size of the table will depend on its location and the maximum number of users. The main feature of the design is the original shape of the legs. They are usually made from halves or whole logs. Furniture is made from wood of various species. Such material remains after the construction of a private house, garden buildings, and auxiliary buildings.
Tools
The materials you need to stock up on are logs and, if necessary, stain. The tools you need to acquire are:
- saw and hacksaw;
- drill with large drill bits;
- plane;
- screws and nails;
- “Moment” glue for wood and metal;
- hammer;
- a piece of leveled reinforcement;
- sandpaper.
Scheme for work
To take into account all the little things, you need to think through the drawing before work. Each size must be marked on it. If you are going to align the boards on only one side, then the diagram must be made in three dimensions.
If you will not process the boards, then a two-dimensional drawing will suffice. As a result, all parts of the table with their actual size should be drawn on the diagram.
Complex crafts
Saw cuts of various sizes allow you to create crafts of varying complexity. There are several popular directions:
- Interior. Tiles from wood cuts are glued to the wall surface. This way you can cover some part or the entire surface. This interior harmoniously combines with country and Provence. Before decorating, the wall is carefully leveled and primed. The tiles are attached in the same way as tiles. Small elements are installed in the gaps between large cuts. The seams are sealed with putty with the addition of the desired dye. Photo 7 shows an example of decorating a hallway. A rectangle of saw cuts is laid on the wall. Hangers are secured to the lower elements with self-tapping screws.
- Tabletop. A table with a top made of saw cuts will decorate a room decorated in high-tech or modern style. The tabletop is assembled on a flat horizontal surface. Sections 2.5-3 cm thick are prepared. The bark is removed and the sides are carefully sanded. A tabletop of the required size is formed from the cuts. The gaps are filled with epoxy resin so that there are no air bubbles in it. A frame and metal legs are made from a steel corner. A tabletop is attached to the frame on top. The surface of the table is sanded and varnished. Fasteners must be recessed into the wood and filled with putty.
Panels made from saw cuts are especially attractive. For its base, you can use an MDF board of the required size. It is painted white to create a general background, then the desired design is applied. The panel is assembled from cuts of different types of wood. Some parts are impregnated with a tinting composition. All elements are glued to the base in a certain order, the outer rows extend beyond the MDF, making it almost invisible.
Preparation of material
First, make sure that you have enough wood according to the drawing and size. If according to the design project it is supposed to make a rough table with legs made of rough wood, then the processing will take place with minimal labor and time. If it is assumed that the finished specimen should be more elegant, then in this case you need to carefully process the wood with a plane.
In the finished bottom boards you need to make holes for the reinforcement. There is no need to do them all the way through. Half the thickness of the board is enough. Each hole should be located at a distance of 30-40 cm from each other. The boards that are above the bottom ones are drilled through at an angle of 90 degrees.
On a note!
If there are unevenness on the boards, they can be easily removed with a plane. You can sand the surface and make it perfectly smooth using sandpaper. This concludes the wood preparation.
How to make a small table for coffee from sawn wood?
Let's see how to make a simple small coffee or coffee table from a medium-diameter end cut. As we remember, to make tables you can use many cuts at once, but in this case you will use one, but a large one, which will become a full-fledged tabletop.
Step 1. First of all, you need to get the saw cut itself. The easiest way is to buy a ready-made one, but in this case the master decided to go into the forest and prepare it himself. It is best to do the cutting in the summer in very dry weather. “Winter” cuts may become deformed during drying or crack. So, you need to find a large and beautiful tree - walnut or oak, etc. And then you need to use a chainsaw to cut off a section from the trunk in the thick part of the required thickness. The saw chain should be sharp and the wood should not be rotten. The cut itself needs to be dried well for some time and only then can you start creating the table.
Suitable wood is being cut
Preparing a tree cut
Prices for the popular range of petrol chain saws
Chainsaw
Step 2. Next you need to carry out rough general processing of the cut. You need to use a plane to cut off all the irregularities from the surface and remove the bark.
Rough processing of saw cut
The bark is removed
Step 3. After roughing, you need to sand the surface of the future table well.
Sanding the saw cut
Step 4. There may be cracks on the saw cut, and in theory such a cut is not used. But sometimes the problem can be solved - the cracks just need to be strengthened. To do this, you need to purchase a small piece of wooden board and cut out “butterflies” from it, as shown in the picture.
The butterfly is marked
Then it needs to be cut
Step 5. Next, the butterflies need to be attached to the cut in the area of the cracks so that both sides of the tree relative to the crack look like connected butterflies, and then you need to outline them with a pencil.
The butterfly is outlined with a pencil
Step 6. Now you need to cut out the notches for the butterflies on the cut itself.
Notches need to be cut on the saw cut
Another photo of the process
Step 7. All that remains is to insert the butterflies into the places prepared for them and cut off their upper part so that it does not protrude above the cut surface (if necessary).
Excess butterfly is cut off
Step 8. Now you need to secure the butterflies with epoxy resin. You can also glue them with any wood glue.
Fixing the butterfly with epoxy resin
Step 9. After this, the tabletop must be carefully sanded again until perfectly smooth.
Re-sanding the countertop
Step 10. Next you need to coat the wood with a layer of varnish or epoxy resin. Can be applied with a brush. After applying the paint and varnish material, its layer must be thoroughly dried before further work.
Wood is varnished
Step 11. Now you need to drill holes in the underside of the tabletop to fix the legs. The markings must be applied in accordance with the location of the holes on the leg mount.
Holes are drilled in the tabletop
Prices for popular models of screwdrivers
Screwdrivers
Step 12. The final stage is attaching the legs for the table themselves. In this case, metal ones were used. They need to be screwed to the tabletop, and the table is ready.
This is where the leg will be attached
Attaching the legs
Assembly of the lower structure
To make the structure strong and last a long time, you need to assemble all the parts using glue and reinforcement. First they work with reinforcement and boards with holes placed on top of each other. The metal rods should stick out a little. We make a mark close to the hole, pull it out and saw it off using a hacksaw. We insert the reinforcement back into the boards and fill all the free space with glue.
Tabletop
The upper part can be assembled in two ways. Let's consider the first of them.
Method 1
While the glue that holds the wood to the reinforcement dries, we move on to assembling the tabletop. If you do not plan to put anything heavy on the top, then you can cover the top with a sheet of chipboard. To decorate, cover it with self-adhesive paper. This method of making a tabletop is only suitable if the height and width of the table does not exceed 1 meter.
Method 2
If you want the table to be more elegant and beautiful, you can attach treated beams. The entire rough surface is processed with a plane and sandpaper. When you are sure that all the parts have a uniform structure, you can file all sharp edges to avoid the possibility of injury.
Wipe the finished table first with a damp cloth, then with a dry one. Now you can start varnishing the finished product. You can apply the protective solution in one layer. This is enough to protect the surface from bad weather.
Labor and cost
Sawing and processing logs is a labor-intensive process that takes from an hour to two. Sawing gutters and fastening logs with self-tapping screws will require skill; this task can also take two hours.
The price of the table will depend on the type of wood chosen. A box of self-tapping screws 6 x 200 in the amount of 500 pieces costs 2.5 thousand rubles. Some stores sell them individually, so you can save a lot of money.
One can of impregnation costs about 600 rubles, depending on the manufacturer. The varnish will cost approximately 200 rubles per 0.2 liter. The funds spent on protecting wood from rotting will result in many years of use of the table.
Recommendations for masters
To ensure that wood furniture pleases you for a long time, there are some tips that should not be neglected:
- Be sure to protect wooden furniture from precipitation and temperature changes. For this purpose, you can find special solutions and compositions in stores.
- Be sure to treat all corners and surfaces that come into contact with the body. This way you will protect yourself from splinters and other injuries.
- Don't neglect drawing up a drawing. This will help you calculate the amount of material and think through all the details.
In these simple ways you can assemble an amazingly beautiful wooden table.
After watching the video, you will learn how to make a table from a log with your own hands.
Where can I get the saw?
Having decided on the basic parameters of the future table, you need to prepare the necessary materials. And the most important material that will play a decisive role in the process is a good quality cut of wood that fits the size. It seems that everything is simple here - I went into the forest, took the first log I came across and sawed off a round piece from it. But in reality everything is much more complicated.
Safety precautions when working with a chainsaw
Preparing saw cuts is not entirely easy. First, you need to find a good tree of the required diameter as well as quality. Secondly, mistakes should not be made during sawing. The slightest mistake - and you will have to look for a new tree and do all the work over again.
Wooden cuts
For the manufacture of tabletops, saw cuts with cracks are almost unsuitable (except in certain cases). Also, the wood must be treated before use. The easiest way is to buy ready-made saw cuts - it turns out that they are sold, but finding a supplier is not so easy.
Table made of saw cuts and epoxy resin
If you prepare saw cuts yourself, then you need to look for one that will have a beautiful wood color, will not be cracked, and will have a beautiful pattern. If several cuts will be used for the tabletop, then it is important to ensure that the pattern is similar, or at least use cuts from the same type of wood.
Important! The pattern of the tree on the saw cut is the highlight of the future table. And therefore, the selection of wood patterns must be treated with utmost care.
Tree cuts
It is best to use saw cuts that are already dry to make a table; moreover, they should be made from a type of wood that is less susceptible to moisture than others. It is better to choose those that do not have knots and other defects that can break off over time and ruin the product. The cuts must be of sufficient thickness and not too thin or too thick.
Thus, only at the stage of preparing the cuts can you stall. But it’s worth it - a unique table made from sawn wood, created by yourself, can become the highlight of the interior. In addition, as a rule, such tables are very durable and can serve for many years without complaints.
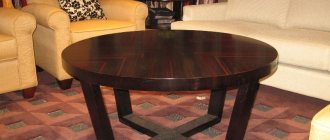
Coffee table made from cut wood