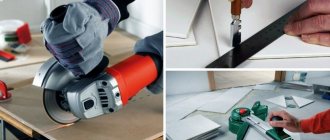
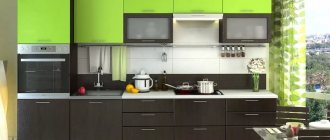
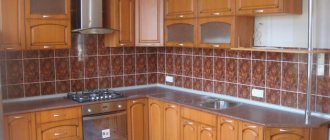
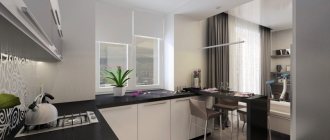
The cost of furnishings directly depends on the material they are made from. Laminated chipboards are widely used in furniture production - the products are inexpensive, have a wide range of models and a variety of shades and textures. To increase strength, moisture resistance and decorativeness, particle boards are covered with a laminated front layer in the form of a film based on melamine resins. You can make furniture with your own hands from laminated chipboard, but it is worth considering that if you cut it yourself, you can get chips on the front surface. Experts recommend making a drawing of the future product and ordering cutting of parts in a store or furniture workshop using special equipment.
DIY furniture from laminated chipboard
Types of partitions
Chipboard partitions are available in several types. Classification is carried out according to appearance and design features. Such walls can be:
- transparent;
- deaf;
- with blinds.
The first ones involve the presence of glass, which is combined with chipboard. The second ones are the most common, as they can provide both noise reduction and complete insulation. But if you want the chipboard partition to allow you to adjust the degree of openness, you can supplement it with blinds.
Attention! Such walls can also be divided into separate types according to their purpose. They can be installed in a living space or delimit the area in a public bathroom.
Chipboard can also be offered for sale in a laminated version. Therefore, laminated chipboard partitions are a separate type. Their advantage is that they do not require finishing cladding. Plumbing partitions made of laminated chipboard are installed in public toilets and can be made from sheets of different thicknesses.
The most common example of such structures are partitions made of chipboard of the PF-16 economy series. They have a 2mm end edge and the door profile is usually made from anodized aluminum. Adjustable legs serve as accessories. An additional bonus is a handle with a busy indicator.
Such designs have reliable fittings, are easy to install and have a warranty from the manufacturer. The aluminum profile for partitions, which underlies the door leaf, can be painted in almost any color. The most common options are:
- beige;
- white;
- grey.
Pros and cons of chipboard
Laminated chipboard partitions have a smooth surface and do not need to be finished after construction, which allows the consumer to save money. But this advantage is not the only one that this design can boast of. An additional advantage is durability. It is impossible not to highlight environmental safety. If you follow the installation technology, there will be no gaps or cracks between the elements, which provides better sound insulation.
It is possible to install such a wall even between rooms with different temperature conditions. Another advantage of chipboard is its moisture resistance. When purchasing, you need to pay attention to whether the material has these properties. If the characteristic is present, the partition can be used under difficult conditions.
Attention! If you plan to finish a chipboard partition with your own hands after installing it, it is better to purchase a non-laminated panel, which is excellent for painting, wallpapering and plastering.
Partitions made from chipboard are superior to structures made from other materials in terms of a combination of factors due to the fact that they are cheap, easy to install and do not place additional load on the floors. The material is universal, because you can match it with any finishing options for adjacent walls and pieces of furniture. Transportation and loading, as well as unloading will be facilitated, since the material has little weight. Its service life is 10 years without the need for repairs or upgrades. The appearance of the walls is quite attractive. The fabrics are resistant to fungus, mold and rot.
Wood-based partitions, of course, have their drawbacks. Among the first and foremost, we should highlight the presence of formaldehyde resins in the composition, which are released into the air in small quantities. Difficulty may also arise at the stage when the master wants to give the partition a curved shape.
Chipboard is difficult to process. Therefore, it is better to abandon the idea of profile milling. In order to take advantage of the environmental friendliness of wood raw materials, it is better to purchase a canvas that is covered with a sealed veneer or film. When building a chipboard wall with your own hands, you should remember that it is not very suitable for hanging heavy objects. It is better not to drive screws and nails into the structure, as they will not hold well there. You should not put excessive stress on such a partition, because it can become fragile. If you plan to hang heavy objects on the wall, it is better to replace chipboard with natural wood.
Production stages
Drying wood raw materials
For the production of chipboards, chips with a moisture content of 2...4% are used. Wood from the warehouse has a much higher humidity: therefore, the chips are additionally dried in special convective dryers at a temperature of about 500ºC.
Resinization
For high-quality pressing, the chips must be evenly covered with a thin layer of binder. Treatment with a binder is called resinization. It is carried out in special mixers that spray the binder using nozzles. Modern equipment makes it possible to cover literally every wood particle with a thin layer of resin, from all sides.
The tarred wood leaves the mixer and is fed into the press.
Pressing
Pressing is carried out in special presses, which can have different designs. In any case, the chips mixed with the binder hardener are compressed at a temperature of 220...230ºС, then cooled and subjected to additional processing.
There are two types of pressing: flat and extrusion. With flat pressing, the press presses on the future slab perpendicular to its plane - usually from top to bottom. This method makes it possible to obtain multilayer boards, and the strength of chipboard, all other things being equal, will be higher than that of extrusion-pressed chipboard. Therefore, at the moment, “flat” technology dominates the market.
During extrusion pressing, a mixture of chips and a binder is squeezed into the space between heated plates from the side, and the pressure vector is directed parallel to the plane of the plate. The strength of the slab is lower, but this method makes it possible to obtain ultra-light hollow-core slabs. Extrusion presses are rarely used today.
Press cycle
The duration of the pressing cycle in the production of chipboards ranges from 30 to 60 seconds and depends on the temperature of the press and the density of the board. The higher the density of the chipboard, the longer it needs to be pressed; the higher the temperature, the shorter the cycle. At the same time, the optimal temperature and duration of pressing are also influenced by the humidity and size of the chips, the type and amount of binder, quality requirements and characteristics of the press itself. As a rule, technologists experimentally select cycle parameters for each batch of raw materials.
Edge trimming and chipboard cooling
After pressing, the finished and still hot chipboard is cooled and trimmed to the required format. Pruning can be hot or cold. During hot trimming, a still hot plate enters the sizing machine. This technology increases productivity, but during cutting, the heated and still soft chipboard can become deformed. With cold pruning, the risk of deformation is minimal. The downside to this type of trimming is the need to add a fan cooler to the production line, which is quite slow.
Conditioning
After cutting and cooling, the chipboard is kept in an intermediate warehouse for 120…140 hours. At this time, the binder continues to harden inside the slab, it gains hardness and strength. Upon completion of conditioning, the slab is subjected to additional processing.
Finishing chipboard
Finishing is the final stage of chipboard production. Most often used:
- sanding on one or both sides;
- lamination with paper-resin films;
- veneering
Package
The finished chipboard is labeled and packaged in bundles. In this form, it is sent to the warehouse or directly to the buyer.
Characteristics of chipboard
One of the important characteristics is the presence of formaldehyde. For residential use, choose sheets marked E-1, which contain the least amount of this substance. As for the assortment, the material is manufactured in three grades, the last of which is a production defect. Even if the canvas belongs to the first grade, small chips, inclusions of shavings and bark, as well as other defects can be seen on its surface. The material can be classified into a certain moisture resistance class. The sheets have increased and normal moisture-repellent abilities. If you need dense material, you should be guided by more impressive figures within 800 kg/m3.
DIY partition installation
Do-it-yourself chipboard partitions are installed on a frame made of timber or aluminum profile. Load-bearing elements are located between the walls, floor and ceiling. Thermal tape is placed under the frame elements.
Vertical posts are fixed at the top and bottom with corners. Do-it-yourself installation of a partition involves independent selection of the pitch between the racks. The distances will be determined by the width of the sheet. The edges should fall on the central part of the vertical load-bearing element.
Partitions made from chipboard of the PF-16 economy series are installed on site. They can have completely different sizes to suit the dimensions of the room. Additional accessories include hinges with an automatic closure made of stainless steel. The designs of the PF-16 economy series have ball locks. Products can have an individual design and fully comply with sanitary standards.
Materials and tools
For work, it is better to choose a 10 mm sheet, which is well suited in terms of strength and will not cause cost overruns. In addition to this, the master will need:
- wooden beam;
- insulation if necessary;
- thermal insulation tape;
- metal corners;
- mechanical fastener.
It is most convenient to drive self-tapping screws with a screwdriver. You will also need:
- hammer;
- plumb line;
- hand saw;
- pencil;
- drill;
- Bulgarian;
- roulette.
The position of all elements, components and sheet material must be checked with a building level. Instead of a hand saw for wood, you can use a metal tool. But it is permissible to replace a pencil with chalk.
Preparation of material for the frame
The frame can be created from wooden beams. The following varieties are suitable for a high-quality base:
- pine;
- ash;
- maple.
Coniferous species are recommended because they have a high resin content, which inhibits decay processes and virtually eliminates the impact of rodents and insects on the material.
The dimensions of the bars must be selected taking into account the dimensions of the wall. It is best to use bars with a cross section of 60 x 80 mm.
Attention! If you want to make the partition more reliable, it is best to install bars with a more impressive section of 450 x 100 mm at the top and bottom.
The wood must be well dried, which takes up to 7 days. After this, the material is treated with an antiseptic. Additionally, you can apply a layer of drying oil. It is heated in a water bath. This way it penetrates better into the structure. Drying oil is applied especially carefully to the ends. For a more effective result, you can lower the beam into a container with an antiseptic.
Marking before installing a chipboard partition
Markings need to exist on all surfaces to which the partition will adjoin. If you do not plan to extend the wall to the ceiling, there is no need to mirror the line there. A line is drawn on the floor along which the future wall will run. This marking is not the edge of the partition, but the line of attachment of the frame element. If a doorway is expected, its location should be shown at this stage.
Surface preparation
During the marking process, you also need to pay attention to the condition of the floor, walls, and ceiling. All bases must be level, and if a block is applied, the gap should not exceed 0.5 mm. If this value is greater, the beam may bend when fastening it. The surface boundaries are treated with a primer with antiseptic properties.
Frame making
The frame must be installed from the ceiling. If the ceiling is wooden, you can use wood screws. But when the base is brick or concrete, the beam is fixed to the ceiling with a wedge anchor. In order to increase the strength of the structure, the guides are installed in smaller increments.
When you are confident in the reliability of the plaster layer, dowels can be replaced with wooden pegs. They are driven into the surface and treated with alabaster on top. Then you can screw in the screw. At the final stage of constructing the frame, the timber is attached to the wall. This will allow the materials on the floor and ceiling to be tied into a single whole. As a result, a frame should be formed.
Attention! Metal corners are installed at angles that should be 90˚. This will make the frame even more reliable.
Guides and racks made of timber can be reinforced with nails if the walls are wooden. Screws are used instead. When the walls are stone, dowels should be used. The racks are secured to the guides; the same screws or nails should be used. Everything will depend on the material of the main wall. The beads that will act as guides should be fixed at the top and bottom in increments of 1 m. There should be no less than three fasteners per bar.
Frame installation
The rack bars should be strengthened between the guides. The step between them will be 60 cm. The vertical joints of the canvases should fall on the profiles.
The frame can also be metal. It consists of guides that run along the ceiling and floor. Rack profiles will make up the internal filling. The distance between them usually reaches 60 cm, but can be less. Connections between rack and horizontal profiles are carried out using crabs. The remaining elements are fixed to each other with bugs.
Chipboard installation
The frame is covered with chipboard sheets using profiles or self-tapping screws. If the sheets are large, it is best to use aluminum profiles. When oriented vertically, it is necessary to start from the corner. The sheets are connected to each other with a special strip. If it becomes necessary to dismantle, this can be done without damaging the surface of the material. If it is necessary to fasten the panels together, you can use connecting profiles. An alternative solution is eccentrics and ties.
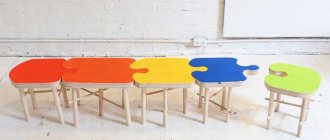
Corner for a child
Sometimes there are a lot of unnecessary fragments of the tabletop left, and then it is possible to build an unusual corner for the baby for toys, books, accessories and children's hiding places.
If there are a lot of scraps, you can make a desk and computer desk, stool, cabinet, small chest of drawers, sink in the same color scheme.
Ideas for creativity and implementation are varied and suitable for a master of any level. All you have to do is choose what you liked the most and get to work. Good luck!
- Author: Ksenia Gavritski
Rate this article:
- 5
- 4
- 3
- 2
- 1
(9 votes, average: 3.7 out of 5)
Share with your friends!
Bathroom partitions
Such designs differ only in the base of the frame and the moisture-repellent characteristics of the particle board. It can be based on an aluminum profile, which can be lined with chipboard. Such designs can be classified according to:
- material of manufacture;
- designs;
- degree of transparency;
- type of operation;
- installation method.
If the partition is located inside the bathroom, it can be made transformable or mobile. But if the structure must have good sound insulation, it should be made multilayer, adding a noise reduction layer to the frame. Sometimes partitions in bathrooms are used only to zone a large space.
Useful tips
- Since chipboard is based on natural raw materials, the material can be used for living space, but it is not recommended to cover children’s structures with such a material, because formaldehyde resins are used in its production. They can have a negative impact on health.
- The partition can perform another functional role - to hide communications. Therefore, after cladding the structure on one side, securing chipboard sheets there, you need to lay all the wires, insulation (if provided), and then begin finishing the second side.
- Before proceeding with the installation of a wooden frame, its elements should be treated with fire retardants and moisture-repellent compounds, which will extend the life of the entire structure.
- If you want to save money, then it is best to use a frame-panel structure as the basis of the partition. To install it, use a beam with a cross section of 50 x 100 mm. The bottom connection will be a horizontal harness, which ensures reliability and stability.
- To soundproof or create a temperature barrier, it is better to lay polystyrene foam or mineral wool in the frame. The thickness of these materials should be at least 50 mm. To prevent exposure to moisture vapor, the insulation sheets are sealed on both sides.
Before starting work, each consumer usually tries to calculate how much money he will need. If you build a frame-panel partition and cover it with chipboard sheets, then for each square meter of such a wall you will have to pay 100 rubles.
What is better for furniture: MDF or chipboard?
For the manufacture of furniture, the two main materials most often used are chipboard and MDF. How to understand which one is better for furniture?
There are fundamental differences between them:
- Laminated chipboard is made from wood sawdust and shavings; formaldehyde acts as a binder.
- During the production of MDF, wood dust from waste from the wood processing industry, crushed to a fine fraction, is used as a raw material. The binding elements are environmentally friendly paraffin and ligin. Thanks to this, MDF is much more environmentally friendly than laminated chipboard. It is safe to use in children's rooms.
Paraffin in MDF serves not only as an environmentally friendly binding agent, but also as an excellent water-repellent material, so it is not necessary to treat it with different impregnations.
Each of them has properties that are better suited in a particular situation:
- Density. MDF is much denser due to its structure, so it holds fasteners much better. It is good to use as kitchen cabinet fronts. The density also allows you to mill MDF, which is not possible with laminated chipboard.
- Constructive capabilities. The structural features of the material make it possible to use MDF in complex structures; the variable capabilities of this material are much higher compared to laminated chipboard.
- Price. Laminated chipboard is much cheaper compared to MDF, so it is used for the manufacture of economy-class furniture.
- Humidity. Laminated chipboard is much less resistant to moisture than MDF.
- Harmful to health. The evaporation of formaldehyde from laminated chipboard is harmful to human health, but not from MDF.
- Colors. Today on the market you can find a huge variety of chipboard colors, both to match the structure of the wood, and a large number of solid colors. The structure of the coating can be either glossy or matte. MDF does not have such a large selection of decorative coatings as laminated chipboard.