Secrets of the professionals
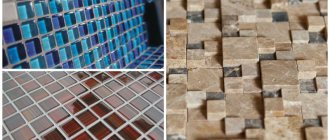
Colored grout for mosaic and ceramic tile joints.
If the grouting is not done well enough, you can ruin the appearance of the mosaic, the walls themselves, or the floor covering. Thus, all installation work can be reduced to nothing. There is one very important rule that absolutely all specialists involved in laying mosaics know about. Before you start grouting the joints, be sure to clean the surface of the tiles from any existing dust and carefully remove the cement adhesive from the joints.
Color selection
Currently, grouts are manufactured in a wide variety of colors. The choice of shade determines how the final result of the work will look. Correct selection allows you to hide errors made when laying the mosaic and transform the design.
Professionals recommend choosing a grout color that matches or is darker than the mosaic itself. If the shade is lighter, then visually the picture will merge. In addition, after complete drying, the grout material may change color.
It is also necessary to take into account the properties of the mosaic itself. If it is made of glass or a photo collage is preferred, then it is better to use transparent grout.
In any case, the choice of color is individual, but before grouting it is better to experiment with different shades.
TYPES AND VARIETIES OF GROOUTS and which is better to CHOOSE?
Currently, in construction markets and in specialized stores you can find a wide variety of cement-based and epoxy grouts. Choose grout for tile joints based on individual factors. So, in particular, it is necessary to take into account the operating conditions of the new mosaic. Ask yourself questions: what kind of physical stress will be placed on the coating? Will it be constantly exposed to chemical as well as thermal stress? You should also definitely take into account the parameters of the seam itself between the pixels - how deep and wide the seam is. In addition, the grouts are matched to the mosaic itself or a little darker. Lately I have been recommending using EPOXY GROUT.
Applying grout
Currently, the range of grouts is very large. There are several options available in stores: these are, in particular, elastic and inelastic grouts, special compositions for rooms with increased mechanical loads, mosaic grouts used in swimming pools, as well as epoxy grouts. There are also subtypes of grout depending on the size of the joint. As for the variety of special grouts, the choice of colors is usually small. But the palette of shades of ordinary grout can reach several dozen items - it all depends on the manufacturer.
RULES for working with grout.
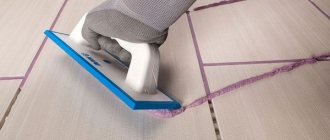
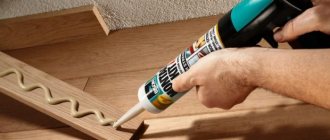
Grouting of joints should be done according to the rules, one day after the installation work is completed. The fact is that the tile adhesive must completely harden (FOR CEMENT ADHESIVES) . If you do not follow this important rule, you may notice that stains suddenly appear on the grouted seam. Why is this happening? Everything is explained simply. When the glue dries, excess moisture is released in the form of steam. This evaporation passes through the grout applied to the joints. Accordingly, the color of the grout may change, and not for the better. It is very important to remember that when applying grout, the seams between the mosaics must be absolutely clean. This is especially important if you use light-colored grout. Agree, it is very unpleasant if a gray strip of glue suddenly appears on a delicate pastel background. Before you start mixing cement grout, you should carefully read the instructions presented on the package. Precise adherence to proportions is of particular importance. There is one more very important rule that builders talk about. The applied mixture must be moistened, then it will not crack and “smear”. As experts say, the grout should be “watered” with water. This is easy to do: blot the surface with a sponge, or spray it with a spray bottle. Undoubtedly, how experienced the master who carried out the finishing work is plays a very important role. If you dream of ideal quality, do not neglect the rules “A VALUABLE MASTER IS A MASTER + PRICE.” The tool used is also of great importance. After the seams are completely filled with the grout mixture, you should wait ten to thirty minutes before fixing. For epoxy grouts the time period is slightly longer. The waiting time depends entirely on the temperature factor and the humidity in the room. The type of grout itself also plays an important role.
So, we wait the necessary time and begin to clean the seams from excess mixture. Excess grout is simply washed away with water, this is the only way to get an even, smooth seam. Typically, professional builders use special water sponges in this process.
How to CLEAN AND protect tiles from FUNGUS AND DIRT?
It should be noted that the question of how to clean grout from tiles concerns almost everyone who has recently completed renovations in the bathroom or kitchen. Many people are also interested in how to clean the grout itself and how it can be protected from contamination.
Many manufacturers of finishing materials recommend the use of special compounds that provide a water-repellent effect. For example, the Atlas Delfin composition is quite popular. True, you need to keep in mind that the use of such compositions is justified only if you used the most ordinary grout to fill the mosaic joints.
But if epoxy grout was used, no additional processing is required. Epoxy grout is good because it is practically not susceptible to contamination. And if dirt gets on it, it won’t be difficult to wash it off.
Interior with mirror tiles
The ability to visually expand the dimensions is relevant for an elongated room: placing the tiles on a long wall will correct such disproportion.
You can achieve a simultaneous visual increase in width and height of a room by laying elements on one wall diagonally or in diamond shapes.
To avoid the “labyrinth” effect, it is not recommended to place mirror surfaces opposite each other.
Covering the entire surface of the ceiling of a large room with tiles creates a feeling of emptiness and coldness; in such cases, it is advisable to do the installation only in the center or perimeter with the arrangement of spotlights.
The desire to make an apartment or house cozy and bright can easily be realized with the help of mirror tiles. Refrain from covering too large areas: reflective elements can be irritating to the psyche and cause anxiety, therefore, when trying to create an original design, be careful and do not overuse the number of reflective surfaces.
REMOVAL OF GROUT FROM THE SURFACE OF TILES AND MOSAICS
Particular attention should be paid to protecting the finishing material – mosaic. When grouting joints, unaesthetic marks may remain on the beautiful surface of the mosaic. And dirt is most noticeable if you chose a light mosaic, but preferred bright grout.
Keep in mind that you can avoid the problem of removing grout from mosaic tiles by taking some preventive measures. So, in particular, there are special preparations that are applied to the mosaic a couple of hours before filling the joints with grout. The drug forms a protective film on the delicate surface of ceramics. And later you can easily remove it from the surface with one movement of your hand.
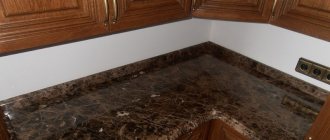
For example, in order to protect marble or polished porcelain tiles from contamination with a grout mixture, you can use special compounds from Sopro. The same compositions are recommended for working with some types of mosaics.
How to grout tile seams - step-by-step diagram
Step 1: Clean the tiles and grout
We arm ourselves with a vacuum cleaner, a damp rag, a brush with hard bristles or a sponge with a hard side and wash, clean, vacuum! When applying a grout, the seams must be perfectly clean, this is especially important when grouting light-colored tiles or mosaics.
Step 2: First batch
Whatever your friends and acquaintances “builders” advise, your main adviser is the instructions on the package. Read it carefully, maybe even several times, and, following the instructions on the package, start kneading. Each case has its own proportions and components, we can give only one piece of advice - use a drill or mixer with a special attachment for mixing. It is very difficult to prepare a high-quality solution manually, and you will lose a fair amount of time. But in the case of an epoxy fugue, this process seems incredibly complicated - at first glance, the epoxy resin may seem already hardened, it can barely be picked out with a spatula. It becomes softer only after prolonged kneading.
Step 3: Pre-Protection
In the case of mosaics, for the convenience of subsequent cleaning of the tiles from grout residues, many builders spray a special spray on its surface, which forms a protective film. Subsequently, you can wash off excess fugue with one movement of your hand. Apply the spray 20 minutes before the main work process; it is important that it dry completely.
Step 4: Filling the Seams
Don’t be afraid to stain the tiles - put more mixture on the spatula and fill the seams with wide, diagonal movements, grabbing several at once, as the master does in the photo. In the case of large floor tiles, you can tinker with each seam individually, but with mosaics there is no point in doing so. We use only a rubber spatula! We press it firmly with our hands so that the grout is 1-2 mm below the level of the tile, forming, as it were, small grooves. If the size of the tiles allows you to tinker with each seam separately, then experienced craftsmen run their index or thumb moistened with water along the seam - this is the best way to level it and deepen it a little.
Step 5: Moisten the grout
It is very important to constantly moisten the grout as it hardens so that it is saturated with water and does not crack. This can be done either from a spray bottle or using a moistened sponge. This step is repeated several times.
Step 6: Remove leftovers
When the joints are filled, after waiting 15-20 minutes, you can begin cleaning up the excess mixture on the front side of the tile. It's simple - soak a sponge with hard bristles on one side in water, and with this hard side, carefully, with diagonal movements, wash away the remains of the fugue. For convenience, fill two buckets of water - in one, rinse the sponge from accumulated dirt, in the second, wash off its remnants.
- Author: Mikhail Malofeev
Rate this article:
- 5
- 4
- 3
- 2
- 1
(2 votes, average: 5 out of 5)
Share with your friends!
Armed with a bucket, water and sponge
Keep in mind that grout does not take long to fully cure. Usually this process takes place in ten to twenty minutes. In order to remove traces of grout from the surface of the ceramic, you need to take a bucket of warm water and a very ordinary sponge . Wipe the surface of the mosaic using gentle circular movements. Be careful: it is very important not to damage the seams themselves. Change the water as often as possible and rinse the sponge well. Once you have removed all the remaining grout, let the grout dry. This will require you to wait approximately half an hour.
Risks of mechanical cleaning method
If you use epoxy grout, it is very difficult to remove such a mixture from the surface of the mosaic. After applying the grout, you need to wait no more than an hour and wash the seams with warm water, changing the water as often as possible and rinse the sponge even more thoroughly . In the same case, if you did not have time to clean the grout immediately, then in a few days you will only be able to get rid of it mechanically, or you will have to buy a new mosaic.
Don't forget that mosaic is not a type of finish that should be replaced every few years. Typically, a mosaic lasts for ten years, and sometimes even several decades. Therefore, try to preserve the appearance of the coating and remove the grout very carefully and, most importantly, in advance.
Resin based grouts
This category of grouting materials is based on epoxy resin. Special coloring pigments are used as additional components, and hardeners are also used. It is worth emphasizing that such mixtures are quite expensive.
The scope of their application is mainly industrial, some office, and also retail premises. Such grouts have very high resistance to various aggressive factors - to the effects of water and numerous chemicals. Epoxy grout is used, among other things, to treat the seams of metal mosaics.
It should also be said that this mixture has a rather viscous consistency and is inconvenient to work with. Respirators are typically used when working with epoxy resin grout. Another difficult point is that such grout is quite difficult to wash off from the surface of the mosaic.
Recently, special grout mixtures made on the basis of so-called furan resin have also appeared on sale. Such mixtures are very resistant to many chemicals, even acids. Meanwhile, working with such grout is quite difficult. Before using it, you need to cover the tile itself with wax, and handle the seams very carefully. After the work is completed, traces of grout are immediately removed from the tiles using hot steam.
About grouting mosaic paintings.
In this publication I want to discuss the options for mosaic grouting. Moreover, the conversation will be about mosaic paintings.
Since the picture usually hangs on the wall and does not serve any other function other than aesthetic, and is not exposed to aggressive chemicals or water, there is no special need for grouting. In addition, it can “bury” too small details. But it can also decorate the work and make it more complete.
Firstly, you should immediately, even before starting work, ask yourself the question: will you erase your painting? This is important because Based on this, you can form your own composition from pieces of glass/stones/smalt with the distance you need between these pieces. After all, distance plays a big role in the overall artistic solution of the work. With its help you can add lightness and volume to the image, create a special rhythm and mood.
Secondly, you should also immediately decide what kind of grout will be: cement or epoxy.
Cement grout is considered to be the easiest to use. It consists of finely ground cement, plasticizers and various additives and pigments. When dissolved with water, these components turn into a plastic mass similar to putty. It's easy to work with, there's a huge selection of colors to choose from, and the price is quite affordable. Another bonus: you can add a little color (or regular gouache!) to the white grout mixture to get the perfect shade... and obvious savings!
Epoxy grout is two-component and consists of epoxy resin with modifying additives and a hardener. The resulting mass as a result of mixing them is more viscous, and it is more difficult to fill the “seams” with it. It comes in various colors, is very resistant to cleaning agents, moisture, and frost-resistant, but I consider the possibility of purchasing colorless grout to be a special advantage of this option. Ideal for stained glass mosaics! You can also add glitter to it. This creates a wonderful, magical, mysterious effect.
From my own experience, I can say that smalt rubbed with epoxy is a ruined work (my personal opinion, if we are talking about a painting). Glass mosaic is good in any version (here everything depends on the author’s idea). But stained glass goes perfectly with epoxy, although cement grout looks quite wonderful.
Work examples:
— Stained glass + epoxy grout
— glass mosaic + transparent epoxy grout. The epoxy “united” the tesserae and reduced the overall contrast.
— glass mosaic + cement grout. Rhythmic and decorative.
- without grouting. Transparent glass mosaic has an interesting effect: like transparent colored caramels)))
In the dark part of the background, the cement glue shows a little, but in this case it gave such a “shabby”, “garage” effect that they decided to leave it and not rub it over.
Deep shadows between the tesserae of natural stone create rhythm and interesting texture, and make the flower more voluminous:
Smalt without grout. Volume and lightness due to shadows and “air”.
HOW TO SELECT AND NOT MAKE A MISTAKE WHEN CHOOSING THE SHADE OF GROUT.
Currently, you can find a variety of types of grout in specialized construction stores. Most manufacturers take into account the trends of modern interior fashion and produce high-quality grout in a wide variety of colors, and not just traditional white grout. With the help of such a grouting material, you can not only ensure high-quality insulation of tile joints, but also create a complete bathroom interior. Very often, grout becomes an inseparable part of the interior solution. With its help, you can, for example, smooth out the color of a tiled mosaic and create the feeling of an even, smooth wall, without a single transition. And in some cases, you can create a contrasting color scheme. For example, you decided to choose the color of the mosaic and chose red, and use black grout. Agree, this design option looks very unusual, original and bright.
So, in order to make the design of the bathroom walls stylish and harmonious, it is necessary not only to carefully select the color of the mosaic, but also to find the optimal shade of grout. How to avoid making a mistake?
Take a piece of your mosaic with you to the market or hardware store. Attach a sample from the catalog to your mosaic and find the most suitable option. But this is not enough. After all, when grouting the seams, everything can change. Without grouting, the mosaic is bright because the seams are still empty, but once you grout it, you don’t know how it will look. Take the time and make a sample of several grouts. It's a pity, but they don't do this in stores.
In the same case, if you used different colors of mosaics to decorate the bathroom, select the grouting material to match the mosaic that plays the “first fiddle” in the interior design. By the way, you can make your task easier by choosing the color of the mosaic and the shade of the grout immediately, in one visit to the hardware store. It will be much more convenient.
Grouting joints between mosaic pieces
Hi all!
In this article I will tell you about the use of mosaic grout using the example of 2 mosaic miniatures.
So, the work has several zones, different in color and tone. There are dark places, like a dog's ear, the body. Light parts: the dog's muzzle, body - in one case, a cape on the back, in another.
We will need dark gray, light gray and white grout. Colors: yellow, blue and red. Rubber spatula, wet wipes, water.
I will grout the first work in stages, using different grout in tone and color for each zone. For the second job I will use light gray grout. Let's see what happens.
For the dog's face I use white grout and yellow color. I dilute the white powder one to three. I weigh 30 grams of powder and 5 grams of water on a scale. I also add 5 grams of yellow color. I stir the resulting mixture for 3 minutes.
Goal: I want the color and tone of the dog’s muzzle to not change after using the grout - not to become darker or lighter, the yellow color of the smalt still works 100%.
I cover the green ear with molar tape so that the yellow mixture does not get on it.
I apply the yellow grout mixture to the surface of the mosaic. I leave the work to dry for one hour. Afterwards, I remove the top greasy layer with a damp cloth and leave the work to dry for another 6-8 hours. After this, I wash the dog’s face completely.
Next, I prepared green from the yellow and blue colors. I need it for my ear.
For the light green mixture I used light gray grout. For dark green - dark gray grout.
I grout the area of the dog's back with light green grout.
First, I rubbed it with the yellow mixture, just like the muzzle. But in the end we ended up with two identical spots in shape and color: the back and the muzzle. Literal repetitions in art are always bad. I had to remove the grout with a sharp object (an awl) and re-grout it with the green mixture. Looking ahead, I admit that this did not save the overall composition. In the second version of the dog, the color of the back mosaic was replaced with red.
Having previously covered the dog's muzzle and part of the back and body with masking tape, I apply dark green grout to the ear. The goal is to end up with a dark spot after the light spot on the dog's muzzle. The expressiveness of the work is the harmonious alternation of light and dark zones in the composition, bright and muted colors.
I also leave the work to dry for an hour. Afterwards, I remove the greasy layer of the mixture with a damp cloth. Then, I dry it for 6-8 hours and wash the surface of the mosaic completely.
It's time to rub the dog's body. I want bright red grout. For this I use white powder as a base.
As always, the proportion is one to three: 60 grams of powder per 20 grams of water and color.
I cover the dog's back and part of the ear with molar tape. I apply the red mixture to the surface of the mosaic.
I leave it to dry for one hour. Then, with a damp cloth, I remove the greasy mixture and dry it for another 6-8 hours.
Only after this do I wash the work completely.
So, I like how the dog's light, warm face and dark, cool ear end up working together. The dog's body came out well. The yellow back matches the dog's face in tone and size. This is bad. In the next version I replaced this part with red. Overall, I'm pleased with the result.
But I must admit that for a person, especially a child, who has just decided to try to make something out of mosaic, such a number of grouting stages will probably frighten him with its complexity and time-consuming process. Therefore, I will show you a simpler method of grouting, using only one grout - light gray.
Dilute the gray powder with water. Stir the resulting mixture for 2 minutes. If the water was poured, the mixture turned out to be liquid, no problem. Leave it to stand for 10 minutes, stirring occasionally. It will thicken and be ready to use.
I apply grout to the mosaic. I dry it for one hour.
After an hour, I wash off the smalt completely.
The result is quite satisfactory. But still, I want to make my ear darker. Therefore, I will put two grouts in the set: light gray for the entire area of the dog, except for the ear. There will be a bag of dark gray grout for it.
The dachshund set, which you can buy here: does not include colored colors. This leads to the complexity and cost of the set.
The purpose of the article is to show how the color and tone of the grout changes the work. Inspire you to find the best solution from your point of view.
I hope the article was useful to you.