Basic rules for cutting plywood or chipboard
The most suitable tools are circular or band saws.
There are many cutting tools, and not just one, but several will be used at once.
To get a clean cut, you need to follow the rules:
- saws with fine teeth are suitable for work;
- First of all, the material is sawn across the grain, then along. This method will prevent corners from splitting;
- on the front side the material is sawed with a hand or band saw;
- from the wrong side - saw with a contour or disk tool;
- when working with a circular saw, it is necessary to ensure high speed and low material feed ratio;
- the teeth of the circular saw should penetrate shallowly into the surface;
- in order for fewer creases to appear on the board, you need to guide the saw along the cutting line, with light pressure and slight kickback;
- adhesive tape attached along the cutting line will protect the material from chipping.
In practice, two professional interchangeable tools are used - a jigsaw and a jigsaw.
In a home workshop you can achieve an even cut. But it is better to entrust work with dimensional sheet materials to professionals with specialized equipment.
Figure cutting
It is even more difficult to obtain curved surfaces of a given configuration at home, and you will have to spend additional money on purchasing a router that will help you get rid of chips and nicks formed when you cut chipboard.
The price of a hand router can vary significantly, depending on the manufacturer, power, and the presence of additional functions. If you do not plan to produce furniture professionally, then it is advisable to purchase an inexpensive model.
To cut chipboard you need to follow these steps:
- Having marked the contours of the required part on a sheet of chipboard, we cut it out with a jigsaw, trying to cut just a couple of millimeters from the intended cutting line;
- we make templates of the design radius from fiberboard or plywood and carefully sand the ends with sandpaper;
- Having attached the template to the part to be finished, clamp it with clamps and process it with a hand-held copying cutter with a bearing, removing excess material exactly to the intended line.
In this case, it does not matter which cutter (with two or four knives is used). The only condition is that the knives must cover the entire thickness of the cut being processed. After processing, all that remains is to glue the edge onto the part. How this is done - watch the video:
How to cut a tabletop without chips using a hacksaw
A regular hacksaw will work to cut the tabletop. However, when working, you need to take into account that you need to leave a margin of at least 100 mm. The tool must have fine teeth. It would be better if it was a hacksaw for metal.
You can saw off the tabletop with a hacksaw.
Attention! The teeth must be hardened and set apart by ½ the thickness of the material.
To work, you will need paper adhesive tape, a file for rough cuts and sandpaper for finishing.
Take several measurements to ensure an even cut.
How to properly cut a tabletop with a hacksaw:
- Mark a cutting line with a sharp tool;
- stick paper adhesive tape along the markings to protect the top decorative layer;
- direct the movements of the hacksaw at an acute angle to the surface of the sheet (no more than 30 degrees);
- cut smoothly, with medium pressure.
All irregularities can be hidden with sandpaper.
If chips appear, they need to be processed with a file, moving from the edges to the center. Sand any remaining minor defects with fine-grained sandpaper.
Final stage
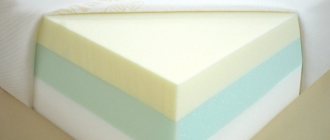
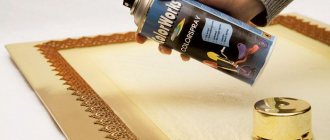
In the last step you need to use another tool. You will need a spray or file, sandpaper, GOI board, adhesive tape and a decorative duralumin corner.
First of all, you need to polish the wood. To do this, you can use a spray or a file to remove the excess. Then use a sander or regular sandpaper (no sanding) to keep the wood looking good. It is recommended that you do this work even if you don't intend to do anything else afterwards. Due to the torn elements of the wood, the material will attract moisture much faster, which will cause faster wear of the material.
READ Makita Cordless Circular Saws Video
Having restored the tree to normal, it is necessary to bring the plastic to the same condition. Usually it is enough to use special polishes. But if this is not available, you should not buy a new one, because you will need very little of this tool to finish one tabletop, and then throw away the AL-KO varnish, which is not economical.
The ideal option for plastic recycling is GOI paste. It is available in almost every home, and is a completely versatile tool and quite effective.
Even if the cut was successful and of high quality grinding, it is better to play on it safely so that even small millimeters do not make themselves felt in the future. Therefore, for finishing it is recommended to use a special furniture corner made of duralumin. It needs to be secured in place until the appearance is neat.
Can I cut with a jigsaw?
The tool is suitable for making small cuts. You will need a tool for working with metal, with fine teeth. The cut is made along the front side: this way there will be fewer chips on it, and there will be small irregularities on the back side.
When working with a jigsaw, the cut is made from the reverse side due to the direction of the teeth on the file.
When working, the tool is not set to maximum speed, but slightly above average. The tool must be moved with smooth movements, with light pressure.
Important! The method is not suitable for cutting long materials, since it is difficult to maintain an even cut line.
Dull saws need to be replaced.
Processing chipboards after cutting
Working with particle boards after cutting the workpiece includes:
- end processing carried out with special edge materials;
- painting, wallpapering or tiling;
- bending slabs of material and repairing accidental or manufacturing defects.
Processing cut edges, do-it-yourself edging process
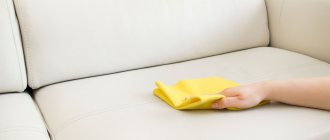
It is necessary to improve aesthetics and prevent chipping of the material. For gluing the ends, melamine films are often used, which are fried to the surface with an iron. They are less durable than the laminated layer, but are visually attractive and protect from mechanical stress and minor moisture ingress.
The process of edging chipboard at home is not very complicated. The cut edges of the slab are cleaned with sandpaper and polished, after which an edge band is pressed against them. An adhesive that is optimal for the specific type of film is applied under the tape (not required for self-adhesive tapes).
The plate is placed on its end, and the plastic edge is pressed down with a heated iron. After removing the improvised hot press, a flat board should be placed on the film to fix the load and the hardening process.
The video will tell you more about how to glue an edge to a chipboard:
Painting and wallpapering
You can paint chipboard with your own hands in several approaches. You must first rid the material of remnants of old paint using heat or mechanical force, and treat any noticeable defects with sandpaper. Apply a regular or acrylic primer to a clean surface.
After the primer layer has dried, the slab is covered with a layer of paint, which is recommended to be applied in two stages. The painting layer can be applied with a brush or spray gun. The material consumption in the latter case will be less, although regular paint will be cheaper.
To protect the chipboard from moisture, you can treat the surface with drying oil or rub it with a stearin candle. We should not forget about applying sealant at joints exposed to moisture.
A universal way to prepare chipboard for further processing is puttying. The surface is pre-coated with a primer, after which a layer of starting and finishing putty is applied. Only non-laminated chipboards are subjected to treatment, since putty holds less well on a laminated surface.
Wallpapering on chipboard slabs is carried out after applying primer. This reduces the likelihood of rust spreading from fastening points buried in the wood.
The tiles are laid directly on a dry and clean chipboard surface using thick adhesives. To enhance the fixation of the tiles, a fine polymer mesh is used, which increases overall strength.
Correction of random defects (holes, dents) or technological holes is carried out with a mixture of sawdust and glue. PVA or epoxy mixture is used as an adhesive base. Repairing slabs usually does not require special skills. Chipboard parts are rarely glued together, preferring to use self-tapping screws or bolted connections.
How to cut with a circular saw
The tool can make long cuts, but during operation more chips are formed (compared to cutting with a jigsaw). You will need a saw blade with fine teeth.
You should work with electrical appliances carefully.
As a rule, the side where the teeth cut remains clean, but chips appear on the opposite side.
You should start cutting from the front edge (facade) to avoid chipping on this part.
It is more convenient to work with a saw fixed on the table. This way you are not busy with the tool and you can use the guide. This will increase the cutting accuracy and allow you to make several parts.
Use tools correctly.
Chips that form after cutting can be processed with a file and sandpaper.
What not to cut chipboard
If the volume of work is large enough and the quality requirements are low, some craftsmen advise sawing chipboard at home using a grinder (angle grinder, commonly called an “grinder”). In doing so, they use a disk designed for working with wood. To make cutting easier, a guide bar is secured along the cutting line using clamps. Cutting chipboard using a grinder can sometimes be seen in the video.
Attention, important! This method is absolutely unacceptable, since the likelihood of injury during operation is very high, especially if large-diameter discs are used and the protective casing is removed from the grinder.
The easiest way to mark is to draw straight lines along the sides of the slab using stretched threads, a square, a ruler and (or) a measuring tape. If there are a large number of parts to be cut, it is difficult to choose the optimal sheet cutting scheme that can reduce losses due to the remaining scraps. To outline smooth curves, you need to use patterns that allow you to reproduce numerous fragments of the same type.
Special programs help improve the quality of cutting, in which the dimensions of products are specified, calculations are made and a diagram of the optimal arrangement of cutting lines is displayed. Such programs include “Cutting 2”, “Master 2” and others.
An example of using the software is shown in the video:
When cutting material with your own hands, you need to pay special attention to the straightness of the corners and maintaining straight lines. Marking large sheets should be done on the floor, working in pairs. Drawing dimensions by one person is fraught with distortion of parameters caused by the displacement of measuring instruments during work.
Methods for cutting chipboard
The main tools for cutting wood panels are:
- hand saw for wood or metal;
- electric or regular jigsaw;
- Circular Saw.
The cuts are more accurate when using a hand saw for metal and a jigsaw. The disadvantages of the saw include its low productivity, which is unacceptable for working with large volumes of chipboard. The use of a jigsaw does not allow obtaining straight cut lines compared to a circular saw.
Working with a jigsaw does not always prevent the formation of chips at the end of the slab. Only the use of high-quality blades can create an even cut line.
To reduce the number or even avoid chipping when processing chipboard, you can use a special technique for working with a conventional circular saw. First, strict markings are made, mirrored on different sides of the material. Then, along these markings, recesses are sawed on each side, going deep into the slab by approximately 60-70% of its thickness (the material is sawn completely in two passes).
Since chips on the surface occur at the exit of the teeth, and not at the entrance, sawing in two passes virtually eliminates damage to the material. This method requires high precision cutting to ensure a smooth end surface. The saw blade for chipboard should have a small toothing to reduce the area of interaction with compressed wood chips.
The use of a sawing machine makes it much easier to cut in two steps. A number of parts can be made by cutting out a workpiece with obviously oversized dimensions (by 5-10 mm), after which they are trimmed on both sides according to specified parameters. The use of a sawing machine allows not only to maintain accurate dimensions, but to evenly cut the lines necessary for the manufacture of prefabricated structures.
Some sawing machines support independent slab marking. These machines are equipped with clamps and rails that facilitate precise cutting.
You can see how to saw off chipboard smoothly and without chips in the video:
Sawing with a router
A great way to get a clean cut. First, the material is cut with a jigsaw at a distance of 2-3 mm from the marking line. Then a cutter is used to align the line according to a pre-prepared template. A cutter with a bearing is suitable for the job.
When cutting simple chipboard, no complications can arise, but with laminated chipboard everything is much more complicated.
This method can be used to make not only straight, but also curved cuts, and to produce radius parts.
We select a saw blade with the largest number of teeth to ensure an even cut.
Among the disadvantages of the method: it is necessary to apply precise markings, file the workpieces in advance and place the template under the router. That is, it is inconvenient for the tool to cut off several identical parts.
Chipboard and the nuances of its processing
You can use a circular saw to cut the tabletop without swarfing.
To work you will need:
- laminated chipboard;
- Blade;
- Puzzles;
- Regular puzzle
In practice, chipboard only began to be used in 1940 in the United States, but after a very short time, popularity spread throughout the world, leading to the emergence of all sorts of varieties. The most popular variety has become chipboard, which is not only a product of pressing sawdust with glue under high temperature, but also additional physical and chemical protection in the form of melamine film.
When cutting simple chipboard, no difficulties can arise, but with chipboard everything is much more complicated. Most often, the manufacturer covers the table with HPL laminate, which further complicates the process. Coatings can vary greatly in their properties, but they are always polymer, so they have the same nuances when processed.
The process itself is quite simple and can be described step by step:
- Using a sharpened blade, a groove 2-3 mm deep is made. If there is a polymer coating of any kind, the blade must first be heated and used immediately. When cold steel is pressed against hard plastic, even with very serious sharpening, microcracks will occur, which is advisable to avoid;
- Using a jigsaw, slowly and carefully adjusting the direction, a cut is made. If there are places where the direction changes, it is better to use a manual jigsaw or find the thinnest nail file in the electric equivalent (inconvenient, but sometimes necessary).
READ What You Can Cut With a Jigsaw
Final cutting steps
Circular saw device.
For this step you will need:
- Scatter or file;
- Sandpaper;
- Insert GOI;
- Scotch;
- Decorative corner made of duralumin.
Everything here is quite simple, but you will not need to use millimeter precision, and each stage is performed in several variations.
First you need to polish the wood. To do this, first use a spray (file) that removes excess. Then using a sander (zero sandpaper) gives the wood a nice finish. This stage is necessary even in cases where nothing is planned to be done after it. Uprooted wood elements remove moisture much faster, causing wear and tear to occur at an incredible rate.
Once the wood is returned to normal condition, the plastic must be restored to the same condition. Special polishes are usually sufficient, but finding them in retail is not always easy. In addition, there is another complication. You only need a small amount of grinding and AL-KO will throw away the rest. The ideal option is GOI paste, which is available in almost every home, and the instructions for its use allow you not to be afraid of future use.
Even with successful cutting and high-quality grinding, you need to ensure that even missed millimeters do not make themselves felt. To do this, you can use a special furniture decorative corner made of duralumin. The corner is fixed in place without spoiling the appearance.
Another expert tip: when cutting, you can use a guide tape with an adhesive layer that will prevent the blade from deviating from the route.
You should not be afraid to cut the tabletop yourself without shavings when it is really necessary, but if possible it is better to take it to the nearest workshop, where it will be done on special equipment very quickly and with the highest quality.
Source
Sawing with a format saw
The most suitable tool that can be used to cut boards and pressed materials of different thicknesses. The cuts are precise and multiple parts can be stamped.
Professional machines are used for industrial purposes.
They are small in size and weight (up to 20 kg), and easy to install. If necessary, the machine can be removed and moved to another location. The tool is suitable for longitudinal cutting to a depth of up to 8 cm. Also, in a home workshop, you can saw the tabletop with a circular saw with an extended work table.
At home, household machines are usually used.
They are more convenient than household ones, as they allow you to make cuts not only along longitudinal, but also along transverse lines. The maximum cutting depth is 9 cm. When working, you need to apply precise markings and follow safety precautions.
Methods for cutting laminated chipboard without chipping
You need to saw a laminated board using a special machine (format cutting machine). But its price is too high (from 50,000 to 100,0000 rubles) when it comes to home use. An alternative could be budget options (hacksaw, jigsaw, etc.), which will take more time to cut but require less investment.
Using a hacksaw
Sawing with a hacksaw at home is quite difficult. First, you need to cut the measurement line with a knife and glue tape along it. This will protect the top layer from damage. Point the tool at an angle of 30 degrees. Carefully move the hacksaw back and forth without pressing hard. To cut laminated chipboard without chipping with a hacksaw at home, choose devices with the finest teeth. In case of damage, the cut area must be passed with a file, directing it from the edge to the center. Finally, rub with sandpaper (fine-grained) and hide the defects under the flexible profile.
Jigsaw
To cut chipboard smoothly with a jigsaw without chipping, you need to choose a device with a minimum tooth size. It is used for small areas of tiles, using smooth movements without pressure at low speed. If you are using a jigsaw for the first time, some cracks may appear on the back of the slab. With further use, the quality of the cut will improve.
Circular saw
The tool is a table with a toothed disk for chipboard. Among craftsmen it is called a circular saw. Cuts through wood better than a jigsaw. A good result without chipping is possible by sketching guide lines and securing the circular saw to the board. Chips should not appear where the saw cut into the slab. But the opposite side can be sawed through with fragments.
Using a router
A router is a power tool for manual wood processing. Suitable for cutting grooves, shaping, edges and drilling. Before using it, a sheet of wood is sawed with a jigsaw, departing 3 mm from the markings. You need to cut with a cutter together with a bearing, which forms the cutting depth to the required level. This is a labor-intensive process that only experienced specialists can do. There is a high probability of cutting the board crookedly.
Sawing with a format saw
The workpiece is placed on the table and fixed in a stationary state. The necessary markings are made on the sheet and the saw unit is turned on. When the disk reaches sufficient speed, the table moves forward along with the wooden slabs and hits the disk.
Equipment setup:
- tile position;
- depth of cut;
- cutting angle.
Chipboard cutting machines are divided into 3 types:
- light – for 5 hours of continuous operation;
- medium – up to 10 hours;
- heavy – up to 20 hours.
What does a cutting machine consist of:
- The bed is the mount on which the entire mechanism rests. A heavy frame will add stability to the device and eliminate vibrations. This is important for quality cutting.
- Saw unit - consists of 2 flat metal discs. The first one pre-saws the slab, and the second one finally cuts through it.
- Work tables. Three people take part in the process. The first is for the location of the unit, the second is for feeding the sawn slabs (movable), the third is for supporting the sawn parts.
- Carriage – allows the movable table to move. In this case, the workpiece is secured using a stop and rulers in the required position.
Sawing with undercut
The process requires a tire - a thrust ruler. It is secured to the board with clamps. Pruning is carried out according to the markings. The tire is installed along the line, and the cut is made 10 mm deep. The second cut is made through. With this method, there will be no chips on both sides, since the laminate is already cut on the bottom side.
Some elements used in design ideas are cut curvilinearly rather than rectilinearly. In this case, a mixed type of chipboard cutting is used.
Trimming sawing method
This method also involves using a circular saw, but a plunge-cut saw is more suitable. You will need a double ruler: it is fixed to the workpiece with clamps. The principle of operation is the same as that of a format-cutting machine: two cuts are made along the same line.
This is what the ruler-bus is used for. It is installed along the marking line, the laminate is lightly cut without disturbing its texture. Then the material is sawed along the marked trace.
By the way! Thanks to the cut on the laminate, no chips will form during the second deep cut.
The cut area can be sealed with an edge.
Using this method, you can cut the tabletop into one or more parts. Minimal chips are possible, but they can be easily removed by regular sanding or hidden with a decorative overlay.
Round cuts can also be masked.
Disadvantage: This method can only make straight cuts.
What tools to use?
If the question arises of how to cut a tabletop, then first of all you need to decide on a cutting tool, and most often several tools are used.
For example, using a circular saw, you can get the perfect result, but this is quite an expensive pleasure, because a high-quality tool costs a lot of money. Therefore, this unit can be found mainly only in special factories.
Grinder - has similarities with the previous tool, but the result will be far from ideal. When working with an angle grinder, many chips may form.
Usually, to cut a tabletop, two main professional and interchangeable tools are used - a jigsaw and a jigsaw.
Construction specialists divide blades or, as they are also called, saws into two main categories:
- tearing little by little on both sides;
- tearing strongly, but only on one side.
When working with a tabletop, you will need the option that breaks on one side.
Before starting the main work, it is necessary to thoroughly sharpen the blade of the tool so that chips do not form during the work. With a sharpened blade, before you start cutting the material directly, you need to make a groove, the depth of which will be about 2-3 mm. This will make it possible to complete the job without injuries or chips.
What cannot be sawed
A grinder or an angle grinder is something you should not use to saw a tabletop. Some masters recommend this method to save time. However, it has more disadvantages than advantages.
Use a level to make precise cuts.
Firstly, the quality of the parts is low: due to the sudden movement of the disk, many chips appear. Secondly, if large discs are used, there is a high risk of injury.
Professionals will make better cuts thanks to the availability of special devices.
In addition, after work a lot of dust remains, which is unacceptable at home.
Cutting panels from chipboard and other materials
This is especially important when cutting slabs with a double-sided finish.
Fiberboard can be cut at home using an electric or manual jigsaw. Of course, the file must be sharp, with a fine tooth; the jigsaw must be set to maximum speed. Install the fiberboard horizontally on a support that should not interfere with sawing (between two tables or chairs, for example), secure it with clamps if necessary.
The electric jigsaw should be held with both hands, pressed firmly against the surface, and moved smoothly, strictly along the marking line, without jerking or pressing.
The same applies to working with a hand jigsaw.
In cases where it is necessary to cut many sheets of material, it is more convenient to contact a specialized company. This will save you time and effort.