Main types of floor screed
- Concrete screed;
- Cement-sand screed;
- Self-leveling or self-leveling (self-leveling floor);
- Dry screed.
Many masters of their craft express their opinions; that each of these types copes well with the task assigned to it, to achieve a flat surface for laying finishing finishing materials.
Screed technology: work order
If you plan to wet or semi-dry screed the floor yourself, then concrete mortar will be needed in any case, and such work will consist of several stages.
- Pre-prepare the base. The surface is cleaned, examined carefully, and all major defects are eliminated. This will make it possible to minimize costs.
- All debris and dust are removed, then the surface is primed; it is better to apply several layers. If the floating method is chosen, then a waterproofing film and insulation are laid on the floor.
- Install guide beacons (horizontally or at the required slope). Then a wire reinforcing mesh is laid out.
- Prepare a solution, pour the screed, level it and cover it with film. They wait almost a month if they use wet technology.
This is just a diagram that you will have to adhere to, but there are quite a lot of different nuances to this “concrete” work. There are several points that you need to familiarize yourself with.
Materials required for screed
The basis is a solution. You can use a simple (traditional) cement-sand mixture, but adding plasticizers will make further work easier and will also shorten the maturation time of concrete. For the solution, use cement M400 or M500. Concrete must be M150 or M200.
For apartments, these brands will be sufficient, but other compositions with a larger proportion of cement can be used. Yes, the screed will be stronger, but the downside is that the shrinkage will be greater, and the likelihood of cracks appearing during the drying period will increase.
Proportions, volume and mixing
To obtain a cement-sand mixture of concrete grade M150, take 3 parts of cement (M400, M500) and 1 sand. The amount of water is 480-550 ml per 1 kg of cement. It is allowed to add one more solid ingredient - gravel (crushed stone) of small or medium fraction.
For increased plasticity, plasticizers are used. The simplest option is PVA glue. Its share in the solution should not exceed 1%. Fiber fiber is another component that improves the quality of the screed. It prevents the formation of cracks during shrinkage of the screed or foundation of a “freshly built” house.
First, all the dry ingredients are mixed to obtain a homogeneous mixture. Then water is gradually added, constantly stirring the solution. The exact volume of liquid depends on the moisture content of the gravel and sand. The ideal concrete for screeding is the one that will slide off the shovel on its own.
To determine the approximate volume of the solution, it is enough to know the area of the room and the thickness of the concrete screed. The last value is converted to meters, then both quantities are multiplied. The result is the volume of concrete in cubic meters. Using the following table, determine how much cement you will need to buy.
It indicates the cement consumption for a solution without gravel or crushed stone. It is better to take construction sand, not river sand. The difference in materials is in the edges: sharp in the first case, smoothed by water in the second. Concrete with quarry sand wins the competition in terms of strength over its river competitor.
What should you do after filling?
Waiting is the wrong answer. In order for the concrete to turn out to be of high quality, it is necessary to maintain temperature conditions and maintain humidity. The optimal temperature is +17°. To prevent moisture from evaporating too quickly, the surface is covered with thick plastic film. In hot sunny weather, it is recommended to curtain the windows. At critical temperatures (+25° or higher), the concrete is regularly wetted. “Moisturizing care” is required for the first 2-3 weeks.
Laying
When using this type of screed, it takes about a month to dry, it all depends on the moisture content (amount) in the mixture used, as well as the ambient temperature (heated, unheated) room.
As practice shows, you can move on a freshly poured surface after 3-4 days, and lay the floor covering after it has completely dried.
Semi-dry screed device
The entire list of works for semi-dry screed is completely identical to the list of works for traditional screed. The only difference is in the amount of water that is added to the cement-sand mortar. It should be such that the finished mixture is moist, but not runny. This is done in order to speed up the drying time of the finished screed. Since the ready-made mixture for semi-dry screed is much less plastic, it is more difficult to level it. Therefore, after leveling is completed, it is additionally rubbed. This is done using a special disk installation, or using a broad rule. After this, the surface of the screed is covered with a film so that the surface does not dry out and cracks do not form on the screed. After 12 hours, the beacons can be removed and the grooves filled with solution.
Self-leveling floor
This type of screed is used to hide small irregularities in the surface being poured. Before pouring, it is necessary to carry out waterproofing in order to prevent liquid from entering the neighbors living below.
Due to the usually small thickness of the layer, this type of screed dries faster, approximately two weeks, taking into account climatic conditions. In rooms with low ceilings, it practically becomes an ideal option.
To lay parquet, it is also necessary to lay plywood sheets, as described above. For other types of flooring used, it will be sufficient to lay a polyethylene foam underlay.
Preparatory work
After you have decided what kind of floor screed you will make, you need to prepare the base for pouring. To do this, you need to remove the old floor covering and all loose parts of the base and preferably vacuum it to remove dust from the surface.
Then we cover the base with a primer for better adhesion (Betokontakt is ideal, but a cheaper one is also possible).
For further work you need to find the zero level. To do this you will need a water level or a laser level.
We find the zero level for all rooms of the apartment at once. To do this, place a mark in an arbitrary place at a height of about 1-1.5 m from the floor and then transfer the marks to all the walls in the apartment using a water level.
You should have marks on all walls in all rooms. These marks must be connected with straight lines.
Now we measure the distance from the drawn level to the floor. This measurement must be taken in several places on each wall. The smallest value will indicate that in this place the floor height is maximum.
From the smallest value we subtract the thickness of the screed and measure the resulting length down from the previously drawn level. After connecting all the newly marked marks, a zero level will be obtained for all rooms. This is the level to which the future screed will be poured.
Please note that the thickness of the floor screed cannot be less than 30 mm (exception is leveling with self-leveling mixtures or levelers).
Cement screed is made from one part cement and three parts sand. But now there are many ready-made dry mixtures that just need to be diluted with water and can be used.
Video: do-it-yourself floor screed step-by-step instructions:
High quality concrete solution
Mix ingredients in a specific order
After marking the floor, we begin preparing the concrete. The preparation scheme is standard, for one part of high-quality cement (M 200) there are three parts of sand.
Mix the ingredients correctly:
- First you need to mix the dry ingredients well: cement and sand. Since a large volume of solution is mixed, you need to prepare a drill with a special attachment or a construction mixer in advance, since it will not be possible to mix the components properly by hand.
- To protect the surface from cracking during drying and further use, it is recommended to add plasticizers to the solution. The technology and proportions are indicated on the packaging for the composition.
- We check the quality of the solution by squeezing a handful of solution into a fist. It should not crumble or crack when compressed.
Related article: Panoramic glazing in a private house and apartment
| Concrete grade | Application | Cement consumption in kg per 1 cubic meter of concrete |
| M100 | Minimum strength. Used for concreting road curbs and fences | 165 |
| M200 | It is used when installing floor screeds in new buildings and during renovation work. Suitable for foundations | 240 |
| M300 | Used for installation of foundations, floors, etc. | 320 |
| M400 | For the construction of structures subject to significant loads: bridges, load-bearing supports on overpasses | 417 |
To obtain a homogeneous mixture, pour the dry ingredients into water. If you do it in the reverse order, the sand and cement will remain at the bottom and it will be difficult to mix them.
What can be used to create a screed?
Depending on the type of screed, they can be made of various materials. So, cement, water and sand are used to create a wet screed. In this case, cement acts as a binding material, and sand becomes a filler. To improve the quality of building mixtures, various components can be added to them to improve strength and reduce drying time.
On a note! To prepare such a mixture, you need to mix 1 part cement with 3 parts sand. The required amount of water is added to them. This is a fairly economical option.
Leveling concrete using the rule
To create a wet screed, ready-made sand concrete sold in stores can also be used. Its main disadvantage is the high shrinkage rate. Because of this, the thickness of the screed layer cannot be less than 3 cm, otherwise it will quickly become covered with cracks.
Advice! To reduce the risk of cracking of the screed, fiber fibers are added to the raw composition or layers of reinforcing mesh are laid on the rough base.
Fiber fiber for screed
For wooden floors, gypsum-based mixtures are used. This material can be laid in a thin layer, as it practically does not shrink. Drying times are also attractive - only 1-2 days. The only exception to the use of such compounds is high indoor humidity.
Self-leveling or self-leveling floors are usually used for final leveling of conventional wet screed. The reason is the fairly high cost of the material. This composition is used to level floors with unevenness of 2-7 mm.
Gypsum self-leveling floor
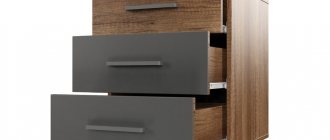
To make a dry screed, you will need sheet materials such as plasterboard, as well as medium and fine expanded clay for filling the base. The joints of individual sheets of material are treated with adhesives.
Dry floor screed and installation of gypsum fiber boards
Types of ties according to the method of coupling
So, depending on how exactly they are connected to the foundation slab or floor slab, screeds can be connected, on a separating layer, or floating. More details about each.
Bound floor screed
This screed is placed directly on the work surface and is fastened to it due to adhesion. There is no hydro or thermal insulation between the layer and the floor. A screed tightly coupled to the floor is made in the following cases:
- when it is not possible to raise the floor level - otherwise the doors will not close later or the ceiling will become too low;
- when the screed should be very light;
- when the foundation is ideal;
- when the screed area is too large.
Basically, a monolithic interlocking screed is ideal for those rooms where massive pieces of furniture and equipment, partitions or warehouse objects will be located. This is a heavy screed, a square meter of which weighs up to 150 kg.
When arranging such a screed, remember: floor beacons are not placed on the base, but “suspended” on pieces of rigid mortar or self-tapping screws. Then these slats remain in the body of the screed. Here is the process of making such a screed:
Screed on the separating layer
In this case, the screed is separated from the lower layer by thermal insulation or waterproofing, but at the same time it does not come into contact with the walls of the premises.
So, thermal insulation is placed under the screed in order to reduce heat loss. It usually consists of hard mineral slabs, the thickness of which ranges from 30 to 90 mm - here everything depends on the heat loss of the room and its heating mode. So, for the first floor of a private house, 30 mm of thickness is enough, and for the ground floors 90 mm is already needed. Today, foam boards with foil are often used as an insulator under screeds.
The main task of such waterproofing is to protect the entire screed cake from moisture. A screed with a waterproofing layer is indispensable for arranging floors in bathrooms, toilets, basements, attics under the roof and floors of the first floors. Here is a detailed master class:
Floating screed
A floating screed is so called because it is located on a certain cushion of an insulating layer, heat-, sound- or hydro-. This type of screed is only suitable for laminate, linoleum and parquet boards. But for parquet – no longer.
A floating screed is most relevant when your floor needs to be insulated or you plan to install good sound insulation. In general, a floating screed is indispensable for the following premises:
- in which, for various reasons, it is impossible to properly prepare the base or it is difficult to remove dust, for example;
- where heated floors are installed;
- in apartments of a storey building, where it is vitally important to waterproof, thermally insulate and soundproof the floor;
- where there is a high risk of cracking;
- where the screed needs to be done quickly and inexpensively.
But keep in mind that if you use additional plasticizers to construct a floating screed, then the screed itself will need to be reinforced. And when making a screed on an electric floor, be sure to put a heat insulator under it so as not to heat the lower floor.
And finally, a floating screed rarely cracks - after all, it is not tightly coupled to the base itself, and it does not “drive”. As for its design, such a screed must be separated from the walls by insulation - this avoids unnecessary stress in the building structure. And this is especially important if you are installing a heated floor - it has a significant coefficient of thermal expansion. In addition, the damper tape, which is usually used as such insulation, can greatly reduce heat loss through the walls.
By the way, experienced builders do not glue damper tape separately to the walls - but construct it from a layer of film (up to 20 cm). It is not difficult to trim off the excess film later.
Let us also note that even a screed on a plastic film alone is also called “floating”, because without it, she already behaves differently. And another tip - when arranging a floating screed, do not overdo it with water - it will intensively come to the surface, thereby diluting the cement laitance. And this will weaken the rigidity.
Technological process for performing wet screed
When considering step-by-step recommendations for making a leveling cement screed with your own hands, you should establish the following procedure:
The first step is to prepare the necessary tools, calculate the area of the room and the amount of materials.
Clean the floor surface from dirt and construction debris. Install beacons from dowels, creating the required slope.
Preparation of mortar of the required consistency and grade by mixing manually or in a concrete mixer.
Apply the solution between the beacons and, using the rule, level it with confident hand movements, creating a masterpiece of construction skill with your own hands. Now you can admire your creativity. It is advisable to leave the finished surface for some time for the solution to harden.
Types of screeds according to material composition
Screeds also vary in the materials they are made from. Their strength, quality and other important characteristics depend on this. For example, according to SNiPs, asphalt concrete screed can only be placed under tongue-and-groove parquet.
Cement-sand screed
There is an opinion among builders that so far nothing has been invented better than a conventional cement-sand screed. It is durable, understandable in technology and suitable for almost all types of coatings.
It is advisable to place hydro and sound insulation under such a screed. It will never allow water to pass down - this is its structure. But during the process of its installation, a situation is quite dangerous when water from the solution is sucked into the floor slab - repairs will have to be made in the apartment on the floor below. That is why for residential multi-storey buildings it is possible to make screed only using semi-dry or dry technology.
Yes, not many people know how to make a cement screed correctly, and therefore you can often see gross violations of technology. Such a screed is no longer suitable for use, because cracks and air bubbles are not a cosmetic defect, but a sure guarantee that any floor covering will not last long. Dismantling a defective screed is expensive.
Therefore, when constructing such a screed, it is important to completely eliminate the possibility of local suction of water (through other materials). Otherwise, this will lead to uneven drying of the surface, internal stresses, and, as a result, cracking. That is why an EPP backing is almost often placed under a cement-sand screed - an excellent sound insulator and water protection.
See what the process of installing such a screed looks like:
It is also quite problematic to make a cement-sand screed in the city - it is difficult to find clean sifted sand there. In addition, cement creates a lot of dust, and it’s quite difficult to carry it to the second to fifth floors.
Plaster screed
This type of screed is also popular today. After all, gypsum, unlike cement, is absolutely environmentally friendly. Thanks to this material, it is much easier to provide the required humidity and temperature in the room, which is what is needed for a residential building.
Industrial screed
Here, concrete grades with special strength are already used, reinforcement and special measures are required to prevent cracks. After all, industrial use of floors always involves heavy loads, both static and dynamic, falling heavy objects and sometimes serious abrasive effects.
In the production of industrial floor screed, technology for separating the slabs is also used - this is necessary in order to prevent the appearance of cracks under significant loads. Industrial screed is also treated with special impregnations to give additional strength and chemical resistance.
As for the reinforcing mesh, which serves to strengthen the concrete screed, it is used once or twice - “double reinforcement”. Look at this photo instruction:
Screed with plasticizers
Today, special plasticizers are often added to concrete screeds. They increase the level of thermal conductivity and strength, reduce the surface tension of water and help increase the bulk density of the coating. The amount of plasticizer is 10% by weight of pure cement.
But keep in mind that plasticizers, especially the second efficiency group, at maximum dosages prevent the cement from setting and hardening. This is especially true for those containing lignosulfonates or their modifications. This means that screed work can take a long time, and the final strength will be 20% less.
But in general, plasticizers in screeds are good because they allow you to use less water, improve the adhesion of the screed to the base, and the mass itself becomes more plastic and easier to lay. Builders often use ordinary PVA glue as a plasticizer - 150 g per bucket of cement.
Semi-dry screed with fiber fiber
This cement-sand screed is made using semi-dry technology, but using synthetic fiber fiber. To do this, you will need mechanical mixers, into which fibers made of plastic or metal are added. They are necessary to give the screed strength - higher or similar to reinforced concrete. Here's what the process looks like:
The need for screed in an apartment
For some, the need to install a screed in an apartment is not obvious. However, even in such a room it is highly recommended to lay this layer. One of the reasons is that the screed can provide good sound insulation of the apartment. If there is no screed or it is of poor quality or thin, then the neighbors below will perfectly hear the stomping of children and loud conversations, and this is unpleasant and wrong for other residents of apartment buildings. Therefore, the better the soundproofing properties, the more pleasant it is to live in such a house.
Preparation of mortar for floor screed
Attention! There are certain norms and rules regarding maintaining silence in the house. They must be followed if you want to avoid problems with residents from other apartments. During the day, the permissible noise level cannot be more than 40-55 decibels, and at night - only 30-45 decibels.
Sources of noise in city apartments
Noise is divided into two categories - shock and airborne. The latter includes all everyday, “home” sounds. This is the speech of people, the sound of a working radio and TV, the growling of a dog, etc. To prevent all these sounds from spreading outside the apartment, thick-walled partitions and massive elements are used in the construction of houses. And the thicker the walls and floors, the less likely it is that this noise will be heard by anyone other than those in the apartment. The shock type of noise includes the movement of objects on the floor, jumping, and loud steps. These sounds usually travel through ceilings. It is quite difficult to make sure that none of this is heard outside the home. However, the level of such noise is well reduced by a floating screed.
Cement-sand floor screed
Attention! The absence of screeds in the apartment or improper installation will not save neighbors from any type of noise.
You will also have to install a screed in an apartment if it was laid poorly during the construction of the house. Pieces of reinforcement may stick out from it or the floor slabs, the surface may be skewed, and if the apartment is located on the ground floor, then in the absence of a screed, the floor will be very cold.
The best ties for large/small areas
Which screed is more suitable for large/small areas? The question is valid in one case - if you are forced to do this work yourself, without sufficient experience. An amateur can get a satisfactory result using a wet screed under the tiles in rectangular areas of up to 4 - 5 m2. This technology will require a minimum of tools. But the tile setter compensates for the unevenness of your amateur screed with an adhesive layer.
If we talk about professionals, the most large-scale work is successfully carried out using the wet and semi-dry method. This is due to the fact that the teams perform all work mechanized. Dry screed, on the contrary, is mainly manual labor. However, this is a quick process of assembling finished elements, so dry technology is no less suitable for large premises.