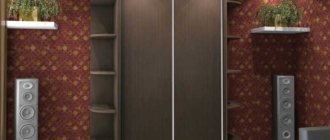
What departments should there be in an ideal storage system?
Today you can purchase a ready-made wardrobe, with the contents provided by the manufacturer, or you can think through and fill the storage system with the types of shelves and rods that will be convenient for you, based on your lifestyle.
Another factor influencing the internal layout of the wardrobe is the area of the corridor.
If there is enough space in your apartment to install a spacious storage system, then there is nothing to worry about, but if the hallway is not large enough, then you can create additional space for storing things by choosing a corner wardrobe or adding mezzanines to a standard wardrobe.
Make a list of the compartments you need.
Before you sit down and start drawing the layout of your ideal closet, you need to think about what compartments you will need in it.
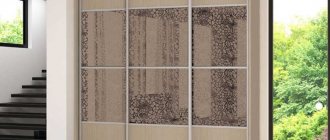
Materials for facades (doors) of sliding wardrobes.
Compartment for household appliances
This compartment is usually made in the middle of the cabinet.
It should be deep and wide enough to accommodate a model of your vacuum cleaner or any other household appliance that you are used to using all the time, but it is not intended for the eyes of strangers.
Equipment for daily use should be at hand, but hidden from prying eyes.
Mezzanine for storing oversized blankets and pillows
It is usually located above the compartment for household appliances. These bedding items are put away on the top shelves of the closet before the onset of cold weather or the arrival of guests, and they will not need to be taken out often.
The width and spaciousness of the compartment for household appliances will be harmoniously continued on the upper tier of the cabinet and will solve the problem of storing large textiles.
Pillows are usually stored on the highest shelves.
Ironing board storage compartment
Many people often face the problem of storing an ironing board.
They try to store it on the balcony (where it can be quite dusty), under the bed (which complicates the cleaning process), in the bathroom (the size of the bathroom does not always allow this). If the depth of your closet is sufficient to accommodate a board, then next to the compartment for household appliances, make a small compartment of a suitable size.
And above it you can make a small shelf for the iron.
The ironing board will not require much space, but this will solve the issue of storing it
Storing suitcases, backpacks and travel bags
This compartment can be made at the bottom if the overall size of the compartment allows you such a luxury, but often such things are stored on the highest, long, roomy shelves.
Be sure to think about space for your suitcase
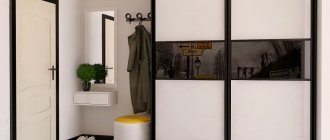
Outerwear compartment
It is advisable that in addition to the wardrobe in your hallway there are also open hangers for outerwear. In the cold season, the weather is changeable, often the bright sun is replaced by heavy rain, or you may be caught in snowfall outside.
It is better not to hang wet clothes in a closed wardrobe, so as not to stain other things and damage the furniture.
Depending on the length of outerwear you wear, the height of the bar will be selected. If the closet is deep enough, then it is better to choose retractable rods. Thus, you will save space, increase storage functionality and create additional convenience for yourself.
Outerwear should be stored in a separate compartment
Compartment for bags, wallets, sports bags and purses
Depending on how many different bags you have for daily use, you should consider where to store them. It will be convenient if bags and shoes are located in the same compartment, but shoes are at the bottom and bags at the top.
Deep shelves, pull-out baskets, and a bar with hooks where you can hang all the bags can be suitable for storing bags.
Bag compartment
Housekeeper
As a rule, the first thing each of us does when entering our apartment is to put down our bag and keys. Then he takes off his shoes and only after that takes off his outerwear. Therefore, it is recommended to make the first compartment of the closet, located from the door, for storing bags, shoes and place a compartment for keys there.
Once the keys have their place, you won’t be able to forget them at home by simply choosing another bag.
Keep your keys in one place so they don't get lost
Shoe storage
Shoes are usually stored on the bottom tier of the closet. Pull-out shelves, metal baskets, and closed shoe racks are suitable for this. Which option is right for you depends on the number and variety of shoes you have.
If the size of the closet allows, then you can make a compartment in the form of a honeycomb, where each cell will be intended for a specific pair of shoes.
It is important to carefully consider the place for shoes
Compartment for casual clothes
It is not always possible to have a wardrobe or a dressing room in the bedroom, so the bulk of your wardrobe can be placed in the hallway. The filling of this compartment should be carefully selected to create maximum convenience and comfort for yourself.
- For example, to accommodate belts, you can build in a retractable hanger designed specifically for this item of clothing.
- For the convenience of choosing a suitable tie, there is an additional element - a tie.
- To prevent your trousers from getting wrinkled, place them on the trouser pant.
- Make sure that your scarves and hats also find their rightful place.
Tiemaker
Neatly folded straps
Laundry storage
Retractable closed shelves with distributors inside are suitable for storing linen.
It is better to store laundry in a closed drawer with delimiters.
Box for storing various small items
Such a drawer can store shoe polish, a brush for cleaning things, spare hangers and other small items that are important for everyday use, but are so difficult to keep in order.
You can store various small items in a purchased box with a lid or in shoe packaging.
The catalog contains real photographs of the cabinets and furniture we produce. You can offer your individual design and dimensions or choose from catalogs of cabinets from famous Italian companies.
We will make custom-made cabinet furniture for you from the same materials and in the same style as the cabinet you have chosen.
View the photo catalog in slide show mode.
| Sample 01 |
The presented classic wardrobes with ceiling heights are distinguished by their strict form and laconic door design. Matte satinato chemical etched glass can be painted on the reverse side in any color according to the RAL catalog.
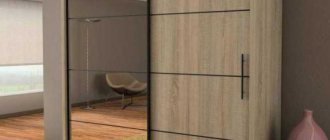
| Sample 02 |
Bleached (bleached) oak veneer is a popular and well-proven solution for covering cabinet doors, harmonizing perfectly with most room finishing options.
Built-in wardrobes under the stairs help make full use of the available living space. The photo shows a wardrobe with white oak veneer in the cottage on the first floor.
| Sample 03 |
Classic wardrobes with sliding and hinged doors with an upper cornice (24 options) and a relief podium.
| Sample 04 |
painted veneer doors
wardrobe with an asymmetrical arrangement of narrow glossy glass. To emphasize the structure of oak veneer, its soft fibers are pre-knocked out (the so-called “brushing” operation). The width of the 2-door built-in wardrobe is 3.7 meters, the height is 2.7 meters.
| Sample 05 |
The largest of the sliding wardrobe doors ordered from us were manufactured according to an individual project:
The width of each door is more than 2 meters (220 cm) with a height of almost 3 meters (280 cm)!
Pay attention to the non-trivial technical solution: the right half of the cabinet, at the customer’s request, was made without intermediate dividers (supports) on a width of 230 cm (and this is with hanging and very heavy doors)!
| Sample 06 |
| In the glass part of the sliding door in the center, a rectangular joint is provided by using 2 beveled 45 degrees |
| Sample 07 |
| Our KNOW-HOW is doors with rounded sides. Please note that the rounding is made for horizontal veneer! |
| Sample 08 |
| Long wardrobe in the living room along the entire wall more than 5 meters ! In the recesses there is reed wallpaper, the same as on the walls in the living room itself. The design of the door allows the customer to easily change the contents of its central part (photos, glass, mirror, leather and other materials) during operation. |
| Sample 09 |
| Bedroom decoration in the same style: wardrobe, bed, chest of drawers, cabinets, shelves (natural anegri veneer). |
| Sample 10 |
Cabinet doors with “homemade” mortise handles (veneering the recesses of the door handle).
| Sample 11 |
| Two structurally identical cabinets and a cabinet in the entrance area of a country house. Veneer - “snake wood”. The width of the cabinets is four meters (3.44 m) The height of the large cabinet is three meters (3.12 m) |
| Sample 12 |
In addition to sliding wardrobe doors, in which only one front side is always visible, it is also possible to manufacture similar double-sided sliding interior partitions that are original in design
thickness 30 - 50 mm.
Our interior partitions can have increased heat and sound insulation.
| Sample 13 |
| We present to your attention a wardrobe with two unusual wide doors. The width of each door is 220 cm with a height of 260 cm ! |
Also offered to your attention is a piece of furniture with the same veneer as in the cabinet, and made in the same style.
| Sample 14 |
Large 3-door wardrobe in the VIP business office - wenge veneer and white satin
, complemented by rosewood veneer inserts.
Please note that in the right photo the decorative strip completely covers the space allocated for the built-in wardrobe.
| Sample 15 |
If necessary, intarsia (combination) of two or more types of veneer can be made on the doors of a wardrobe or furniture.
Designer door made of bright Italian veneers and narrow painted frosted glass. The mortise handles are also painted.
| Sample 16 |
The 3-door wardrobe is almost four meters (3.8m) wide and features a beautiful natural teak veneer.
Wardrobe in the hallway - wenge veneer, white matte satin glass and mirror.
| Sample 17 |
A popular type of sliding door is painted glass framed by a thin veneer profile.
Our options are easy to compare with Italian ones: instead of the usually offered 4-5 veneer options, 100-120 are offered, instead of 5-6 shades of glass - almost 40,000 (price / production time / readiness and time frame for troubleshooting are not discussed). |
But the main thing is the unique service - the ability to choose the color of the glass exactly to match the color of the walls of the room , which is achieved, on the one hand, by using special lightened glass (which does not distort the color in the gray-green direction, which is especially noticeable in warm tones common to rooms), and on the other hand, in the process of color selection, the involvement of specialist painters and a computer tinting system from the field of car painting (the color of a damaged car fender must correspond exactly to the base color).
| Sample 18 |
Long (more than 3.5 meters) sliding wardrobes in the hallways of cottages and large apartments:
| The mirror is bronze and one of 12 varieties of wenge veneer (there is no aluminum separating profile). | Anegre veneer and satinato glass with sandblasted pattern. |
| Sample 19 |
Closet doors that are similar in design to interior doors, in particular classic ones, are popular.
Two versions of the same cabinet - solid and mirrored.
| Sample 20 |
The new cabinet design is a constructive option when glass (satin or mirror) occupies only part of the width of the door.
In the photo there is a tall, large cabinet made of mahogany veneer and frosted satinato glass.
Please note that the similar door design we implemented (without an aluminum profile at the veneer joints) is in principle impossible within the framework of the technology of traditional sliding wardrobes!
| Sample 21 |
Tall and wide wardrobe for the office. Sliding wardrobe doors are made of natural wood veneer and matte satin glass.
| Sample 22 |
Doors made of one material can look interesting, stylish and fresh - only glass, or only veneered elements.
In the second version of the wardrobe, veneer panels are separated by a thin anodized aluminum profile.
The most traditional and commonly used door design is with painted frosted glass in the middle (the door handle can also be embedded in the glass).
[/td]
| Sample 32 |
We present to your attention an inexpensive wardrobe for an office or hallway with mirror inserts tinted in bronze color.
Along with mirror elements, it is possible to use matte satin glass, painted in any color (more than 1000 RAL color options) or glossy glass (lacobel).
| Sample 33 |
Open wooden shelving covered with wenge and oak veneer will complement the interior of your room. It is also possible to manufacture other cabinet furniture to order.
| Sample 34 |
In apartments of certain styles or sizes, it may be optimal to use uniform wardrobe doors (without decorations, details or divisions into parts).
| On the left is a techno-style apartment. The tall cabinet in the niche is closed by two hanging doors 3 meters with a solid mirror (more precisely, 2.95 m; manufacturers usually make traditional sliding wardrobes no more than 2.75 meters high). | |
| On the right are the same minimalist cabinets, but the doors are made of bleached oak veneer. |
| Sample 35 |
Bedroom set made of dark oak veneer. Sliding wardrobe, 4 wall shelves (without handles - open by pressing the lid), bed with lighting, two bedside tables, corner shelf, framed mirror.
| Sample 36 |
We produced custom-made wardrobes with hinged doors: a built-in wardrobe in the attic and a built-in wardrobe under the stairs in the cottage.
| Sample 37 |
Furniture for a children's room.
Two corner columns and a cabinet - zebrano veneer. In the center of the cabinet there are two hinged doors with a veneered aluminum profile (the glass is not inserted in the photo).
TV stand with another option of zebrano veneer.
| Sample 38 |
We are always ready to realize the customer’s fantasies - symmetrical mirror elements on wardrobe doors!
On the right is a wardrobe and an original bookcase.
| Sample 39 |
Sliding doors (up to four meters high and up to 2.5 meters wide each) separate the room from the storage area.
The photo on the left shows a built-in wardrobe with birch veneer doors. In the photo on the right - sliding doors made of bleached oak veneer combined with white satin
.
Sliding doors can have different designs and finishing materials on each side.
| Sample 40 |
Corridor wardrobes and corner modules in two apartments. Fits perfectly into the available space!
| Sample 41 |
A common situation: when moving or renovating, the color of the laminate of the speaker systems does not match the new color scheme of the room, furniture and cabinets.
We will help solve this issue by covering the audio speakers with a veneer of a matching color over the “original” laminate (the red laminate is visible in the photo on the right). This option is only available when ordering a cabinet or furniture.
| Sample 42 |
We will install custom cabinets in the niches of the apartment. This cabinet uses OPTIVITE
, having increased transparency in the absence of a dark green edge.
| Sample 43 |
3-door wardrobe in the hallway (the two left doors are mirrors, the right one is veneered, with a section adjoining it on the left with a hinged veneered door).
Pay attention to our know-how! The sides (ribs) of sliding doors are completely veneered together with an aluminum profile!
| Sample 44 |
Options for individual cabinet furniture to order - cabinets, chests of drawers, shelves, cabinets - for the hallway, living room, bedroom
If you have made your choice and want to calculate the cost of a sliding wardrobe and place an order for a wardrobe, or if you have any questions, call us now!
And please don’t forget that if you need custom-made cabinets and furniture the Veneer + Cabinet factory works for you!
Cabinet furniture and shelving for your cabinets! Italian design - Russian prices! Stylish, inexpensive! Creative contact with design studios Individual cabinet doors - any of your wishes Our response to sanctions - Made in Russia! Manufacturing of wardrobe cabinets for the bedroom, living room, hallway We produce and sell veneered sliding wardrobes Wall panels, sliding doors made of veneer and glass Wenge sliding wardrobes, bleached oak, satinato glass
| Home | Catalog of cabinets and furniture | About products | Components and Technologies | Veneers | Order and Contacts | Site Map | © 2008-2020 Veneer + Cabinet |
| Our sliding wardrobes are: (and not only!) | Modern design, hidden door sliding system, high-quality workmanship, attention to detail, openness to customer suggestions, in-house production and, as a result, an adequate price! |
| Using information from the site www.shpon-shkaf.ru | Link exchange Search query statistics from 10/04/2020 |
Website creation Web.Dev-Team.Pro
Types of sliding wardrobes. Pros and cons of each type
In order to decide on the choice of a sliding wardrobe suitable for your hallway, it is worth remembering all the existing types of this furniture, and also think about the advantages and disadvantages of each type.
Table. Types of sliding wardrobes.
| Built-in | Fits perfectly into any suitable space. Embodies any design idea. Possibility to make it yourself. | Cannot be moved to another location. |
| Semi-built | Attaches securely to the wall. Fills empty niches in space. | Cannot be moved. |
| Hull | Can be used to divide space into zones. Easily disassembled, assembled and rearranged from place to place. | There is a lot of free space that cannot be filled with things. Suitable for people with few belongings. |
| Angular | Using corners, expanding the usable area of the wardrobe. | Often you have to make it to order, which is more expensive than other options. |
| Straight | Versatility and simplicity. | Suitable only for the simplest set of things. You may find that the standard design for your wardrobe is inconvenient. |
| Radial | Extraordinary. It will fit into any interior and become its decoration. | Expensive and not always practical. |
| Modular | It is convenient to create and supplement the storage system with various modules and options. | The cabinet will be limited to those modules that are in the manufacturer’s collection. |
Cabinet furniture from the manufacturer will not suit every client with its contents
The modular storage system is assembled from different furniture elements sold separately
Radius sliding wardrobes look very impressive and modern
Corner solution will save space in the room
Semi-built-in storage system is wall-mounted on one edge only
Built-in wardrobe fits into any free niche
Varieties of modern wardrobes: photos of interesting options
There are various variations of sliding wardrobes, which differ in shape, size and finishing material. According to the type of design, products can be cabinet-mounted or built-in. The first option is a self-contained cabinet, which consists of rear and side walls, top and bottom panels, and sliding doors. The structure can be moved from place to place. It is advisable to install such a wardrobe in low rooms, since the structure does not reach the ceiling.
Built-in cabinets can be given any style, so they fit more harmoniously into any interior, do not violate the overall harmony and look quite aesthetically pleasing
Important! An autonomous compartment has certain dimensions and a clear geometric shape, so it will be difficult to fit it into an irregular corner or place it along an uneven wall.
The wardrobe, built into a niche, is represented by a fixed module that occupies the entire space of this recess. This model does not have a back wall or top panel. If the cabinet takes up all the free space along one of the walls, it may lack side elements. This is a solid design that is made to order. A built-in swing wardrobe is assembled from ready-made elements with your own hands. The main advantage of such a model is the ability to install it anywhere, since the elements of the product are adjusted to the existing space.
The design of the built-in wardrobe is such that it completely occupies all the space allocated for it, which is used most efficiently
The design can be straight, angular or diagonal-angular. The first option is represented by a rectangular product. This form is used for frame double-leaf wardrobes. The corner model allows you to make maximum use of the corner, which is especially important for small rooms. This form is most often used for square hallways and rectangular children's rooms. Despite the seemingly small size of the product, the built-in corner wardrobe is very spacious on the inside. However, in order for the design to be convenient to use, it is important to select the internal layout.
The diagonal corner cabinet has a slightly convex facade. This design is characterized by maximum capacity and has an attractive appearance. However, the product is highly expensive compared to other models. This is caused by the complex shape of the facade.
The main advantage of a cabinet wardrobe is that it can easily be moved to any place in case of repair
Filling straight wardrobes
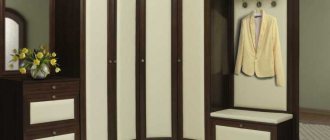
Two-door storage systems
The filling of the closet depends on what exactly you are going to fill it with, how many shelves and rods you will need to keep all your things in order. The traditional filling of such cabinets is one compartment with a high rod and one compartment with shelves.
In this case, you will have the opportunity to hang your coat on a hanger and put your bag on a shelf.
The best option for a two-door wardrobe
It is advisable that the closet have not only open shelves, but also closed drawers. It will be convenient to store various small things and those things that you don’t want to gather dust in.
Examples of filling 3-section closets
Having the opportunity to put a storage system with three compartments in the hallway, you can differentiate between them based on what items you have more in your wardrobe. If you have a large collection of different pairs of shoes, then you can allocate the entire first compartment for storing them, adapt the second compartment for outerwear, and place your bags in the third.
The three-section cabinet allows for space for a vacuum cleaner or ironing board.
Three-section wardrobe with a rod in the middle compartment
If you do not have a lot of outerwear, then you can allocate only one compartment for storing it and it will be more convenient to make it in the middle compartment.
An example of a three-section wardrobe with two compartments for clothes
Such filling for a storage system in the hallway will be convenient for a family. For example, the husband’s outerwear will hang in the right compartment, and the wife’s in the left compartment. Or one compartment can accommodate the clothes of both spouses, and the other compartment is dedicated to storing children's clothes.
Having the opportunity to install a four-door wardrobe, you do not necessarily need to make four different compartments inside it.
Due to the free space inside the cabinet, you can make the central section more spacious by combining the second and third compartments. Or, on the contrary, make the compartment in the middle narrow, but increase the size of the side compartments.
It is not necessary to strive for all sections to be the same size
Popular options for filling a wardrobe
As you understand, there can be a lot of options here, but there are several basic configurations that can be modified to suit your own desires.
What departments should there be?
Conventionally, the entire height of the wardrobe can be divided into three zones: lower, middle, upper. Shoes and some types of household appliances (vacuum cleaners, for example) are usually placed in the lower zone. At the top, high mezzanine shelves are most often made, which are used to store things that are rarely used. You can also put away out-of-season items there.
The filling of the wardrobe is developed individually in each specific case.
The entire middle part is usually occupied by shelves, drawers, and hanging sections. It’s usually with their placement that you have to tinker. So that everything is convenient for all family members.
How to organize a small closet inside
In the vast majority of cases, any filling of a sliding wardrobe has a certain number of shelves and sections for hangers. This is the simplest option and the most economical. Usually they are two-door - the recommended width of the door leaf is no more than a meter, which is observed in this case. The smallest wardrobe is just over a meter wide. They are usually installed in the corridors of small apartments. Two doors are also made if the length is a little longer - up to 180 cm.
Dimensions of the smallest wardrobes and their approximate contents
There won’t be much variety here, but it’s quite possible to install a couple of drawers if necessary. Retractable devices for compact placement will come in handy here. You'll definitely need a pantsuit.
Medium sizes
If the width of the wardrobe is 180 cm or a little more - about 2 meters, it is most often divided into three sections. These models are also called three-door, since most often the number of sections coincides with the number of doors. With a width of 2 meters, each section is about 60 cm wide (including partitions). This is a fairly convenient format - not too wide and not narrow, with such a length of shelves there will be no problems with sagging chipboard even if its thickness is 14 mm.
By increasing the length of the cabinet to 270 cm, it can still have three doors - the door width is still less than a meter. But at a great height, such doors are already quite massive and require good fittings (guides and wheels must be of good quality so that sliding is smooth). So already with a width of more than 240 cm you can plan 4 doors. In this case, there can be three sections. You just have to move two doors to access each of them.
Filling a medium-length wardrobe
The first and third sketch consist only of shelves and compartments for clothes on hangers. The space is distributed differently, but there are a lot of shelves. All others have added drawers and/or wire baskets.
Boxes can be located at the very bottom. Based on the lower part, they give the entire structure increased rigidity. But the bottom drawers are not very convenient to use - you have to bend low. Therefore, they are often raised higher so that they are approximately at a level above the middle of the thigh or at waist level. But in this case, a reinforced jumper is needed under the bottom drawer to give greater rigidity to the entire structure.
Pay attention to the mezzanines - the upper compartments. In the options presented above, they are the same size as the sections, but this is not necessary. If necessary, one mezzanine can be located above two sections. It is only important to correctly calculate the thickness of the material for the shelf so that it does not sag.
Wardrobe 3 meters
If the length of the wardrobe is three meters, there are 4 sections, and there may be more doors. There is more space, but there is not much difference in the filling. Just more of the same shelves, pantographs and drawers/baskets. There can be a lot of combinations. Choose the option that suits you most, but you can also change it to suit your needs and tastes.
Filling 3 meter sliding wardrobes
A few more options for interior filling of large cabinets in the photo gallery. There are several interesting ideas for organizing storage on open shelves - in baskets or plastic boxes. This, by the way, is a budget replacement for drawers, as well as a way to modernize the filling of a sliding wardrobe without problems and special costs. If you decide that there are few drawers and a lot of shelves, you don’t have to order drawers and go through the hassle of installing them. A good replacement is boxes or baskets of the appropriate size.
Pay attention to how the shoe shelves are installed
There is even a compartment for storing household chemicals - in plastic trays mounted on the wall
Console shelves do not belong to the interior, but they are convenient for placing small items
This option has more drawers. Narrow drawers and wide baskets are also an interesting option.
Interior arrangement of a corner wardrobe
To make a corner closet convenient to use, you need to ensure the accessibility of things located in the corner. The easiest way to do this is with coat hangers. There are several options. The easiest to implement is to install two clothes rails without a partition between the sections. In this case, the width of the cabinet on both walls should be the same, and the missing rigidity is added by the rack to which the crossbars are attached.
Filling a sliding wardrobe in the corner: install two adjacent rods for hangers
The second option is that one part of the closet has a shallower depth and it will be possible to place weekend clothes “behind the wall”. It is not used that often.
You can hang unpopular clothes in an inconvenient place
Another way is to install a rotating stand in the corner. They can be found in stores specializing in commercial equipment.
There is a rotating stand in the corner. Quite convenient
Just choose a model with a stand - it will support the shelves from above, giving rigidity and stability. The rest of the wardrobe is not much different.
Filling corner wardrobes
Examples of corner compartments of different shapes
Corner storage systems benefit from the fact that thanks to them, the maximum space in the room is filled, including the corner area.
Example of a corner storage system
If you make the corner closet deep, it turns into a mini dressing room.
It is convenient to place not only a clothes rail, but also open shelves, closed drawers, shoe baskets and long upper shelves for storing suitcases or hats.
Inside the corner cabinet you can store an ironing board or a vacuum cleaner. It is not necessary to cover the entire floor of the compartment, you can make a corner cabinet of this shape
The corner storage system can be made in any shape to suit the design of your home.
Master Class. How to assemble and install wardrobe doors
Let's see how the process of installing sliding doors for a built-in wardrobe takes place.
In this case, the interior of the furniture has already been assembled and installed; to use it, you only need to install the doors.
- Step 1. The first step is to buy or rent all the tools. In this case, you will need a screwdriver, an aluminum saw (a miter saw will be used here), and a hammer drill equipped with a drill.
Scissors and tape measures, drills and hexagons, etc. may come in handy.
- Step 2: The first step is to install the top rail of the coupe system on the ceiling. To do this, you first need to measure the width of the opening (for example, from wall to wall).
The width of the opening is measured
- Step 3. Next, you need to measure with a tape measure and cut off the required piece of aluminum profile with a saw.
Cutting an aluminum profile Use a tape measure to measure the required length of the profile
- Step 4. Now you need to drill holes in the profile to mount it on the ceiling. There are three pairs in total, at the beginning of the profile, in the middle and at the end. But there may be more.
Holes are drilled parallel to the opening
Holes are drilled in the profile
- Step 5. Together with an assistant, you need to lift the profile and align it along the end of the cabinet, and then screw it using self-tapping screws. This will not be easy to do without the help of another person.
Screwing the profile
The profile is aligned along the end of the cabinet
- Step 6. Now you can proceed to installing the bottom rail for the doors. Just like with the top rail, first you need to take measurements.
The width of the opening is determined from below
- Step 7. Again, you need to mark the desired size of the rail on the metal profile, and then cut off the section with a saw.
Another piece of profile is cut off
- Step 8. Next, in the place where the rails will be mounted, you need to lay the prepared section of the profile, without fixing it yet. At this stage, you need to insert compartment doors into it and make marks on the bottom rail in the places where the stoppers will be installed.
Laying the prepared profile
Places for installing stoppers are marked
- Step 9. Then, after fitting, you need to install stoppers on the rail in the right places and then screw the bottom rail to the floor or bottom of the cabinet. The bottom rail can be fixed with double-sided tape.
Then, before applying the sticker, you first need to degrease the surface, and only after that glue the tape itself.
Degreasing the surface Using double-sided tape Fixing the bottom rail
- Step 10. After this, you can install the doors in place. The wheels on the bottom of the doors should fit into the corresponding grooves.
In this case, the wheels are already installed on the doors themselves. But how to fix them correctly if they were separate? There is nothing complicated here either.
- Step 1. The cabinet must include special fittings. If the cabinet is made by hand, then such accessories can be purchased separately in the store. It consists of metal elements of different types - with and without a wheel.
Those that do not have wheels are mounted at the top of the door at a short distance from its side edge, but flush with the top end. The fittings must be screwed on using self-tapping screws.
The fittings are screwed in. Self-tapping screws are used for this.
Step 2. The second type of fittings, which has wheels, must be secured at the bottom of the door so that the height is optimal. Two pieces of each type of element must be attached to each sash.
Step 3. Next, you just need to screw on the handles, and you can install the doors on the cabinet body.
All that remains is to screw the handles
Step 4. First, you need to insert the sash into the far upper rail, and then, carefully lifting the door, install the wheels on the lower rail.
The remaining doors are installed in the same way, but on the nearest rail, etc.
Cabinet door being installed
Attention! Depending on the type of construction, the wheels on the doors can be located either at the bottom or at the top of the cabinet.
Practical designs for cabinets to save space
Just calculating the size, depth and width of the shelves is not everything.
Before you get started, you need to know what kind of fixtures and designs are on the market. Maybe they will be very useful to you and you will already start from their presence when calculating the size of departments.
Here is a list of the most common auxiliary elements:
- Bars, brackets, lifts for clothes on hangers
- Trousers
- Holders for ties and belts
- Honeycomb baskets for linen and tights
- Shoe holders and shelves
Now we will look at each of them in detail, you will see their photos and then decide for yourself whether you need them. If yes, then estimate their size and plan your closet taking this detail into account.
Bars, brackets, lifts for clothes on hangers
Rods and brackets vary not only in length, but also in location. If your closet is very narrow, then it will not be possible to equip it with a bracket for outerwear located lengthwise.
Here it is, as in the photo, standard:
But you can install a transverse bracket. For narrow cabinets, this is simply a brilliant invention. Here is a photo of such rods.
As you can see, they come in regular and retractable types. The latter are more expensive, but save more space.
There is also a very interesting and practical option - a lowering bracket. Things can hang right up to the ceiling, and when needed, you simply lower the bar.
And as you understand, the free space below can be equipped with additional shelves. This is what a device called an “elevator” looks like. No need to stretch high, very comfortable.
It is also a good option when the bracket is equipped with additional accessories, with which you can place more things in one area. These are the so-called “chains” and they look like this:
Trousers
The trouser is a very convenient addition. And sometimes it is not at all advisable to devote an entire shelf with a bracket to storing trousers (of course, if you do not have 50 pairs of them).
It is much more practical to place this holder somewhere under the shelf and make it retractable.
For example like this:
Holders for ties and belts
Small things tend to wrinkle and disappear from view if no special device is provided for their storage.
We give you examples of successful placement of such holders, and you can choose what you like best.
The last photo shows not an element of a wardrobe, but an ordinary hanger. If you can buy one, then you don't have to worry about where to place your tie holder.
Honeycomb shelves for underwear and tights
Decide right away how many drawers with dividers you need. Focus better on the number of family members who will use the closet. Ideally, each person should have their own shelf.
But, ordering these with chipboard partitions is expensive. The market now offers options for ready-made distributors that just need to be inserted into an opening drawer.
Like these ones:
Therefore, before designing retractable systems, find the distributors, find out their dimensions and, based on this information, make the final calculation.
Shoe holders and shelves
There are also just an incredible number of them now. And such elements are absolutely necessary, since putting shoes in a regular box is inconvenient. In this case, only a small amount of space will fit in there; the shoes will wrinkle and it will be inconvenient to take them out.
Look at the photo to see what types of shoe holders there are.
Holders and shelves for bags in the closet
If you have a large closet, then getting similar hooks or special shelves is very reasonable.
The bags will always be visible and will not get wrinkled.
Iron holders
I can't think of a better place for an iron! Provided, of course, that your closet is spacious enough.
Vacuum cleaner holders
The vacuum cleaner itself can be placed on the bottom shelf, and the handle can be secured in a similar way.
When you have already decided what accessories you will purchase, it’s time to start making initial calculations of the compartments.
After you make a sketch depicting the required compartments, the master will correct them and adjust them to the exact dimensions, taking into account door systems and other nuances.
We give you several examples of successful schemes for the “insides” of a wardrobe, and you can already think about what you can change to suit your needs.
An example of filling a 2-door wardrobe with dimensions and diagram
Here is an example of the simplest and most functional content of a two-door wardrobe.
You can take this calculation as a basis, and place drawers, pull-out brackets and other fittings in place of open shelves.
In general, filling a two-door closet correctly is not so easy. There is very little space there and you need to think about every centimeter and turn before making a decision. It’s like the proverb: “Measure seven times, cut once.”
But, if you managed to successfully arrange the internal drawers, then even such a small closet can fit a lot of things.
Be sure to equip such a wardrobe with pull-out fittings, elevators and other accessories for wardrobes. Don't forget to equip the doors correctly.
For a small closet it is better to install regular hinged ones. And it is more convenient to open them (there is no dead zone) and you can hang something on the inside of the doors (a holder for ties, scarves, hats, etc.).
Radius wardrobe inside (with photos and dimensions)
Radius sliding wardrobes, which got their name due to their curved facades, give the room a stylish and original look, allow you to make the most efficient use of its space, and hide planning flaws.
They can be installed in any corners and where no other furniture will fit (for example, in a very small hallway or the gap between interior doors that are too close together).
Types of radius sliding wardrobes
Radius cabinets are divided into:
- depending on the configuration of the facades - convex, concave and combined;
- at the installation location - corner and linear (along one wall);
- by design - cabinet-mounted and built-in.
Corner models with convex and concave facades are symmetrical and asymmetrical. They are ideal for installation in small spaces (hallway, bedroom, bathroom, loggia).
Concave wardrobes are less spacious compared to convex ones, but they take up less space and visually expand the space; they do not have a “dead zone” in the corner.
sketch of a concave radius sliding wardrobe with dimensions
A convex wardrobe installed in a large niche can replace a dressing room.
sketch of a convex radius sliding wardrobe with dimensions
In the central part of a linear cabinet with a convex shape, you can arrange a dressing table.
A radial wardrobe with a concave or wavy facade looks especially elegant and eliminates the risk of injury to children and family members with poor vision due to the absence of sharp corners.
An L-shaped wardrobe with a concave corner section allows you to use the space behind the swing door, corrects the proportions of a long room and makes it more comfortable.
sketch of a radius sliding wardrobe with dimensions
The most original and functional option for a studio apartment or spacious room is a corner or linear wardrobe with a combined facade, which combines concave, convex and straight sections (curved surfaces are not suitable for installing mirrors that you need to look into), there are open shelves.
sketch of a radius sliding wardrobe with a “wave” facade and a combined facade
A cabinet wardrobe is a separate piece of furniture that can be freely rearranged anywhere and even transported to another apartment.
The built-in one is installed “once and for all”, therefore it requires a very careful choice of location and careful design calculations.
Filling a radius wardrobe
The main elements of the internal content of radius sliding wardrobes include:
- rods for outerwear and wrinkled clothing;
- shelves on which wrinkle-free items are stored, bed linen, mesh or wicker baskets with various small items, hats, boxes with shoes, bags, sports equipment, suitcases;
- drawers - they are convenient to use for storing underwear, hosiery, gloves, scarves and other accessories.
The most convenient area for use is the middle zone of the closet, so it is recommended to place shelves and rods for everyday clothes there.
It is advisable to use the mezzanine space for storing out-of-season items, and the lower one - depending on the location of the cabinet (in the hallway - for shoes, in the bedroom - for bedding, in the nursery - for toys).
To transform an ordinary wardrobe into the most comfortable storage system, additional accessories are used, the most popular of which are:
- pantographs - devices that lower rods with clothes to the desired height;
- mesh baskets and shelves that provide free visibility and ventilation of things and shoes stored on them;
- Full extension drawers with compartments for small items.
In wardrobes for living rooms and children's rooms, open sections are often made for TV, audio equipment, books, photographs, trinkets, and organization of the workplace.
How to choose the right wardrobe
The most important criteria when choosing a radius sliding wardrobe are:
- purpose, dimensions, layout and design of the premises;
- the type and number of things that will be stored in it - the type and required number of shelves, drawers, clothes rails, shoe baskets, etc. depend on this.
Other important nuances to consider:
- a built-in wardrobe with the same internal volume takes up less space than a cabinet one, and is cheaper due to the absence of a back, one or both side walls, a ceiling plate, or a bottom;
- financial possibilities - if they are not limited, you can choose any materials and accessories, actively use the entire internal space of the cabinet by installing lifting, telescopic and rotating mechanisms, drawers and full extension shelves, trouser holders, tie holders, umbrella stands, and other small components.
If the wardrobe will be used by several family members, it is advisable that each of them have a separate section.
Design - to your taste!
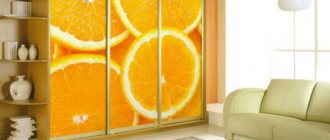
The materials for decorating the facade of a radius sliding wardrobe are so varied that they practically do not limit the flight of the designer’s imagination, and sometimes it takes more than one day to select them.
The most affordable in price are HPL plastics, eco-leather, natural wallpaper, and photo printing. More expensive finishing options include acrylic plastics (frizz, camelit), frescoes, natural veneer, curved glass.
By wisely combining budget materials with expensive ones, you can create real furniture masterpieces even at modest costs.
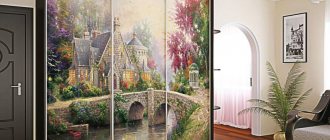
The easiest way to make a radius wardrobe exclusive is through photo printing, with the help of which you can apply your favorite picture from a magazine, a frame from your favorite movie, a luxurious natural or city landscape to its façade.
The image can occupy the entire surface or only part of it. A pattern that replicates the wall decoration is ideal for creating a fashionable minimalist interior.
The color scheme depends on the purpose of the room and the colors in which its interior is decorated.
Particularly high demands are placed on materials for wardrobes in children's rooms - they must not only be beautiful, but also safe.
Trust your sense of style, don’t be afraid of extraordinary solutions - and your wardrobe will become the subject of everyone’s admiration!
Bonus for those who read to the end - a video of how one of our most beautiful cabinets opens!
We hope that our material was useful to you! Now you can:
- view the catalog of our radius cabinets
- read our other articles about furniture. For example, our material on how to store and fold things in a closet
- come and see the cabinets “live” in one of our showrooms
If you liked the article, share the link with your friends:
Get a consultation
An example of filling a corner wardrobe with dimensions and diagram
The corner closet needs to be thought out especially carefully, since the slightest carelessness in the design and you will have large “walking” spaces.
And this, we think, is not included in your plans, because corner cabinets, as a rule, are ordered when they want to save space.
We give you two options for schemes. One for a simple cabinet, and the second for a double, simply located at an angle.
Ready-made modular systems
And, if you do not want to make compartments from chipboard, then you can not fool your head and assemble only the wardrobe box, equipping it with doors that match the design of your hallway.
And the “internals” can be purchased in special stores that sell ready-made storage systems. For example, Leroy Merlin and others.
They can be taken as a whole, or as separate elements.
The systems are sold both in prefabricated versions and in the form of individual elements that are assembled like a construction set.
How to make additional shelves with your own hands? Step-by-step instruction
Over time, your priorities in storing things may change and you will need to redo the internal contents of the wardrobe.
You can do this yourself by removing extra shelves or make additional ones yourself.
- Step 1: Make room for a new shelf.
First you need to free up space
- Step 2. Take measurements of the depth and width of the space using a tape measure.
Then you need to take measurements
- Step 3. Purchase suitable material (wooden boards, plywood, MDF, chipboard) and fastening (furniture corner or Euroscrew) from the store.
Furniture corners
- Step 4. Using a jigsaw, cut out a shelf of the appropriate size.
The shelf is cut out
- Step 5. Using a screwdriver, attach the mount on one side to the shelf and on the other side to the cabinet.
Shelf fastening
Instead of a shelf, you can complement your hallway storage with metal baskets, shoe racks or hooks.
Today you learned everything about the internal filling of the wardrobe in the hallway. Photos with dimensions and examples will definitely help you create a truly practical wardrobe that will delight you for many years.
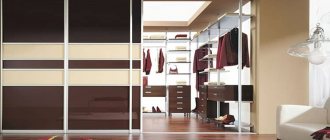
Filling the built-in wardrobe in the bedroom
A closet is perfect for storing things and shoes, inside of which there will be many shelves and a rod for placing hangers with shirts, trousers and dresses. It is better that the designed space is closed. This applies to both the entire cabinet and internal modules.
For small rooms in which small dressing rooms measuring 2 by 2 meters or 2 by 3 meters are made, it is recommended to close the wardrobes with sliding doors. This saves a lot of space in the bedroom.
When planning the internal filling of a wardrobe that will be in the bedroom, you need to consider the following points:
- The dressing room should be deep enough and roomy, which will allow you to place bed linen, home and casual clothes, and shoes.
- The ideal depth for a wardrobe in a bedroom is 50-60 cm, which is needed to install a standard size rod and pull out drawers.
- In the interior arrangement it is necessary to use various modular sections designed for shoes and accessories.
Filling the wardrobe in the bedroom involves the use of components such as:
- Shelves and niches necessary for storing shoes.
- Mounting for an ironing board and iron, if the interior space of the dressing room allows.
- A pantograph rod equipped with a trigger and handle necessary for height adjustment. Layout of the wardrobe using a pantograph, which is a special design attached to the side or rear walls of the shelves. If the need arises, such a mechanism can be easily pulled out.
- Hangers for hangers.
- Hangers with hooks are necessary for placing things that will not wrinkle.
- Trouser holders.
- Pull-out baskets that will be pulled out and placed at different levels. They are great for storing belts, ties, socks, and small accessories.