Using a miter box
A miter box will help you correctly cut the plinth for installation in a corner - a special device that is a tray for cutting boards, plastic, etc. at different angles. You can buy a miter box in a store or make it yourself. Usually a miter box sold in stores comes with a saw, but you can also use your own tool.
Factory-made miter box
The miter box has a recess for the board or plinth to be cut and slots for the saw, located at an angle of 45 and 90 degrees. You will need to cut the baseboard at a 45 degree angle.
To cut a baseboard using this device, you need to follow these steps.
- We apply the plinth to the future mounting location.
- We mark where we will cut.
- We place the plinth in the groove of the miter box so that the lower part is pressed against the surface of the device, and the part that will be lubricated with glue “looks” up.
- We cut off the section by inserting the saw into one of the 45-degree holes.
- We correct the cuts using a knife or the same saw (we remove irregularities).
How to cut the corners of a ceiling plinth using a miter box
After this, the plinth can be glued into place.
How to properly cut the corners of a wooden baseboard
Ilyinskikh Dmitry Alekseevich head of construction and installation work
The most difficult and critical process when installing floor and ceiling skirting boards is joining the corners. Accurately and accurately performed work makes the interior beautiful, complete and holistic. To create a beautiful and correct joint, you need to know the cutting technique and installation methods.
What will you learn about in the article?
- Such different skirting boards for your home
- Tools required for work
- How to properly cut corners of ceiling plinths
- Trimming skirting boards in a miter box. Trimming technology
- The easiest way to cut skirting board corners is by trimming
- Cutting out "internal" corners
- What is necessary to form an internal angle that is not equal to 90º
- Cutting out "outside" corners
- Atypical configurations of rooms and corners
Such different skirting boards for your home
Currently, the construction market offers skirting boards made of various materials - wood, MDF, plastic.
Wooden skirting boards are considered traditional. They have been used for a long time for plank, parquet and laminate flooring. They are distinguished by a textured or smooth outer surface; many models have special cable channels. Installation is carried out using self-tapping screws, nails or glue for fixing to the floor.
When installing on self-tapping screws, it is important to choose the correct self-tapping screw design; there must be a cutter at the tip of the screw, otherwise you will have to do preliminary drilling, and this is your time.
The products are characterized by a long service life, environmental friendliness and safety. Can even be reused, dismantled and reinstalled with new floors.
Skirting boards must be painted with oils, varnishes or enamels. This is a prerequisite for their impeccable appearance, long service life and a variety of shades and colors to suit your interior.
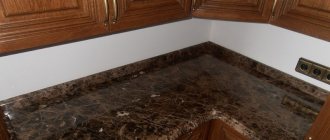
Valuable wood is an expensive material, which affects the cost of the final product. To cut the corners here you will need special tools.
Photo 1. Wooden plinth
Plastic skirting boards are distinguished by their simplicity and convenience. They have a thoughtful design with cable channels. To form corners, hide joints, and mask attachment points, there are corners and plugs. They are quick to install and come in a variety of shade options. They do not require painting or putty and blend well with any coating.
Photo 2. Plastic plinth
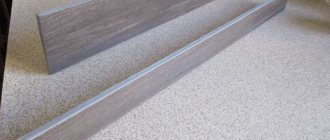
MDF skirting boards have an attractive appearance, are protected from dust and dirt, and do not fade. It does not require special care and is easy to install. When trimming the edge of such a plinth, you should remember its fragility and carry out the work carefully.
Photo 3. MDF floor plinth
Skirting boards made of any materials have many color options. Therefore, it will not cause any complications to choose it to suit your interior. Often the color of the profile is matched to the shade of the floor or trim.
Trimming the edges of skirting boards made from different materials is not particularly different. The only difference is the density and density. Therefore, working with wood is quite simple.
Tools required for work
- A miter box is a special tray consisting of three surfaces. Its sides contain special slots located at certain angles to the axis. They guide the hacksaw blade at the desired angle when cutting.
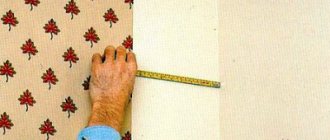
- Pencil, washable marker, construction tape.
- Knife, fine-tooth hacksaw or good miter saw. Plastic skirting boards can be cut with an ordinary sharp knife or a hacksaw.
- Sandpaper; sanding a wooden baseboard before painting is a must.
- Fasteners, screws, nails, dowels.
- Hammer, screwdriver.
Photo 4. Miter box
Before starting work, you first need to calculate the required number of skirting boards. For this purpose, the standard length of the product (2.5 or 3 meters) is multiplied by the perimeter of the room and a margin of 10% is taken for trimming. For installation you will also need fasteners and plugs.
How to properly cut corners of ceiling plinths
Ceiling plinth can be made of wood, plastic, foam. The last option is the most common. It has an affordable price, many varieties and is easy to use. A sharp knife is usually used to cut it.
Before starting work, you need to cut the material in accordance with the perimeter of the room. You can first draw a diagram on paper, marking all the corner connections.
Photo 5. Technology for trimming baseboard corners
Trimming skirting boards in a miter box. Trimming technology
- The right strip is placed in the miter box from left to right. The wrong side, which will be attached to the ceiling, lies on the bottom.
- The profile is pressed firmly against the tray and cut at an angle of 45º.
- Another plank is placed from right to left and cut in the same way.
- The angles of the cuts are joined at the point of attachment and adjusted with a knife (for foam and plastic).
The easiest way to cut skirting board corners is by trimming
- The miter saw is set to an angle of 45º.
- The product is pressed tightly against the base of the machine.
- We saw off at the set angle.
Cutting out "internal" corners
The standard room has a rectangular appearance with corners of 90º. In fact, such ideal angles are quite rare and are only an installer's dream. If you are lucky, then the procedure for cutting the corner of the edge of the plinth occurs as described above; it is very easy to do this by trimming.
When cutting, you need to remember which side the baseboard will be located on. To create an ideal corner for wooden surfaces or a joint, you can use putty, but a good carpenter will never do this, but will simply saw it straight.
Photo 6. Cutting out the inner corner
What is necessary to form an internal angle that is not equal to 90º
- It is necessary to make preliminary markings on the floor with a pencil. Profiles are applied alternately on both sides and their boundaries are outlined. This creates a diamond in the corner. Its diagonal will be the cutting line.
- We apply the bar to the resulting figure and put a diagonal mark.
- We connect the mark and the corner of the plinth. This angle of inclination will be the cutting line.
- The resulting side edge must be painted the same color as the baseboard.
If the inside corner is cut with a slight exaggeration, this will enable the fit to be made more accurately. Sometimes a plug is inserted into the plastic or foam at the final stage into the joint and a beautiful, neat corner is obtained. In wooden products, the joints are simply carefully adjusted; putty is the province of incompetents.
Cutting out "outside" corners
If the external angle is standard and equal to 90º, then the stages of its installation are similar to the internal one. When carrying out work, you need to remember the location of the trimmed strip. But if it is not standard, then you will have to work hard...
Photo 7. External corners
A non-standard external corner is done like this:
- We place the profile against the wall and draw with a pencil all its internal and external edges.
- We carry out similar manipulations with another molding.
- By analogy with the inner corner, we get a rhombus. Only in this case it is outside. The diagonal of the resulting figure is the sawing line.
- Using a file, cut out the corners in the miter box.
- We clean the edges and mount them.
At the final stage, it is necessary to finally secure the plinth around the perimeter using self-tapping screws or liquid nails.
Atypical configurations of rooms and corners
Some rooms have original, atypical configurations. In such situations, it is quite difficult to install a skirting board beautifully. After all, angles are often external and internal at the same time. There are also rounded options. All the methods listed above do not work here.
If there is a round corner, the plinth strip is cut into several (usually 4-5) pieces. Using plugs, a neat corner is laid out from the parts. The plinth is fixed with liquid nails or self-tapping screws with or without plugs
Photo 8. Non-standard internal corner
The procedure for cutting corners for a ceiling or floor requires the preparation of the necessary tools (depending on the material). The work requires care and endurance.
Photo 9. Non-standard external corner
You can buy all the necessary materials for carrying out such work in our LesoBirzha online store. You can also order delivery throughout Moscow and St. Petersburg from us.
See how we can
May 27, 2019935
Ceilings made of Angara pine in the Extra grade under white covering paint
Angara pine... there is so much in this word that rings in my heart... After all, this is the only material that, in high grades, can be safely painted in white, covering color, without fear that over time yellow spots will appear in the area of the knot and resin pocket . Because there are no wood defects in the hangar in the Extra grade.
Ceilings made of Angara pine in the Extra grade under white covering paint
May 27, 2019
935
May 27, 20191209
Vertically mounted lining made of Angarsk pine in color TV 34
Calm lining made of Angarsk pine "Prima" 145 mm wide, laid vertically along the walls. It was pre-painted in the workshop using a Teknos varnish scheme, color TV-34. A very interesting combination of white ceiling and gray walls in the bedroom.
Vertically mounted lining made of Angarsk pine in color TV 34
May 27, 2019
1209
May 14, 2019656
The natural charm of Angarsk pine in home decoration
A customer from KP “Zaokskie Prostori” contacted us with a request to install a ceiling with lining clapboard made of Angarsk pine in the Extra grade
.
Unique ceiling decoration, with harmoniously selected colors, for this special thanks to the workers of the brushes and paints of the paint shop. The natural charm of Angara pine in home decoration
May 14, 2019
656
03 April 2019458
Cedar ceilings in a two-level apartment
“Our Works” is with you again
And
. Another turnkey project, an apartment in the Naberezhnaya Khimki residential complex, and we begin to get acquainted with the amazing finishing material made from natural cedar - AB grade lining
.
We would like to tell you the main secret of this material. Cedar ceilings in a two-level apartment
April 03, 2019
458
View other works
How to make a miter box yourself?
If desired, a miter box can be made at home. It can be made of wood or iron. The dimensions of the workpiece do not play a special role, but the wider it is, the more accurate your cuts will be. However, if the width is greater than the length of the hacksaw with which you will cut the baseboards or boards, then sawing will be extremely inconvenient, so you do not need to take a workpiece that is too wide.
First, a transverse straight line is marked in the center of the workpiece. Then, at a distance of 1/2 the width of the workpiece from the intersection of the straight line with the edges of the workpiece, marks are made. Then these marks are connected crosswise, as shown in the figure.
Wooden miter box, fastened with self-tapping screws
Next, the process of marking the side walls of the miter box begins. Attach them to the already marked base and make marks, focusing on the markings of the base. Then draw straight lines from these marks across the entire wall.
Scheme for making a wooden miter box
After this, the process of installing the miter box begins. The walls must be attached to the base using self-tapping screws if the device is made of wood or chipboard, or corners with bolts if it is made of steel. Only after installation, the slots for the saw are cut in the miter box.
After making the slits, the miter box is ready. If you have a large amount of work or want to do repairs regularly (on a professional basis), this simple device can speed up the process of cutting skirting boards by 5-10 times.
How to cut a baseboard without a miter box?
The easiest way is to draw the future cutting line on paper (cardboard, wallpaper), and then, attaching a plinth blank to it, cut it off.
To do this, you first need to attach the baseboard blank to the paper and draw two parallel lines that will mark the sides of the baseboard. Then, using a protractor, you will have to measure 45 degrees and draw a line for the future cut. Then the drawing is used in the same way as a miter box: a workpiece is placed on it and the excess is sawed off along the line.
How to cut the corners of a ceiling plinth without a miter box
The disadvantage of this method is that the saw will have to be held suspended, focusing on the drawing, and not inserted into a pre-prepared slot.
Trimming fillets
Trimming using a miter box
How to evenly trim the corner of a ceiling plinth using it?
A miter box is a simple tool used by carpenters. With its help, you can cut any workpiece at the desired angle.
It is usually a wooden, metal or plastic tray on which special vertical slots are made for cutting at an angle of 45° and 90°.
There are complicated designs, which, in addition to the mentioned angles, also have a hole for making a 60-degree cut.
A special miter box is produced for professional work. Its rotating mechanism allows you to fix the cutting blade in relation to the workpiece at any given angle.
Internal corner
The prepared plinth is applied to the ceiling, and the required length is set aside.
Then this same bar is inserted into the miter box exactly as it will be located on the ceiling. It must be pressed against the far wall of the device. In this position, the plinth is held with your left hand.
The hacksaw blade should be in such a position that its angle is 45 degrees, and the handle is as close to the hand as possible. Trying to avoid pressing on the saw, we carefully cut the workpiece.
Next, you need to cut off the counter strip at the baseboard. It is also placed at the far wall of the instrument, held and pressed, this time with the right hand.
The position of the hacksaw is similar to the previous procedure - its handle approaches the hand at an angle of 45 degrees. The baseboard is cut.
Then the finished, already cut planks are joined - the accuracy of the fit is checked. It is believed that for better orientation, when making an internal corner, it is better to start cutting from the front part of the product. The cut locations usually have to be adjusted with a file.
External corner
The most correct thing to do, in order to keep the dimensions more accurately, is to first start marking the inner corner, and only after that move on to the outer one.
Otherwise, it may happen that the entire length of the bar is not enough.
The plank is applied to the ceiling, and marks are made according to the size. Holding with your left hand, the ceiling plinth is pressed against the nearest wall, the handle of the hacksaw moves closer to your hand. The workpiece is cut.
The strike plate is pressed against the nearest wall, while it is held with the right hand. The hacksaw blade should be at an angle of 45°, the handle of the tool should be close to the hand of the master. A piece of the workpiece is cut off, the corner is neatly joined.
This type of edge processing of parts using wort is good in cases where the angle between the walls is even and straight (90°).
If its performance leaves much to be desired, then it is worth using a different method.
How to cut a ceiling plinth without a miter box?
Markings on the ceiling
The method with markings on the ceiling allows you to cut the corner accurately and evenly. It has one drawback - the plinth strip is quite inconvenient to hold in weight during the procedure.
In all other respects, using this method you will be able to mark the angle for cutting even more accurately than others.
When the plinth is applied to the intended installation location, all dimensional deviations and inaccuracies are noticeable and immediately taken into account.
Corner cutting
First you need to take a couple of blanks, then cut them at a right angle. Pressing the end of the plank against the perpendicular wall, we apply one plank. We draw a line on the ceiling along the contour of the plinth. We remove the first plank, then, in the same way, resting the end against the wall, we apply a counter plank. We mark a line along the contour in the same way.
The point where the two separate lines intersect is the mark at which the workpiece is cut. Each strip is applied to the surface again, and the point of the future cut is marked on both. From the found point to the other edge of the plinth strip, draw a line. We cut the skirting boards according to the previously made outlines, carefully join them, and place them in the place where they will be installed.
This method allows you to more accurately process internal corners.
How to make a miter box template with your own hands
If you don't have a miter box, you don't have to buy a tool for one-time use. You can make a template with similar functions yourself.
To do this, the required cut angles are applied to wood, paper or cardboard.
Then you need to draw a pair of parallel lines, find the center, and then use a protractor to measure angles of any given size.
This method is especially convenient because, using it, you can set an angle of any size, even larger than a straight line.
The method of processing a plinth blank using a homemade tool is practically no different from working with the original. The plank is pressed against one of the parallels, after which the hacksaw is set at the required angle and cut off.
Remember that before cutting the corners of the workpiece, be sure to check the size of the angle between the walls! To do this, use a protractor and a corner.
If the angle is not right
Unfortunately, in some cases the angle between the walls in a room is not straight, but acute, or, conversely, obtuse. This is due to design defects that arose due to the fault of unprofessional builders, the architect’s idea, or the result of soil subsidence some time after the construction of the building. This is especially common in village houses and cottages.
House plan with sharp and outer corners
No miter box or drawing replacing it will help in this case, and you will have to make markings in place.
- Place the workpiece against one of the walls so that its end rests against the other wall.
- Draw a line on the ceiling along the workpiece.
- Carry out the same operation against the other wall.
- At the intersection of the two lines, place a mark on the workpiece itself.
- Draw a line from the mark to the corner of the workpiece and cut along it.
- Do the same with the workpiece that you will attach to the other wall.
- Glue both blanks; they will fit tightly.
External corners
It happens that a room has not only internal, but also external corners, which also need to be covered with plinth (see photo). How to do it? There are several ways here too. The easiest way, as in the case of internal corners, is to trim them using a miter box. The external joints must be cut so that the side that will be glued to the ceiling is on the surface of the miter box, and the side pressed against the wall is facing the wall of the device.
As in the case of internal corners, you can also use markings “in place”, that is, draw lines on the ceiling. Here the technology exactly repeats that used for internal corners.
You can use markings on the wall by attaching a blank and drawing a line along its lower edge (see photo).
If the outer corner turns out to be too rounded, you can refine the joint using a knife.
Cutting ceiling plinth. External and internal corners
To the point where they converge, a line is drawn directly along the future part of the connection. From the point on the ceiling to the second one. The resulting marking will be the line along which you need to saw off or cut off the connecting parts. Using these techniques, you no longer have to wonder how to cut the corners of the ceiling plinth.
How to cut ceiling plinth correctly. Important little things
The measurements required to cut the plinth for the ceiling should be done in a special way . To determine and mark an internal corner, the length must be measured from the corner itself. To mark the outer corner, it is necessary to take into account that the plinth will protrude into the interior of the room at a distance equal to its width.
It is not advisable to fasten the skirting boards until their exact location has been measured and the counter plinth has been cut. Only after the perfect convergence of both strikers in the corner can you begin their installation and fastening. If you work with polyurethane or wooden skirting boards, defects and flaws can be corrected with a nail file or file. To fit a foam product, you should arm yourself with a sharp knife.
If even after finishing the baseboards there remains even a small gap, do not rush to get upset - it is easy to repair it with ordinary putty. Cutting ceiling plinth accurately and accurately is not that difficult. But in order to acquire at least a small skill, first try to practice on small workpieces.
What tools can you use?
The feasibility of using certain tools is related to the materials from which the plinth will be made.
Table 1. Types of materials and features of their use.
| Type of material | Material properties, requirements | Tool |
| Polyvinyl chloride (PVC) | PVC skirting boards are distinguished by the fact that they are easily damaged when pressed and no longer restore their former appearance, since they lack elasticity. Therefore, you cannot press on such skirting boards when cutting. | Cut with a construction knife or a hacksaw. A blade or sharpened kitchen knife will also work. |
| Styrofoam | Foam plinth is also not very durable, but it is better than its polyvinyl chloride counterparts. Easily crumbles. | You can use the same tools as for PVC |
| Tree | Stronger and more aesthetically pleasing than their polymer counterparts, but more expensive. | It is best to cut wood with a hacksaw; you can cut it with metal, although this way you risk clogging the teeth of the blade with sawdust. A wood saw with fine teeth is best. |
Using factory corners is an alternative to cutting and sawing
Instead of cutting out skirting boards, you can use ready-made corners, which are sold in the same hardware stores. In this case, the main plinth can simply be measured and cut in the usual way, at a right angle, and then attached end-to-end with the corner element .
Corners for PVC ceiling plinths
The disadvantage of corner elements is that they are actually and visually larger than the baseboard, which is why the corner will be noticeable. This can ruin the look of the room. It is also inconvenient to use corners where the walls do not meet strictly at an angle of ninety degrees. But in most cases they look great.
Some useful tips that will make the work and preparation easier
Next we will talk about the tool with which you can make trimming. This section also contains useful information on joining pieces of plinth at the corners.
Selecting a tool for forming an angle
The most economical option is to buy a simple plastic miter box. It is a plastic block with eight working slots. This device is designed for only two operations: trimming at 45, 90 and 22.5 degrees. An angle of 90 degrees is useful, for example, if you need to embed a socket box into the middle of the molding.
Some devices come with eccentric locks included. They are preferable because it is easier to work with - the plinth is clamped in the desired position and does not move during the cutting process. Accordingly, if any errors occur, they will be minimal and adjusting the angle will not be difficult.
How to cut a plastic baseboard: a simple plastic miter box
If you have to make repairs in your own home, then perhaps it makes sense to purchase a more serious tool - a rotary single-plane miter box. It is designed for cutting at angles of 15, 22.5, 30, 36, 45 and 90 degrees. The design of this miter box includes 2 clamps - for clamping in horizontal and vertical planes, as well as a limiter that will allow you to cut workpieces to the same length. The hacksaw will be built-in here. If it is not clear how to cut a ceiling plinth, the video review below will help you.
How to trim a baseboard in a corner: a rotary miter box
How to saw down a ceiling plinth: the video contains a detailed description of a rotary miter box and information on how to use this tool.
This will be useful to you at work
As you noticed, the text mentioned marking using electrical tape. This is the most convenient way to mark blanks, since the pencil is not always visible on the floor plinth, and it is sometimes difficult to trace its lines from the ceiling. The bright pieces of electrical tape are very clearly visible, and when they are no longer needed, they are removed literally with one movement of the hand. There are no traces of glue left after removing such marks.
Sometimes you have to trim moldings with a very large pattern. How to connect corners to make them beautiful:
- From one long fillet we cut pieces according to the number of corners, each of which should contain an element of the pattern. On both sides of the pattern there should be 5 cm of the length of the plinth.
- We measure the resulting blanks and find their middle, cut along the center line.
- We make corner trims as usual, but taking into account the fact that the centers of the patterns on the workpieces should fall on the tops of the corners.
How to join the corners of a ceiling plinth if there is a large pattern on its surface