Since ancient times, people have tried to make the place where they live better, more comfortable and more beautiful. Many ways have been invented to decorate both the house itself and the surrounding area.
In the warm season, flowers are especially popular, but ordinary lawns will no longer surprise anyone. No one remembers who first came up with the idea to make a street vase from ordinary unnecessary rags and cement. The result is a very original and incredibly beautiful decoration for the garden, which you can easily make yourself.
Necessary materials and equipment
In order to make such a vase with your own hands, you need to prepare the following:
- Rags. These can be old towels, either waffle or terry. A simply hygroscopic fabric that perfectly absorbs water is also perfect. The sizes can be completely different, because you can make vases both small and quite large.
- Cement.
- Water.
- Sand.
- Container for shaping the vase. This could be an old bucket, a large iron or plastic container, or much more.
- A coloring agent intended for coloring concrete (if necessary).
- Container for mixing cement mortar. It should be deep enough and it is best to use one that is made of metal (you can also take a container made of plastic).
- Drill with attachment for stirring solutions. Of course, you can do without it, but thanks to a drill, the work of creating a cement vase will become much easier.
- Strong film made of polyethylene.
Option using forms
Making your own garden pots from cement is a simpler task than it seems at first glance.
What will you need?
- bag of cement;
- any lubricant - paraffin, sunflower oil;
- protective gloves;
- molds - 2 pieces (one smaller, the other larger - corresponding in shape to the first);
- bucket for mixing concrete;
- spatula or small blade;
- a small heavy object in the form of a load (for example, a stone).
Step by step guide
Step 1: Selecting a Shape
Before you make a cement pot, you need to find 2 containers of different sizes. They should have the same shape, but differ in size. Ideally, the gap between the smaller and larger container is at least 5 cm.
- carton boxes,
- plastic containers,
- old pots,
- glass containers,
- stainless steel containers.
The containers should have a shape from which the pot can be easily removed after drying. For example, cans have grooves that make removing the finished product difficult.
By placing concrete in a wooden box or thick cardboard box and loading a smaller box into it, you can create square pots. To prevent the concrete from soaking the cardboard, thin boards can be placed at the bottom of the box. Cover the box with film and grease the film with oil.
Step 2. Preparation of the solution
You need to prepare a bucket (bowl) for preparing the cement mass. Pour the cement mixture into a bucket and gradually add water, stirring constantly. The packaging of the purchased mixture contains information about the proportions for preparing concrete. You must follow the manufacturer's recommendations.
The mixture should have an acceptable consistency, then it is convenient to spread. Liquid cement takes longer to harden, but the surface of the pot will be smoother. A thick solution is difficult to spread; the finished product will receive more cracks, holes, and air bubbles.
Usually the mixture is prepared in the following proportion: 1 part cement – 2 parts water.
You can enrich concrete flowerpots with additional effects by adding various additives to the freshly prepared mass, giving the products a unique character:
- glass beads,
- small shells,
- small pieces of broken dishes,
- small items.
Step 3: Apply oil to molds
Apply oil to create a greasy, slippery coating on the surface of the forms in contact with the concrete. Thanks to the oil layer, the molds will not stick to the concrete, making it easier to remove the finished product.
Step 4. Filling with cement mortar
It is advisable to wear protective gloves and carefully and slowly pour the cement mixture into the prepared container. The mass is evenly distributed along the bottom of the container.
Answers to questions: how to make a flower pot with drainage holes out of cement?
A pebble or other object is placed at the bottom of the mold. You can drill holes in the finished flowerpot, but wait until the concrete has completely hardened. Hardening takes 2-3 days.
Basic rules for preparing the mixture
The first step is to prepare the sand. It should be small, without debris and large pebbles. It is best to sift it through a medium-sized metal sieve.
Then take a container for applying the solution and put the rag there that you are going to use to make the vase. Remember or mark the volume that it occupied.
Next, water is poured into the container up to the mark (the height of the rag) and sand and cement are poured in a 1:1 ratio. Mix the contents of the container using a drill with an attachment. As a result, the solution should have a consistency similar to not very thick sour cream. If the solution turns out to be thick, then add water, and if it is liquid, then add a little more cement and sand. By the way, if you make a solution without sand, the finished vase will not hold its shape well.
The mixture with cement and sand needs to be mixed so much that it is enough to make just one vase. If you want to make several of them, then it is best, after you finish with the first product, to apply the solution for the second again (you can pour into it what is left in the container after making the first vase).
We make beautiful flowerpots from fabric and cement for the garden and cottage
To make flowerpots or flowerpots you will need:
- Cement (for a high-quality solution, it is advisable to add fine gravel and expanded clay, as well as a little sand),
- Pieces of fabric or old towels (waffle or terry)
- Container for mixing the solution and water
- A bucket or other container for drying the pots (to give it the desired shape),
- Paints, brushes and decorations
Let's start working on the flowerpots.
First you need to prepare a cement solution. It is better to do this in seals.
In order for the mixture to be of high quality and the flowerpots to turn out beautiful, the following proportions must be observed: mix 2 parts of sand and one part each of cement and gravel. The gravel should be fine (from 3 to 7 mm), but if you want the flowerpots to be lighter, some of the gravel should be replaced with fine expanded clay.
Gradually add water to the dry mixture; the consistency should resemble liquid sour cream.
Wrap the bucket on which the flowerpot will dry with polyethylene so that nothing sticks to it.
Dip the selected piece of fabric or towel into the solution. It needs to be completely saturated with cement. Then we take it out and straighten it.
We lay the fabric on a bucket standing upside down and straighten the folds so that it is beautiful. The bottom should be smooth, as shown in the photo:
The flowerpot will dry for about 2 – 3 days. After this, it can be removed from the mold, painted and decorated to your liking.
Step-by-step making of a vase
- 1 step. Take a container on which to place a rag soaked in cement and wrap it tightly with film. This is necessary so that the finished vase easily and quickly leaves its shape.
- Step 2. Immerse the prepared rag in a solution of cement and sand, which must first be thoroughly mixed. You need to straighten the rag in the container and carefully ensure that it is completely saturated and not even a small dry piece remains.
- Step 3. Leave it in the solution for about 10 minutes so that it is better saturated with it.
- Step 4 Take out the rag and wait for the excess solution to drain from it. After this, carefully place it on the container that you wrapped in film.
- Step 5 Spread the rag so that the bottom of the vase is as even as possible. Lay out the edges the way you like best. You can make wavy edges, as well as fancy sharp creases.
- Step 6 Leave the vase until the cement is completely dry. This may take from 24 to 72 hours.
- Step 7 After the vase has dried, it should be carefully removed from the container.
Making a vase from concrete
Ready-made cement structures can be easily bought in the store, but we will make concrete vases with our own hands. All you have to do is decide what shape you want to make and prepare the material.
Forms for pouring concrete
You can choose any mold that you like. When choosing a mold to pour, decide what element your finished decor will be. What forms are there:
- from a plastic or glass bottle;
- made of cardboard or wood;
- from a disposable cup;
- from fabric.
Concrete vase can be made from miniature molds, all the way up to tall pots.
Tools and materials for concrete pots
The next step is to prepare the material and tools. You can buy all the components for working with concrete at any hardware store.
What you need to prepare for work:
- cement, preferably grade M-400 or M-500. You can also use a ready-made cement-sand mixture;
- ordinary quarry sand;
- fine crushed stone 5-20 mm;
- water;
- frame (mold for filling);
- gloves and spatula;
- container for mixing concrete;
- film.
Step-by-step instruction
We have prepared the main tool, we have learned what forms there are, and now let’s proceed to the step-by-step instructions on how to make a vase from cement:
- mix cement, sand and crushed stone with the addition of water. The ratio of cement and sand should be 1 to 3, and crushed stone - 25% of the total mass. Mix the whole mixture well. You can also use a cement-sand mixture or ready-made concrete B 25 with the addition of water;
- Cover one part of the mold with film so that at the end of the process it is easy to separate the frame;
- pour the made concrete onto the bottom of the mold, the layer should not exceed 4 cm;
- then level the layer with a spatula;
- use a regular metal pin or fittings as a drainage tube;
- Attach a second form to the tube, which serves as a weight. Load crushed stone or sand into it;
- after - pour the mixture between the frames and level the mass with a trowel (spatula);
- when you finish the concreting process, until the concrete sets completely, you need to spray it with water from a spray bottle and cover the form with film;
- After your vase is dry, remove all unnecessary frame elements. Do this very carefully so as not to damage the concrete.
The entire concrete drying process can last for two weeks. While your mold is drying, you can make several of these elements. We hope that our method will be useful to you to make concrete vases with your own hands.
Making a vase with a smooth surface
If you are not happy that the vase you made from cement and rags has rough walls, then you can use this trick.
To do this you will need in addition to the above:
- fifteen percent silicate glue;
- a large piece of high-density cardboard;
- another piece of polyethylene film.
The sand must be very fine (sifted), just like cement. You can also add a small amount of Rotband plaster to it when preparing the mixture.
Instead of water, silicate glue must be used. You can purchase it quite easily, as it is sold in every hardware store. If the glue is of a higher concentration, then it must be diluted with water to the required concentration, or more precisely, fifteen percent.
Main advantages of cement products
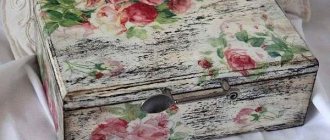
Making a vase from cement and fabric with your own hands allows you to realize the most unusual fantasies, which will highlight the design of the site and give it originality and exclusivity.
The material is quite resistant to changes in temperature, humidity and other atmospheric phenomena. Plants planted in such a pot will have a beautiful, well-groomed appearance, this will ensure a complete absence of weeds. Thus, you can create entire flower beds or flower beds from a certain class of plants. By following the correct technologies for making cement flowerpots, you can achieve strength and a long service life. Original items decorate garden plots, areas at the entrance to the premises, verandas, gazebos, and flower beds. After manufacturing, drainage is placed on the bottom of the vase, soil is filled in, and plants are planted. Larger products are immediately installed in a permanent place, as they are difficult to move. Small vases complement the design style of the garden plot.
Step-by-step making of a smooth vase
- 1 step. Apply a solution of cement, sand and silicate glue as described above, and soak a rag in it.
- Step 2. On a flat surface, spread the cardboard and film on top of it. Don't forget to wrap the container on which the rag will be placed with film.
- Step 3. Pull out the rag and let the excess solution drip off. Then it is spread over the film. Make sure that all, even the smallest folds, are straightened.
- Step 4 Place a container wrapped in film approximately in the center of the rag. Then you need to hold the container and cardboard and turn the resulting structure over. As a result, the rag stuck to the polyethylene should be draped over the top of the container. The cardboard can be removed.
- Step 5 When forming the edges of the vase, it should be taken into account that there should be no strong creases in any case. This is because it will be quite difficult to remove the film from them. If it happens that the film still gets stuck, then you can simply burn it out using a splinter or matches.
- Step 6 Leave the vase to dry completely. This will take longer than in the first case, since the top of the vase will be covered with film.
Correction of defects and decoration
After the vase is ready and the film is removed, you may find small defects on its surface. However, fixing them is quite simple and for this you will need silicate glue (undiluted) and a paint brush. All you have to do is completely cover the vase with glue. All defects will be hidden.
If you want to give the finished product shine and brightness, then you can add any dye to the silicate glue before you start painting. But it is worth considering that it must be water-soluble.
The process of creating a printed vase
This type of vase is made in almost the same way as a glossy one, of course, with a slight difference. A film is placed on a cardboard sheet spread (necessarily on a flat surface). After this, you should mark approximately the place where the print will be located. Here it is worth considering that the container intended for forming the product will be placed in the middle. Having decided on the place where the print will be located, it (or rather the film in this place) should be generously coated with silicate glue. Then you need to put a piece of newspaper, fabric, and so on in this place. The front side will be pressed against the film, and the back side will be pressed against the rag. Be careful that no wrinkles form.
After this, you should also coat the reverse side of the print thoroughly with adhesive. Then you need to wait at least 10 minutes. During this time, the silicate glue will completely saturate the paper or fabric. Make sure that there are no places where glue has not been applied. Then a rag soaked in a solution of cement, glue and sand is spread on the film. A container is placed in the middle of it, and the entire structure is turned over. Having formed the edges of the future vase, you just have to wait until it dries.
Creating a print
For manufacturing you will need the same material that was used in the glossy product. To create a print, you need to take printed fabric with various patterns, wallpaper or newspaper.
The cardboard is laid on a flat surface, a film is spread on top, then the location of the print is marked, taking into account that the form will be in the center. The location of the pattern is generously lubricated with silicate adhesive, fabric, newspaper or wallpaper is placed on this area, the outer side is placed on the film, and the inner side is connected to the fabric.
The inner side is also generously lubricated with adhesive; this work can be done while the main fabric is soaked in cement. Leave space for up to 10 minutes for complete impregnation, while ensuring that small folds do not form.
A rag soaked in the mixture is spread on the foam, a bucket or other prepared form is placed in the central part, then it is turned over so that the fabric remains on top of the container. Beautiful edges are formed and left until completely dry, then the product is removed. To create a product with a bright and colorful color, white sand and the same cement are used, and the necessary pigment is added. It is worth considering that such materials may be more expensive than conventional standard types.
You can trim the edges with a simple hacksaw, but the cuts will stand out from the main color, so they are sanded with an emery mesh for plaster.