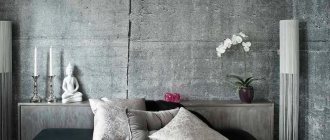
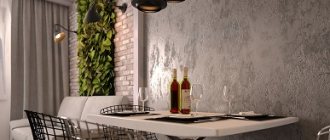
Repairs in our turbulent times are a very expensive undertaking. Moreover, it is costly both in terms of money and time. But despite this, I want the house to be beautiful and cozy. The use of decorative plaster allows you to get a chic interior after renovation. At the same time, it is not necessary to buy expensive materials to achieve the “wow” effect. You can make decorative plaster even from ordinary putty, which can be bought at any hardware store.
How does putty differ from plaster?
There are a large number of mixtures with which today you can repair steep surfaces. A beautiful finish is obtained by using decorative plaster. It contains organic components: mineral chips, granite flour, cotton or wood fibers. When they are mixed with a binder, a plastic mass is obtained that easily lays on any base in a thick layer and forms a relief texture. The use of special tools allows you to create more complex patterns. All this significantly expands design possibilities, which has a positive effect on the final result.
Putty is needed to prepare surfaces for subsequent decoration (painting or wallpapering). This is her main task. Plaster helps to form a protective layer; it can be used to correct minor defects and hide unevenness. The composition is applied in a thin layer, no more than one centimeter. It dries quickly, after drying a base appears, which is considered the final stage of repair. Next, the decorating process begins.
Putty helps create a perfectly smooth base for subsequent decoration Source rabota.multi-viza.com.ua
You can work with putty and create a beautiful texture. To do this, you just need to properly prepare the base, prepare the composition of the required consistency, and buy the appropriate tools. The concept of “decorative putty for walls” does not exist. There is only the usual leveling composition and a special technique for applying it.
Features of finishing material
The sought-after coating is durable, environmentally friendly, attractive in appearance and has a long service life. It successfully imitates a variety of textures, is repairable, and can be repainted over time if desired. All this is thanks to the special composition, which includes three main elements.
- The binder is also the main component. It can be cement, lime, gypsum, silicate glass, acrylic, silicone, etc. Determines the basic properties of the finished solution.
- Filler. Responsible for the texture and decorative characteristics of the composition. For mineral bases, various fractions of sand and stone chips, shell fragments, etc. are used. Synthetic fillers and stone powder are used for polymers.
- Plasticizer. Various substances that increase the viscosity, elasticity and adhesion of finishing paste.
Instagram @pdmdecavers
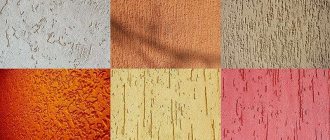
To give the required shade, pigments are added to acrylic, silicate and silicone pastes. All others are painted after application to the wall. Multi-color painting looks especially good
There are several main types of finishing plaster mixtures.
- Textured. Contains special impurities that form an original relief during application.
- Venetian. Imitates noble natural stone of various types.
- Flock. Contains flocks or multi-colored decorative flakes that are applied to a damp base. After drying, it is covered with a layer of protective varnish.
- Walls
Types of decorative plaster for interior wall decoration: tips for choosing and 40 photo examples
Possible effects
Every molar is capable of decorating walls with putty. To do this, you need to be able to prepare a solution of the correct consistency. It should look like thick sour cream without lumps. Since the composition tends to dry quickly, it cannot be prepared in large quantities. It is better to mix the powder with water with a mixer turned on at low power. It is important to comply with all the manufacturer’s requirements and take the recommended mixture to water ratio, as well as follow the suggested sequence of adding components. Only under such conditions can one expect that the ready-to-use material will “work correctly.”
Experienced molars prefer to use warm water to mix the solution. This way the powder dissolves better. You need to prepare the putty when you already have all the tools necessary for the job at hand (large and small spatula, metal brush, roller with a shaped roller, cloth or rags).
Different tools will help you create different reliefs on fresh plaster Source delaisteny.ru
Decorative puttying of walls begins in the same way as regular leveling:
- The surface is first cleaned of contaminants: old paint is removed, oil stains are cleaned with a solvent, cement laitance is cleaned with a spatula.
- Smooth areas are given a roughness: with a spatula, notches or grooves are made on them, which can provide the required percentage of adhesion of the new layer to the old base.
- The walls are primed with a suitable primer (if the surface is porous, it is worth applying the primer in two layers).
- To prevent the base from drawing water out of the putty later, it is moistened before applying the mixture. If this is not done, applying the solution to a dry surface will be extremely difficult. It will clump, which will have a negative effect on the even distribution of the putty.
- Apply the putty with a spatula in a sweeping motion in one direction. It is important to maintain the correct angle between the tool and the wall. If you need to create some additional pattern on the surface, the technology of applying decorative plaster from ordinary putty is used.
The “rain” effect created on the wall using decorative plaster Source firebioprotection.com
See also: Catalog of projects of houses with an attic and a garage in the chalet style.
So, for example, to get a “rain” texture, the mixture must be applied at an angle from bottom to top or horizontally from one edge of the wall to the other. This will be the second layer of putty. It lies on the first one after it dries well. When the second layer has set slightly, you need to sand it, leaving a trace of an intermittent furrow. At the final stage, the wall must be painted. The paint will only apply to the protruding part of the finish; deep unevenness will remain unpainted. This will help create the desired decorative effect.
To obtain the “brush” texture, you do not need to wait for the applied layer to partially dry. Immediately take a metal brush and use it to create furrows in the desired direction. You can move it horizontally, vertically, wavy, in circles. By adjusting the depth of movements, you can create different decorative effects.
Wave effect created using a brush Source 72pd.ru
To obtain the “scale” texture, the putty is applied in pieces with a small spatula. A new stroke is applied on top of the previous one, without waiting for it to dry. In order for the curls to obtain the desired shape, the spatula lingers on the surface of the wall for a few seconds, and only then is pulled away from the base. When the putty applied in this way dries, a pattern is created that has depth and volume.
The scales are formed with a spatula Source yarstroyservis.ru
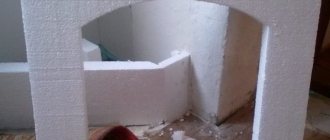
Beautiful wall decor with putty is obtained using polyethylene. If you apply it to the newly applied layer of leveling mixture and leave it for a day, then after removing the film you will get a surface that imitates the walls of a cave. This effect helps create an interesting interior design.
A professional craftsman can use putty to create a wall that looks like a rock. To do this, he unevenly distributes the solution in one small area (50x50 cm). Then a thicker layer of solution is applied to the next area. Use a smoothing iron to smooth out protruding edges and form natural streaks. It turns out very beautiful, as evidenced by the following photo.
Decorative putty “Rock” Source antiseptic.kiev.ua
See also: Catalog of companies that specialize in finishing materials and glass products.
You can create decor from putty using a figured roller and a piece of rag. Tools are applied immediately, while the leveler layer has not yet dried. To create unusual effects, any available materials are suitable (dishwashing sponge, tree branches, leaves and flowers from the herbarium). You need to experiment and try to create something original on a small piece of wall, and then evaluate the results. If you like them, it will be much easier to see what the finish will look like when finished.
Tips and recommendations for use
When applying drawings or patterns with your own hands without ready-made templates, try to follow the same steps. Any little thing can ruin the whole impression of your idea.
If you are a beginner and decide to decorate the wall yourself, then it is better to purchase a relief roller. The ornament will be the same and no one will notice the absence of professionals.
To create a relief design on the wall, it is better to use the services of an artist.
Start plastering from difficult areas. To distribute everything evenly.
When purchasing finishing material, always check the expiration date. If it expires very soon, and you have not yet started repairs, then you should not buy it, even on sale.
If you plan to work intermittently, keep in mind that the finished composition dries faster than the dry mixture.
If you decide to make a mixture for plaster yourself, do it right away for a large surface, because you won’t be able to make an identical material a second time.
Video description
The video shows ideas that can be adopted by those who are trying to create texture using decorative plaster:
Final finishing
The putty itself is white. If you are not satisfied with it, the finished finish can be additionally painted with water-based paint. But to create an even shade, experts prefer to add colored pigments to the finished solution. When diluted, it will be a little darker; when it lies on the walls and dries, the color will become two shades lighter. This must be taken into account when choosing this coloring technology.
Its difficulty lies in the fact that you cannot immediately prepare the solution for decorating the walls: it sets quickly. And it is extremely difficult to create two identical shades when mixing again. Each time the color of the mixture will be new. Therefore, it is worth adding pigments to the putty only when surfaces of a small area are being treated. In other cases, it is easier to paint already finished surfaces, then the decorative putty walls will look the same color.
Painting is done with a brush or roller. Usually two layers of paint are applied: one base coat fills all the recesses, then, when it dries, a layer of contrasting composition or water-soluble paint two shades darker is applied. First, a small area is painted, then the applied layer is wiped off with a wet cloth without pressure. This technique helps to emphasize the relief and highlight its convex parts.
Decorative putty painted in two colors Source avatars.mds.yandex.net
DIY tools for applying decorative paints
Basic set of tools for applying decorations to walls:
- Set of spatulas;
- Bucket for mixing putty;
- Mixer for mixing the mixture;
- Water at room temperature;
- The putty you have chosen.
Depending on the pattern you have chosen for decorative plaster, you may need trowels, rollers, texture rollers, and various devices for forming a pattern on the wall.
Selection of formulations
Manufacturers offer a wide range of plaster mixtures. Some of them are intended for exterior use, others for interior decoration. Moisture-repellent putties are used to level the walls in the bathroom. By understanding their differences, everyone can save money and ensure the durability of the finish coating.
Cement putty is gray in color and difficult to paint. Source stroidomsait.ru
So, experts conditionally divide all existing proposals into three large groups. Available for sale:
- gypsum putties;
- cement compositions;
- polymer mixtures.
The former have high plasticity, fit well on any base, but do not tolerate high humidity. Therefore, gypsum putties cannot be used for bathroom renovations.
The second ones are more durable. They withstand weather conditions well, making them ideal for façade work. They are expensive, which is why their use indoors is considered inappropriate from an economic point of view.
The color of the gypsum putty is slightly pink Source remont-book.com
Structural mixtures
This is a granular, heterogeneous structure mixture with the addition of pebbles, wood fibers, mica, and quartz granules. The product is made on the basis of a solvent or water.
The advantages include plasticity and ease of application. Structural compositions are mainly used for cladding bathrooms, corridors, and facades.
Protective covering
Applying colorless transparent varnish is an important step necessary to strengthen the decorative coating and give it durability. You can apply a layer of varnish only after thoroughly drying the wall; this will take a day. There should be no drafts in the room.
For living rooms, it is better to choose water-based acrylic varnish, since it does not smell and does not emit toxic substances. On textured surfaces, a glossy, varnish or pearlescent finishing layer looks good. Do-it-yourself decorative plaster using ordinary putty is a great way to make the interior unique and original. The main thing is good imagination and taking into account all technological nuances.