Types of products and installation methods
There are several options for installing a sink into a countertop. The choice of installation method depends on the design features of the sink. The most common types of sinks are:
| Types of products | Advantages | Flaws | Installation principle |
| Invoices | Budget price category. Easy to install. | Small material thickness. Formation of a gap between the countertop and the sink. | The sink is placed on a free-standing cabinet so that it becomes an extension of the worktop in the kitchen. |
| Mortise | Ease of use. Practicality and durability. | High price. | Inserting the sink into the countertop, into a specially made hole, provides for fastening with clamps and brackets to the inside of the module. |
| Under-desk | Aesthetic appearance. Noise insulation. Durability due to reliable sealing of joints. | Inaccessible due to high cost. Not suitable for all countertop materials. | The sinks are mounted in a cut-out hole, but are fixed below the countertop, forming a single whole with it. |
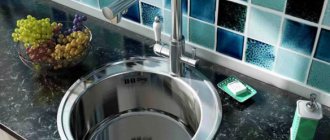
Overhead two-section sink Source vseme.ru
Kitchen sinks are traditionally made from stainless or enameled steel, as well as from artificial stone and composite materials, which are resistant to external influences and sudden temperature changes.
Material
As for manufacturing materials, kitchen cabinets can be made from almost any lumber. The main requirements for this piece of furniture are:
- moisture resistance;
- practicality;
- wear resistance;
- durability;
- aesthetics.
You can make a stainless steel sink cabinet measuring 80 cm wide from:
Chipboard. This is the most budget-friendly DIY option .
The peculiarity of laminated chipboard is: a wide range of materials, ease of processing, practicality, resistance to negative factors and attractive appearance.Almost all home furniture makers prefer this material. The presence of a melamine film on the surface of the chipboard protects the material from high humidity and prevents its deformation. But poor-quality edge processing or damage to the protective layer of the material can lead to the evaporation of harmful resins, which negatively affects human health.
When choosing laminated chipboard, you should be very careful about its manufacturer. It is advisable to check the quality certificate and read consumer reviews before purchasing.
- MDF. Excellent material, in the ratio of affordable cost and high quality. It is made from wood, therefore it is safe and environmentally friendly. The appearance of MDF pleases with a wide range. The material differs in texture, texture and color schemes. It is easy to process and is resistant to scratches, chips and negative factors.
Array.
This is an ideal option for classic interiors. When choosing wood, you should consider its type. Some varieties are more difficult to process. For example, making a cabinet from solid oak at home will be quite difficult . But as a result, such a piece of furniture will have the highest technical characteristics.Listing the positive aspects of natural wood, one cannot fail to note it: attractiveness, nobility, presence of a pleasant aroma, long service life. Such furniture always looks luxurious and aristocratic. The only thing is that when using the cabinet in a humid environment, the wood must be treated with antiseptics.
In addition to the materials for making the sink cabinet, you should also carefully consider the purchase of the sink itself. It can be made from:
- of stainless steel;
- artificial stone;
- ceramics.
Consider the option of a stainless steel sink. Because it is of high quality and reasonable cost. In addition, stainless steel is a classic material and is most often found in kitchens. The advantages of the material include:
- hygiene;
- practicality;
- durability;
- strength.
Stainless steel sinks are divided into economy and premium options. The difference lies in the thickness and quality of the metal sheet, as well as in the design of the product. The most practical are sinks with a thickness of at least 0.9 mm .
Attention : when choosing a stainless steel sink, preference is given to products where the seams are not visible. Experts also recommend choosing a matte finish, as it does not show water stains or scratches.
How to install a countertop sink
The method of installing overhead products has its own peculiarities. The sink is mounted on a separate kitchen module so that its upper part is completely covered. This work is usually not difficult even for beginners. The sink is fixed using L-shaped elements with oblique slots.
Before installing an overhead stainless steel sink on the cabinet, you need to complete the following preparations:
- Purchase at least 4-5 parts for fastening, as well as 15 mm self-tapping screws.
- Connect the mixer in advance.
Instructions for installing an overhead sink:
- Take the prepared fasteners. Attach them to the inner surface of the cabinet. Place marks.
- Focusing on the markings, tighten the screws. They should be located 5 mm above the markings.
Installation on a wooden frame Source remontkit.ru
Treat the end part of the cabinet with sealant. This will make the sink mounting location more reliable and protect it from moisture and dirt.
Place the product on the screws. Before attaching a stainless steel sink to the countertop, you need to check that it fits as tightly as possible to the cabinet.
Fasten the fasteners firmly. If excess sealant appears, clean it from the cabinet. Connect the water supply.
See also: Companies specializing in decorative forms and engineering communications.
Assembling a cabinet for an overhead sink.
Before attaching the overhead sink to the cabinet, it still needs to be assembled. There shouldn't be any problems at this stage: just follow the instructions. In the end, you should end up with a cabinet without a top. The back part should have a cutout into which communication pipes will go: water supply and drainage. We fasten the side posts and the bottom using confirmats (furniture hex screws), corners or other fasteners. Then we nail or screw the back cover.
Ready! Now place the cabinet where it will stand and you can do the washing. How to attach an overhead sink to a cabinet? To get started, prepare all the necessary tools.
Mounting a mortise sink
Inserting a sink into a countertop involves a number of successive steps.
Preparing materials and tools
Before proceeding with the installation of the sink, check the complete set of the sanitary ware. The kit must contain all the necessary fasteners and seals. You should have on hand: silicone sealant, tape measure, level, Phillips screwdriver, screwdriver, electric jigsaw, drill.
Carrying out markings
The method of applying markings on the tabletop depends on whether the kit includes a cardboard template. Its presence greatly simplifies the work. The outer and inner contours of the sink are cut out using the template. Then it is placed on the tabletop, secured with tape and outlined with a pencil.
The template is applied to the upper surface of the tabletop Source remontu.com.ua
If the template is not included, marking the hole is a little more difficult. First, trace the edges of the sink, positioning the sink so that its bowl faces down. Then the sink is turned over and placed on top of the countertop in the same way as it will be installed when finished. Secure with tape. Align and trace the outline. The correct installation of the product and the ease of its operation depend on how accurately the markings are made. A cutting line is drawn inside the contour.
To make markings, it is better to use a pencil Source berkem.ru
Cutting a hole
Before cutting a hole for the sink in the countertop, take an electric drill and make 2-3 holes one after another on the cutting line to create a single gap. Its length should be such that an electric jigsaw can easily fit inside. With its help, slowly and very carefully cut out a hole.
If the jigsaw deviates a little from the marking line, it’s okay. A discrepancy of 2-3 mm is allowed. The cut site is cleaned of dust and the product is “tried on”. It should fit freely into the hole, but not cling or “walk around”. If the shell does not fit completely into the hole, it is slightly widened using a jigsaw.
The tabletop should not be turned over from the front side during cutting, otherwise chips may form. Source stopdacha.ru
Detailed installation instructions
Let’s look at how you can independently install an overhead sink from “A” to “Z” without resorting to the services of hired installers and furniture manufacturing companies.
The instructions will be useful to anyone who is used to doing all the simple housework with their own hands, and the sink itself will find a place in a country house or in an apartment kitchen as a temporary replacement.
Step #1 - selection of materials and tools
To assemble more quickly, the cabinet can be purchased ready-made, but only if it is sized to fit the sink.
The second solution is to order from a furniture company, but this option is only advisable if the cost of the order is low.
One of the finished product options. However, a self-made cabinet has a significant advantage - an individual design, selected for a specific interior.
To put together a cabinet and attach a sink to it, you will need the following materials:
- thin boards, sheets of chipboard or MDF plywood;
- steel sink;
- kitchen faucet with hoses;
- fastenings for washing (screws, corners);
- sealant or polyurethane foam;
- hinges and handle for the door;
- siphon with sewer fittings;
- antiseptic impregnation;
- legs or rollers.
To attach the sink to the cabinet, you only need a screwdriver or a screwdriver to tighten the screws, but to cut out the walls, base and door you will need a hacksaw, circular saw or jigsaw.
When using power tools, which significantly reduce the number of chips when cutting chipboard, it is recommended to use guides so that the lines are perfectly straight
To clean the ends, you will need sandpaper, and to drill holes for self-tapping screws, a drill with a thin drill bit. We do not recommend using nails: they are more difficult to hammer into particle board panels, and besides, the structure fastened with nails becomes inseparable.
It is better to purchase all materials in advance so as not to waste time searching for the necessary parts during the assembly process. The listed tools are usually found in the home workshops of amateur craftsmen, especially if they are in charge of a dacha farm.
Step #2 - making a kitchen cabinet
The sink cabinet has a design that differs from conventional kitchen cabinets. It does not have two elements: a back wall - for free connection to communications, as well as a countertop, since it is completely replaced by an overlay sink.
A drawing with dimensions can be taken in the public domain, although there are universal parameters: height - 850 mm, depth - 600 mm, width - 500-600 mm. The finished model is also suitable as a sample.
Sheets of chipboard, thick plywood or moisture-resistant plasterboard - sometimes it’s easier to take some materials left over after repairs - we take in such a volume that there is enough material for two full walls, a bottom and parts for the connecting “belt”.
Procedure:
- first we cut out the large elements - two identical side walls and the base, then - the horizontal connecting parts;
- We carefully cut and, if necessary, clean and process the edges;
- if we use planed boards or plywood, before assembly we cover all elements with antiseptic impregnation, varnish or paint;
- we connect the elements according to the drawing using self-tapping screws and metal corners;
- Attach legs or rollers to the bottom side of the base.
If possible, we adjust the legs. If desired, the space under the cabinet can be covered with a plank. Lastly, we hang the door. This is best done after installing the sink.
To attach the hinges, take a drill with a bit of suitable diameter and drill two holes - top and bottom. We try to ensure that the crown does not penetrate right through the panel.
It is recommended to place drawers (transverse stiffeners) directly under the sink and at the very bottom. You can also make additional crossbars in the middle if the structure is voluminous.
Having assembled the structure, we check its strength. We install it at the chosen location - it is desirable that it is as close as possible to communications.
Step #3 - choosing a suitable sink
Metal overhead sinks are sold in plumbing stores and can also be found in garden departments. They are similar to each other, but may differ in design and size.
In addition to single sinks, which are a traditional rectangular or square product with rounded corners of the bowls, there are models with drying shelves on which it is convenient to stack washed dishes, vegetables or fruits.
When choosing the size, you need to take into account the dimensions of the cabinet, if it is already ready. Otherwise, the sink is chosen according to needs: single or double, with or without a drainer.
If you need to soak dishes, it is better to purchase a sink with two compartments. It will also be appropriate for large families, when an additional compartment is needed to accommodate a large volume of dishes or wash vegetables.
Check if there is an overflow in the bowl - insurance against flooding, as well as a round grate for the drain hole, which traps large debris and food debris
The metal from which the sink is made can be shiny (traditionally “steel”) or matte. In terms of technical characteristics, both options are the same.
Next, we’ll look at how best to attach an overhead sink to a kitchen cabinet.
Step #4 - installation of faucet and siphon
Once the cabinet is assembled and adjusted, the hardest part of the job is over. All that remains is to fix the sink, having previously fixed the mixer and siphon to it.
First, you can install the mixer using the fasteners and gaskets included in the kit.
If you do not have experience installing a faucet in the kitchen, then it is advisable to look at the installation diagram given in the user manual. In the figure: 1 – elements for fastening; 2 – mixer with flexible hoses; 3 – connecting the tap to the sink; 4 – mixer is securely fastened
If only cold water supply is available at the dacha, then instead of a mixer, install a simpler device - a single tap for cold water.
Next you need to install a siphon. It is necessary to prevent odors from the sewer pipe from spreading throughout the living quarters.
It is also advisable to attach it to the bottom of the sink before installation, but it is also possible after - there is enough space under the sink to manipulate the plastic fittings.
Thanks to the prefabricated design, plastic siphons are installed quickly - according to the scheme proposed by the manufacturer.
Before attaching the sink, it is recommended to first install the siphon and mixer, since all procedures are much easier and faster
Step #5 - installing the sink on the cabinet
Often, to install metal sinks, plastic “corners” are used - L-shaped pads, which are fixed to the upper ends of the side walls.
Elastic plastic helps the sink “sit” in place. During operation, it does not suffer from friction, but it holds firmly and does not move when washing large dishes.
If the sink and cabinet fit perfectly in size, linings, screws or other fasteners do not need to be used.
Before installation, sealant is applied to the edges of the cabinet, after which the edges of the sink are pressed tightly against the walls and partitions.
It is recommended to use silicone sealant designed for use in microclimates with high humidity. It will last much longer and withstand the load during operation
When using any adhesive, you should remember that a permanent connection is created, although with a certain force it will still be possible to tear the sink away from the cabinet.
When planning the installation of the door, you need to make sure that it opens freely without touching the front edge of the sink, which will be lowered by several centimeters.
The process of installing a sink is simple and takes a minimum of time if it matches the size of the cabinet.
Step #6 - connecting to communications
Without a connection to the water supply and sewerage system, the sink is unusable, so the final stage is connecting the plumbing fixtures.
First we connect to the water supply network. The mixer has already been installed - all that remains is to connect two flexible hoses. They lead from it to tees embedded in water pipes.
When connecting to the water supply network, the fasteners must be securely tightened, ensuring the connection assembly is leak-tight. It is convenient to work with flexible eyeliner, so even a beginner can cope with the task
Next, it remains to connect to the drainage system by connecting the outlet pipe - a pipe connected to the outlet of the siphon - with a sewer pipe.
Most often, corrugation is used for assembly, but it traps debris and sags over time.
If you need to increase the outlet to the sewer for waste from the sink, it is better to use flexible hoses with a smooth inner surface or plastic pipes
After installing and connecting the mixer and siphon, turn on both taps and check the functionality of all devices.
Upon successful completion of the work, the door is hung at the very end - this completes the installation of the sink.
Video description
Watch the video on how to embed a stainless steel sink into a countertop:
Connecting communications
At the final stage, communications, cold and hot water are supplied to the plumbing product. First, use a fixing screw and a rubber seal to secure the tap. Experienced craftsmen assemble the faucet before cutting out the countertop for the sink, connect hoses to it and fix it to the bowl.
Water hoses are pulled to the water supply system. Check the reliability of all connections. If necessary, use fum tape. Start the siphon and connect it to the drain corrugation.
After the communications are connected, it is important to check whether there will be a leak Source rudmar.ru
Professional advice on installing sinks: what to look for
Experienced installers share the following secrets of their work:
- When installing a mortise sink yourself, you need to check the dimensions of the hole several times. It should not be too large, otherwise the sink will “walk” in the groove and the fastenings will not provide the required strength.
- When installing a stainless steel sink, do not overtighten the screws. This may cause damage.
- Instead of the seals that come with the sink, you can use sealant. You shouldn't save it. It’s easier to carefully remove excess than to deal with leaks later.
- When using a screwdriver, it is important to be careful not to bend the hardware. If you don’t have much experience with this tool, you should give preference to a Phillips screwdriver.
Silicone sealant should be checked for hardening speed before use. Source mtdata.ru
Drawing for a stainless steel kitchen sink 80 cm
Before you start making a sink cabinet, you need to decide on its materials, design and dimensions. The dimensions of a piece of furniture are determined depending on the availability of free space in the room. For small kitchens, compact and small corner or straight models are made. If the kitchen is spacious and roomy, a massive trapezoidal sink with a wide countertop will fit perfectly in it.
The standard sizes of a sink cabinet are:
- width 50 cm;
- depth – 60 cm.
But, as practice shows, housewives prefer sinks with a width of 80 cm . These are exactly what we will talk about in our article.
Help : when choosing a sink for the kitchen, you should consider its depth. It is inconvenient to wash dishes in a shallow bowl. And with a very deep bowl, you will need to constantly stand in a half-bent position. Therefore, experts recommend choosing a stainless steel bowl for the sink of medium depth (from 16 to 20 cm) and a width of at least 80 cm.
Installation features depending on the shape and material of the sink
The insertion process may have its own nuances depending on the selected sink material and its shape.
Installing a corner sink
An important point when installing such a product is cutting out a right angle. In order for an electric jigsaw to easily pass through the corners of the tabletop, several holes are first made in them with a drill, one after another, and they are combined.
You should also pay attention to the fact that the corners of the sink and the connection lines between the inner and outer corners of the cabinet coincide.
Installing a square sink
Installing a sink into a countertop begins with drawing a line that runs parallel to the edge of the countertop. Then make an indent to the width of the sink and draw a second line. In a similar way, two perpendiculars are measured and laid.
Mark the intersection point of the segments that connect opposite angles. The siphon is located in this place.
Square shaped sink Source userapi.com
Installing a stone sink
Sinks made from natural stone, such as granite, do not have faucet or drain holes. The first can be mounted separately to a tabletop or adjacent wall. And it is impossible to do without a siphon.
Carefully making such a hole in a natural stone sink yourself, without sufficient knowledge and experience, is a very difficult task. For this you need an electric drill with diamond bits. For this reason, it is better not to install expensive granite sinks yourself, but to trust specialists.
Rules for installing a countertop kitchen sink
Before starting installation work, it is worth deciding on the place where the structure will be built. Usually it is tied to sewerage and water supply. However, modern technologies make it possible to embed the device anywhere in the headset. When choosing an installation location, it is advisable to follow these recommendations:
- The bowl is placed as close to the work area as possible, making it more convenient to cook.
- The design divides the work surface into two parts: dirty and clean. In the first, food is processed, in the second, they are served.
- The sink should not be placed near the stove or refrigerator. It's not practical.
- It is advisable that there be light where the bowl will stand. If necessary, additional lighting is provided.
For a functional kitchen, it is best to choose a deep appliance: you can wash large dishes and other large items in it. It is worth choosing a low mixer - this combination will give a minimum of splashes during operation.
Video description
Watch the video on how to embed a stone sink into a countertop:
We install ceramic products
Ceramic sinks have the following feature: one part of the sink is overhead, the other is cut into the countertop. Such models are fastened using a combined method. To ensure the reliability of the structure, both sealant and mechanical fixing devices are used.
In addition, to secure the sink, load-bearing structures are made from wooden blocks. You can do this yourself. Wood should be treated with antiseptic agents.
Products made of ceramics and natural stone are very heavy, so when installing them, durable countertops and cabinets are required Source www.build2last.ru


