Today it is difficult to imagine a modern kitchen without a modern sink to match it. Now it not only serves as a place for washing food, dishes or other kitchen utensils. An important role is played by its placement relative to other equipment and furniture, issues of design and ergonomics. Therefore, when choosing a kitchen sink, in addition to its aesthetic appearance, you should first of all pay attention to its functionality and ease of use.
In order for the sink to be comfortable to use, it is necessary to install it both taking into account the manufacturers’ recommendations and taking into account a number of tips from practicing installers and designers.
There are some general installation rules for any kitchen equipment, as well as some specific ones that will only suit certain groups of products. Therefore, we will first consider general recommendations for the placement of kitchen sinks, then their main installation types, and then the installation nuances for each of them.
We will install a mortise sink of any model
Today, more and more people are choosing countertop sinks for their kitchens. In many ways, installing a kitchen sink on a countertop is more convenient:
- it cannot be torn off from the fastenings, even if some effort is applied;
- no need to choose a suitable wall, as when installing a wall-mounted sink;
- the thickness of the wall next to which the overhead sink is installed can be any;
- You can choose any location for installation;
- the table surface next to the sink is very convenient to use while preparing food;
- This sink looks very aesthetically pleasing;
- All connections to the sink are hidden inside the cabinet.
The listed advantages are slightly overshadowed by the difficulty of installation. Indeed, in order to install a sink efficiently, certain skills are required. The hole for installing the sink must be cut not only accurately, but also without damaging the surface of the table, and this is very difficult to do without a good tool and accurate calculations. This is practically artistic wood carving.
Our company's specialists successfully install any plumbing fixtures. We have many grateful customers, and we always welcome new clients. By inviting our specialist to connect the sink in the kitchen, you will be convinced that they are contacting us for a reason. The low cost of installing a kitchen sink and the high-quality work of our craftsmen attract new customers to us.
How to install an overhead sink on a cabinet - brief instructions
The overhead option for installing a kitchen sink can be ordinary or “slide-in”. In the latter case, the sink itself is equipped with curved slides on the side and front sides, and special grooves are provided on the bedside table. After you have successfully assembled a sink in the kitchen, all that remains is to slide the sink into these grooves, move the structure to the wall - and you can connect the communications.
If you use a direct overhead mounting option, you will have to seal all joints. High-quality waterproof sealant combines the properties of glue and a protective waterproof composition. The upper perimeter of the open cabinet is generously coated with this composition; all that remains is to precisely place the sink itself on top.
Otherwise, one day it will fall inside the cabinet along with the dishes, destroying the sewer and breaking off the pressure water hoses. Negative impressions from such an accident will be available to both you and your neighbors below. As well as eliminating the plumbing collapse and renovating two rooms from the personal budget. How to install an overhead sink on a cabinet without the risk of such an incident? Using auxiliary bars or internal sheathing.
Simple overhead sinks are usually equipped with additional fasteners. Massive bars, precisely screwed to the wrong side of the cabinet, are suitable as such. It is necessary to accurately mark the bottom edge of the pre-installed (without glue!) sink and build an internal sheathing along this line. Then the sink will rest on auxiliary bars, and not on the thin end of the bedside table. The operation is similar to the hidden installation of sheathing, only in the final stage it is supplemented with adhesive sealing of the joint between metal and wood.
Sink installation diagram
Both variants of mortise and overhead sinks are mounted in cabinets with doors (less often with drawers) that do not have a back wall. The assembly of this element of the kitchen set has its own characteristics. They consist in the complete absence
internal partitions and walls, as they will interfere with the installation of the water supply. This means that stiffeners, which play an important role in strengthening the structure, are missing. And when a countertop sink is installed, even a large part of the countertop is missing, since it is replaced by the steel part of the sink.
When assembling a cabinet under the sink, you should put more effort and take this part of the furniture more seriously than the rest of the cabinets. It is advisable to place it on special substrates, as there is a possibility of water leakage. It would not be superfluous to treat the cabinet itself with a special water-repellent agent. It is better to provide special fasteners for tightening clamps from inside the cabinet (they are installed to strengthen the structure after installing the water supply system).
If the overhead sink is massive and heavy, sealing adhesive alone is not enough. This can lead to a broken sink and destruction of half the kitchen. In addition, neighbors on the floor below will suffer, since if a break occurs, the water supply system may be damaged and water will flow out.
It is better to strengthen overhead sinks with special fasteners. For these purposes, metal corners or special beams are used, which bear the main weight of the sink.
So, to install a kitchen sink with your own hands, you should follow a clear action plan:
- make preliminary markings;
- we decide on the location of the sink;
- installation work;
- finishing work.
In order to do this work yourself, you will need the following tool:
- drill with drills;
- screwdrivers, self-tapping screws;
- pliers;
- sealant;
- pencil, ruler;
- fasteners.
In the final part of the work, when the sink is installed, as a rule, faucets, water filters (if any) and other additional structures are attached.
Installing a stainless steel kitchen sink yourself is not such a difficult task. It is enough to take this work seriously, prepare the necessary tools and materials, and most importantly, decide in advance on the type of sink and the method of its fastening, since the specific assembly of the washing cabinet will depend on this. If you are not confident in your abilities, it is better to seek help from a specialist, but you will have to pay a lot of money for this work.
https://youtube.com/watch?v=Ndnm8yp-fLs
Installation rules: all the nuances of installation
So, we purchased convenient plumbing fixtures that fully meet the owners’ needs in practicality and appearance. By the way, stainless steel sinks are popular for kitchens today. Firstly, they are affordable, light weight, and durable to use.
The universal color “metallic” can be combined with a variety of color schemes in the room.
Installation is quite simple, there are only two stages:
- Assembling the sink cabinet;
- Installation of an overhead stainless steel sink on a cabinet.
The sink is an indispensable attribute of the kitchen. You can easily install it yourself - you do not need to have special knowledge and skills.
Algorithms for self-installation
On the wall
Wall installation is carried out as follows:
At the selected level, drill holes (minimum 8 mm) for installing brackets.
- We hammer plastic dowels of the appropriate diameter into the holes.
- We screw the brackets themselves into the dowels, making sure that they are at the same level.
- We put the sink on the brackets, level it (the design of the mounting eyes on most models allows this) and fix it with fastening nuts.
- We attach the drain siphon and install a mixer to supply water.
- If necessary, apply a moisture-resistant sealant to the junction of the sink and the wall.
On a cabinet without a tabletop
The instructions on how to attach an overhead sink to a cabinet are also quite simple:
- On the inside we install mounting brackets made of plastic, or we screw wooden blocks with metal corners.
- We apply silicone sealant to the ends of the side walls.
- We place the sink on top, making sure that it does not move relative to the underframe.
- From the inside, we fix the sides of the sink (or special protrusions on them) with brackets. If there are no brackets, we snap them onto the sides with metal corners.
- Using a screwdriver, rotate the adjusting screws, securely clamping the bracket fastenings.
- Remove any silicone that protrudes from under the edge of the sink with a wet hand or a clean rag.
Into the tabletop
The price of sinks that are mounted in a mortise manner is usually quite high. And the countertops themselves are not cheap, so inexperienced craftsmen should not take on the job without preparation.
If you are confident in your abilities, then installation should be carried out according to the following scheme:
Before attaching the sink to the countertop, we prepare a hole for installation. To do this, we place either the sink itself or the template that comes with it on the surface. We mark according to the template using a marker.
- We make holes at several points along the marking line using a wood drill. Then we connect these holes by sawing the grooves with a jigsaw.
- We process the edges of the resulting hole with a rasp, removing large burrs. After this, we apply a sealant to the cut, which will prevent the wood or MDF from swelling when in contact with moisture.
- If dismantling was previously carried out, then we return the tabletop to its place. Apply sealing butyl tape around the perimeter of the hole.
- We install the sink, positioning it in such a way that at least 10 mm of the edge extends over the entire area of the table.
- Using standard fasteners, we fix the sink from the wrong side. For mounting on thin countertops, additional wooden blocks are usually attached.
- Additionally, we seal all joints with silicone.
Recommendations from specialists for installing a kitchen sink and a list of necessary tools
If you decide to mount the sink yourself, then it will not hurt you to familiarize yourself with several rules that explain how to mount it correctly and where, what tools and auxiliary materials to use, depending on what your sink is made of (stainless steel or other) .
First, a sink (made of stainless steel, plastic, it doesn’t matter) should never be mounted next to an oven or refrigerator. Secondly, the location should be fairly close to the work area, since this is where direct preparation for food preparation takes place (cleaning, slicing, etc.). And finally, the third rule is that the sink should divide the work area into parts. The first will be intended for dirty work, the second for clean work, for example, serving.
As for the connection to the sewer and water supply systems, today this does not affect the installation location, since modern technologies and the use of new building materials make it easy to choose any suitable location for the kitchen system.
Now about the tools that may be needed during the work process. Here is their list:
- screwdrivers, preferably different ones;
- electric drill;
- electric jigsaw;
- wood drills;
- pencil and ruler;
- pliers;
- sealant (silicone);
- seal.
Summing up
Advantages of installing a sink yourself:
- There are tools in almost every home; attaching an overhead sink to a cabinet can be done using almost improvised means;
- You can save on the cost of a professional plumber by doing the steps yourself;
- If the plumbing product did not come with any fasteners, then purchasing them is not a problem.
If you cannot install the plumbing yourself, it would be better to turn to professionals.
Installation and fastening of the sink
Before installing a stainless steel sink on a cabinet, you need to understand that you can use various fastening materials for this. For example, the easiest way is to apply sealant to the ends of the upper frame and place the sink itself on top of it. True, we must pay tribute to this plumbing fixture, which itself can withstand decent mechanical loads, which cannot be said about sealants. After all, the kitchen sink is constantly subject to shocks, displacements, and vibrations. Therefore, the sealant as a fastening element is in doubt in this case.
Someone is trying to convince you that instead of sealant it is better to use polyurethane foam, which has a greater adhesive effect. Nobody argues with this that foam is better than sealant in terms of adhesive function, but again there is no certainty that washing under the influence of mechanical loads and temperature changes will not come off this type of fastener.
Therefore, experts recommend the only correct fastening, which includes special fastening elements in the form of brackets. Here they are in the photo below.
They are installed on the ends of the sidewalls closer to each edge. Fastening is done with a self-tapping screw. That is, you need to screw in two self-tapping screws at a certain level on the inner sides of the side walls of the cabinet. The location of their installation is determined experimentally. To do this, you need to install the bracket with the top shelf close to the top end of the cabinet wall. Make a mark in the outermost slot
Please note that the brackets themselves are installed so that the slot for the screw, which is located at an angle relative to the top shelf, is positioned at this angle towards the door
Now, according to the marks on the sidewalls, screw the self-tapping screws, but not all the way, because you need to install the brackets on them, putting them on the slot and sliding them all the way. In this case, there remains a gap between the upper shelf of the fastener and the end of the side wall, where the seating edge of the sink itself will need to be inserted. After which the brackets are moved all the way, clamping the edge of the plumbing fixture, and the self-tapping screw is screwed in all the way, securing the bracket itself. This fastener for an overhead sink is considered the best. In any case, this is a guaranteed fastening. But before fixing the overhead sink using this method, it is recommended to treat the upper ends of the side walls of the cabinet with sealant. This, firstly, will strengthen the fit of the sink, and, secondly, will create conditions for hermetic installation of the device.
There is another option that is rarely used today. This is a mounting of an overhead sink on a stand made by yourself. It can be made in the form of a lathing that is attached to the sides of the cabinet. In fact, the design itself should somewhat resemble the shape of a sink bowl. That is, the sink will be supported not only on the side walls of the cabinet, but also on the manufactured frame.
What you need to install a sink
Stainless steel sinks are very popular due to their light weight, durability and ease of installation.
Before you begin installing the sink, you need to assemble the furniture. Depending on the type of cabinet, fasteners and assembly methods differ. The kit usually includes accessories and the necessary instructions. To attach the sink correctly, you need to assemble a minimum set of tools. To seal the seams, you will need silicone sealant, which will protect the surface of the furniture from moisture.
Installation accessories:
- electric drill or screwdriver;
- a set of drills with a diameter for fastening;
- screws and other fastening products;
- screwdrivers in a set with different sections;
- masking tape to protect furniture;
- ruler and device for level measurement;
- sealant for sealing joints.
Before installation, it is recommended to clean the space and remove excess. For convenience, all communications should be secured to the stand in advance. After fixing the sink, this stage will be problematic. The installation location will depend on the location of the water pipes and sewerage. If space permits, it is not recommended to place the cabinet next to the refrigerator and heating appliances.
Selecting a sealant
The sealing material plays a major role in installation work. The following types of products are available on the market:
- Silicone acrylic;
- Elastic silicone;
- Polyurethane silicone.
When purchasing, you need to pay attention to the features and characteristics of the sealant: shrinkage, adhesion, purpose.
Apply the product to a dry, clean surface to ensure maximum adhesion. If the surfaces are not fully prepared for sealing, then moisture may penetrate into the cracks, which can lead to the growth of fungus and mold.
Typically, elastic silicone sealing material is used. It is easy to use and quite reliable.
What determines the quality of our work?
Any installation of an overhead sink begins with studying the template configuration. The more complex the shape of the sink, the more effort will have to be made to cut the appropriate hole. The slightest mistake can lead to damage to the tabletop.
For a good craftsman, high-quality installation of a mortise sink does not depend on its model, shape and material from which it is made. Today in fashion:
- round sinks made of stainless steel and stone;
- double sinks with two drains in a variety of materials;
- built-in and surface-mounted granite sinks.
One of the popular models of sinks is a bowl made of granite chips. It looks solid, washes well, and lasts a long time. Its installation is more difficult than installing sinks made from other materials.
If there are no holes for installing such a sink, then installing a granite sink turns into a filigree work. Sometimes there are holes, but they are too small and you have to cut them out additionally.
Our craftsmen do an excellent job with this work, using special drills with a “diamond” crown and other tools. To determine how much it costs to install a kitchen sink, you need to know what material the master will have to work with.
The sink itself is quite heavy, so installing the sink into a kitchen countertop is done with great care so as not to drop or break expensive plumbing fixtures. More and more people are installing a convenient and practical double sink in their kitchen.
It is usually made of stainless steel, so it is easy to clean and is not “afraid” of chipping if you accidentally drop the plate into the sink. But there are other models - marble, granite or quartz. Installing these “stone” double sinks is similar to working with a granite sink
More and more people are installing a convenient and practical double sink in their kitchen. It is usually made of stainless steel, so it is easy to clean and is not “afraid” of chipping if you accidentally drop the plate into the sink. But there are other models - marble, granite or quartz. Installing these “stone” double sinks is similar to working with a granite sink.
Unlike a conventional sink, installation of a countertop sink with a double sink includes two drains. This turnkey sink is installed by our specialists and delivered to the owners in working condition.
Installing a round sink in the kitchen or bathroom is no less popular. Like other models, it can be made from a variety of materials
The laconic geometric shape attracts attention and looks great in any interior.
The installation of any models of built-in or counter-mounted sinks is a little complicated by under-counter installation of the sink, because you have to work in an inconvenient narrow space.
Before you ask how much it costs to install a kitchen sink, tell our operator which model you want to install. By inviting a specialist to install a sink, you can be sure that a qualified technician will come to you.
By calling us and ordering any plumbing service, you will be convinced that we work not only efficiently, but also quickly. The best specialists of our company will go to fulfill your order.
Stainless steel sinks
It is worth paying attention to the following characteristics of sinks:
- Functionality. Depends on the nature of the work in the kitchen. Number of bowls and wings for drying - additional compartments allow you to carry out several manipulations at the same time, which is very convenient for bulk cooking.
- Capacity. Depends on the daily number of dishes that need to be washed.
- Combination with the interior. An acrylic white sink does not always fit harmoniously into the kitchen design, so it is important to choose a model that matches the texture so as not to disrupt the integrity of the kitchen space.
Modern models can be equipped with automatic valves for adjusting the drain, as well as outlets for connecting dishwashers and washing machines.
Pay attention to the functionality of the sink.
Think about whether you need the additional features that modern plumbing offers. If you install a filter unit under the sink, you can pay attention to models with an additional hole for a second tap. Of course, it can also be done using a drill by drilling a through hole in the countertop.
To produce such a product, a copper alloy is used, which prevents washing from corrosion and the effects of food acids. The main advantages of a stainless steel sink include:
- light weight, thanks to which transporting the sink will not be difficult;
- if used correctly, the overhead sink will last a long time;
- hygiene;
- acceptable cost.
This type of washing is not without its drawbacks. These include low levels of sound insulation when in contact with water. But low-quality stainless steel sinks, which are produced using a thin steel sheet, have this disadvantage. To eliminate this problem, you need to buy a sink with an underfloor bowl so that its depth is sufficient.
The sink in the kitchen has a strategically important role, so you need to choose and install it yourself correctly.
Before deciding how to install a sink into a countertop, you need to decide on the choice of product. The best option is to connect a deep sink and a faucet that is not too high - in this case there will be a minimum of splashes when washing dishes. The sink should be deep so that it is convenient to wash large pots or stack plates after a family dinner.
The material also matters - it is easiest to connect a traditional stainless steel sink yourself. Enameled steel would also be a good solution.
Installing a kitchen sink with your own hands requires the following tools and materials:
- Sealant;
- Self-tapping screws and screwdrivers;
- Jigsaw;
- Fasteners (as a rule, they are included with the product).
Advice! Before fixing the kitchen sink, you should carefully treat all seats with sealant. This will ensure high-quality waterproofing and protection of the chipboard from damage due to high humidity.
Installing a kitchen sink with your own hands can be done using various technologies. The installation method is selected depending on the type of sink structure:
- Invoices are considered the most budget-friendly and easiest to install with your own hands. The sink is placed on a separate cabinet. The disadvantage of this option is that there are gaps between the sink and the cabinet.
- Mortise ones are installed directly into the tabletop, for which you need to cut out the corresponding hole.
- Undercounter sinks belong to the more expensive segment; they are mounted below the countertop, thanks to which they provide excellent sealing and appearance.
The affordable overhead (built-in) sink is made of stainless steel. It is mounted on a separate module and covers its entire upper part. The installation is very simple here - special L-shaped elements with an oblique slot are used for fastening. About 4-5 such fasteners are provided for one sink.
Advice! The connection of the mixer is carried out before the stage of installing the sink (the sink is installed with the equipment already installed) - otherwise it will be inconvenient to do all this at subsequent stages.
How to attach an overhead sink with your own hands:
- You need to attach the L-shaped fasteners to the cabinet from the inside and make notes;
- Screw the screws in the marked places. It is important to choose short 15 mm screws and screw them in so that at least 5 mm remains above the mark;
- Cover the end of the drawer with sealant - it will protect the furniture and additionally glue the sink;
- After this, the sink is installed on the screws screwed into the cabinet and moved until it fits completely;
- Then the fasteners are fixed, the excess sealant is wiped off, and you can begin connecting the sink to the water supply and sewerage system.
Of course, it’s easier to install an overhead sink yourself, but a built-in model provides a greater level of tightness and looks very neat on a cabinet with a common countertop. The question of how to embed a sink into a countertop is solved quite simply - you just need to make the right hole for the sink.
Installing a sink into a countertop is carried out according to the following algorithm:
- The location of the sink is found on the countertop and the shape of the future hole is determined. To do this, turn the sink over and trace the contour directly on the countertop or on cardboard. If you have chosen a product of complex shape, then a ready-made template is most likely already included in the kit - this will help you cut out the desired hole;
- The finished template is applied to the tabletop at a distance of about 7 centimeters from the edge and begins to be cut out. To do this, step 1.8 cm deep from the edge of the template, leaving support for the sides of the sink;
- On the cutting line, first make a hole with a drill, and then cut out the outline with a jigsaw. The lower part of the tabletop is secured so that it does not fall out during cutting and damage the edge of the remaining surface;
- Sealant is applied along the contour of the cut. It also covers the lower joints of the sink;
- You can start attaching the sink - it is pressed with the included clamps;
- After the excess sealant has been removed, you can begin connecting the communications.
Read more: Illuminated plasterboard niche installation and installation of lighting
An undermount sink can be mounted flush with the countertop - however, this is a labor-intensive process that requires experience, since it involves removing the layer of countertop under the edge. The depth of removal is equal to the height of the side with a layer of sealant.
If you decide to install and connect the sink so that it is below the table level, you will have to resort to the services of specialists. After all, this installation method is chosen for expensive structures - not made of steel, but of natural, artificial stone.
In this case, special tools are required for fastening - for example, a jigsaw and diamond-coated saws. Indeed, in such sinks there may not be a hole for draining water - complete sawing of products is not carried out in industrial conditions.
Sinks made from natural materials are secured with a special mounting adhesive.
As for sinks with unusual shapes, they come with a paper template from which the installation hole can be cut.
Do you want to connect the sink yourself correctly? Don't forget 3 more points:
- It is better to replace rubber seals with silicone sealant. Rubber will not provide a tight fit and does not have a sufficient service life, while the sealant will fill all the gaps and cracks;
- It is better to connect sinks made of natural or artificial stone together to prevent falls and damage;
- Fastening the sink to the countertop or module with self-tapping screws is carried out exclusively by hand. Using a tool may create too much tension, which may damage the structure.
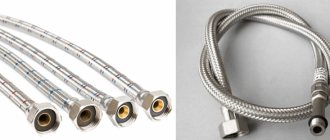
When the installation work is completed, you can connect the sink. To do this, the hoses through which cold and hot water will pass are connected to the general water supply system.
Advice! The connection requires the use of a rubber gasket to better seal the joint.
After the hoses are secured, the connection is made in the following sequence:
- A siphon outlet is inserted into the sink (it is better to use S-shaped designs, since the bottle one gets clogged too quickly);
- A pipe (angular rigid or flexible corrugated) is added to the siphon;
- The pipe from the siphon is discharged into the sewer pipe;
- All connections are checked for leaks.
Read more about installing a siphon here: installing a siphon in the kitchen in 4 steps
It may turn out that the diameters of the pipes from the siphon or sewer are very different. In this case, it is necessary to use an adapter - a sealing collar. At this point, the installation of the kitchen sink is considered complete.
How to attach a stainless steel sink to a cabinet
There are several ways to attach the sink to the cabinet:
Using sealant. Apply caulk to the edges of the cabinet and install the sink on top.
How to attach a stainless steel sink to a cabinet with fasteners?
Step-by-step instruction:
- On the inside of the cabinet, mark the locations for fasteners with a pencil.
- Screw the screws into the marked places (not all the way).
- Secure the brackets using self-tapping screws.
- Install the sink into the grooves of the fasteners. Check whether it lies evenly in the place allocated to it.
- Remove the sink and turn it upside down.
- Apply sealant to the ends of the side walls.
- Seal the perimeter of the sink with silicone sealant.
- Insert the bowl into the grooves of the brackets.
- Screw the sink from the inside with self-tapping screws.
- Remove any silicone that protrudes from under the edge of the sink with a wet cloth.
- Connect the water supply. Use flexible connecting hoses that make it possible to move the sink away from the wall for ease of installation. Connect the siphon to the drain pipe, connect the flexible hoses from the mixer to the source of hot and cold water.
- Hang the doors on the cabinet. To install the doors evenly, first screw the hinges to the doors, then attach them to the side frame and use chalk to mark the locations of the hinges and their holes on the side frames. Screw the doors one by one, making sure that the marked location of the hinges matches.
Adviсe:
- Install a surface-mounted sink with a faucet and siphon already attached to it, as this will be difficult to do after installation.
- To connect the water supply, use metal-plastic pipes. They are reliable, flexible and durable.
- The overhead sink can be secured using a sliding method. In this case, the cabinet must be equipped with guides, and the sink must have special curved edges. Installation of this model is quite simple - just insert the curved elements of the sink into the guides of the cabinet and push it all the way.
How to attach it correctly with your own hands
In order for the sink installation process to go quickly and efficiently, you need to choose the right sealant. This will allow you to reliably and permanently protect your sink from prolonged exposure to moisture. In addition, to successfully install an overhead sink, you will need the following tools:
Screwdriver Set;
The video shows how to install a stainless steel sink on a cabinet:
Secure to the tabletop
For these purposes, it is important to adhere to the following action plan
- It is necessary to draw the contours of the future sink on the countertop. For this spruce, a regular pencil will do. Be sure to take care of the indentations from the front and rear edges of at least 5 cm. After this, you can take measurements where the bowl will be concentrated. Using these measurements, it is worth drawing the outline of the hole for the sink.
- the line along which the cut will take place should extend 1 cm outward from the sides of the bowl. Make a hole at one point of the contour. If the shape of the bowl is in the form of a rectangle, then the hole should be made in the corners of the designated contour.
- Attach masking tape to the outside of the outlines. Thanks to it, it is possible to protect the tabletop from damage that a jigsaw can cause to it. In the process of cutting the opening, it is necessary to screw self-tapping screws into the cut to a small depth. Thus, it is possible to protect the inside from falling. The element to be removed should also be secured from below with support.
- Treat the ends of the table top along the saw cut using silicone sealant. This way you will protect your products from moisture. Application of sealant is also possible along the drawn perimeter.
- Insert the sink and installed mixer and siphon into the prepared opening. Secure it to the tabletop using clamps. These fasteners are included in the plumbing fixture complex. All that remains for you is to connect the mixer to the water supply and drain the product through the sewer siphon.
Here's a video of attaching the sink to the countertop from below:
Mounting on a kitchen cabinet
In this case, the DIY installation process is carried out as follows:
- Prepare the place where the bowl will be installed. It is worth turning it upside down and tracing the outline with a pencil. You can cut the hole using a jigsaw.
- To prevent the embedded part from falling prematurely, it must be secured with 2-3 self-tapping screws.
- After this, try on the sink to the resulting hole. If it is placed normally, you can attach it to a set, equip it with a siphon or mixer.
- Attach the faucet to the bottom using nuts and washers. Screw flexible hoses into it.
- The siphon is assembled using union nuts. When the sink is equipped with an overflow, it is also worth connecting it to the siphon. Although it is not uncommon to find ready-made siphons for sinks with overflow. The finished sink is installed in a prepared place, and then connected to the water supply and sewerage system. Seal all existing spaces with sealant.
The video shows how to attach a countertop sink to a cabinet:
Assembling a cabinet for an overhead sink.
Before attaching the overhead sink to the cabinet, it still needs to be assembled. There shouldn't be any problems at this stage: just follow the instructions. In the end, you should end up with a cabinet without a top. The back part should have a cutout into which communication pipes will go: water supply and drainage. We fasten the side posts and the bottom using confirmats (furniture hex screws), corners or other fasteners. Then we nail or screw the back cover.
Ready! Now place the cabinet where it will stand and you can do the washing. How to attach an overhead sink to a cabinet? To get started, prepare all the necessary tools.
Furniture assembly
The first stage requires preparing the furniture itself so that the plumbing can be installed. Usually delivered to the customer in disassembled form. If you don’t know how to assemble a sink cabinet, the instructions included with the furniture will help.
Looks like a diagram.
The standard set is:
- 2 side walls;
- 2 doors (or one);
- Bottom;
- 3 frames for rigidity;
- Fittings, corners, screws.
You need to have a screwdriver on hand to carry out assembly, or a standard furniture hexagon.
- The side walls and front frames are connected with screws and corners. One of the frames is attached from above, and the second from below.
A sink cabinet is the most popular solution for a small kitchen.
If you plan to have a countertop sink, you won’t need a countertop – you just need to choose a sink of the appropriate size.
You can also install simple internal shelves in your homemade cabinet.
Features of overhead sinks
The advantage of this material is that it can be successfully combined with almost any kitchen design. Overhead sinks are one of the most popular sink options. Their advantages are obvious:
- low cost;
- ease of installation of the sink.
The disadvantages include:
- relatively small thickness;
- gap between the cabinet.
Overhead models are placed on the cabinet and secured. This is extremely easy to do, especially if the height of the structures is standard.
Important. Such sinks are best suited to sets of separate modules, where the sink is not part of a single work area covered by a common countertop
Installing an overhead sink is preferable in corner kitchens. where the headset is located in an L-shape, and the height of the modules is standard.