Choosing a style and shape
The entrance and entry to the site must be in harmony with the fenced area and everything that is located on it - the house, other buildings, landscape design. A multi-level cottage with bay windows and turrets is unlikely to look impressive behind a standard gate made of corrugated sheets. A small, siding-clad house with a simple shape will get lost against the background of a massive forged structure with many decorative elements.
Another important point is the “permeability” of gates and fences:
- Solid doors will not only protect the residents of the house from prying eyes, but will also allow the area to be insulated to some extent, protecting it from strong gusts of wind and drafts. This may be relevant for households located in open areas or elevated areas.
- Mesh, lattice and openwork structures, on the contrary, will open the estate to the eyes of passers-by, allowing them to admire its design and the appearance of the house. This option is recommended for small areas, since a solid fence in this case will visually limit the space.
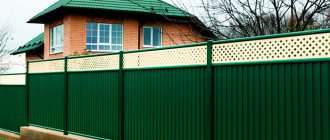
You can also choose a combined option Source www.masterovit.ru
Selection of dimensions and design
Gates for a private home must be of dimensions that will allow vehicles to freely enter the site. If they are intended for the entry of only passenger cars, then an opening about 4 meters wide is sufficient. But you need to take into account that larger vehicles may have to be driven into the territory - for example, a sewage truck for pumping out a septic tank or a cargo truck with furniture and materials for construction.
The standard width of the gate is 1 meter or a little more. But all these parameters are only recommended; nothing prevents you from increasing them. However, for massive structures, a more powerful frame, supports and foundation should be selected to ensure their stability and shape stability.
It is much more difficult to arrange a convenient entry and exit with limited space. In such cases:
- install a gate with a wicket inside one of the leaves;
Gates with a built-in wicket Source www.vorota-mo.ru
- they push the garage gate to the border of the site, and only put a gate in the fence;
- They make gate leaves of different widths so that the smaller one serves as an entrance for people.
In the latter case, it is necessary to consider a stopper for the wide sash so that it does not move when the narrow one is opened.
Note! A gate in the gate is not the best choice if there are children and elderly people in the house, since when passing through it you will have to step over the threshold formed by the gate frame.
See also: Catalog of companies that specialize in the installation of fences and barriers.
Swing type
In the photo of the gate you can see the easiest model to implement. The design of this plan is equipped with a gate. This is a fairly common option for a private home. Pillars are used as a basis; they are installed in width. The third post is necessary in order to establish the exact width of the gate.
Mounting occurs according to the following gate diagram:
First, the gate leaves and gates are installed on welded hinges that are located on the posts. This is an important stage, because depending on it in the future the direction of their discovery will be determined.
In general, sashes are frames made of metal. Other options are also possible, for example, a profile pipe, or a corner that is sheathed with a metal sheet, wood, or corrugated board.
There is a manufacturing option that involves using exclusively wood. In this case, it is worth securing the boards to a reinforced frame.
Heavy gate structures should not be used, as this places a significant load on the hinges and support posts. It is best to adhere to the weight of the sashes. A closing device is useful for the lock's hinge; you can use a powerful latch.
This type is really easy to install. The work can be done independently. It is worth considering the disadvantages in this case as well.
During installation, the support pillars may tilt, as well as the sashes may sag. This drawback is observed if the installation was initially broken. Reasons also include incorrect calculation of the weight of the sashes. It is important to deepen the foundation of the supports. Heavy material will make the situation worse. The weight of the loops must match the material.
The advantages of this choice are as follows:
- economical, fairly compact placement, there is no need to clear additional space for installation;
- easy installation work.
Material selection
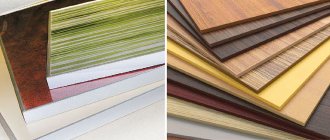
The materials used for the manufacture of gates and gates are classic - wood and metal. Not so long ago they were joined by modern composite materials (WPC, polycarbonate), but they have not yet become widespread.
Tree
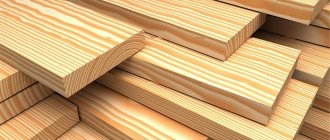
Wood attracts with its natural beauty and the ability to build a gate with your own hands in any style. As a rule, coniferous wood is used for this, which is more resistant to atmospheric influences due to its high resin content.
Wooden gates in Russian merchant style Source kelohouse.ru
But despite this, without special treatment, which must be carried out regularly, not a single wooden structure located on the street will last long. When choosing this material, you need to be prepared for the fact that both the supports and the sashes will have to be periodically painted or impregnated with special compounds.
Wood is a very convenient and pliable material that is easy to work with, decorating the structure with figured elements, carvings, overlays, making solid or openwork canvases. It goes well with metal parts - forged decor, decorative overhead loops, etc. Quite often, only the filling of the metal frame is made of wood.
Manufacturing and installation process
In order to make wooden gates with your own hands, you will need careful preparation. Only after drawing up a design diagram and collecting the necessary materials and tools can production and installation begin.
Installation and erection of poles
Pole installation steps:
- Clearing the site and determining the location of the holes.
- Digging holes with a drill or bayonet shovel to a depth of at least 1 meter, with a diameter 10 cm larger than the post.
- Cutting pipes with a grinder and inserting them into prepared holes.
- Filling the gaps with crushed stone.
- Checking the verticality of the support with a plumb line.
- Compacting crushed stone to strengthen the foundation.
- Mixing a liquid mortar (1 part three hundredth cement to 3 parts sand).
- Pouring mortar into holes. Wait for it to dry completely.
- Covering supports with bricks. If you add washing powder to the solution when laying, this will prevent the composition from settling. Check the correctness of the angles periodically with a plumb line.
- After installing the pillars, their tops are equipped with caps (finished or cut from galvanized steel). This improves drainage characteristics and looks aesthetically pleasing.
- After drying, the stacked brick rows are embroidered.
Parts of wooden supports that will be underground must be treated with water-repellent resin or bitumen mastic to prevent destruction.
The gates are mounted on supports. Therefore, they need to be installed correctly, securely, with rigid fastenings. For normal functioning of the structure, sagging is unacceptable. To prevent violation of the gate geometry, it is important to maintain the perpendicularity of the supports in relation to the ground. Strengthening them with half a brick will prevent the pillars from skewing. This width must be taken into account when drawing up the preliminary drawing.
Instead of wooden poles, you can install metal, brick or concrete supports. As an additional stiffening rib at the top of the support, it is recommended to fasten it with a horizontal beam.
Construction of the frame
The basis for the frame can be made of wood or metal profiles. In the second case, you will need a welding machine to connect the parts. If the gate frame is made of wood, the timber is cut into the required parts and laid out on level ground in the shape of the future gate. After checking the verticality and horizontality, holes are drilled in the beams. The parts are fastened with self-tapping screws. It is fashionable to further strengthen the center and corners with the help of a cross beam and metal corners. Beams for reinforcement are attached crosswise across the frame at an angle of 45 degrees.
For fastening, you can take self-tapping screws or use dry wood dowels. The pins must first be coated with epoxy glue. To secure the sheathing, an additional jumper is installed in the center of the frame. Jib beams are attached in the corners - 30-40 cm bars. When erecting a frame, its size should take into account the protrusion of the sheathing boards by 20-25 cm. It is convenient to assemble and sheath it in a horizontal position on the ground.
Manufacturing of sashes
The sheathed frame must be hung on installed supports. After preparing the sashes, metal hinges are attached. They are hung on a frame or on support posts. The optimal location of the loops is calculated in this way. A distance of ¼ of the total height is marked from the top and bottom of the support. After marking, lancet hinges are attached on which the sashes are installed.
The lower edge of the gates must be at least 5 cm away from the soil. Otherwise, fallen snow or formed ice will prevent the gate from opening. To prevent the doors from opening from the wind, they need to be adjusted. When marking fastening points, it is advisable to use a level.
Gate installation
Before installing wooden gates, the hinges are screwed to the leaves. At the same time, capercaillies are inserted. Before screwing in the bolts, holes are drilled to a depth of several centimeters in pre-marked areas. Their diameter should be less than the diameter of the screw. This trick will make it easier to screw in the bolts. It is important to maintain a distance of 5 cm from the ground to the sashes. After installation, the closed sashes are secured with a padlock or a metal pin. The coating is applied to the wooden surface after installation of the gate structure.
Sheathing of the structure
The frame is covered with boards, slats or picket fences. The elements are fastened to the base with self-tapping bolts. Various options for fastening elements are used. For example, a picket fence is attached vertically without gaps, or boards with a gap diagonally.
Sheathing elements are cut to the required dimensions in the required quantities. Pine boards are often used for cladding. This type of wood is most protected from climatic influences. After trimming, the elements are planed on all sides and attached to the frame.
When installing gap boards, a piece of wood is used as a template. The lath is taken to be equal to the length of the board and the width of the gap step.
The boards secured with self-tapping screws are cut in a straight line. The cut area and unevenness on the surface are sanded with sandpaper. The edges of the sashes can be insulated to provide a better seal and better thermal insulation.
Impregnation and coloring of wood
The installed sashes must be coated with a primer, antiseptic solution, and varnish. Wood coating products must be designed for outdoor use. Sequence of processing work:
- Sanding wood with sandpaper or a sander, including sanding the side surfaces.
- Seal the pores with putty and sand again after drying.
- Tinting to reveal the shade and texture of wood.
- Applying primer.
- Coating with the first layer of varnish.
- After drying, apply a second layer of varnish.
If iron forging is used as decor, the decorative elements are attached before grinding and painting. To protect the wooden panel during the fastening of forged parts, a thin sheet of tin is used. After varnishing, the joints between iron and wood are treated with sealant.
Selecting the opening method
Another criterion by which gates for a home are chosen is the mechanism for opening them. If gates are made primarily of swing gates, then other mechanisms have been invented for gates that allow them to be rolled back in one direction, moved apart in the opposite direction, and even raised:
- Hinged doors are distinguished by a simple and understandable design, ease of installation, and practicality. But this method of opening the passage cannot always be implemented due to lack of space in front of the gate, for example, a small courtyard and a narrow street.
- Sliding structures do not need to organize a free area for swinging doors - they roll to the side along guides fixed along the fence. The gate can be embedded in the canvas or located on the side opposite to the rollback. Such gates are often equipped with an automatic mechanism that moves the door leaf based on a signal from the remote control.
Video description
The design of sliding gates is well described in the video:
- Up-and-over systems are installed in garage doors. To move the canvas, a hinged lever mechanism and guides installed on the ceiling are required.
On a note! You should not install up-and-over gates if you plan to use them more than 10 times a day - the mechanism is not designed for frequent use.
- Rolling or rolling gates consist of horizontal sections, which, when lifted, are screwed onto a shaft in a box located in the upper part of the structure.
Rolling overhead gates Source sunproofpro.ru
Features of sliding gates
Sliding options are increasingly being used during the construction of fencing. They take up relatively little space. In addition, the machine can be located just a few centimeters from the fence and this will not interfere with opening or closing them. The availability of a variety of building materials makes it possible for everyone to make sliding gates with their own hands. Drawings, photos and videos will allow you to more carefully study all the features of the work.
Sliding option
The main types of sliding gates:
- console;
- hanging;
- recoil.
Hanging variety
The hanging option is not particularly popular. This is due to the fact that a rail is installed in the upper part along which the canvas moves. This rail is a kind of limiter, so not every vehicle will be able to enter the yard.
Product Installation
Sliding products
To operate sliding options, the rail is installed along the wall and directly in the opening itself. It is not practical to use such a system in the northern regions. Because with a large amount of snow, the operation of the shutters will be difficult, and snow-covered areas will constantly need to be cleared.
Sliding options diagram
Advantages of the console type
The console type is by far the most popular. They can be used in both southern and northern regions. The movement of the canvas occurs above the ground, so there is no need to constantly clear the path. In addition, the advantage is that there are no restrictions at the top. This makes it possible for even high-height vehicles to enter the yard.
Console type
For an installation of this type, only one support column is required, which will bear the entire load from the canvas. Therefore, it is important to make it as high quality and reliable as possible. The cantilever beam itself on the gate can be located below, above or in the middle of the door leaf.
Helpful information! The beam located in the middle is considered the best option, since it generally strengthens the entire structure.
Recoil model
Everyone can handle making sliding gates with their own hands. Drawings, photos and videos allow you to study the principle of the sliding system. It is important to take into account all recommendations when performing work.
Electric drive and accessories kit
Features of sliding gates
Sliding options can significantly save space in the yard. But at the same time it is necessary to control the space along the fence. For the system to function properly, it is first necessary to clear the area of debris and any vegetation.
Sliding design device
Installation of support elements
The beginning of the work is the installation of the main support column, which will bear the main load. If you wish, you can make sliding gates yourself: drawings, diagrams and videos will help you follow the technology. To work you need to prepare the following tools:
- welding machine and grinder;
- drill and screws;
- suitable sized rails and rollers.
Rails and rollers
For the sashes themselves, it is best to use galvanized material. It is able to last a long time, while maintaining its original appearance. Polymer-coated corrugated sheets are often used.
Helpful information! The use of corrugated sheets is considered the most successful solution, since it is treated with special agents that prevent corrosion.
Products of this type can be equipped with automatic or manual drive.
Sliding type drawing
At the beginning of work, it is worth preparing drawings according to which the work will be carried out. Drawings and diagrams also allow you to calculate the exact amount of material required. The height of the gate must correspond to the fence. The width of the opening can be very different. Sliding products exert pressure not only on the rails, but also on the pole, so special attention must be paid to its design. Its lower part must be immersed in the soil and properly concreted.
Support for sliding products
Arrangement of rails for moving the web
Sliding gates will run on a rail that is located on the ground. To do this, you need to choose a U-shaped metal profile. Its length should be equal to two lengths of the canvas. For reserve you need to make another 30 centimeters. It is important that the rail is installed on a concrete base. Only in this way can you obtain the most reliable design that will last for a long time. After all the rail systems are installed and secured to the support pole, the electric drive can be installed.
Rail device
Assembly of the canvas and its installation
The door leaf is made from a metal frame, to which a profiled sheet will subsequently be attached. Rollers are attached to the bottom of the metal frame. The door leaf is installed last. Do-it-yourself sliding gates: drawings, photos and videos provide complete information about the design and process of the work.
Gate leaf
Briefly about the main thing
So, when choosing a gate with a wicket for a private house, you should be guided by such criteria as their appearance and its compliance with the exterior of the house and site. Ease of use is of great importance, which depends on the dimensions of the opening and the opening mechanism - swing, sliding or lifting. And the material from which they are made will affect the durability of the structure: wooden ones will not last as long as metal ones, especially in the absence of regular maintenance.
Ratings 0