Wood selection
You need to start making a chair with your own hands by choosing the type of wood. They are hard and soft. The first include beech, oak, birch, maple, walnut, cherry - all have high strength and resistance to deformation. Products made from such wood can last for decades, but they are also more difficult to process, since such materials have a dense structure. They are also distinguished by their high cost.
Soft woods - pine, spruce, linden, aspen, alder and others - are more susceptible to scratches and chips. They are inferior to solid ones in practicality. Their advantage is that due to its looser, straight-grained structure, such wood is convenient to saw, cut, sand and glue. The products are light and elegant. Materials made from soft rocks are much cheaper than materials made from hard rocks. There is particularly durable wood (yew, acacia, boxwood) - it is better not to process it at home.
Typically, chairs are made of timber (with a section of 60 by 40 mm or 40 by 40 mm) or boards 10-15 mm thick. You can also make furniture from a log; to do this, you must first dismantle it. This is done independently on a makeshift stand using a grinder with a circular saw. If you lack the skill, it is better to entrust the cutting to professional carpenters.
When purchasing blanks, you need to check the quality of the lumber. If the rules for drying wood have been violated, this can be determined by external defects: cracks on the surface, warping of the wood (bends, irregularities) and resin protruding in some places. Also, boards that are stored in damp areas should not be used to make a chair. All these factors negatively affect the strength and wear resistance of wood.
High-quality materials for chairs should be selected according to the following criteria:
- smooth surface, without knots, bends or distortions;
- no cracks or chips;
- The wood is dry, without signs of mold or wormholes.
Before starting work, it is useful to treat lumber with special antiseptics - this will increase their moisture resistance and prevent fungal infection. After impregnation with this composition, a chair made of solid natural wood becomes stronger and more durable.
Smooth surface, without knots, bends or distortions
No cracks or chips
The wood is dry, without signs of mold or wormholes
Model selection
Having decided to give yourself or your loved ones such a necessary and convenient item, you can try to make it yourself. For something to become a favorite in your home, you need to work on it in a good mood and with confidence that everything will work out. Do-it-yourself folding chairs can be of various models:
- in the form of a stool;
- with backrest;
- tourist;
- in the form of a stepladder.
Before you make a chair with your own hands, you should choose a suitable modification. A stool is the simplest option. The top can be made of thick canvas, wooden slats, or a solid round or square board. The four legs are equal in height and width and can be attached directly or crosswise.
Solid legs for a folding stool are traditionally made from furniture plywood.
A chair with a back is a more functional model. The spine does not get tired from sitting on it. The back can be hard (screwed to the base using fastening fittings) or soft (when fabric is stretched over the supports). A camp chair is constructed from metal tubes connected to each other using bolts. The role of the seat is played by fabric such as burlap or tarpaulin, which is stretched between the spread out supports. The stepladder has larger dimensions than a regular chair. It consists of steps, legs, a seat, and is quite simple to perform.
The choice of the right model depends on the characteristics that a person expects. It is important to consider how much weight the piece of furniture should support, how heavy it should be, how often it will be cleaned, and so on.
In the form of a stool
With backrest
Tourist
In the form of a stepladder
Tools and fasteners
To ensure that the manufacture of chairs does not require extra costs, you must immediately decide which model to make. For the simple form option you will need:
- saw or electric jigsaw - to give parts the required dimensions;
- plane and sandpaper - for sanding wood;
- screwdriver or drill - for making holes and screwing in self-tapping screws;
- mallet (carpenter's hammer) - used to hammer in dowels;
- a small chisel - you will need it to make connections;
- furniture glue - it is used to glue all joints to give the structure strength;
- self-tapping screws - necessary for additional strengthening of all glued areas, as well as for fixing the seat;
- tape measure and right angle ruler;
- putty;
- stain, wood varnish or paint.
The presence of a furniture jig will greatly facilitate the work - this simple device helps to make the necessary markings of connections quickly and accurately. Clamps will also be useful, as they firmly hold wooden parts during processing or adjustment, which eliminates distortions. You can quickly and efficiently round the corners of workpieces with a hand router (if you don’t have one, use a plane).
Putty can be replaced with a homemade mixture. To do this, sawdust must be mixed with PVA glue, and then the resulting mass must be covered with the head of the screw or the erroneous hole.
Required Tools
To make a chair, it is better not to limit yourself to hand tools, but to purchase electrical equipment.
What tool is required:
- Electric jigsaw. Used when cutting configurations from plywood. The disadvantage is the presence of sharp edges in the product after cutting.
- Fraser. Sharp edges are processed, mounting holes and grooves are made.
- Sander. The tool removes all small burrs. The surface becomes even and smooth. Purchase paper of different grain sizes in advance.
- Screwdriver. Using this equipment, you can not only tighten screws, but also drill holes.
- Clamps. Used during assembly. Installed to press the parts to be glued.
In addition, prepare a hammer, a ruler, a square, pliers, a tape measure and a pencil. For ease of work, a workbench is required.
Design Features
For a beginner in carpentry, it is better not to take on chair models with fine carvings, curly elements or curved backs. Often, novice craftsmen practice making stools to gain experience. If the farm does not require them, there is no need to transfer materials and time to them. By carefully studying the manufacturing instructions, you can immediately make a wooden chair with a simple design. This is a universal piece of furniture that, due to its design, will last a long time. It will fit perfectly into the interior of a country house, and can also be used as a kitchen chair. A regular model with right angles will require the following parts:
- 2 rear legs;
- 2 front legs;
- 4 drawers, as well as horizontal strips that strengthen the seat and the entire structure as a whole;
- 3-4 legs – connect the legs at the bottom, which gives the chair additional stability;
- seat;
- back.
It is possible to install legs and drawers in larger quantities - it depends on the imagination of the master. The backs are also made in different ways. For example, you can make several narrow planks and place them vertically, fastening them at the top and bottom with transverse parts. Or make one wide plank and connect it to the back legs. The advantage of this model is its ease of implementation. Among the shortcomings, the only drawback is that the design is too primitive, which will not stand out against the background of the rest of the furniture.
The sketch and drawing of the future exclusive must exactly correspond to its purpose. For this reason, you should initially decide whether it will be just a chair for sitting or with additional functions.
With soft seat
Visually, this model looks like an ordinary chair, but its upper part is upholstered with foam rubber and fabric. To make an option with a soft seat, you will need to know how to work with a stapler. You will also need to stock up on additional parts and tools:
- A piece of plywood. The seat is cut out of it with a jigsaw exactly to the required size.
- Foam rubber with a density of 40 kg/m, thickness 40-60 mm. You can replace it with batting or padding polyester.
- Upholstery fabric. For soft seats, tapestry, velor, flock, courtesan, leather or leatherette are suitable.
- A sharp knife with a long blade. They are convenient for cutting foam rubber.
- Manual or electric stapler. Use it to cover the seat with fabric.
In addition to the seat, you can also make a soft back. In this case, you need to correctly calculate the amount of material so that there is enough for both parts.
The advantage of making such chairs yourself is the ability to choose the optimal size, taking into account your body type. However, you need to take the choice of texture seriously. Natural leather cannot be used to upholster kitchen chairs, as it stretches due to moisture and begins to bulge over time. It is better to choose jacquard - this material has excellent water-repellent properties.
Armchair chair
The main advantage of this model is the presence of armrests. In addition, it looks more presentable, and if you decorate it with fabric, you will get a rather stylish piece of furniture. An amateur carpenter can easily make a chair of this shape with his own hands. The easiest way would be to make a model with a straight back. For stability, it is better to make the legs wide, using a 15 mm board.
The front legs should be longer than in a regular chair, so that their upper part can then be connected to the armrests. They are made 8-10 cm wide from 10-15 mm boards; the edge is usually rounded to make it more comfortable for the hands. For fastenings you will need furniture bolts - with their help the frame of the chair-chair will be assembled.
For an untrained craftsman who does not have woodworking skills, this design may be too complicated.
Folding
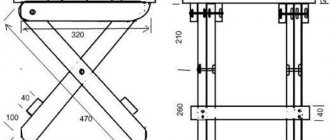
An excellent solution for small spaces. Thanks to its folding legs, it can be quickly assembled and disassembled. There are also disadvantages - lack of a backrest, fragility. Experienced craftsmen recommend making a folding chair from hardwood boards - oak, maple, birch, elm, then the model will be strong and stable. Pine planks are less durable. As a basis, you need to take 2 long slats, which will serve as both the front legs and the back, when they are connected from above by a transverse board. The rear legs are attached to the seat. They, unlike a regular chair, are shorter than the front ones.
In the folding version, it is important to position the central axis correctly so that the seating area does not end up being too high. To assemble a chair of this model, additional fasteners will be required: furniture bolts and nuts with matching washers. Such furniture is usually made according to a sketch, so it is very important that the craftsman knows how to work with drawings.
Transformer
Outwardly, it looks like a massive chair with a back, and if you unfold it, you get a staircase of 2-3 steps. The main advantage is the height. With its help you can reach the very top shelves of cabinets, remove curtains, and in general this chair is very useful, especially during renovations. The disadvantages are that it is heavy and takes up a lot of space. If you are making this model for the first time, it is better to choose a drawing of a chair without intricate shapes of legs and additional elements (for example, there is a design in which the steps protrude in a spiral). In addition to other materials and tools for such a chair, you will need a piano hinge and 2 sets of guides - with their help the steps will extend.
It is not easy to make such a wooden chair with your own hands. This will require skills in working with a jigsaw, drill, and plane.
Assembly
Chair assembly procedure
A wooden chair is assembled without a seat twice: first dry and without wedges, and after adjusting the parts and checking the configuration by measuring the sides and pairs (oblique diagonals from the lower corner to the opposite upper one), finally with wedging and gluing. In both cases, the so-called. an apron made from the rear legs, back and longitudinal sides, and the “apron” is already adjusted to it, see fig.
Note: Note the way the tenons are inserted into the front legs here and below when we get to the seat posts. With equal spikes, like in a stool, the sides of the chair do not cut into the legs, and there will not be adequate strength.
About frame details
All parts of the chair are made from solid wood. The temptation to make the rear legs prefabricated to save material is great, but don’t: they will soon break. It’s better to take on the set right away, marking the contours on the surface of the board according to the template with a shift. If the chair is for dining, then in this case the longitudinal drawers should also be slanted/curved, and the question arises: how to make tenons with grooves? It is very difficult to mow at home, and it is not necessary. You will have to spend a little more material, but oblique/curved drawers with straight tenons can be obtained without much difficulty from a board as thick as the drawer height, see fig.:
How to make slanted/curved drawers with straight tenons
Only now you need to mill the tenons, using a mandrel with the required angle, and always in a bag: remove the fold from the long sides, transfer the bag and fold the short sides. The corners of the studs are rounded separately, this is no longer critical.
Back
The back of a chair, as you know, can be solid, hard, stacked, or soft. Solid rigid - just a curved bar. It is cut out, like curved drawers, as well as details of hard inlaid backs, pos. 1-3 in Fig.; We won’t talk about the backs of Viennese and other complex chairs for now. The back parts are assembled on spikes; We’ll leave chairs with backs with screws in museums of Soviet consumer goods.
Chair backs
For a simple soft back, pos. 4, you need a straight top bar and, possibly, an intermediate support (purlin, “backrest”). The base of the back is made of 4-6 mm plywood. They cover it in the same way as the seat, see below, but use foam rubber no thicker than 7 mm or use batting/felt. The soft padding is placed on glue, not reaching 15-20 mm to the edges. The decorative lining is sewn into a pocket, placed on a base with padding and stitched at the bottom. Place the backrest in the grooves selected in the top bar, rear drawer or purlin and rear legs; select the grooves by measuring the thickness of the back covered with fabric. The sequence of chair assembly changes:
- assemble the left (right) part of the apron with the back drawer, top bar and purlin for dry use;
- put the backrest, perhaps with adjustment;
- they complete the apron by installing the missing rear leg with its own longitudinal drawer;
- the front part is attached to the apron;
- after checking the configuration and final adjustment, they go through everything with glue (optionally with wedging) in the same sequence;
- The soft insert of the backrest is finally placed either dry, or with a minimum amount of glue added only to the grooves so that it does not squeeze out onto the fabric.
Seat
How the chair cushion is arranged is shown in Fig. with a drawing at the beginning. Unlike the seat of a stool, the upholstery in this case does not stretch as much when the sitter fidgets, so the inner upholstery of the base is not required. The base is made of plywood or a solid board with a thickness of 12-30 mm. But the seat of a chair is more difficult to clean than a stool, so the foam padding must be covered with felt or, worse, batting that absorbs sweat. Solid particles of dried sweat are subsequently squeezed out of the seat.
Correct upholstery of a chair seat
The upholstery of the chair seat also does not need to be fastened as carefully as that of a stool; you can get by with pinning it with a furniture stapler without gluing. Cover the pillow with decorative fabric in the usual way, trimming the scars that form at the corners. But the cladding made as shown in Fig. will last much longer. If the chair is covered with much more elastic and expensive leather than fabric, this is a must-have option.
Laths or jibs?
Chair brackets for seat installation
Drawings of chairs most often show the fastening of the seat to slats, embedded in the legs along with the longitudinal drawers and additionally attached to them with self-tapping screws. This highly technological and low-labor method is widely used in industry, but for yourself it would be much better to lay the seat on the jibs, see fig. on right. The chair will be much stronger, the seat will get dirty less and will be easier to remove for cleaning.
How to install the seat?
A seat simply laid on top of the support frame loses all the advantages compared to a stool, and the chair frame experiences increased loads. Therefore, it is better to place the seat of the chair in a tray formed by the drawers; To do this, if the seat is on jibs, they are placed lower by the thickness of the base of the seat without a cushion. So that the front drawer does not interfere with the legs, it is lowered to the same thickness, which will only make the entire frame stronger, and the seat itself is moved forward by the thickness of the drawer or a little more. Then the front jibs cut into the front frame flush with its top.
Marking the blank for a shaped chair leg
About curly legs
I really want to put a homemade chair on curly wooden legs. This is not at all as difficult as it might seem, you just have to spend money on thick beams: for the front legs, taking into account the margin for processing, a 150x150 beam will do, and for the rear legs - from 250x250. How the figured legs on the bars are marked is clear from Fig. Basic conditions: you need 2 identical templates, with their heads and heels meeting on the inner (relative to the finished leg) edge of the beam. However, the convergence of the heels is not necessary, then they will turn out to be wide, like hooves, and the trace of their supporting surface will look like a horseshoe. The technology itself does not require art education: they simply remove the excess from the side of the inner edge and alternately from the outer edges.
How to determine the optimal height and dimensions
Thanks to the science of ergonomics, optimal chair sizes have been developed so that a person feels comfortable while sitting. These standards are designed for men with a height of 170-175 cm, and women with a height of 160-165 cm. The optimal parameters are as follows:
- chair height from floor to seat – 400-450 mm;
- seat width – 400-450 mm and depth – 500 mm;
- distance from the floor to the end of the upper edge of the backrest – 850-900 mm;
- back width – 300-400 mm;
- the back is straight or at a slight slope of 8-12 degrees.
The chairs are designed according to GOST for people weighing up to 100 kg. Drawings and dimensions with standard parameters can be used by those whose height and weight correspond to the average data. For the rest, to find out how to make a chair that will be comfortable to sit on and not spoil your posture, you need to take your own measurements. To do this, you need to sit down, keeping your legs at right angles and measure the distance from the floor to the inner bend of the knee - this will be the height to the seat. Then measure the length from the knee to the hip - this is the depth of the chair. The distance from your hip to your neck will help determine the height from the seat to the top edge of the backrest.
Optimal chair parameters
Calculation of parameters for selecting an individual chair
There are other standards that will help you make the right choice. Correspondence of human height to the height of the chair in cm:
- 146-177 – 43 cm;
- 159-188 – 46 cm;
- 174-207 – 51 cm.
In this case, the angle of the bent legs should be 90 degrees. The most comfortable body position is considered to be one in which the depth of the seat is 2/3 of the length of the hips. With this position, the correct deflection of the lower back is maintained.
Correspondence of a person's height to the height of the chair
What materials and parts are needed
Assembling a camp chair for fishing is easy. To do this you will need certain materials. If you use available items you can significantly reduce the cost of the whole process. The most popular wooden chair model. Wooden blocks of different sizes are the basis for assembling all elements: frame, seat, back.
Use good wood to create a chair.
As a rule, metal pipes are used for supports. They come with wood and fabric seats. There are canvas and leather inserts. You can find plastic elements. Plastic is a reliable and yet not complicated material. It also fits on a chair.
To make a folding chair with your own hands, having a drawing at hand is the main condition.
To assemble the structure with your own hands, you need fasteners. The base is assembled using self-tapping screws, bolts, screws, staples. And the materials you will need are the following:
- wooden supports;
- wooden seat supports;
- six boards of different sizes for the seat;
- wooden back;
- crossbars to connect the bars.
Use special paint to decorate chairs.
Drawing adaptation
The easiest way to make a drawing of a chair with your own dimensions is to rework an already finished one. To do this, you need to replace the inappropriate parameters (length of the leg from the floor to the seat and others) with the required numbers, and then draw a diagram according to the new input. To do this correctly and avoid distortions, it is important to take into account the proportions of each element and know exactly which parts should be identical and which should not. Another important nuance is that when replacing sizes, you must respect the scale. There is a second option to get a drawing of chairs with a back - enter your parameters into a computer program, which itself will draw a diagram.
Rework a completed drawing, taking into account proportions and scale
Enter parameters into a computer program, which will draw the diagram itself
Product repair
Folding chairs can break down from time to time. If this type of furniture breaks down, it will not be difficult to restore its operational properties. There are quite a number of videos published online that clearly illustrate how to repair a homemade camping paraphernalia for recreation.
So, you now fully know how to make a folding chair with a backrest. You can easily make a structure with your own hands from different types of wood right at home on your balcony. You can create drawings with your own hands or find ready-made design projects for folding country furniture online. A pair of chairs (transformable) will make a family vacation comfortable in any conditions. Even a novice carpenter can make a folding chair according to the proposed scheme.
Decorating the product
You can transform a boring chair using various decorating techniques. The simplest and most popular methods:
- Pasting with colored film. The range of colors is so wide that it will satisfy even the most capricious buyer. The decorating process itself does not require any special skills. In addition to the film, you will need scissors, a metal spatula and a degreaser.
- Using ready-made stickers for decoration - they are attached to the surface of the furniture and smoothed out. However, over time, the products lose their attractiveness and will need to be replaced with others.
- Dyeing through a layer of tulle. You will need acrylic paint and a piece of scrap fabric with beautiful lace. The tulle is fixed with tape, paint is applied over it (it is better to use a spray can), and after drying the material is carefully removed.
Besides painting, there are also other ways to decorate furniture. A familiar and win-win decor for a chair is beautiful pillows, covers and capes. They come in a wide variety of shapes and colors. To turn an ordinary chair into an exclusive piece of furniture, you can use old curtains and tablecloths, things that are out of fashion, lace, ribbons, bows and much more. For example, pillows can be sewn using old padding polyester jackets as a basis. It is important to remember that all decorative elements must be made removable so that they can be washed or cleaned.
Using comic magazines, you can make an unusual, beautiful chair for your child. You need to cut out bright pictures, and then carefully paste them over the details of the product at your discretion. When the glue dries, coat the surface with clear varnish. This technique is called decoupage.
Decoration
After the homemade folding stool is ready, it should be impregnated with protective agents and decorated. The easiest way is to give the desired shade with stain and cover with several layers of varnish.
You can decorate and at the same time make a wooden chair with a back more comfortable by upholstering it with fabric with a layer of filler. To do this, foam rubber is glued onto blanks made of plywood or chipboard, covered with fabric on top and nailed along the perimeter with staples.
To hide the edges of the fabric and fasteners, you can glue any dense material to the lower parts of the back and seat or nail a piece of fiberboard.
You can also use the decoupage method for decoration or decorate the product with carved elements.
Master class on making a chair from solid wood
In order to understand the principle of operation and in the future to boldly take on figured, complex designs, you need to start making chairs with your own hands with simple models. To make rectangular furniture with a soft seat you will need:
- board 15 mm thick;
- timber with parameters 40 by 40 mm;
- piece of plywood 45 by 45 cm;
- foam rubber 45 by 45 cm, thickness 40-60 mm;
- fabric for upholstery 55 by 55 cm.
You will need to make legs, drawers, slats for the seat and legs from the timber, and take an edged board for the back. Carry out the work following the procedure:
- Cut the tree. To do this, you need to lay out the patterns on the wood along the grain, trace the contours, and then cut out all the parts according to the drawing. Immediately align identical parts to size. You should have 2 front and back legs, 4 drawers, 2 legs, 2 cross slats.
- Cut a seat out of plywood.
- Mark the joints for the back, legs, drawers exactly according to the drawing, using a furniture jig.
- Make the necessary holes with a router and clean them with a chisel. It is important that their inner edge deviates from the edge of the leg by at least 10 mm.
- On the legs and slats, mark the dimensions for the tenons (10-12 mm), then carefully cut them out.
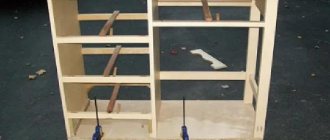
- Glue the connecting edges of the back, then insert them into the grooves of the rear legs and fasten with clamps. Also secure the rear drawer into the grooves near the seat.
- Apply glue to the edges, then connect the front drawer with the legs and let dry.
- Assemble the frame without glue - if there are no distortions, you can glue and final assemble the workpiece.
- While the chair is drying, make a soft seat.
- After complete drying, screw on the legs, secure the slats for the seat, place the seat, and secure it with screws.
- Cut off the tenon caps, fill the screw holes, and sand the surface when finished. The corners at the ends of the legs should be rounded and the bases smooth so that they do not scratch the floor.
To make a decent first wooden chair with your own hands, the drawings must be simple and understandable, and the materials must be of high quality. If desired, any craftsman can master the basics of carpentry. You should start with the simplest furniture models.
Cut the tree
Make the required holes
Fasten the back parts
Connect the front part
Assemble the frame without glue
If there are no distortions, assemble the frame, gluing all connections
Finish assembling the frame
Try on a seat part
Make a soft seat and secure it to a chair
Finished design
Drawings and diagrams
They begin to create folding chairs with their own hands from a preliminary drawing. It will display the appearance of the future product, its components, dimensions, which when unfolded are most convenient for the person who will use it.
Then a detailed diagram of the folding chair is drawn: the dimensions of each part, the location of the fastening of the frame elements and the location of the transformation mechanisms.
Already at this stage it is necessary to think about how the product will be unfolded and how to fix the seat to ensure the greatest stability. It is recommended that you first familiarize yourself with ready-made drawings and diagrams, use one of them, or create your own using the example presented.
The easiest way is to make a wooden chair with your own hands with cross legs, a seat fixed at the back and equipped with grooves in the support bars.
The slats will be fixed to the crossbar of the front legs. At the same time, there is practically no difference in creating a product with or without a back.
