What are boar tiles?
“Boar” tile is one of the types of ceramic facing materials that imitates brickwork. Initially, lamellas were produced for the exterior decoration of facades, but nowadays manufacturing companies offer a wide range of tiles intended for decorating the interiors of buildings: bathrooms, kitchens, toilets and others.
The product got its name due to the similarity of the mold for casting the tile with a pig's snout. “Boar” has an oblong rectangular shape and bevels (beveled edges) that add volume, but products are also available without bevels.
The surface of this type of tile can be glossy, matte, semi-matte or textured (artificially aged, crackled), the color scheme is varied, but monochromatic (without applied drawings or patterns).
What kind of hog tile is this and why is it called that?
This unusual name for the material is explained by the presence of two holes at the end of the tile. These holes are covered with a blank glaze, and due to this, the finish resembles a boar's snout. This was the reason for the appearance of this name.
Today, a “hog” is a monochromatic tile of an elongated shape, close to the size of a brick.
Due to the fact that the tile has a rectangular shape, it can be used to imitate brickwork. The volume of the tile visually appears larger and more textured due to the slightly beveled end chamfer. There are models without such an edge, and in this case the contrasting grout is responsible for the texture.
Beveled bevels give the ceramic surface a more vibrant and original look
Material advantages
The advantages of brick-like tiles include:
- Width of assortment.
It is possible to choose the material according to color and texture to suit every taste and for various interiors.
- Resistance to temperature fluctuations. When decorating a kitchen backsplash with tiles, you don’t have to worry about the integrity of the lamellas during intense heat load.
- High moisture resistance.
- Durability, resistance to chemicals.
- Easy to maintain: a wall lined with this facing material can be easily cleaned of soot or grease even with a damp cloth;
- Long service life of the product.
- Versatility of use (laying possible in any room).
The material is indispensable for those who value environmental friendliness!
What is a boar
Kabanchik is a small-format ceramic tile that looks like a glazed glossy brick. However, there are matte hog tiles, mirror hog tiles, and even craquelure tiles with aging effects. The tile has beveled edges around the perimeter, giving it a unique texture and volume. However, on sale you can find options with minimal chamfers or without them at all.
Of course, the first time you hear such a name, you might be surprised. Everything seems to be clear with the name Metro - the subways of New York, Paris and London are decorated with just such tiles. In our country, the tile has this name because in its manufacture a blank is used in the end of which there are 2 through holes. The side view of the workpiece makes one think of a pig's snout.
As for the size of the tile, its peculiarity is that the length of the product is 2-3 times greater than the width. Different manufacturers have different lines of tiles of this type. The most popular tiles are 7.5 cm by 15 cm, but sizes such as 7.5 cm by 30 cm, 10 cm by 20 cm, and 15 cm by 30 cm are also in demand.
It would not be out of place to list the advantages of boar tiles, for which modern housewives love them so much:
- Microorganisms do not accumulate in it and it does not absorb dirt. She is easy to care for;
- A large selection of colors and textures allows you not only to integrate tiles into modern interiors, but also to create unique and original compositions;
- Excellent resistance to temperature changes and high humidity conditions;
- Simple installation technology;
- Long service life.
What style does a hog tile backsplash fit?
A kitchen apron decorated with a “hog” harmoniously combines with many design styles:
- In a classic interior.
The tile attracts the eye, while simultaneously focusing attention on other interior details;
- Nordic, Scandinavian style.
It is a combination of glossy and rough textures (this tandem can be achieved by decorating the backsplash with textured tiles, and the walls with elegant wallpaper, or vice versa).
- Simple, deliberately uncomplicated country (or Provence) style.
The design of the room can be emphasized and refreshed by laying the walls with “brick” tiles. The slats complement the “rustic” image of the room;
- The interior is in an urban, industrial style.
(with a large number of details, furniture made of metal and glass) it will look more complete if you make a “hog” installation of not only the apron in the kitchen, but also a small section of the wall;
- Art Deco
The restraint and monumentalism of the Art Deco style goes well with the geometricity and strict lines of tile laying; a good result can be achieved by combining white lamellas with bright interior items, a black apron with light-colored furniture, or using tiles and decorative plaster for finishing;
- The colors of the lamellas are relevant for high-tech design: in this case, the seams are treated using grout in dark shades, emphasizing the deliberate roughness of the style.
ATTENTION! When choosing lamellas, think about the materials of what texture will prevail in the room and how the tiles will be combined with them. Beige or white products are universal for kitchen decoration - they will complement any style and will be combined with the color of other interior items. Also take into account the size of the room: dark tiles will visually reduce the space, while light ones will increase it.
Textures
The first thing that catches your eye when looking at a tile is its texture. The most common type is boar with a smooth, seamless texture. In such cases, they try to keep the seams between the tiles minimal to make them easier to maintain in the future.
Rarely do they use a hog made from marble. This solution is more relevant in the bathroom than in the kitchen. Although the pattern can hide dirt from the stove or work area, it is difficult to fit it correctly into the interior.
Another division of this tile is its volume. The boar can be convex or flat.
Convex models are accompanied by bevels along the edges. They can be of different widths and depths. There is no big difference in terms of practical convenience between these options, but cleaning flat tiles is a little easier. But the difference is so insignificant that this decision should be made only based on taste impressions and the interior of the room.
For a kitchen in a country or classic , a convex hog with a rounded edge is suitable.
Flat tiles will look good in a modern interior in a minimalist or loft .
Design options
The tiles are available in two types:
- with a chamfer - the presence of beveled edges on the lamellas, which gives convexity and relief to the wall on which the installation is made;
- without chamfer – tiles with a flat surface, without beveled ends. To emphasize the severity of the brickwork, in this case it is advisable to use a grouting compound of a contrasting color.
IMPORTANT! Caring for an apron made with beveled facing materials requires more attention. Cleaning tiles with a pronounced texture will be a little more difficult than flat slats.
What is a “hog” tile, why is it called that?
“Boar” was developed more than a century ago. They were used for façade cladding “like a brick”. This name is given because of the manufacturing technology. When placing the solution into the mold, 2 holes were provided in it. It looked like the snout of the animal for which the material is named. After baking, the blank was divided into 2 identical parts, which had a slightly protruding surface.
This type of tile was first developed more than a century ago, but is still in great demand and popularity.
Nowadays, “hog” means a convex tile, similar in appearance to brick, with a beveled bevel at 45°.
Manufacturers do not use this old name for their products; it is used only among the people. In European countries, this tile is called metro. This is due to the fact that cladding with this material is done at subway stations in London, Paris, and New York. The “hog” tile has the following advantages:
- strength (perfectly withstands mechanical loads);
- hardness (it is almost impossible to split the tile);
- durability (unlimited operational period);
- frost resistance and moisture resistance;
- Possibility of installation on uneven surfaces.
Among the main advantages of “hog” tiles are hardness, durability and moisture resistance.
“Boar” comes in different colors, shapes, textures, and technical characteristics. However, all options have common features. This is an elongated monocolor, brick-like, small-format and glazed. A distinctive feature is the beveled edges at 45°. However, there are varieties without chamfer.
Popular tile sizes
The dimensions and proportions of the facing material are close to the proportions used in the production of bricks. The most common and popular tiles are 20x10 cm and 30x10 cm formats.
Manufacturing companies produce lamellas of various sizes, ranging from the smallest 10x7.5 cm to large 30x15 cm. The standard length of products varies from 10 to 30 cm, width from 7.5 to 15 cm, tile thickness can be 2 cm (at the center point facial plane).
Main dimensions of hog tiles
Kabanchik is a rectangular ceramic tile that resembles a brick.
Initially, it was used for cladding buildings, then it migrated to the walls of the subway, which is why in the USA and Great Britain it is called “subway”. The boar has three main sizes:
- small 7.5x10 cm;
- large 10x20 (10x30) cm;
- large 28.5x8.5 cm.
Since large tiles visually make small-sized kitchens smaller, a standard size of 10x20 cm is used for them. Any product is suitable for spacious rooms.
How to choose grout?
To grout the seams of a kitchen apron tiled to look like brick, it is advisable to use two-component mixtures (latex or epoxy-based) that are water-resistant: the composition can be easily cleaned from the accumulation of soot, grease and other types of contaminants.
Mixtures of this type have good resistance to chemicals, do not darken and are designed to withstand temperature fluctuations and frequent washing.
Choosing the color of the grout mixture:
- white:
The most common option allows you to make the cladding more expressive (if the color of the tiles contrasts), the grout can act as a binding element for tiles of different shades or neutralize the complex color scheme of the lamellas. For a Scandinavian-style interior, a harmonious combination of white composition with facing materials of the same color is harmonious;
- black:
The composition is suitable for light-colored tiles and will emphasize the simplicity and elegance of dark-colored materials. Finishing the apron with tiles of different colors is an original solution, but choosing the tone of the grout in this case can be difficult, so the most suitable option would be black;
- neutral grout (beige, gray, dark and light shades).
Practical to use and favorably emphasizing the slats of classic colors. Also suitable for finishing seams on brightly colored items;
- color composition.
Choosing a tone lighter than the tile will make the surface of the cladding visually more prominent.
You can choose a grout that completely matches the color of the lamellas, or you can use a material of a completely opposite shade, getting an unexpected and original combination of colors.
IMPORTANT! By maintaining the width of the space between the tiles at 1.5-2 mm, they achieve emphasis on the facing material itself. With a width of 4-5 mm, the seam is visualized as a decorative element and requires very careful and accurate design.
Small and large kitchen areas
Each room has its own unique features. Due to its versatility, the hog is suitable for any type of kitchen, however, there are a number of recommendations for choosing the color and size of the tile :
For dark and small rooms, it is worth purchasing a light hog of the smallest size. Even rows of white tiles of moderate size will visually enlarge the room and stretch it horizontally. When choosing a colored hog, it is worth remembering that the cold spectrum expands the space, and the warm spectrum narrows it, so a blue hog, sea green, is suitable for a small kitchen . You should also avoid excessive variegation and choose monochromatic collections.
Interesting article: Plastic kitchen wall aprons
For spacious rooms there are practically no restrictions. Any color, installation option, texture will look great on a large wall. The only advice is that the size of the hog should be above average, otherwise the tiles will simply get lost in a large kitchen.
Styling tools
To install and trim the lamellas, you will need the following tools and accessories:
- adhesive mixture for ceramic products;
- grinding float;
- composition for rubbing joints;
- rubber and metal (toothed) spatulas;
- building level;
- roulette;
- metal square;
- marker or chemical pencil;
- tapping cord for marking lines;
- drill (with a nozzle for mixing the solution);
- rubber mallet;
- a small angle grinder with a diamond wheel for cutting (grinder);
- metal profile or wooden strip (for fixing the first row of facing elements);
- rags, sponges (removing excess adhesive or mixture for rubbing joints).
ATTENTION! If you don’t have a construction float, process the cuts of the lamellas with a special “Turtle” grinding disc for ceramics, which is mounted on an angle grinder. Use an electric tile cutter to process beveled products - this will reduce the likelihood of damage to the product and reduce the amount of dust during work. If you are laying lamellas without a chamfer, it is permissible to use a manual one.
Preparatory work
Before installing the kitchen apron, you must complete the following preliminary work:
- clean the wall of old paint and plaster;
- use a level to check the evenness of the surface for hog cladding;
- degrease the wall and apply a primer, wait until it dries completely;
- measure the distance from the floor to the place where the first row of slats will be laid out;
- Taking into account the result obtained and the type of installation, apply markings to the base;
- drill holes below the line of the first row, drive in plastic dowels;
- install a metal profile or wooden plank using screws. The top of the fixing strip must coincide with the mark of the lower level of the cladding;
- make a preliminary layout of the tiles on the floor, selecting elements by color and format, check each lamella for chips and cracks;
- Prepare the adhesive immediately before starting installation. It is advisable to use a mixture that is intended for use in rooms with high humidity and temperature fluctuations. You should not dilute the entire contents of the container at once - mix the glue in the amount that you will use per hour of work. The adhesive properties of the solution decrease over time.
IMPORTANT! Always purchase facing material with a small reserve (add another 10% to the required quantity) - in case of careless cutting or falling of the lamella, you can always replace the damaged element.
Tile features
Tiles began to be widely used at the beginning of the 20th century. At that time, it was almost never found in residential apartments and private houses. It was used to line the walls of subways or large buildings. Therefore, the boar was also often found under the name metro.
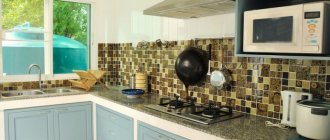
White classic kitchen with hog tiles
A lot of time passed before cladding began to be actively used to decorate kitchen aprons. Today, a boar is a rectangular tile with a smooth surface. Usually it is painted in a single color. Due to this, it is fashionable to achieve different styles in kitchen design.
A special feature of the cladding is the volumetric ends. Designers actively use them for different layouts. Due to this, they achieve interesting effects and unusual solutions.
The palette is not limited to pastel colors
The facing material is limited in size. The standard dimensions of one tile are:
- width – 7-10 cm;
- length – 10-330 cm.
Today it is a rectangular tile
An apron laid out in this way is quite popular today. This happens due to its original appearance, as well as the presence of such strengths of the cladding as:
- Resistance to conditions of high humidity and sudden changes in temperature.
- Wide range of colors and shades. This will allow you to choose the cladding to suit any kitchen interior.
- Durability. In the production of finishing materials, high-quality components are used.
- Different installation methods. This makes it possible to apply different design techniques in any kitchen.
- Easy to care for. Every housewife will quickly restore her apron to its original form. This does not require the use of harmful household chemicals or expensive cleaning products.
- Versatility. Due to the large number of different colors and textures, the tiles suit almost all styles.
Resistant material to temperature changes
The main thing is to choose the shade of the finishing material and choose the installation method. If you follow these simple rules, you can achieve an interesting kitchen apron that will not leave anyone indifferent. It will create a cozy atmosphere in the kitchen, where it will be pleasant to gather at a common table with friends and family.
A boar is a practical way to decorate an apron. It will not cause the housewife any trouble with cleaning and maintaining cleanliness in the kitchen.
Cozy atmosphere in the kitchen
Apron installation
- spread the adhesive using a spatula on the back of the tile. The surface of the applied composition should have small depressions and grooves;
- place the solution on the surface of the base - the “hog” is thick and heavy, so to improve the adhesion of the surfaces, a layer of glue is necessary both on the wall and on the slats;
- Apply at one time the amount of mortar required to lay 2-3 tiles;
- press the “brick” against the wall with force or by lightly tapping it with a mallet;
- the lower part of the tile should rest against the fixing profile or rail, which will prevent possible slipping of the cladding;
- to maintain the same distance between the lamellas, insert plastic crosses into the space between the tiles;
- lay out all subsequent tiles, checking the evenness of laying each row with a level or vertical plumb line (you can use a level bar);
- an hour after completion of installation, remove the dividing crosses and clean the tile joints from excess mixture with a rag or sponge;
- After the glue has dried (average time - 24 hours), remove the fixing metal profile or rail.
IMPORTANT! Lay out the first row, starting to install the slats from the part of the wall away from the entrance.
To cover a kitchen wall, the following types of installation are used:
- traditional - the lamellas are arranged horizontally or vertically, repeating the pattern of the brickwork. This is the simplest method, suitable for a beginner. There is another option for classic installation - with the elements of each subsequent row shifted by 1/3 in relation to the tiles of the lower level;
- stacked (horizontal and vertical) - tiles are placed one above the other, matching them in width or length. Vertical installation is suitable for rooms with low ceilings, horizontal installation visually expands the area of the room;
- diagonal - laying the “hog” at an angle of 45˚;
- “herringbone” - installation of elements at an angle of 90˚ relative to each other, a beautiful and original method, but requiring skill and experience;
- in a checkerboard pattern - alternating tiles laid vertically and horizontally can be made from single or double elements.
IMPORTANT! For the stacking method, the choice of color of the grout mixture plays a big role, since attention is focused specifically on the seams.
Boar tile layout options
If you use plastic panels that imitate a hog, there will be only two cladding options: vertical and horizontal. But the rectangular shape of the individual tile elements allows you to lay it in several ways:
- Vertical with offset. A method by which you can visually lengthen a tiled wall.
- Horizontal staggering. The most common option is when the tiles are laid offset, like a brick.
- Horizontal stackable. A neat seam-to-seam method with an emphasis on geometric accuracy.
- Vertical stackable. A method designed to emphasize the severity of lines in the interior.
- Diagonally. The elements are placed at an angle of 45°. This option is suitable for small kitchens, as it visually expands the apron area.
- Herringbone. The tiles are laid in a zigzag pattern to create a beautiful pattern.
The photo shows a black vertical hog, adding respectability to the interior.
Grouting joints
- Proceed to decorate the seams with the mixture only after the adhesive solution has dried;
- dilute the composition with water, scoop a small amount onto a soft rubber spatula;
- with little effort, rub the mixture into the entire depth of the space between the tiles;
- after finishing the process, use the corner of a spatula to fill out the seams - this will give them a uniform and even appearance;
- 40 minutes after grouting, carefully remove excess mixture;
- When the solution is completely dry, wash and polish the kitchen apron.
If necessary, fix the baseboard.
IMPORTANT! Do not use a spatula made of rubber or black plastic - marks may remain on the ends of the tiles that will be difficult to remove.
Care Tips
Due to the fact that each hog tile is coated with a special glaze, dirt and dust do not eat into the surface of the material. Which, of course, makes caring for the kitchen apron much easier.
For everyday cleaning, it is enough to use ordinary wet wipes, and for more thorough cleaning, use solutions for washing tiles or glass.
The only weak point of the hog is the seams, where dirt gets clogged quite tightly over time. In this case, there is only one recommendation - constant prevention . Immediately after cooking, you can go over the joints with a sponge to prevent the fat from congealing in small depressions.
Difficulties in laying material
Careful wall preparation
The evenness of the base plane before installing the facing elements can be assessed using a construction, water or laser level. If there are no such devices, use the following method: drive a nail into the upper corner of the wall and tie a long (to the floor) nylon thread or fishing line with a weight to it.
When the plumb line takes a stable position, fix its lower part by driving a second nail into the lower part of the wall and tying a thread on it. This way you can control the deviations of the installation from the vertical plane. Horizontal deviation can be determined using a transparent flexible tube filled with water (at least a meter long). Well, or using a level.
Depending on the degree of damage to the base surface, choose how to fix the problem:
- using putty (suitable for correcting unevenness up to 1 centimeter) or plaster (from 3 to 5 centimeters);
- installation of plasterboard sheets on a pre-constructed frame (with height differences of more than 5 centimeters).
Important! Be sure to appreciate the evenness of the walls!
Accurate trimming of cladding
When decorating the outer corners of a room with a “hog”, it is necessary to fit the lamellas at 45˚ (the sawdust of the back side of the tile) using an angle grinder and diamond discs.
ATTENTION! Set the minimum number of revolutions on the grinder - this way the cutting will be precise and the risk of chipping the tiles will be minimal. After this, carefully sand the edges of the lamellas with sandpaper.
Finishing internal corners:
- when laying tiles without a chamfer, cut out the joining elements at an angle of 45˚ and align the edges, check the resulting angle for evenness;
- When installing beveled tiles, make a bevel of the product at an angle of 45˚ and, using a grinder, make a trapezoidal cutout that follows the profile of the lamella.
After cutting the tiles, be sure to clean its surface from dust and crumbs.
ATTENTION! A simple way to design external and internal corners when installing a “hog” is to use ready-made ceramic corners. You can also purchase small square elements for this purpose.
Maintaining strict horizontal laying
To install rectangular tiles, the “staggered” method is often used - in a checkerboard pattern with offset options of 20%, 30%, 50%. To maintain the evenness of the horizontal masonry, strict control of the distance between the floor and the beginning of the first row of facing elements is necessary.
A “sliding” installation line can ruin the appearance of the kitchen.
The size of the tile seam
You can often hear advice that it is necessary to leave a gap between ceramic products during installation of at least 5 millimeters. Thick seams require very careful execution and do not always look aesthetically pleasing and beautiful.
Beveled tiles require special care in finishing the seams, since the relief of the elements involuntarily attracts close attention.
The color of the grout is not of primary importance, the most important thing is that all intertile spaces must be narrow and perfectly even. When making a wide seam, it will be difficult to fulfill this condition, so a gap of 2 millimeters is considered optimal (it is especially important to adhere to this rule when using the traditional method of installing beveled tiles).
When laying a “hog” without a chamfer, the permissible size of the tile joints is 5 millimeters.
Installation of overhead accessories
In some cases, it becomes necessary to mount additional accessories on the surface of the apron: sockets, shelves, holders. Choose a place to attach parts only on a horizontal line (seam).
Be sure to make sure that the outermost part of the accessory does not coincide with the facet of the tile, otherwise the product will look as if it is “hanging” in the air.
Marking vertical seams
When installing lamellas, it is necessary to accurately calculate the number of vertical rows of the apron: the edge of a wall or floor cabinet, the connecting plinth (installed to create a smooth transition between the cladding and the surface of the slab or furniture) may align with the central part of the tile, as a result of which the fit will not be tight.
What is a hog type tile: Photo and description
Kabanchik is a voluminous rectangular tile that has a chamfer and resembles a brick in appearance. This material appeared at the end of the 19th century, and was originally used for facade finishing work. This tile got its name because of the peculiarity of its manufacture - during the pouring of raw materials into molds, two technological holes appeared in the products, giving them a similarity to a pig’s snout. After firing in the kiln, the blank was divided into two parts and thus two identical tiles with a three-dimensional surface were obtained.
Hog tiles have a large number of varieties, both in design and shape, but the main distinguishing features are cut edges at an angle of 45 degrees, monochrome color and convex shape. It should be noted that tiles of this type can also be found without chamfer, that is, beveled edges.
The finishing material has a number of advantages, which explains its popularity among consumers:
- durability;
- high hardness and strength;
- easy to maintain, since due to the dense texture, dirt does not eat into the surface of the tile;
- resistance to chemicals, high moisture and temperature fluctuations.
Another important advantage of boar tiles is that when finishing they can be attached to uneven surfaces, which is why repair work is carried out much easier and faster.
Useful tips
- It is more convenient to install the slats before installing the furniture in the kitchen, but in this case it is necessary to make precise markings of where the interior items will be located. It is permissible to make an apron after placing the elements of the kitchen set;
- when calculating the required amount of adhesive when laying hog tiles, remember that the product is heavier than standard material of the same size, so more mortar will be required to fix it on the wall;
- When dismantling the slats or metal profiles after the glue has completely dried, under no circumstances pull the support towards you: you may accidentally tear off the tiles of the first row. To avoid this situation, remove the rack in a downward direction.
With the help of ceramic tiles “boar” you can implement the most daring design solutions in any kitchen, regardless of its size, wall color and interior style.
The only drawback of the material can be considered the cost, which is significantly higher than the price of ordinary tiles.
Boar tiles: why choose for a kitchen backsplash?
The decision to use wall covering on a kitchen work wall is usually a top priority in a given room's renovation process. Hog tiles are an excellent choice for protection against dirt and moisture. It will work in bathrooms and kitchens. This is also a good idea for an original panel. The appearance of such tiles will improve the impression of the space, as well as the overall order and cleanliness. The choice of materials for home decoration should be well thought out, as the material will last for many years, so there is no need to be guided by fleeting interior fashion trends. The boar tile celebrates triumphs in the latest implementations, supported by practicality.
Ceramic tiles are currently the most popular finishing materials for the kitchen. Thanks to them, interior design acquires a unique style.