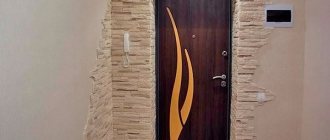
One of the options for creating both an original and practical interior is to design the doorway in the form of a beautiful arch. Now it has become fashionable to combine the kitchen and dining room, living room and bedroom into a single room. The arched opening in this case unites the rooms, but leaves some isolation behind each functional space. In rooms with high traffic, corridors, kitchens, dining rooms, they get rid of doors altogether, because household members get tired of constantly opening and closing them, and if the door is constantly open, its presence becomes meaningless.
Types of arches
The variety of designs of this element makes it possible to find a suitable option for any room style. Depending on the design idea, the vault of the structure takes different forms. Taking into account the appearance of the arch, the following types are distinguished:
- Classic. The most common, laconic and harmonious in a large number of interiors. They have a semicircular arch without protrusions, suitable for spacious, high rooms.
- Romantic. Their arches are rectangular, and the corners are somewhat rounded. They are usually used in wide interior openings.
- Portal. It has a laconic square or rectangular shape, which eliminates unnecessary labor costs, but is not applicable everywhere.
- Modern or British. An intermediate form reminiscent of classic and portal. The circle is smoothed, but cannot be called rectangular. Looks good in the openings of rooms with low ceilings.
- Trapezoid. The vault has a trapezoidal shape.
- Ellipse. A popular universal type of design where the corners are rounded. The most popular type of design for low, spacious rooms. Combines with other types, columns.
- Half arch or Thai. The arch is asymmetrical, the left and right sides are made differently, combining in one design an angle and roundings of a non-identical radius.
- Turkish. Originates in the palaces and harems of the Ottomans. It will require harmony with the entire interior, the presence of Mediterranean motifs in decoration and furnishings.
- Gothic. It has a spectacular sharp arch and can be the center of the interior.
- Arch transom. Its upper part is decorated with an insert made of plastic and glass. Stained glass and relief details are used.
About decorative stone
Among the popular materials that are used in the construction of arched openings, it is worth highlighting plasterboard, wood, brick and stone finishing. Each of the materials is complemented by a variety of decorative elements. Decorating an arch emphasizes the style of the room, helps change the dimensions of the opening, and disguise some defects. The decoration with stucco, forging and carving is good in its own way, but an arch made of decorative stone is the most impressive. There is no design idea that cannot be realized with the help of stone.
When using artificial stone inside a house or apartment, the requirements for its protective functions are significantly lower. But even here it resists mechanical damage better than other materials, does not corrode, and is not subject to rotting. The word “decorative” should not scare away lovers of natural things: the material contains cement, pumice, expanded clay, environmentally friendly fillers of volcanic origin, clay and slate derivatives. There are practically no shortcomings in raw materials.
Laying
Laying is done from bottom to top. You need to start from the corner of the opening-wall. The seam should be left approximately 4-5 mm. If corner stones are used, they must be glued from below. If flat ones are used, the installation should be done with an overlap.
During the procedure, you should not forget to check the horizontal positioning. Elements on the arc can be trimmed to maintain the required radius. This can be done with wire cutters or a grinder with a special attachment.
The edges must be sanded using a file. When the finishing is completed, you need to wait for the solution or glue to dry. After this, you need to start refining the seams. For these purposes, we use grout of the appropriate color. To perform the procedure, it is better to use a construction syringe. Otherwise, you can use a rubber spatula. You can make the tool yourself. To do this, cut a square piece of polyethylene, roll it into a cone, and secure it with tape. The tip of this element must be cut so that the resulting size corresponds to the size of the seams between the stones.
Related article: Small country flower bed (20 photos)
Next, use one of these tools to press the grout into the seams to completely fill them. In this case, you need to do everything carefully so that the material does not get on the front part of the products. All you have to do is wait until the grout dries - the decorative stone arch is ready.
Advantages
Decorative stone is practically free of any disadvantages. It is made from a material that is not subject to chemical and atmospheric corrosion.
In addition, it is called an environmentally friendly finishing material.
It contains cement, pumice, expanded clay. Pumice is a glassy substance that has a specific origin, similar to volcanic lava, since it is formed when the mass instantly solidifies. Pumice has an airy structure, so it does not let warm air out of the room. Expanded clay is baked clay balls.
Thanks to the wide range of artificial materials, you can choose an imitation of natural stone similar to natural material.
How to choose a decorative stone for arch design
To begin with, they assess the purpose of the premises being renovated, in which it will be used as decoration. Then the required quantity is calculated. For arched openings, narrow plates are more suitable, which are easier to attach to curved arches. It is better to purchase stones with water-repellent properties or then coat them with a water-repellent composition several times.
To calculate the required amount of material, add 5-10% to the cladding area. Material is saved by using stone scraps in the corners and for additional fragments. Primers are taken at the rate of double treatment of the wall. The amount of glue is approximately 3 kg per 1 m2.
Before laying on the surface, the packages with the stone are opened and the contents are mixed. First, individual fragments of the future decor are laid out on the floor, selecting them according to shades and size. Short ones are combined with long ones; their placement next to each other should look natural. Inspect the tile from the back side; there should be no foam layer on it that impairs adhesion. If there is one, clean it with a wire brush.
Selecting a stone by color
The perception of the color of the cladding is influenced by several factors. When choosing a material, evaluate its color at different times of the day, under natural and artificial light. At the southern and northern windows, on a cloudy and sunny day, the samples will look different.
Pay attention to what the selected facing material will be adjacent to: wallpaper, glass, decorative plaster. The texture and color of the products are selected in accordance, but not in one boring color.
The color choice is influenced by the history and style of the home. Some color may not suit the style and ruin it. Sometimes chocolate is better than black, and beige stones look better than gray ones. If there are colored specks, contrasts, and play of shades, this will create a more beautiful surface.
Stone classification
Depending on the materials used in production, the following types of decorative stone are distinguished:
- Porcelain tiles. This material is based on clay, feldspar, inorganic additives and dyes. After mixing, all components are pressed and sometimes fired. The material is distinguished by an abundance of shades and textures. It is possible to realistically imitate ornamental stones. The material is resistant to temperature changes, but is not resistant to chemicals.
- Agglomerates. This is an artificial stone, which includes marble, granite chips, and various additives. The binder is a polymer compound. The material is quite durable and tolerates temperature changes well. However, it is not without its disadvantages. It is not resistant enough to chemically aggressive environments, UV radiation, and wears out quite quickly.
- Stone made of colored concrete. This is the most common material for wall cladding of all those listed. It consists of Portland cement, sand and various additives that determine color and other performance properties. The use of fiberglass mesh in the production brings the material closer in strength to its natural counterpart and even to metal.
What styles are arches made of decorative stone suitable for?
Styles sometimes coexist with each other, sometimes one is born from the other. This is influenced by wars, fashion, crises. The use of decorative stone differs depending on the style of the room.
Classic
Strictness and proportionality, high-quality wood and silk are combined with refined finishing. It should be coarse, in small quantities. The most suitable single-color decorative stone.
Gothic
It is practically never found in its pure form, but you have to deal with the elements. Stained glass windows and forged elements are in harmony with decorative stone. Door portals framed in rough stone create a “castle” effect. The part of the arch with “losses” is impressive, where brick or different-sized stone masonry is visible.
Empire style
In the rich ceremonial decor with bronze, crystal, and bas-reliefs, the expressive texture of the stone will play an important role. The arches are laid out with relief fragments, framed with frames and friezes.
Country
In a wealthy country house there is always wood and decorative textured stone. Arches lined with stone harmoniously coexist with plastered walls.
African style
The arches are covered with stones of warm and hot colors: spice colors, brown, copper. Masks and wooden dishes, skins go well with mahogany, rosewood, and ocher relief stone.
Scandinavian style
The laconic northern interior is emphasized by light natural tones in the decoration. The relief of the stone will look much more advantageous with multi-level lighting.
Vintage
“Grandma’s” antique furniture and the exit from the room through an arch made of smoky brick will appeal to lovers of romance.
Techno
Here, concrete, exposed floor beams, metal and glass will be in harmony with the rough texture of the stone-lined arch, whitewash and peeling paint. An uneven corner of a brick wall with visible reinforcement would be quite appropriate.
Articles on the topic
Brick sides - what they are called, characteristics, instructions, advice from masons
Insulation of a brick house from the outside - mineral wool, polystyrene foam, expanded polystyrene, instructions, advice from masons
Brick plinth on a strip foundation - masonry technology, instructions, advice from masons
Brick pediment - advantages, disadvantages, masonry, instructions, advice from masons
How to paint the outside of a brick house - types of paint, instructions, advice from masons
How to plaster a brick base of a house - stages of work, instructions, advice from masons
Wooden floors in a brick house - types, how to install, instructions, advice from masons
Cladding a house made of aerated concrete with bricks - masonry, disadvantages, instructions, advice from masons
Reviews ()
Lighting and other ways to decorate an arch
It is important to properly design the visual expansion of space in order to result in an interesting object. Decorative stone alone creates a feeling of incompleteness. If the arch leading to the hallway or to the nursery is stylized as the entrance to a cave, a tunnel or the mouth of an exotic lizard, an additional way of decoration in this case is light and plants. Without vegetation, it is difficult to create an arch that will serve as a tunnel to the underwater world.
The lamps built into the arched opening do not spread light into the room itself, which is convenient at night. Illumination will add mystery to the arched doorway. You can't do without light here if the arch is the head of a dragon.
The color nuances and shimmers of the stone require good lighting. For such purposes, stylish sconces are hung and LED lighting is installed, depending on the specifics. The material goes well with living weaving plants and vines. The wide, uncomfortable opening is balanced with shelving and shelves on the sides.
Types of beautiful Arches made of Plasterboard: Do-it-yourself interior design
The element is universal: you can use different decorative materials. Depending on the general decoration of the premises, the following is used: colored painting, textured plaster, wallpaper, wood, ready-made decorative panels (MDF), stucco molding (gypsum, polyurethane), natural and artificial stone. An option to enlarge the room.
This combination allows you to rationally organize work in small kitchens. The arch connects to the table, which continues the work surface and becomes an additional place for storing kitchen utensils. Decorating the passage between the living room and the corridor with an arch gives the room light elegance or classical fundamentality. The premises radically change their appearance. For the image it is not necessary to use expensive wood or natural stone.
Advantage: 3.8 to 7 m² of additional space can be added to the standard size. Unlike balconies, loggias are included in the living area of apartments, so central heating communications can be laid in these rooms. For flower lovers, a winter garden is organized.
By regulating the temperature with electric heating, conditions are provided for tropical plants or flowers that can withstand cooler “weather”.
Do-it-yourself arch finishing
To create a stone structure in a house, you will need step-by-step instructions, a list of materials, the availability of which will be taken care of in advance.
Tools and materials
- Construction mixer for thoroughly mixing glue. In absence, they adapt a drill.
- Level, tape measure, mallet.
- A cutting machine is required.
- Glue container.
- Paint brushes.
- Pencil, sandpaper.
- Metal brush.
- Grout syringe, grout.
- Spatula or spatula, sponge.
- Wedges made of wood or plastic.
- Water repellent. Unlike waterproofing, it will allow the stone to “breathe”.
- Primer, glue, the stone itself.
Preparing the surface
This stage is carried out traditionally: the remnants of the previous coating are removed, the unevenness is smoothed out using sandpaper, then they are puttied using a primer. The primer is selected in accordance with the wall material.
If the walls are concrete, monolithic, a special adhesive primer is used. When working in a hot or humid environment, the back of the tiles should be wetted. Moisture-resistant plasterboard is dried well after priming.
Preparing stone for laying
The installation material is being reviewed again. In accordance with the markings, the finishing stone is cut correctly. When developing a sketch, take into account the installation method: end-to-end or with a seam formed. Trimming is done using a machine, giving the products an arched appearance. If necessary, clean the reverse side with a wire brush.
When using a hand saw you need to be careful. Excessive force when cutting leads to the fact that the stone breaks along unexpected lines.
Preparation of adhesive solution
The material is attached to the wall using silicone tile adhesive. Liquid nails, as well as cement-sand mortar, are suitable. The best option is a specialized composition, which is prepared in a bucket using a mixer. The composition is thoroughly mixed until completely homogeneous.
You should buy glue after purchasing the tiles and prepare according to the instructions. They don’t make a large supply, because... the solution sets quickly.
Laying stone
The design of the arch starts from the bottom. First, using a spatula, glue is applied to the wall, then to the back side of the stone. On both surfaces its thickness should be 5-10 mm.
An overly thick layer will cause the stone to slide and the cavity will lead to the formation of condensation. During the procedure, the horizontal positioning is periodically checked.
To finish the corners, use special shaped elements or lay the stone so that its edge protrudes to the thickness of the tile. The fragments on the other side of the corner will level the ledge.
The tile is applied to the selected location and pressed lightly. Using a level and a mallet, level and achieve a complete fit. When tapping, having determined the voids inside, the elements are dismantled, the glue is cleaned off, and the process is repeated again. The glue protruding along the edges is removed with a spatula. At the ends of the elements, the glue is not removed; it will contribute to their better adhesion to each other.
With the seamless method, the tiles fit tightly together. Provided that the material has been previously prepared, the process occurs quickly. By laying from top to bottom, clear boundary lines are obtained.
For masonry with jointing, special wedges of the required thickness are used. You can use plasterboard strips of different thicknesses or tile crosses. The beauty of the arch in the future depends on competent and careful execution of the work. If the thickness of the fragments used exceeds 15 mm, the technology requires a pause after laying 3-4 rows, giving them the opportunity to set.
Grouting and final stages
After the solution hardens, about two days later, the auxiliary elements are removed. Excess solution is also cleaned off. Prepare a grouting compound that fills all the seams. A construction syringe is used to fill the cracks. After half an hour, the seam is smoothed out with a special spatula or spatula. You can use a dish sponge to remove excess grout. In accordance with the design, grout of different colors and shades is used.
Arch in the house. Brick imitation
Today's master class will tell you how to decorate an arch in a house in the form of a brick using the papier-mâché technique.
Believe me, the imitation is simply indistinguishable from the real thing! Therefore, in order not to waste time, let’s get to work, and at the end you will be able to admire such beauty. First, let's decide on the list of materials that you will need: - cardboard packaging for eggs and boxes from household appliances, - Bustilat glue (thick PVA can be used), - starch, - mosquito net or for washing clothes, - rectangular shape the size of a brick, - brushes for paint and glue, - a basin or bucket, - rubber gloves.
1. Take cardboard, tear it into pieces and pour boiling water over it to soften it. It is advisable to add water several times. When two hours have passed and the water has cooled, take it with your own hands and begin to crush the pieces of cardboard to approximately the same size. If you have a construction mixer, you can grind with it. One batch of “bricks” yielded approximately this amount of raw materials. Rice. 2
2. After the gruel is ready, put it in a net and squeeze it well. Believe me, no press is needed here, everything works out great with your hands. Fig 3
3. The lumps that you got as a result of squeezing again need to be broken into smaller ones. Tear until you get the texture of natural stone. So don't overdo it. Now starch comes into play. Take two tablespoons of starch and dilute it in 0.5 cups of water. Now you need to pour this mixture into a saucepan with 1 liter of boiling water and cook the paste. Now pour the paper crumbs into a bucket and start gradually pouring the cooked paste into it. Remember, the pieces of cardboard should be slightly moistened, not flooded. Therefore, do everything gradually and slowly.
4. Add 3 tbsp to the mass. spoons of bustilate and mix everything thoroughly with your hands. You should end up with “minced meat” that does not crumble, does not spread, and when clenched into a fist, juice does not flow from it.
5. Now take rectangular shapes, cover them with polyethylene and put a lot of papier-mâché in them. In this case, you need to compact everything well with your fingers. Next, remove the brick from the mold, place it “face” on your palm, and apply glue to the wall with your other hand. After this procedure, place a papier-mâché brick on the wall and press it with your fingers over the entire area. Even if the brick loses its shape, it’s okay. The mass is malleable, so immediately give the desired shape to your brick. Rice. 4
6. There is one nuance in these bricks: the more moisture they contain, the more they will shrink. Therefore, calculate what distance there may be between them after drying. Rice. 5
7. When all the bricks have dried well (this is about 2-3 days), start painting them. Personally, I took white acrylic paint for interior work and mixed it with brown and brown colors. Try to thoroughly blot every brick and every depression with your brush so that everything is painted well. In a separate jar, I also added yellow and orange to this paint, and then used a semi-dry brush to show the volume (this can be seen on the top two bricks). Rice. 6
Basically, that's all. It turns out that this is an ancient brick arch without extra costs and effort. Don't be afraid to experiment, do it with pleasure and admire your work. Rice. 7
Become the author of the site, publish your own articles, descriptions of homemade products and pay for the text. Read more here.
Rules and secrets for laying facing stone from specialists
To create a natural look for the masonry, the stone in places around the edge is decorated with decorative chips. To do this, draw the desired line with a knife, and bite off the excess along it with pliers, trying to snatch off the excess in small pieces. Chips are smoothed with a file.
Large and small stones are alternated, and the joints of the slabs should not coincide from row to row. When finishing, which is not done from the floor, an auxiliary metal profile is fixed to the wall, which is removed after the structure dries. Clear and even corners and shaped parts are obtained using a grinder using a diamond wheel.
You can protect the arch from abrasion with acrylic varnish. When cleaning, use a broom, vacuum cleaner, or spray bottle, after which the drained water is simply removed from the floor with a rag.
Arches, as a rule, do not stop at finishing with decorative stone. This element looks more advantageous, echoing the same fragments on the walls of the room. The process takes a lot of time, but an arch designed in this way will decorate the house in an original way and bring additional comfort.
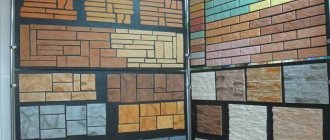
Decorative brick for arch
Decorative brick Loft R-12
Decorative brick-like tiles in Loft style R-12 red..
Decorative brick Loft R-14
Decorative brick-like tiles in Loft style R-14 brown..
Decorative brick Loft R-8
Decorative brick-like tiles in Loft style R-8 beige color..
Decorative brick Loft Clay
Decorative brick Loft Loft Clay brown...
Decorative brick Avignon 404
Decorative brick Avignon 404 beige color..
Decorative brick Avignon 485
Decorative brick Avignon 485 brown...
Decorative brick Alicante 361
Decorative brick Alicante 361 gray...
Decorative brick Alten Brik 310-00
Decorative brick Alten Brik 310-00 white...
Decorative brick Antique brick 32320
Decorative brick Antique brick 32320 white...
Decorative brick Bremen 052
Decorative brick Bremen 052 beige color..
Decorative brick Bremen 769
Decorative brick Bremen 769 brown...
Decorative brick Bremen 778
Decorative brick Bremen 778 brown...
Decorative brick Bremen Brik 305-00
Decorative brick Bremen Brik 305-00 white...
Decorative brick Bremen Brik 305-70
Decorative brick Bremen Brik 305-70 brown..
Decorative brick Brooklyn 195
Decorative brick Brooklyn 195..
