Video on creating a flowerbed with your own hands
Concrete flowerbed - review of worthy solutions for a summer residence
Unusual flower beds in a summer cottage - a review of the best options
Mixborder - a review of the best colors according to experts
Vertical flower bed - instructions on how to plant petunias
Mulching a flower bed - detailed instructions
Blooming stream in the yard - recommendations for creating
A flowerbed of perennials - how to make the right choice and not make mistakes
We create a flowerbed at home with our own hands
Load more videos
- >
Concrete flowerbed - review of worthy solutions for a summer residence
- >
Unusual flower beds in a summer cottage - a review of the best options
- >
Mixborder - a review of the best colors according to experts
- >
Vertical flower bed - instructions on how to plant petunias
- >
Mulching a flower bed - detailed instructions
- >
Blooming stream in the yard - recommendations for creating
- >
A flowerbed of perennials - how to make the right choice and not make mistakes
- >
We create a flowerbed at home with our own hands
Ideas for creating beautiful flower beds at the dacha (photo)
The desire for innovative experimentation allows us to realize our own creative ideas for arranging unusual flower beds with various ornamental motifs and color combinations. They give the dacha a complete look and magnificent design. After looking at ideas and photos on the Internet, you can choose various options.
The ribbed metal flower bed is very strong and durable
Decorative forged objects harmoniously complement the surrounding landscape
Two colors
In flowerbeds of any configuration, you can create an interesting composition by choosing varieties of two shades. In this case, the pattern can be very different.
For example, one color creates a central bright spot, and the second frames it, giving it a unique sound. In such a situation, a contrasting solution is required. You can make a drawing of the night sky or choose other variations.
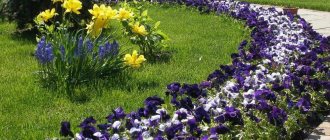
The combination of blue and yellow looks beautiful in any design.
Application of pots
It is convenient to create a flower bed from already flowering plants that were previously grown in pots. They are placed on the steps near the house, hung on strong ropes, or completely buried in the ground in a designated area. As the flowers fade, it will be easy to change varieties.
If desired, make a different arrangement, select a new color scheme. Such a mobile flower bed can easily be moved to another place.
Flowers in clay pots look great
The use of tulips to decorate the porch of a house has become a fashionable trend in modern landscape design.
A variety of colors and paints will delight their owner for a long time
Planting flowers in pots - a simple and creative solution for planting tulips
Vertical flower beds
There are many options for solving such a flower garden. They successfully use pipe scraps, the side wall of which is cut out, filled with soil, plants are planted and hung in several tiers. It’s easy to decorate the wall of the gazebo by placing flowerpots with pots and flowering crops on it.
If desired, a special structure is made - wooden or metal with several tiers, most often in the shape of a pyramid. For this purpose, boxes and containers of different sizes are used, which are laid out at the required height. Old ladders, chests of drawers, shelving are adapted.
A multi-level structure made of wooden boxes is excellent for planting low-growing plant species
One of the advantages of vertical flower beds is their mobility.
The concept of a flower garden and flower bed
A flower garden refers to any specially planted ornamental plants. There may be a complete absence of a clear shape or border of the plantings. Plants can be placed in any mixture.
A flowerbed is a clearly organized planting. Flowers are placed structurally, in a given sequence. There is symmetry here. The contour of the flowerbed is clear and closed. The shape usually has geometric outlines.
Methods for arranging flower beds and flower beds
Flower beds are organized in any convenient place. Plants can be planted in disarray under trees, close to a fence or wall of a house, between a stone embankment. Flower beds can have a certain structure or grow as needed.
Flowerbeds are located in places with minimal space restrictions. Often plants are planted surrounded by a green lawn.
The flowerbed is often adjacent to garden paths. Occasionally, structural flower plantings border the fence and are close to the house.
How to draw a flower bed with colors step by step?
Drawing a flower bed with paints is a little more difficult than with pencils. However, it will be easier to cope with this task if the process is divided into stages.
Step 1:
- Using a simple pencil, draw the outlines of the future flower bed and flowers, as described above. Make the outlines very thin so that they do not show through the paint later.
- There is no need to draw details of flowers and leaves. In addition, when painting with paints, it is better to avoid depicting too small colors and their wide variety.
- Choose no more than four types of plants, preferably contrasting in color and size. Then the colors in the drawing will not merge, and the picture itself will turn out more picturesque
Step 2:
- Start with the lightest and brightest plants
- Place them in the center, making them the focus of the picture.
- It will be better if these flowers have tall stems (roses, loosestrife, peonies)
Step 3:
- Add darker shades, gradually leading them into the background
Step 4:
- Draw the background of the picture lightly and airily. To do this, dilute the paint very strongly with water.
Step 5:
- Draw dark green grass between the flowers. It is more convenient to do this with the edge of a brush
Step 6:
- Draw the details of the composition and the contours of the plants with colors of a more saturated shade.
Step 7:
- Carefully work out the buds of all plants located in the center and in the foreground. To do this, use a thin brush to outline the outline with paint that is a couple of shades darker than the main color.
- Draw the petals. Make a smooth transition from dark to light shades. At the base of the bud, near the stem, add just a little green color
Step 8:
- Make the plants in the background more blurry. To do this, use a semi-dry brush to very carefully lightly brush the contours of the plants.
Step 9:
Bring your painting to life by adding shadows and highlights. When working with paints for the first time, consider the following:
- Make sure that the brush is not too dry (so the paint will not adhere well) and too wet (excess water will form spots and streaks in the drawing)
- mix paints on a palette (or white construction paper)
- apply strokes not with the tip of the brush, but with its flat surface, placing the side in accordance with the location of the buds and inflorescences
- Paint the background of the picture with wider strokes. To do this, it is better to use a different brush.
- draw details with the tip of a brush
- start tinting the picture with a transparent layer, gradually darkening it in the necessary places by passing the color multiple times, as if layering one layer on top of another. This will avoid unnecessary darkening
- so that the bottom layer of paint does not wash out and the shades do not mix, before applying another color to the drawing, let the previous layer dry
- periodically move away from the picture to look at it from some distance. This way it will be better to see the shortcomings of the work that you can correct.
Predominant plants
A mix of various plants is planted in flower beds. There are annuals, perennials, deciduous shrubs, and conifers here. The construction is not limited to plantings. The presence of heterogeneous relief, stones, and various decor is possible.
Plants in a flowerbed are planted in strict sequence. They take into account height, spreading, flowering period, and decorative appearance. Annual crops are used more often. Herbaceous perennials may be present.
Regular plantings
Regular flower beds are characterized by the creation of a complex planting trajectory. Ornate lines intertwine into a bizarre pattern. It turns out to be a kind of carpet of flowers of different types.
Caring for such a flower bed requires special attention. Required:
- regular weeding;
- thinning;
- replanting new plants.
Regular flower beds are rarely made at the dacha. This option is typical for city parks. Special services are involved in maintaining the flower garden.
Irregular plantings
It is easier to arrange flower beds near the house on an irregular basis. In this case, the performance is characterized by a free style. Plants can be arranged linearly. Flowers are planted in rows or groups.
Ornamental grass: review of the best decor options and instructions for using ornamental grass (170 photos)- DIY flower beds - 180 photos of unusual ideas for beginners and features of their application
Garden arch: 145 photos of the best models and rules for their use in modern projects
It is recommended to carefully select varieties based on height and flowering time. It is better to alternate large specimens with low-growing varieties, ornamental grasses, and cereals.
Basic principles of landscape design of the local area
In order to understand how to design flower beds near the house, you need to understand the basics of landscape design. Landscape design is the art of organizing space using natural elements - plants, stones, trees. This direction is subject to the basic artistic principles of harmony.
The choice of plants for the flower garden in front of the house must be made taking into account climatic conditions and soil characteristics
Principles of harmony:
- Integrity.
- Balance.
- Proportionality of forms.
- A color scheme.
Integrity presupposes the unity of all elements on the site. All of them must be made in the same style and create a single composition. These could be identical elements in different parts of the site or unity of color in decorative compositions. To achieve integrity, you need to immediately choose a landscape style and create a general plan. This is especially important for the entrance group, that is, elements placed in front of the house. Since this part of the space creates a general impression.
Roses, Japanese quince, chokeberry or hazel are planted in a sunny place. Among herbaceous plants, bells, daisies and marigolds grow well in the sun
Balance involves evenly placing elements in a composition. In the flower garden in front of the house, these can be patterns of flowers, borders along the edges of flower beds and paths. Balance can be symmetrical or asymmetrical:
- Symmetrical balance involves repeating shapes in a mirror image around a center line or point.
Such a center could be a house, a central path, or a flower bed in front of the house. The path from the gate to the porch of the house is often chosen as the central line of the composition. - Asymmetrical balance is obtained as a result of the chaotic placement of elements, which at the same time maintain a single structure. For example, flower beds under windows of the same scale and shape, but of different sizes, an irregularly shaped rockery on the lawn, ornate paths.
A well-arranged flower garden will adequately decorate the front part of a personal plot
Harmony in an asymmetrical balance is more difficult to achieve, but asymmetry looks more natural and picturesque.
Proportionality of forms. Flower beds, borders, artificial decorations, boulders should not dominate each other and create an oppressive impression. A smooth transition from one element to another is important. The transition from larger to smaller shapes creates a natural perspective.
When creating a flower garden, harmony of shapes, colors and heights of plants is important.
To combine colors, you can choose ornamental plants of the same color scheme or contrasting with each other. How to design flower beds near the house - there can be many color solutions. For example, make the borders of the paths from white flowers, and the design of the flower garden in front of the house from blue and light blue. Compositions in which plants of the same color are selected - red or purple - look stylish. White flowers easily set off any contrast. The main thing is not to plant different plants of different colors and sizes all together.
Tall plants attract attention and define the structure of the flower garden
Lower plants fill the space of the flowerbed and serve as the background of the composition.
Additional principles of landscape design follow from the basic artistic rules:
- Naturalness.
- Verticality.
- Plant combination
Naturalness. One of the principles of landscape design is enjoying nature. Therefore, to achieve naturalness, you should not get carried away with artificial elements - fences, statues, as well as straight lines and strict geometric patterns. It is better to frame the figures from a grass or flower border, marking the boundaries of the elements with natural stones or boulders.
Naturalness involves the use of unpretentious herbaceous plants - lupins, peonies, phlox or daylilies
The easiest way to use a heuchera, tenacious or arabis as a living border for a flower bed
Verticality. New trends in the design of territories. It involves the development of ensembles not only in the horizontal, but also in the vertical plane. This could be decorating a flower garden in front of the house with vertical plants or in the style of an alpine hill. Creating hills and elevations increases the area and provides additional opportunities for planting.
For vertical gardening of an area located on the eastern or western side of the house, Amur grapes are perfect - a powerful vine that quickly grows up to 8 meters long.
The combination of plants suggests not only beauty, but their biological harmony. It is important that the plants match their natural requirements: light, watering, soil acidity. Before you plant a flower garden on your site, you need to find out how much space the plants occupy in adulthood.
The flowerbed on the north side of the house is decorated with shade-tolerant plants - juniper, thuja occidentalis, microbiota, bergenia and hosta
A wide variety of light-loving shrubs and flowers are suitable for a flower bed on the south side of the house.
Layout, marking
Before planting plants, it is recommended to clearly compare the characteristics of the specimens intended for use.
With the right approach to the matter, it is possible to achieve the appearance of a “blooming carpet.” At the same time, the flowerbed will delight you with its beauty continuously from spring to late autumn.
Before planting plants, markings are also carried out. To do this, set the shape of the boundaries of the structure.
For a rectangular or square flower bed, it is easier to draw boundaries. To complete the circle you will have to use a compass made of pegs and rope.
Flower bed - pencil drawings for children to sketch: photo
Drawing is extremely useful for children at any age, as it develops:
- fine motor skills
- fantasy
- Creative skills
- attention to detail
- perception of objects in all their brightness and completeness
In addition, the process of depicting the world around us is a fascinating and interesting activity. But some children refuse to draw difficult things for fear of failure. Arouse your child’s interest in drawing and self-confidence using our tips:
- ask your child what flowers he wants to display in his flowerbed
- teach him to draw a flower from the middle, and then draw a stem with leaves
- explain that when coloring a drawing, the paint or pencil strokes should not extend beyond the outline
- stop working when you see that the child has lost interest in the activity. Don't force him to draw if he doesn't want to.
- praise his work and hang the drawing in a visible place so that the child knows that you like the result of his creativity
To make it easier for a young artist to draw a flower bed, we offer several options for sketching.
Plant layout rules
The photo of the beautiful design of the flower bed shows that plants of different heights and colors are used for planting. Tall specimens are suitable for the central part. The dimensions of the components are gradually reduced as they move towards the edges.
It is better to take annuals as a basis, the flowering of which continues throughout the summer. Plants are replanted annually with a few perennials. The duration of flowering of “permanent” specimens is usually short.
Do-it-yourself flower beds from scrap materials (photo)
By applying a creative approach, you can implement a fashion trend that has been active for the last few years and involves the use of a variety of obsolete items to decorate flower beds.
They restore chairs, armchairs, umbrellas, carts, beds, bicycles, wheels. Old buckets, watering cans, and shoes are used. If desired, they are primed and turned into real art objects, covered with various patterns, decorated with beautiful pebbles, shells, and mosaics.
Incredibly beautiful and stylish handmade decor in the form of an old bicycle decorated with flower pots with flowers
Old things are also objects of art, if you find the right approach to them
For a summer resident with golden hands, not a single old thing will go to waste
An original idea for decorating a site
Flowers on a stump
By cutting down old trees, they leave stumps that will perfectly serve as the basis for a beautiful and elegant flower bed in the country. It is enough to hollow out a depression in the center, place a vessel with soil in it and plant your favorite plants. A log in which a place for soil is prepared by squeezing out the side part will be useful.
Flowers on a stump will always be the center of your attention
Flowerbed from a stump
Second life of car tires
Used tires remain in demand in the design of flower beds, as they attract attention due to their quick installation, the ability to create various compositions, and mobility. They can be primed and painted.
If you have artistic abilities, they apply interesting patterns, whole pictures, decorate them with marble, malachite, wood and other natural objects. In such a frame, any unpretentious plants will look advantageous.
Unconventional use of an old car tire as a hanging flower bed on a tree
Stone fencing
Stone masonry perfectly strengthens and decorates the edges of a flower bed of any configuration. If a static flower garden is planned, then a cement-sand mortar is used during construction, which makes such a frame durable and strong. It looks elegant even without greenery.
Low flower beds can simply be lined with cobblestones or broken bricks. Elements of such a frame can be easily moved to another place if necessary.
You can use ordinary stones to beautifully decorate a flowerbed in your dacha.
Bottle flowerbeds
To decorate the perimeter of flower beds, bottles - plastic or glass - are increasingly being used. If necessary, they are selected in the same color. Install vertically with bottoms up, digging into a previously dug trench.
Under the bright rays of the sun, such objects look very beautiful and impressive, creating enchanting light reflections. The unusual sound is enhanced if you select bottles of different colors. Before installation, it is recommended to fill them with earth for stability.
Using bottles as a fence for a flower bed is a very bold, but justified decision.
Wooden fencing
Wood always looks prestigious, interesting, unusual. To decorate the perimeter of flower beds, tree cuts, dies, cuttings of boards, clapboards, and picket fences are used. They make wattle fences from willow vines and build low fences. There are many options.
Flowerbed under a tree . If the area of the plot is limited by free acres, the solution is to plant flowers near (around) the tree. At the same time, it is important to choose shade-tolerant and unpretentious varieties of flowers and plants.
Bright flower bed under the tree crown
Unpretentious species of low-growing flowers are well suited for planting under a tree
Selection and planting of flowers
A DIY flower bed at the dacha usually includes the following types of plants:
- Tall. Delphiniums, lupins, rudbeckia, and irises are used.
- Medium height. Preference is given to asters, zinnias, and lavatera.
- Short. Petunias, herbaceous carnations, violas, and daisies are often found.
Seedlings are planted in the flowerbed in May after the perennials have emerged. When using exclusively annuals, sowing with seeds is permissible.
It is important to select plants taking into account the needs for composition and soil moisture. This will ensure a comfortable neighborhood for the components.
Planting flowers in a flower bed
The best time for planting flowers is spring, and for bulbous and early-flowering perennials, autumn
1Irises should be replanted after they have flowered, this is the most favorable time, they are at rest, and after a month and a half they begin to grow a new root system.
2When planting perennial plants, remember that the planting holes should be such that the plants can easily spread their roots into them.
3The depth should not be excessively large; the best option is when the lump is completely located in the new hole.
4Freshly dug soil around the planted plant should be compacted, eliminating voids in the area where the root system is located.
5It happens that after the first watering the soil sags; in this case, add fresh soil.
6Leave a small depression to make it convenient to water the plant.
Basics of care
Plants in irregular flowerbeds begin to be cared for immediately after planting the seedlings. Timely watering is needed. We must not forget about loosening the soil after moistening. When the plants are fully rooted, weed and water as needed.
It is important not to miss the budding period of the flowerbed components. At this time, the plants are fertilized. Use complex fertilizer. Fertilizer is applied in liquid form at the root.
It is permissible to use a sprinkler system. In the fall, humus or compost is added to the empty site.
During the flowering period, it is important to regularly inspect the plants. It is necessary to promptly remove weak specimens and wilted flowers. Healthy, strong plants will produce more buds.
Composition design
A beautiful flowerbed design is impossible without following the rules for organizing a flower garden. Recommendations for beginners are as follows:
A small flower bed is easier to care for. It is better to make several small flower beds than a single large composition.
Visually voluminous flower beds are perceived worse. It is recommended to make a round, square or slightly elongated rectangular version.
The flowerbed on the lawn does not need to be further framed. The division is best done using low, spreading annuals.
Plants should not be planted crowded. They will stretch out and bloom weakly. Dense plantings are more likely to develop diseases.
Proper design consists of well-selected, well-planted plants. It is contraindicated to litter the flower garden with excessive decor.
How to draw a flower bed with a pencil step by step for beginners and children?
If you want to create a similar drawing, but you are only taking the first steps in fine art and don’t know where to start the process, use our tips.
Stage 1:
Prepare the necessary materials:
- paper
- simple pencil
- eraser
- colored pencils
Stage 2:
Determine the shape of the flowerbed you will draw:
- square
- in the shape of animals or geometric shapes
- multi-level
At the same time, keep in mind that in life we look at objects from a certain angle. In order for the image to be believable, it is necessary to stretch the shape of the flowerbed in width, transforming:
- circle to oval
- square to rectangle
- thinner and elongated silhouettes
Stage 3:
Using a simple pencil, draw guide lines that will help create the composition of the drawing:
- horizontal - the lower part of the flowerbed should be wider than the top, as it will be closer to the viewer
- vertical - in the middle to determine the center of the future flower bed
- additional – to designate auxiliary elements
Draw these approximate lines thinly, without pressing hard on the pencil. You will need to erase them with an eraser afterwards.
Stage 4:
Think over and draw the border of the flowerbed in the form of a brick fence:
- stepping back from the contour of the flowerbed at some distance, circle it
- draw in the outline the bricks, which are larger in the foreground and get smaller as they move away
- in the background, do not draw the details of the fence, as the flowers will cover it
Stage 5:
Use jagged circles to mark the location of the plants:
- in the center depict tall flowers or herbs (roses, peonies)
- Place low flowers (daisies, poppies, lilies) on the sides and in the front of the flowerbed.
Stage 6:
Start drawing flowers in the designated areolas. Since there are a large number of plants in the flowerbed, depict them in different stages of flowering:
- opening buds
- lushly blooming
- fading
- with seed pods
We offer several schemes for drawing some colors.
- draw small circles with a wavy line
- divide them inside into four parts
- in the middle of each circle, draw the middle - a box
- around it in an oval in two rows, mark the seeds with dots
- from the flower heads draw tall thin stems
- add two sharp leaves on the sides
Chamomiles:
- draw circles for the heads
- Inside each one, draw more circles, but of a smaller diameter - these will be the centers
- draw thin petals, trying not to go beyond the outline of the outer circle
- complete the stems
- draw leaves that look like dill
- show the structure in the middle of the flowers with strokes, and the veins on the leaves
- draw three stems that converge at the bottom to one point
- from it, take two elongated oval sheets ending with a sharp tip
- Place thin branches-hooks on the stems on which the flowers will be held
- draw flower corollas
- make a wavy outline at the bottom of each
- At the top of each stem, draw berries in circles
Roses:
- draw several elongated ovals
- draw long, curved stems from them
- draw the outer petals using wavy lines on the oval
- At the top of the oval, draw a small horizontal spiral - these are the inner petals tightly adjacent to each other
- under the bud, make the stem a little thicker to create a sepal
- place thorns and leaves on the stem
Peonies
:
- draw large circles
- take the stems away from them
- inside the circle draw petals in the form of wavy lines and crescents
- erase the template contours of the lily with an eraser
- start the image from the center of the flower
- from it draw six curved lines
- around every second line draw elongated petals
- the remaining lines will also become the center of the petals, but will be slightly covered by the previous ones
- draw the stamens in the center of the flower
- add a stem with thin leaves
Tulip:
- draw a thin graceful stem
- draw an oval on top - the future bud
- draw wide curved leaves
- on the bud, using smooth lines, draw vertical, narrow petals that hide behind each other
- finish the top of the oval with a wavy outline
Iris:
- draw a circle - this is the lower central petal
- on the sides, draw two more with smooth lines, a little narrower than the middle one
- above it draw two wavy elongated petals
- make the outline of the flower a little torn and uneven
- draw the straight stem and narrow leaves
Stage 7:
Finish the drawing:
- draw the details
- add shadows
- color with colored pencils
- erase guides and reference lines
As you can see, drawing a flowerbed with a pencil is not at all difficult. If you draw with children, help them. To make it easier, find photographs of flowers and draw from them. You can also use diagrams that are available on the Internet.
Unusual Design Ideas
A classic flowerbed will not always be the right solution. Sometimes an unusual flower garden is a way to diversify a boring design. There are different ideas that are easy to implement in reality.
Raised Flower Beds
The classic version simply rises upward. The result is achieved with the help of rigid fencing of the territory.
Stones, concrete slabs, and slabs are used as borders. A higher earthen mound is made inside the resulting box.
How to draw flowers step by step
You can see diagrams for drawing flowers below, but for now let's talk about how to draw flowers
step by step, and what is needed for this.
To draw flowers you will need a standard set of drawing materials, namely:
- simple pencils;
- eraser;
- colour pencils.
If you want to draw flowers with paints, then you will need paints instead of colored pencils. You can decorate your favorite flowers with a simple pencil, but you must admit that flowers will look much more beautiful in color.
A sketch of a flower is best done with a simple pencil, because lines drawn with a simple pencil can always be easily corrected with an eraser. For sketching, soft pencils marked “3B” or “4B” are best suited. Once you've made a sketch, feel free to erase the extra lines and color with colored pencils or paints! When decorating flowers, always try to choose bright colors.
In most diagrams of how to draw flowers step by step with a pencil, you can see that first the outlines of the flower are drawn with a pencil, and then the flower is painted with color.
When decorating flowers with colored pencils, take your time! Apply strokes horizontally or vertically, that is, in one direction. If you paint it in different directions, you will get “straw”. And don’t forget that in the beginning you shouldn’t put too much pressure on the pencil.
As a rule, drawing a flower begins with a bud, and then draws the stem and leaves.
How to draw flowers step by step with a pencil: diagrams
I specifically selected the easiest diagrams on how to draw flowers step by step with a pencil, so that it would be easier for a beginner to draw flowers. Once you get past the easiest flower drawing patterns, you can move on to more advanced drawings.
Good luck drawing flowers that will decorate your cards and drawings for various holidays!
If you liked the diagrams on how to draw flowers step by step, share them with your friends!
How to draw flowers
How to draw flowers
In this lesson we will look step by step how to draw beautiful flowers. We will take a rose as the main flower. Typically, a rose is a flower with five petals and stems containing needles. The most popular roses are red. But there are also other colors: white, yellow, pink...
Let's start drawing flowers with a simple pencil. You just need to look at the computer monitor or print the page and repeat step by step, as shown here.
For convenience, the red lines show what will be drawn at a specific drawing stage. The black lines show what was drawn in the previous steps. As they say, let's go.
Step 1
. For stems, draw two wavy diagonal lines that intersect each other. We draw circles at the top of each stem to show where the flowers will be.
Using curved lines we draw leaves on the stems.
Step 2
. Inside the circles we make sketches of the petals. Petals should be drawn in wavy arcs. At the same time, do not forget that another arc emerges from one arc, which provides the effect of overlapping petals.
Draw another line for the flower stems.
Step 3
. We give shape to the leaves, drawing contours with uneven lines. We draw the main vein through the center of the leaves. Add a second line for each stem that has leaves on it.
Draw several thorns on the flower stems.
Step 4
. We finish drawing the more uneven (natural) edges of the petals. We add small veins, drawing them from the thick central vein to the edges of the leaves.
Now we carefully erase all the remaining auxiliary lines of the sketch and outline the drawing again to give it a more finished look.
Here is a video tutorial that shows you step by step how to draw flowers with a pencil. Here we got a whole bouquet of flowers.
Try to go through the entire lesson step by step and write what you got.
Do you like flowers? This is one of the most beautiful creations of nature. It's just a pity that they fade quickly. What if you draw them? Of course, the original from the Creator cannot be compared with an attempt to reflect reality on paper, but such flowers will delight you at any time, as soon as the desire to enjoy the beauty arises. A step-by-step lesson will teach you how to draw, or more precisely, a fiery primrose.
Take a close look at the sample:
Let's start by drawing two circles on a sheet of paper with a simple pencil, thereby indicating the size of the flowers and their compositional location:
Draw a small circle and five petals in the center of each circle.
We learn to draw flowers, but at first the sketches don’t turn out the way we would like. Using light movements, apply as many lines along the intended contour as you think are necessary to give the petals the desired shape. Do not press too hard on the pencil.
Notice that each petal slightly covers its neighbor on one side.
Start drawing the leaves:
Since this is a top view, at this stage of the lesson, in pencil, it may seem to you that the leaves don’t look much like themselves. Be patient. Soon they will take on a realistic look.
When you have drawn all the necessary contours, carefully erase the excess strokes with an eraser. Go over the entire drawing with a soft eraser, desaturating the brightness of the lines from a simple pencil, but so as not to lose sight of the main outlines of the sketch.
It's time to use
On top of the barely visible lines, draw the outlines of the petals with an orange pencil and the leaves with a green pencil.
Half of the lesson on how to draw flowers with a pencil has been successfully completed!
Fill in the flowers and leaves with a matching tone. But do it not like in kindergarten, but masterfully: the direction of all strokes should go along the petals. Not across and not diagonally! Otherwise, such shading will destroy the natural appearance of the drawing. Trust professional experience on how to draw flowers with a pencil.
Leave the core of both flowers white (empty), we will add color to them later. And at this stage, continue working with the leaves. They just need to be shaded and given a green color. Don't forget about the tops of the pistils - circle them in yellow.
Take and work the central part of each flower.
Add tone to the petals. Its thickness should be smoothly distributed from light, almost white, to deep. A bright pink pencil will enrich the carmine core.
As part of the lesson on how to draw flowers with a pencil, a useful tip: always check the combination of two or more colors on a separate sheet or in the margins of the drawing if you are not sure what the intended color combination will look like. This simple action will save a lot of time and avoid disappointment. How beautiful is the fiery primrose!
Usually children draw only simple flowers like daisies; other types of flowers seem complex to them. And parents, too, cannot always show off their artistic abilities. Thanks to these simple step-by-step diagrams, you can explain to your child how to draw flowers - daffodils, tulips, roses, snowdrops and others. Step-by-step drawing is a much more effective method than trying to redraw an object from a photograph.
Vertical flower beds
The base is a flowerpot holder. The bowls are placed at different levels. Low-growing plants are planted here.
You can use indoor options. Vertical flower beds are an excellent solution for limited space.
Floating Islands
This option is suitable for a summer house with a pond. The flower bed is organized in a foam bowl. The base is secured to the “anchor”. You can make holes in the bowl. In this case, the flower garden will not have to be watered. Green “pets” will receive moisture directly from the reservoir.
It’s not difficult to beautifully arrange a flowerbed on your site. It is not necessary to have landscaping skills. It is enough to follow the rules, compliance with which will lead to spectacular results.
Creative ideas for creating a flower garden
By placing a large pot with a soil mixture inside on its side, they create a flower stream by planting plants starting directly from the neck. A curved line looks especially impressive.
If there is a small pond on the site, fix miniature pots with flowering plants on foam plastic and lower them into the water. Such floating flower beds add a romantic touch to the surrounding atmosphere.
Floating flower bed
An original flower pole is created from a chain-link mesh rolled into a cylinder shape. They fasten it with wire, cover the internal space with agrofibre and fill it with soil. Ampelous varieties of flowers are planted in the cuts cut on the side walls.
A flowerbed made by yourself will become the pride and decoration of your site
The activity of creating flower beds yourself becomes exciting and fruitful if you approach it creatively and systematically. Introducing your own ideas into ready-made solutions makes any version of flower beds unique and original.
Author of the article: Lastovskaya Lyudmila Viktorovna
Tags: flower beds
- Related Posts
- Coniferous trees and shrubs - garden design tips for beginners
- When to plant tulips: varieties, planting rules, growing secrets
- Roses - how to grow on your own plot: planting, pruning, care, diseases and pests
« Previous entry