Materials for a summer shower
Depending on your budget and needs, almost any building material intended for outdoor use can be chosen to build a shower. It can be a frame, block structure or a building made of wood, brick, or stone.
To assemble the frame, a metal profile or pipes are most often used. You can assemble the booth yourself using a grinder and a welding machine, using PVC film, tarpaulin, profiled sheets and plastic panels for cladding.
In my ideal scenario, make a three-story house, the last floor would be an attic. At the same time, the house would not be small and wide enough to accommodate enough technical and utility rooms, as well as bedrooms and recreation areas, including a workshop and a winter garden. And in the future, the garage itself in the house should be large, for two cars + space for various things. Agree, such a house can be placed on 6 standard acres, but it will be a house, but without a garden and a cozy local area.
Watch the video: Do-it-yourself summer shower at the dacha
Showers made from these materials can also be purchased ready-made. As a rule, they are equipped with tanks with a capacity of 200 liters; there are models of summer showers with heated water and a changing room. The price range (in the Russian market - 15-30 thousand rubles) is determined primarily by the cladding materials.
The advantage of buying a ready-made summer shower: professionally verified dimensions of the structure, adequate selection of fasteners and moisture resistance of the cladding.
Another factory-made option is plastic showers with non-dismountable closed cabins, with a built-in sink, combined dressing room and electric water heater.
Making a shower stall
Organizing a summer shower for your dacha with your own hands is very simple - select a container, install the base behind the house and you can practice water procedures. This is everyone's opinion until the construction process begins. And then a number of questions begin to arise regarding parts, drainage, water outlet, and cabin dimensions.
We will tell you all about the intricacies of the structure and teach you how to make a summer shower for your dacha with your own hands with photo examples.
It is necessary to consider what features the buildings have:
- Before starting construction, you need to choose a place that will be fully illuminated during the daytime. Thanks to this placement, the water in the tank will heat up as much as possible during the day and its temperature will be pleasant for swimming.
- The area should be hidden; swimming is still a hygienic procedure. Be sure to take care of a thick curtain or door.
- As noted above, you need to take care in advance of a high-quality drainage and drainage system; how convenient it will be to use the shower and the stability of the structure depend on them.
Carefully consider the process of heating water; will it be natural or artificial through the use of an electric heating element? Please note that using natural water heating is more economical, but it is unlikely that you will be able to take a shower in bad weather. Artificial heating will not depend on weather conditions.
Modern models of containers made of plastic allow you to always have heated water available, so in the summer there is no need to install additional heating elements. If you have to use a shower during the demi-season periods, then you need to think about installing a heating element first.
Once the nuances are taken into account, you can think about a suitable design option.
Let's consider the process of constructing showers made from:
- wood;
- polycarbonate.
Wooden buildings are the most common, wood is easy to process, its use does not cause difficulties, and the material itself holds its shape well and retains heat, which makes it possible to use the shower even in bad weather.
How to build a booth:
- To construct the frame you will need wooden beams. For racks located in the corner, blanks with a cross section of 100x100 mm are used. A container for liquid is placed on top. Based on the parameters of the timber, the ideal volume would be 200 liters.
- Several additional racks are added to the front of the structure; a size of 50x50 mm is suitable. This parameter is enough to hang the door.
- The corner posts at the front are installed 20 cm higher than those at the back. Thanks to this, the slope of the roof is achieved. If a water container is used instead of a covering, then each rack is placed at the same level.
The racks are attached to the frame below using special hardware and mounting angles made of metal. Repeat similar steps on top.- A door is installed on the finished structure. For the door structure, boards are used, which are knocked down with several lintels and one slatted slant so that the door does not warp.
Finally, the finished structure can be coated with paint or varnish, and the inside can be covered with film so that the wood does not begin to swell after use.
Now let's look at the popular version of a summer shower, which is decorated with polycarbonate.
To make such a structure, you will also need a frame; it is not advisable to use wood here; it is better to use metal profiles with cross-sectional parameters of 40x60 mm. The principle of operation is practically no different from the previous wooden version. Stands with jumpers are also used here, but here they will have to be welded.
Please note that the manufacture of this shower is different. You can make a frame and then place it on a poured base, strengthening it with anchors. You can do it another way - concrete the racks in the created foundation and then tie the spacers and lintels.
To sheathe such a shower you need:
- cut out fragments of the required size from polycarbonate with a thickness of 10 mm;
- attach the material to the profile using hardware and gaskets;
- weld the frame for the future door structure from the profile and secure it to the stand, then cover it with polycarbonate.
Why shouldn't you use wood with polycarbonate? Firstly, these materials do not combine well; they can change under the influence of temperature. Secondly, wood can change due to humidity, which is not desirable in polycarbonate showers.
Regardless of what material is chosen for the work, showers made of both wood and polycarbonate can be equipped with natural and artificial heating of water; this is everyone’s personal approach. High-quality sealing of the structure is important. Only in a shower where there are no cracks and the door closes tightly can you bathe at any time of the day.
Of course, indoor showers are more popular than summer showers; they are called beach showers. It is thanks to the closed structures that a person can comfortably take a shower and not be afraid of a draft or prying eyes. If you need comfort, take care of building a closed model.
Examples of designs for self-assembly
Given the initial dimensions of the shower stall with an area of 1 sq.m and a height of 2 meters or so, you need to calculate the required number of blanks for the frame: steel corners 5x5 cm, or 2mm profile pipe with a cross-section of 4x2 cm. The length of the blank for the racks should take into account an additional 20-30 cm for concreting.
At the next stage, standard welding of the structure is done, then a concrete floor screed into which the vertical posts are buried. After that - welding the frame and installing the hinged door. All that remains is to line the cabin with construction sheets, film or other waterproof material.
To drain water, you can use a tray with an outlet pipe, or provide a sewer outlet at the stage of screeding with concrete. When selected to the appropriate size, a flat plastic water tank will also serve as a roof for the building.
It will be easy to equip such a homemade shower stall with a dressing room, doubling the area of the structure and separating the compartment with a curtain. Instead of a concrete floor, you can make a wooden floor, leaving gaps for water to drain into the pan.
Wooden blocks and boards are another available material for building a summer shower. In this case, you can abandon the concrete screed, strengthening the strength of the wooden frame with metal fasteners or additional corner braces.
As cladding, you can use boards, logs, or make a wicker from twigs. As you can see by looking at the photos of summer showers, wooden structures made professionally and from high-quality materials can easily fit into a well-kept landscape.
What material is the greenhouse made from?Tents for garden swings
DIY canopy - step-by-step instructions for beginners. Canopies made of different materials: wood, metal, polycarbonate (200 photos)
Using wooden boards or profiles, you can, with record speed, build unpretentious-looking collapsible options for a summer shower with a small tank, the walls of which can be curtained with an awning.
Step-by-step instructions for building a shower with a metal frame
To make the frame you will need a metal profile pipe, an angle grinder, a welding machine, a tape measure and a level.
All tools should be at hand
After manufacturing, it is recommended to protect metal surfaces from corrosion processes with paint for exterior use. The amount of metal is determined based on the dimensions of the frame, as we described above. It is better to use a purchased water container; the length and width of the structure are adjusted according to its size.
Step 1. Draw a sketch of the frame indicating the length of each element. Take your time, carefully consider ways to strengthen the vertical posts. To strengthen loaded units, you can use pieces of rolled sheet metal with a thickness of at least 1 mm. Prepare squares or triangles with a side of 10–15 cm from it. Make sure that the angle is right and the cuts are even.
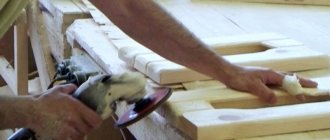
Step 2 . Cut the blanks with a grinder. It is necessary to cut in compliance with all safety regulations; the grinder is a very dangerous tool. If you have many identical parts, it is recommended that you first accurately measure and cut one, and then use it as a template. This increases the accuracy of the elements.
Important. Make sure that the cutting disc rotates in the desired direction. If installed correctly, the sparks should fly towards the master, but for some it is inconvenient to work this way and they change the direction of rotation. This is very dangerous; while biting, the grinder is thrown onto the worker, which can cause serious injuries. It is impossible to hold the tool with your hands; the ejection force is too great.
Step 3. Start welding the frame. In order for the weld to be strong, maintain the welding conditions. The electrode thickness and current indicators depend on the profile parameters. For the frame, it is enough that the pipes have a wall thickness of 1–2 mm; such rolled products have the required physical strength and will fully withstand the load of a water tank. For welding, we recommend using a Ø 2 mm electrode; make sure that the slag is evenly blown off the surface of the molten metal and the seam is continuous.
How to weld a structure correctly?
- Prepare a level workspace; the dimensions should be such that the largest elements can fit freely.
- Place the two parts to be welded on the workbench and check their position under the square. As we already mentioned, the angle should be right and the parts should lie in the same plane.
- Tack the parts on one side, the length of the tack is no more than a centimeter, give the metal time to cool. During cooling, the unit will move to the side and the correct position will be disrupted.
- Using a hammer, trim the corners and turn the pieces over to the wrong side. Check the dimensions and spatial position again.
- Carefully weld the parts on the other side, now you can make a seam along the entire length.
- Turn the assembly over again and make a full tack weld. Weld metal pipes on all sides at the same time.
- Remove slag from the surface of the weld and check the quality of the weld. If there are large shells, then re-suture.
- Use a grinder to remove sharp metal stains.
Thus, you can independently prepare two side planes of the frame; all that remains is to connect them into a single structure. It is very difficult to do this alone; it is better to call an assistant. One will hold the elements, and the second will weld them. You need to constantly check the corners, don't rush. Practice shows that reworking an incorrectly welded frame always takes much more time than carefully checking the dimensions and spatial position during the preparation of structural elements.
Welded frame option
It is better to make vertical posts and a platform for the tank from a rectangular or square pipe; with the same dimensions as a round one, they have significantly better characteristics of physical strength in bending and compression. As jumpers, in addition to sheets at the corners, you can use any wire rod, square or reinforcement. There are pieces of profile pipe of sufficient length left - use them.
Vertical racks
Metal frame for summer shower
Mounting unit for a vertical post and two cross beams (connection option if there is no welding machine)
Attaching the angle to the cross beam
Step 4. Weld a platform below for the sheathing boards. The dimensions do not matter, it is intended only for support. The grille can be made non-separable or assembled from individual elements. For manufacturing, take smooth lumber; the thickness of the boards or slats should support the weight of the washable ones. If you have thin materials, then make several jumpers for them.
Step 5: Install the frame over the shower location. This can be a concrete platform or ordinary temporary stone stops. The second option is preferable for several reasons. Firstly, there is no need to engage in excavation and concrete work. Secondly, at any time, if necessary, the shower can be moved to another place.
Summer shower foundation
Foundation for a summer shower. Measuring diagonals
Metal frame - old lattice, wound with wire
Shower foundation. Cover with large construction waste
Preparation of concrete. Mix the mixture in a trough
Preparation of concrete
Add crushed stone to the cement mortar
Poured foundation
If you weld legs with support platforms made of sheet steel at the bottom of the vertical posts. The dimensions of the platforms are approximately 20x20 cm, this is enough to guarantee the stability of the structure. Such a platform makes the shower more mobile when moving; for installation you only need to slightly level the ground under the supporting platforms; this work takes a few minutes.
Practical advice. Many people are concerned about water drainage. If your cabin is located next to the entrance of the house, and there are sidewalk paths everywhere on your personal plot, then it is recommended to make a dirty water storage tank. If the shower is located at the back of the buildings, then you don’t have to waste time and effort on building outlets. For hygiene procedures, 10–15 liters of water is enough for one person; such a small amount will be absorbed into the ground without any problems. For complete peace of mind, you can dig a hole under the shower for 2-3 car tires, water will accumulate in it. After moving the frame, the tires are removed and the hole is filled with earth.
Step 6. Level the cabin, make sure that the racks are strictly vertical and the platform for the container is horizontal.
Attaching a vertical post to a corner of the foundation
To fasten the parts of the structure, ordinary M6 bolts of different lengths, corresponding washers and nuts were used. But the nuts are not quite ordinary, but with plastic sealing rings
Step 7. Clean the surface of the metal structure from rust, oil stains and dirt, and check the stability of the frame with your hands. Everything is normal - you can start painting. Choose the color of the paint as desired, the main thing is that it is suitable for painting metal surfaces and for outdoor use. Don’t be too lazy to do the painting very well, use brushes, carefully rub the paint into the frame. If one layer is not enough for uniform coverage, you will have to repeat.
First you need to degrease the surface with white spirit, kerosene
Treating a metal frame with a rust converter
Metal frame after treatment with a rust converter
Metal frame coated with primer
Primer for metal
Step 8. Place a water container on the top platform and attach a shower head. If desired, you can make an additional outlet for collecting warm water for various household purposes.
Water supply to shower
Water supply through a tee with taps on taps
If there are no doors in the cabin, and only a plastic curtain is hung, then the wind can blow it inside the cabin. This creates some inconvenience when taking a shower. There are several ways to correct the situation:
- Attach to the curtain in several places of attachment. Two approximately in the middle of the height is enough.
- Hang any “hangings” next to the plastic curtain. The main selection criterion is weight. The heavier they are, the better they will hold the curtain.
Vertical threads with wooden beads hang under the curtain
If you want to increase the comfort of taking a shower, then it is better to attach a door. For its manufacture, you can use both lumber and rolled metal. The design of the doors is elementary; they are hung on vertical side supports.
Experienced summer residents strongly recommend adding an additional compartment next to the shower for changing clothes and storing bath accessories.
Additional semicircular compartment
When making the frame, think about this point; little material and time will be required, but the convenience of using the shower will increase significantly. The compartment also needs to be equipped with wooden gratings for the feet.
Making a wooden grate for the floor
Lattices
Wooden floor gratings
Silicone mat to prevent feet from slipping on wet boards
If children will use the shower, be sure to install a shower head with a flexible hose for them. Place the water supply switch tap at such a height that children can reach it without any problems. Read the seal for the glass curtain in the bathroom on the website.
Good reliable lock on the summer shower
Wall-mounted summer shower
To build a cabin adjacent to the wall of a house, or an outbuilding with running water, you will not need a frame and a tank; water at the required temperature will be supplied from a common system, without restrictions on capacity, which will significantly increase the comfort when taking a shower.
In this option, you should pay attention to waterproofing the walls and drainage. It will be necessary to ensure the water resistance of the coatings on the walls of the house and the extension. On a piece of land that is within reach of water, you will need to lay out a drainage layer of pebbles, or make a concrete screed to ensure the drainage of water into the sewer system.
By choosing a suitable secluded corner for bringing the mixer with shower outside, you can do away with partitions and get special pleasure from water treatments in a free space in the open air.
If there is no such architectural possibility, then a pipe with a curtain may be enough to enclose the shower. In other cases, an open shower can be a comfortable and stylish part of the exterior.
- Do-it-yourself tandoor - step-by-step instructions for quick production at home (100 photos)
Do-it-yourself bathhouse made of timber - 120 real photos of ready-made solutions. Step-by-step instructions for beginners
Country cabins - an overview of the best options. 100 real photos + DIY construction instructions
The walls of the extension, without restrictions on area and shape, can be made of brickwork, stone, tiled concrete, wood, metal profiles and other materials.
An outdoor shower can also be provided when planning an outdoor toilet, combining water supply and drainage; moreover, the compartment with a washstand will also serve as a dressing room. Combining an open-air shower and bath is another fashionable innovation in the layout.
A little about the nuances of construction
After choosing a shower option, you need to decide on the location. Since the water must be heated by the sun's rays, an open space, further away from trees and the house, is suitable. Preferably at the highest point of the site.
The shower should be spacious enough. It is necessary to provide not only a place for washing, but also a changing room. It is believed that the minimum comfortable shower is:
- height from 2 to 2.5 meters;
- width from 2 meters;
- length from 1.5 meters.
In this case, the washing area itself will occupy approximately 1 square meter.
A capital foundation for such a structure is usually not required. You just need to raise it about twenty centimeters from the ground on small supports (paving slabs, brickwork, foundation blocks...).