Furniture production has come a long way in recent years. However, sometimes there is a specific idea of what furniture should be like and those models presented in furniture stores are not suitable. There are two ways to implement the desired project: custom manufacturing or independent design and assembly. Today’s material is about how to properly make drawings of furniture for self-production.
Drawings of furniture for self-production
Drawings of sliding wardrobes
For those who have seriously decided to make a wardrobe with their own hands, first of all you need to acquire cabinet drawings with dimensions and a list of necessary parts and accessories. You can use ready-made sketches, or you can make an individual project. To do this, you will need to measure the place where you plan to install the future cabinet. After receiving the required data, we transfer it to paper. This will allow you to determine the dimensions of the product. We draw a sketch with our own hands, this will allow us to visually determine the thickness of the chipboard. On the resulting drawing you need to put all the dimensions, now the drawing has turned into a drawing of the cabinet.
The next thing to pay attention to is the doors.
In this regard, you can also choose two ways: 1. Order a ready-made door.
In this case, it will be enough to provide the manufacturer with the dimensions of the opening. All other difficulties in creating a sliding system will fall on the shoulders of the manufacturer. 2. Assemble the door and sliding system yourself. In this case, it is important to know the profile manufacturer. The calculation of the door size will depend on this. Next, you need to make a list with the dimensions of all cabinet parts. And a particularly important point: the side parts, floor and roof of the cabinet should be slightly larger in depth than the filling parts. Typically this difference is 100 mm. After installing the sliding system, the difference will not be noticeable. The doors will take up all the protruding parts.
Cutting map
Furniture manufacturing begins with cutting out the main consumables. More often, cabinets, tables, and chests of drawers are made from chipboard or HDF. Let's say the sheet has standard dimensions 2750 x 1830 x 16 mm. To cut out the required parts, you need to draw up a cutting map. It provides schematic documentation indicating the elements that will be needed. Based on these drawings, the worker will cut out parts that correspond to the parameters of the future product. The remaining materials that need to be returned to the customer are also marked on the map.
The cutting map is a very important document and deserves a thorough study. The first sheet is called "Specification". Here is a list of elements. The product number is highlighted in a red circle at the very beginning of the table on the left. The word "Orientation" and three lines indicate the direction of the texture. On the cutting map it is predominantly horizontal. Four columns next to each other give an idea of integrity, size, quantity and material. On the right is information about the square footage and percentages of residues, parts, waste and cut length.
An important indicator is the cut; it directly affects the cost of cutting. The tariff is determined by footage. The cutting distance in mm must be divided by 1000. To find the total footage of all sheets, it is necessary to sum up the parameters.
Sheets of material are produced with errors, so they have to be sawed off at the edges. The offset is usually 5–15 mm. This work should not be counted in the cutting footage; the contractor should be warned about this in order to avoid unnecessary expenses. To learn to understand the meaning of the symbols on the map itself, it is worth studying a specific example.
| No. | Cipher | Name | Size | Quantity |
| 1 | 1–2 | Chipboard bulkhead | 2368 x 598 | 1 piece |
| 2 | 1–1 | Chipboard bulkhead | 2368 x 598 | 1 piece |
The procedure for making an additive machine for furniture with your own hands
Dimensional data is plotted in the center of the line. The number in column 1 indicates the part number on the sheet. As for the code: the first digit here indicates the product number, the second - the part. This data and the name of the material on the map are recorded in the lower right corner. The designation of the remainder is given by the word of the same name.
Example of cutting map
Drawings of built-in wardrobes
Built-in wardrobes are a bit like the design of sliding wardrobes. Drawings of cabinets of this kind are made quite simply. It is enough to know the dimensions of the niche in which you plan to place the contents of the cabinet.
The drawing includes the system and all the contents of the future cabinet: • Shelves; • Boxes; • Shelving.
In a word, everything you might need for a comfortable life for your household. It is also important to understand what the cabinet design will be. The amount of material for assembling the cabinet, as well as the necessary list of accessories, will depend on the nuance.
Having a sketch with dimensions, it is important to decide on the fittings. This process may be slightly complicated by ignorance of the names and purpose of this or that item, but finding out all this is not difficult.
When assembling a cabinet, it is important to take into account all dimensions. This will create a stable structure that can last for many years. This will require good cabinet drawings, in which everything will be thought out to the smallest detail.
Drawings of corner cabinets
Corner cabinets are a very convenient solution, especially in those homes where there is not too much space. On the one hand, they take up little space, on the other, they are quite spacious.
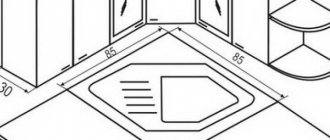
Let's take a closer look at the cabinet diagram. It would not be superfluous to note that all such cabinets have a similar design and differ only in size and content. The front part is cut at 45 degrees, the back side will be located directly in the corner of the room. The side walls allow you to create an internal space, and allow you to easily implement the façade part. It is possible to assemble a cabinet without side walls, but in this case you will have to lose room space, which we are trying to save by resorting to the design of a corner cabinet. The optimal dimensions may be 800*800*1100. Such dimensions will allow you to place a fairly large wardrobe without taking up much space in the room. Speaking about the filling of such a cabinet, I would like to note that it can be determined based on personal needs. Therefore, you should not pay special attention to this moment. When making parts of a corner cabinet, it is important to maintain all proportions. This is especially true for the top cover and bottom, which should be cut at an angle of 45 degrees.
Kitchen Cabinet Drawings
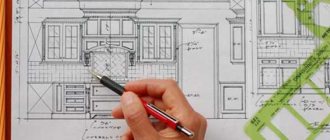
To make a kitchen set with your own hands, you need to take measurements of the places where you plan to install the cabinets. Then, taking into account the quantity and functionality, draw a sketch of the future kitchen set.
When drawing up a cabinet drawing, it is important to enter the correct dimensions; everything else is unimportant. You can even draw it by hand. Accuracy will also be necessary when calculating the details of the cabinets. It is important to take measurements in millimeters, this will allow you to get the desired result. Only accurate calculations will allow you to make a high-quality headset.
Before you start making kitchen cabinets, you need to decide on their number and size and transfer everything to paper. In the future, the manufacturing process is quite monotonous. To obtain a high-quality headset, strict adherence to all dimensions indicated in the drawing is required. Moreover, it is important to observe not only the external dimensions, but also the internal ones. Otherwise, you won’t end up with a kitchen set, but something incomprehensible. The drawing will be your main document when making kitchen furniture.
Cabinet plans
Cabinet drawings, regardless of their shape, size and where they will be installed, play a very important role. They will be the basis on which you can rely in the manufacture of all components of the cabinet.
Regardless of the features, it is important for all drawings to adhere to clear dimensions. The length, width and height of the external parts and the dimensions of the internal components transferred to paper must be strictly observed when making cabinets. The product will not turn out the way it was intended if the dimensions of at least one part are violated. This will lead to deformation of the entire structure and poor quality results.
Preparatory process
The creation of any furniture always begins with the design of the future item. This can be done in the traditional way, drawing a drawing on paper, or using special programs. You should also make accurate calculations and select the necessary parts for the product.
Instructions for installing furniture hinges, the nuances of their adjustment
Design
Today there are many 3D programs for creating furniture designs. Their main advantage is that there is no need for design skills. There is no need to study information on sizing calculations and draw on paper - not every person has such skills. Of all the programs, there are 5 most popular:
- Volume;
- T-FLEX Furniture;
- SketchUp;
- Adobe Photoshop;
- DYNALOG.
Before printing a drawing for the manufacture of cabinet furniture, you should double-check everything carefully. Otherwise, one mistake in calculations can reduce the efforts to nothing - nothing will be remade.
How to make your own furniture polish using improvised materials
Volume
T-FLEX Furniture SketchUp Adobe Photoshop DYNALOG
Assembly drawings
It is advisable to create an assembly drawing that will simplify the manufacture of furniture. It includes:
- images of all parts, providing information about their connection and location relative to other parts of the product;
- exact dimensions;
- designations of permanent connections and conventional numbers of components;
- specifications.
An assembly drawing is a type of engineering document that shows the location of all parts of a product and their relationship to each other.
Calculation and detailing
The technology for manufacturing cabinet furniture requires careful adherence to preliminary calculations. The design of the product must maintain rigidity. This can be achieved using a back wall or drawer, which is fixed at an angle of 90 degrees between the panels. Without these parts, the furniture will constantly wobble or fail.
It is important to remember about gravity - all unsupported elements with a length of more than 90 cm will sag. The thickness and width of the part will not affect this in any way. It is also necessary to calculate partitions that will not prevent the product from serving its intended purpose and will serve as a rigid frame.
How to make a cabinet drawing
The most important thing when creating a drawing for any cabinet is a clear vision of what the end result should be. The fact is that it doesn’t take much time to create a sketch. The main costs of this resource will be required to take measurements of the place where the cabinet is planned to be installed. It will also take a lot of time to list all the elements needed to assemble the cabinet. Without this list, you shouldn't even start assembling. There is a very high probability that the process will go in the wrong direction.
When creating your own drawing for a cabinet, it is important to consider not only the dimensions of the external structural elements and internal parts, but also the thickness of the material from which the cabinet is planned to be made. This will help make calculations more accurately, which will further contribute to the creation of a high-quality interior element.
After taking measurements and transferring them onto paper, you need to decide on the components of the cabinet. Will these be shelves, drawers or all together. Will the cabinet have a stand or a vertical bar? It is necessary to indicate in the diagram all the details, even the most insignificant ones. Moreover, it is not enough to indicate the names; it is important to enter the exact number of elements.
Selection of furniture fittings
It is best to buy quality products. This will not be cheap, but it will allow you to assemble a high-quality cabinet that will last quite a long time. Choosing accessories should not be difficult. The store manager will recommend one manufacturer or another, and the number of necessary accessories is already indicated in the drawing. The main thing is to follow the pre-planned assembly plan that you have on paper.
In any apartment, especially a small one, it is very important to have a place where you can hang clothes, put boxes of shoes and place many other things without creating the effect of cluttering the space. A built-in wardrobe will help you with this. Now a very large number of companies offer services for the assembly and installation of such cabinets, but, as a rule, they are not cheap. An alternative is to read our article and assemble a wardrobe with your own hands.
Wood as a material for making furniture yourself
After making a sketch and a drawing based on it, you can proceed to the selection of material. Before choosing a particular material, you need to study the features of working with it and learn about its performance properties.
Solid wood stools
Prices for solid oak boards
Solid oak board
Natural wood
Due to the wide variety of natural shades, patterns and textures, natural wood is very popular in the manufacture of furniture. Wood is malleable and allows you to create objects of interesting shapes, decorated with artistic carvings.
The advantages of the material include the following:
- Strength and durability. Solid wood furniture lasts for decades.
- The array can be easily restored by removing scratches and gouges.
- Environmental friendliness and naturalness are the main advantages of the array.
- Solid wood furniture looks expensive and will be appropriate in any interior.
- When making a chair, table, chest of drawers or cabinet from natural wood, you are guaranteed to obtain a piece of furniture with excellent performance properties.
Solid wood furniture looks rich and luxurious
Wooden furniture is made from solid or press-glued panels, which are not inferior in strength to solid wood.
Properties depending on breed
Soft and hard wood is used to make furniture. Soft wood (alder, poplar, aspen) is used to make parts that will not be subject to stress during operation - decorative elements and facades with an original design.
Modern style bedroom set
Table 1. Popular wood species for making furniture
| Breeds | Description |
Oak | The most popular type of wood for making furniture, which is characterized by high strength and wear resistance. The advantage of the material is the presence of a beautiful natural pattern. |
| Beech | It has a creamy yellow tint with brown specks. Due to its high flexibility, it is used for the manufacture of furniture of complex, including round, shapes. |
| Pine | The material is durable, low cost and accessible. Contains natural antiseptics, so it lasts for many years and has a positive effect on the indoor microclimate. |
Cherry | An expensive type of wood with a characteristic reddish tint, which becomes more saturated over time. |
Walnut | A material with a luxurious brown tint, allowing you to create exclusive interior items. |
Sequence of actions when making furniture
Table 2. Manufacturing of furniture from solid wood
| Illustration | Description |
| Step 1 | Markings are applied to the wood material. |
| Step 2 | Cut out the details. |
| Step 3 | Perform grinding of parts. |
Step 4 | The parts are treated with antiseptics. |
| Step 5 | Connecting holes are made. |
Step 6 | The parts are painted. |
Step 7 | The parts are varnished. |
| Step 8 | Start assembling furniture. |
Prices for popular models of eccentric sanders
Random orbital sander
When making furniture from solid or glued solid wood, two methods of connecting elements are used - detachable and permanent.
Wood based materials
Working with wood requires skill and knowledge about the properties of the material; moreover, the cost of high-quality raw materials is quite high and it is not rational to “get your hands on” with it. Beginning craftsmen prefer materials that are easier to process and inexpensive.
Table 3. Wood-based materials
| Name | Description |
Chipboard | Used for the manufacture of cabinet furniture. It has a low cost. It is important to choose high-quality material that contains an acceptable amount of formaldehyde that is not dangerous to humans. It is also necessary to use protective edges on the cuts of parts, which not only protect the environment from the release of formaldehyde, but also give the product a neat appearance. |
laminated chipboard | It has a protective laminated layer that protects the material from mechanical and thermal stress. The laminated surface is not afraid of moisture. It is highly decorative and allows you to create furniture not only in different colors, but also using photo printing. Can imitate any material. |
Fiberboard | Used for making furniture of curved shapes. The material is inexpensive, durable, with good thermal insulation properties. The disadvantage is low moisture resistance. This material is recommended only in dry rooms with normal humidity. |
MDF | It is environmentally friendly due to the reduction in the percentage of formaldehyde in its composition. The material is durable, resistant to moisture and fire. The material is available for fine processing. However, its cost is higher than the materials listed earlier. |
Plywood | It is widely used as a material for making furniture - very durable, reliable and easy to process. Often used to make children's furniture. |
Choosing a location and size
It’s great if the room in which you plan to install a wardrobe has a niche - in this case, you will only have to mount the “filling” of the cabinet, attaching shelves and hangings to the walls of the niche, and also install sliding doors; the back and side walls will be missing. If you don’t have one, you can build a corner wardrobe, or simply attach it to the selected wall. Please note that after assembly this structure will be motionless and cannot be moved; Therefore, carefully choose the location of your cabinet.
Next, start designing. Start by measuring your future cabinet using a tape measure. Measure several times and write down on a piece of paper the desired height, length and width of the cabinet. This information will be useful when purchasing materials. Draw a drawing to scale, mark on it all the necessary additions that you plan to insert into your closet. These can be shelves, drawers, baskets, mezzanines, hangers, etc. Designing a wardrobe yourself is not so difficult, the main thing is to conscientiously take its measurements, take into account the scale when making a drawing, and pay attention to every little detail.
The length of the cabinet should not exceed 3 meters, the maximum is 5 meters. The length of each door is no more than a meter. This is directly related to the load on the “rails” of the cabinet and on the structure as a whole. Make a full calculation of the necessary materials for your individual project. Double check and recalculate several times. Remember the “golden rule” - measure seven times, cut once. It will be very unpleasant if you have to redo something during the construction stage.
Self-made furniture technology
The process of making cabinet furniture yourself can be divided into several stages.
Stage 1: design
This includes creating a sketch and detail drawing. This has been discussed in detail earlier.
Kitchen sketch
It is also worth noting that in addition to information about the dimensions of the product and its components, the project must contain information about the material, color, and texture of individual elements.
Applying dimensions
In order to be able to quickly make adjustments to the drawing being developed, it is recommended to carry it out using one of the special graphic programs, in which it is possible to set the necessary parameters and see clearly what the final result will look like.
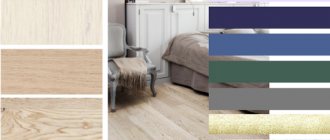
Choice of colors
Stage 2: manufacturing parts
Table 5. Algorithm for manufacturing cabinet furniture parts
| Illustration | Description |
| Step 1 | Select the material for manufacturing the parts. |
Step 2 | A drawing of the part is made. |
| Step 3 | A pattern is made on a scale of 1:1. The pattern is outlined with a pencil or a bright marker when transferring the part to the surface of the workpiece. |
| Step 4 | Using a jigsaw or circular saw, cut out the part in accordance with the markings. |
Step 5 | The parts are polished. |
Step 6 | Process the edges. |
Stage 3: making holes for fittings
Table 6. Making holes for fittings
| Illustration | Description |
Step 1 | The parts are laid out on the floor surface or work table. |
Step 2 | Places for fixing the fittings are marked on the surface of the parts, taking into account the drawing data. |
Step 3 | Drill holes. |
Step 4 | Attach fittings. |
Prices for the range of drills
Drill
Stage 4: machining the ends of parts
You can start assembling furniture only after carefully processing the cuts. To do this, remove excess, grind the ends and fix the edge tape. As previously noted, PVC edges are made in a factory, but at home you can use melamine tape with an adhesive layer.
After fixing the edge, use a utility knife to trim off the excess and clean the edges with fine-grit sandpaper
To work you will need tape, a stationery knife and an iron. The edge is applied to the end and pressed with a heated iron for a short time. If you overexpose it, the edge will be damaged.
Stage 5: furniture assembly
Table 7. Furniture assembly process
| Illustration | Description |
Step 1 | Fittings (hinges, locks, guides) are attached to the main parts. |
Step 2 | The supporting frame of the product is assembled. If there are any, fix the mirrors. |
| Step 3 | The remaining parts are attached to the supporting frame. |
Step 4 | Fix the handles, wheels, put the drawers in place. |
Step 5 | Attach decorative caps to the fastener heads. |
Video - How to make a sofa body yourself
Drawings and detailing
If you have the capabilities and skills, design your wardrobe yourself using a special computer program. This will allow you to work it out in more detail and clearly. If this is not possible, draw sketches by hand, taking into account all previously made calculations. This is called detailing, that is, working out the cabinet in detail. Be sure to indicate on your diagram the thickness, width and depth of shelves and partitions, the length of the rods and the height of their location, etc. Enter all the information into a table, so it will be more convenient for you to organize it.
In general, whether we design our wardrobe on a computer or draw a diagram by hand, we carefully take measurements, systematize them and begin purchasing the materials and tools necessary for construction.
Calculation of body parts and cabinet fronts
Any cabinet consists of two parts - the body with internal filling and the front part. In this article you will learn how to independently calculate the parts of the cabinet body using a drawing.
You can read how to calculate the fronts for a wardrobe here. If you are new to making furniture with your own hands, we recommend ordering already assembled sliding doors from the catalog of one of the companies in your city. It is better to place an order when the cabinet body is assembled. Since the actual internal dimensions of the already prepared cabinet niche will be required after assembling the cabinet.
Another type of cabinets is with hinged fronts. You can read about the calculation of hinged facades - internal, overhead and corner - on the Shkaf-INFO website here. However, knowing the dimensions of the doors to determine their cost is not enough. The price will vary depending on the material chosen for their manufacture. You can read about the types of furniture facades here.
Briefly about the cost:
- Facades made of laminated chipboard are the cheapest. Doors of this type can be “put in” immediately into the general cutting of parts, this will be more economical. The only additional cost is the edging of facades with PVC edges 2 mm thick (two-piece). The visible ends of the body parts are rolled up with PVC 0.4-1 mm thick (one piece) or covered with melamine edge.
- Mid-price category - facades made of MDF boards. They can be lined with various materials - PVC film (the most budget option), plastic, acrylic (High Gloss panels), veneer or painted with enamel. The cost will depend on the type of cladding, the complexity of milling, the presence of glazing, additional decor, etc.
- The most expensive are facades made of solid wood. However, there is a controversial point, due to the different values of wood species. In some cases, facades made of pine and birch in the simplest design without treatment and in standard sizes can cost less than MDF. Therefore, there is a reason to “monitor” the market in your city, study all the offers and only then decide what kind of facades you want to make for your closet.
Materials and tools
To create a wardrobe with your own hands you will need the following materials:
- Pre-sawn chipboard sheets. It is best to order sawing from experienced craftsmen, providing them with your detailed cabinet diagram with all measurements;
- Dowel-nails, self-tapping screws;
- Plastic furniture corners;
- Wooden beams made of timber;
- Guides, wheels;
- It is better to buy sliding doors for a closet ready-made, in this case you will be able to choose doors with a mirror or interesting engraving;
- Hooks for clothes, metal bar.
The following tools will help you install your wardrobe:
- Drill, hammer drill, screwdriver;
- A simple pencil, a meter ruler, a construction level, a tape measure;
- Drills for concrete and wood;
- Jigsaw;
- Hexagon.
In order to make a wardrobe correctly, take into account all the features of your apartment - uneven walls, crooked floors and ceilings. Take careful measurements at different points. Perhaps during the installation process something will have to be filed or corrected. To make your work easier, try to choose a more or less standard design, especially if you have no experience in assembling furniture.
Classification
There are several types of drawings for furniture:
- Parts drawings. They depict individual components and indicators necessary for the manufacture of furniture.
- Assembly. Display products, groups of parts, and also contain assembly data.
- Tabular. Includes data for the production of identical components.
- General views drawings. Shows the main characteristics of the product.
Nuances of assembling cabinet furniture, useful tips for beginners
At the preparation stage, design and working diagrams are carried out. They also have their own varieties. There are two types of design drawings:
- A preliminary design drawing depicts the architecture, shapes, structural elements and dimensions of the furniture. This document becomes the basis for preparing a technical project.
- Based on the technical design, which includes general and prefabricated diagrams, working drawings are developed.
All data on the production of the model is shown in working drawings, which are divided into documentation for serial and mass production. After testing prototypes of products, they become the main ones in furniture assembly. Custom production drawings are used to create individual, one-off items. In furniture manufacturing, breakdown is sometimes used instead of prefabricated documentation. On it the model is shown in a vertical projection in its actual size. Horizontal and vertical sections are superimposed on the breakdown.
Parts drawing
Assembly
Tabular General view
Step-by-step manufacturing and assembly instructions
The first stage is marking:
- First, take a ruler or tape measure and measure the full length of the cabinet in the place where you are going to install it. The easiest way to do this is from the corner of the room, then one of the side walls will be the corner wall of the apartment;
- From the resulting point, draw a vertical line from top to bottom to indicate the border of the wardrobe. To make the line more even, you need to take several measurements from the corner at different height levels and make marks with a pencil, which you then connect with a line;
- then you need to measure and draw another vertical line - the border between the department with shelves and the department with a hanger. A wooden post will be installed along this line to separate these departments;
- Now mark the height of the shelves on the resulting lines, making marks on both sides with a pencil.
The second stage is to install the fasteners:
- take the fasteners, attach them to the resulting lines and mark the places where you need to drill holes in the wall;
- a dowel-nail must be driven into each resulting hole;
- We attach the fasteners to the wall with self-tapping screws.
The third stage is installation of the internal filling of the wardrobe:
- to secure the dividing post, place it on the fastenings and screw them to them with screws;
- To install the mezzanine, first of all we draw a line horizontally using a level and a pencil. Next, on the resulting line we drill holes for fastenings - two in each compartment and on each side; Dowel-nails are driven into them and the fastenings are fixed on the wall. Secure the mezzanine to them using self-tapping screws;
- To install the side wall of the cabinet, measure the height of the room as accurately as possible and try to adjust the wall to the result obtained. Install it and attach it with self-tapping screws to the existing fasteners;
- we mount the shelves: mark their installation locations on the side of the wall and on the dividing post, install two fasteners on each side and place the finished shelves on them. Attach using self-tapping screws;
- The second compartment of our closet is reserved for things on hangers, so we need to install a metal pipe there. Purchase round fasteners according to the diameter of the pipe, attach them with self-tapping screws to the wall and the middle dividing post, if necessary, cut the prepared pipe, insert it into the fastenings and secure.
Stage four – installation of false panels:
- false panels are installed at the bottom, top, side and near the wall. Each of them is drilled in several places, placed where installation is planned and marked with a pencil where it is necessary to make holes in the wall;
- Dowels are inserted into these holes, and the false panels are attached to them with self-tapping screws.
Fifth stage (final) - installation of doors and guides:
- To install the guides, you need to measure their desired length and adjust it to size. Afterwards, using self-tapping screws, they are fixed on the false panels - top and bottom;
- Installing doors requires a certain skill and accuracy. Attach the rails to them, but do not tighten them too much to allow the rollers to move more freely. The door is inserted first into the guide from above, then into the guide from below. Set them up to move freely along the rails. It is advisable to stick soft pile on the side of the door to prevent noise from impact and to avoid damage to the door;
- thoroughly check the quality of installation of all parts and the operation of the doors. If everything is in order, the job is finished!
Making a drawing for the kitchen
In the case of a kitchen cut with your own hands, a well-executed drawing of a kitchen cut is one of the main stages of the work. With it, you can easily calculate the required amount of material and fittings, cut all the necessary parts and then assemble the finished product from them.
- First, you will need to measure the room, taking into account all its elements that fall within the area where the future kitchen is located - the kitchen cutting diagram should take into account all the recesses and protrusions in the walls, including sockets, window sills, etc.
- After measuring the parameters of the kitchen, sketch out its plan with all the data obtained on paper. For a more complete picture, you can sketch out the floor plan from different angles. And now, having the kitchen plan before your eyes, you can move on to the next stage and calculate the cut of the kitchen.
But before that, an important note: remember that if you take, for example, the size of the bottom base of your kitchen, it will not be the sum of the sizes of all modules, but the size of the bottom along the countertop. Therefore, the parameters of the area on which the kitchen will be located are not all that we need.
You need to subtract the gaps from the total size of the part of the room allocated for the future set. They are up to 30 mm in width on all sides; there is no upper limit in height, since the kitchen may have high ceilings. The size of the gaps is generally very individual in each specific case; it depends on many factors, for example, on the material, fittings, etc.
The calculation of the kitchen set is done according to the scheme from general to specific - that is, from general dimensions to the sizes of individual parts.
Examples of competent design
Now all we have to do is figure out how we can decorate the façade of the finished wardrobe. Of course, we should not forget that its appearance should be in harmony with the rest of the furniture and the overall design of the apartment.
Most often, to decorate the facade of a cabinet, a combination of two or three colors of chipboard is used, for example, the combination “wenge + oak” or “wenge + beech” looks very beautiful, that is, a combination of dark and light colors.
If you are a fan of natural materials and the design of your apartment is made in eco-style, then pay attention to inserts made of bamboo, rattan and wood.
Wardrobe doors decorated with mirrors, stained glass and glass inserts look very modern and stylish.
For pretentious antique interiors, a wardrobe in a merchant style, decorated with pilasters and gilding, is suitable.
If you are the owner of a leather furniture set, you may like leather inserts on the cabinet doors. This ensemble looks very expensive and elegant.
As an option, you can cover the doors with self-adhesive film with photo printing. If you choose the right print, such a wardrobe will be in no way inferior to a wardrobe made to order by professionals.
Post Views: 2,078
