How to repair furniture yourself
Tips and tricks for repairing furniture with your own hands: how to glue veneer, remove chips and scratches and get rid of the grinder beetle
If your furniture has lost its presentation, scratches, chips, dents and stains have appeared on it , do not rush to replace it with a new one. You can very easily repair furniture yourself without resorting to the expensive services of repair shops.
Almost all defects can be eliminated yourself. This material will be useful not only for those who want to give new life to their old furniture, but also for those who purchased new wooden furniture, but damaged it during transportation. Before you repair furniture yourself, read the tips and recommendations from the masters presented below.
Restoration of chipboard facades
The front part of furniture made of chipboard can rarely be restored. Similar procedures for filling scratches, cracks and dents with furniture wax turn out to be ineffective. Because light hits the surface differently, it is impossible to make defects less noticeable. Usually they resort not to the restoration of damaged chipboard facades, but to the actual renovation of the entire facade part of the furniture:
- They are covered with wallpaper or covered with artificial leather. To do this, it is recommended to remove the facades and twist the handles - this will make it neater.
- They use photo printing, hand painting and decoupage techniques. The pattern can be applied exactly to the location of the defect, and not over the entire surface of the chipboard facade.
- The facade is decorated with self-adhesive moldings and various overlays. You can find out more about furniture decor.
- Glue strips of melamine tape of a similar or contrasting shade. If you think through the concept, this disguise of damage can look like a design technique.
Furniture made from laminated chipboard is currently the most popular.
Furniture made from chipboard is very popular because it is inexpensive, high quality and has no problems with repair.
It is inexpensive, and repairing chipboard furniture is not a problem.
The affordable cost of this furniture is explained by the use of relatively cheap materials for repairs: wood, chipboard.
Due to the fact that the surface of the board is laminated, the furniture has a very attractive appearance and harmoniously complements any design, decorating it.
Like other items, furniture is subject to damage during use. More often this happens during transportation or careless handling. There are a number of damages that are particularly common for furniture.
Chipboard products can be successfully restored
. Typically, when using furniture, it develops scratches of varying depths, cracks, dents, chips of varying depths and abrasions.
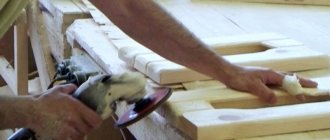
How to glue veneer using an iron
Veneer most often suffers on the edges of countertops, doors, and drawers. If it is impossible to repair the damage or a fragment of veneer is lost, then the old veneer in the damaged area must be replaced with new one.
Replacing the entire surface with damage, that is, veneering large areas, at home, without experience, will not ensure uniform sticking of the veneer, its pressing and drying.
To repair the surface of furniture, choose veneer of a suitable tone; if this is not possible, use the lightest version of veneer, which you can then tint yourself, but when choosing, pay attention to the texture of the wood.
Remove the damaged piece of veneer with a sharp knife. First, mark the cut line, and then quickly cut a piece of veneer. If the wood or chipboard underneath the veneer is damaged, putty it and level the surface.
If chips or losses of veneer are insignificant (1-2 cm) and it is not possible to buy veneer, fill these areas with wood putty, after drying, sand and paint with acrylic paint to match the surface.
Before gluing the veneer, prepare the following tools and materials:
- suitable veneer;
- PVA glue (or “Moment” glue, “Liquid nails”);
- sharp knife;
- iron;
- syringe;
- sandpaper, block;
- cotton fabric or cloth;
- paper;
- flute brush.
When repairing furniture at home, follow these instructions to repair damaged veneer:
Apply a small amount of PVA glue to the prepared underlying surface using a flute brush.
When cutting, try to keep the cut line slightly wavy and the piece cut with a slight allowance. Coat the cut piece of veneer with PVA glue.
Place the veneer in place so that the direction of the grain matches. After this, it is advisable to firmly press the veneer with a wooden block.
To speed up the gluing process, use an iron. To do this, place a cloth or sheet of paper between the veneer and the iron and press the iron against the surface for a couple of minutes.
If the original veneer is not damaged, but swelling has occurred, it can be returned to its place by ironing it with a hot iron through a damp cloth.
- If the previous method did not help, it means that the adhesive properties of the glue have been lost. Cut the swollen coating and use a regular syringe to inject PVA glue under it. Press down on top with a weight and leave for a day.
Restoration of chips and scratches on tables, cabinets and cabinets made of chipboard
Chips at the ends of lids and table tops, especially at radii, are not uncommon for children's and office furniture.
They can be removed altogether if the end of the furniture is covered with melamine edge. To do this you need:
- Purchase a new melamine edge with glue of the desired shade and thickness (it is usually sold in strips in the same place where chipboard and furniture fittings are sold).
- Remove the old edge by heating the end with an iron.
- Sand the end using a chisel and sandpaper until the chips disappear.
- Apply the new melamine edge using an iron, carefully cut off the excess with a utility knife and sand with a sponge or fine-grained sandpaper.
- If necessary, tint along the edge - with a stroke or felt-tip pen.
If the chips are deep enough and it is not possible to grind them off, then such defects can only be masked:
- Process the chips, clean them from dirt and give them a more regular shape with straight edges using a chisel.
- Select the shade of furniture wax. Sometimes you have to mix several different crayons; in its pure form it is unlikely that you will be able to find the right color.
- Using a plastic spatula, lightly fill the chip with furniture wax and compact thoroughly.
- After the wax has dried, carefully cut off the excess using a spatula or a utility knife until the surface is level and the edge is straight.
- Sand with a rag, if necessary, restore the texture close to the overall chipboard pattern using retouching felt-tip pens (short thin lines, smearing the borders with a napkin). Afterwards, fix the result with a fixing varnish.
In a similar way, deal with scratches and dents - select the wax or stroke according to the shade, fill it until it is level with the surface, sand it, retouch it and treat it with a fixing varnish or polish.
How and how to repair scratches on furniture
Almost always there are various scratches on the surface of old furniture. This is due to the fact that the old generation of varnishes, and these were mainly alcohol varnishes, did not have either chemical or mechanical strength and did not form a strong protective film. Read more about what and how to repair scratches on furniture further in the material.
Of course, you want to remove such damage without much effort, without resorting to complete cleaning of the surface. But no recipe can give a 100% guarantee, since the result is determined by a number of factors, and one of them is the type of varnish coating.
Deep scratches can be filled with a mixture of PVA glue and wood flour resulting from sanding and sanding wood. Remove excess immediately with a spatula. After drying (after 3-4 hours), if necessary, paint the putty with acrylic paint in the same color as the surface.
How to remove a scratch on furniture if it is so deep that the wood is exposed? Damage can be corrected with acrylic paint, stain, or impregnation of the appropriate color. Using the tip of a thin brush, paint only the scratches, applying the composition in several layers.
Operation "Liquidation"
Repairing chips
To repair chips on chipboard you will need:
- retouching felt-tip pen (or a regular one of a suitable color);
- hard tint wax;
- wax melter or lighter for melting wax;
- chisel or spatula;
- felt fabric;
- fixing varnish spray.
Chip on laminated chipboard
Chips usually appear at the corners and are small, light-colored indentations (chipboard color).
The elimination process consists of several stages:
- Preparatory treatment of the chip . In this case, it is necessary to process the chip with a chisel so that its edges become straight.
- Repairing the chip . To do this, hard wax of a suitable color is melted with a wax melter or lighter and applied to the chip with a small margin.
- Leveling the surface . After the wax has dried, using a chisel, having worked through each plane, carefully cut off the excess wax, forming a clear right angle to the surface, and lightly sand it with a felt cloth.
- Texture restoration . Using a thin retouching felt-tip pen, apply lines along the chip in accordance with the overall texture, wiping each time with a paper napkin to easily blur the clear boundaries of the lines and make them more believable.
- Opening with varnish . To fix the seal and to give the restored surface a characteristic shine, it is treated with a spray varnish.
Removing scratches
Such damage is especially often found during the renovation of children's rooms. To remove scratches, you will need the same tools for repairing furniture as for repairing chips, only instead of hard wax it will be more convenient to use soft wax. .
How to remove scratches: sequence of work
- Using a spatula, apply wax transversely to the scratch, simultaneously compacting and leveling it.
- Use a thin retouching felt-tip pen to fill in the missing texture.
- To fix the place of sealing and level the surface gloss, apply a fixing varnish.
Scratches on chipboard
Advice! To seal cracks when wax is unavailable, you can use a special furniture touch.
Restoring a worn surface
Scuffs, like scratches, often occur on laminated chipboard due to constant contact with the surface of foreign objects. For example, you can find them during renovations in the hallway or kitchen .
As a result, the top protective layer and partially or completely the paint layer are worn away.
In order to eliminate the abrasion that has already appeared, you need to do a few simple manipulations:
- Stretch a microfiber cloth over your finger and dampen it with a matching colored marker.
- Use a napkin to touch up the abrasion, rubbing along the surface structure.
- Apply several thin layers of fixing varnish.
Repairing cracks
Cracks in chipboard furniture often appear under the influence of moisture, heat or improper use at the attachment point of the cabinet doors.
To repair cabinet furniture with your own hands you will need:
- clamps (adjustable clamps);
- syringe with needle;
- PVA glue.
Repair process:
- PVA glue is filled into a syringe without a needle (for easier and faster penetration) and the needle is put on.
- Using a syringe, fill the entire internal volume of the crack with glue.
- Place a clamp on the slab on either side of the crack and tighten it.
- Remove excess glue with a napkin and leave in this position for at least a day.
After the glue has dried, the element will be ready for use again.
How to remove cracks and other damage to furniture
Small cracks (up to 2 mm) can be filled with epoxy resin and heated with a hair dryer, both the surface and the glue. The resin hardening time is 4-6 hours.
Since it is not at all difficult to remove cracks on small furniture, we will focus on deep damage. If there are very deep cracks in the furniture frame, they require filling with epoxy glue in two or three steps and sanding after two to three weeks.
Filling large depressions and cracks requires puttying. Finding the right color putty is not easy. Using water-based wood putty, you can tint it with acrylic paints to achieve the desired color.
How to quickly get rid of the borer beetle
The sharpening beetle is the enemy of furniture. It poses a threat not only to the furniture in which it has settled, but also to any other furniture in the room, or even to the house if it is made of wood.
It's easy to spot. Small holes on the furniture indicate that a woodworm lives in it. As woodworms reproduce, they penetrate everywhere. If they are not destroyed promptly and promptly, the furniture will perish. Read on to learn how to get rid of the borer beetle.
To combat the borer, special chemicals are sold - insecticides. The method of their use is recommended by the manufacturer. First, vacuum the entire surface of the damaged furniture to remove dust from the holes, then inject the product into the holes using a syringe or pipette. Treat the entire surface of the furniture by applying the composition with a brush.
There is also an old, time-tested option - treatment with dichlorvos.
Another simple way is to paint the product with topcoat paint on any base. Grinder larvae will not be able to penetrate layers of paint.
Methods of heating and freezing are safe for health. Warm up the furniture thoroughly with a stream of sighted air (60 °C), using a construction or regular hairdryer. If possible, freeze the item by leaving it outside at a temperature of -5°C or lower.
Disposal of chipboard
The issue of recycling wood-based materials remains unresolved. The composition of chipboard contains 10-15% of harmful substances. Popular disposal methods include landfilling and incineration. In this case, formaldehyde vapor may enter the environment.
The choice of waste disposal method depends on the type and volume of production. In Russia, chipboard processing and combustion for energy production are not common. Processing technologies are still under development.
We recommend reading: Types and selection of containers for construction waste
Installing the necessary equipment requires significant financial expenses. However, recycling waste helps to avoid the release of toxins into the atmosphere, helps preserve the environment and reduces the cost of producing building materials.
Burning
Chipboards can be disposed of by burning them in special boiler systems. This method allows you to convert waste into energy. When chipboard and MDF are burned in special boilers, the release of toxic substances into the atmosphere is minimal.
The waste is first crushed. During combustion, 250-300 g/kWh is produced. The disadvantage is the high cost of the equipment and the inability to provide the boiler installation with the required amount of fuel. This disposal method has not become widespread in Russia.
Recycling into secondary materials
Using a crushing plant (shredder), the slabs are crushed into chips. Additional filters can reduce dust emissions and reduce production hazards.
The shavings are pressed or used in building mixtures. Materials obtained from recycled chipboard:
- Arbolit. Concrete, which is produced from wood chips, cement, water and chemical additives.
- Technological shavings. Used in the pulp industry, used for the production of particle boards, feed yeast, hydrolytic alcohol.
- Sawdustbegon. Used for thermal insulation of premises.
- Thermal plates Also basted for thermal insulation.
- Gypsum sawdust concrete.
- Termiz, Velox, xylolite, Durizol.
When processing chipboard into recycled materials, it is necessary to follow the technological process. Working with wood-based materials involves increased risk due to the release of toxins. The resulting materials must be tested for toxicity.
Return to production process
At large enterprises, it is appropriate to return wood chip waste to the production process. Transporting lump waste to landfills for disposal is unprofitable. Reusing materials reduces production costs.
Repair of cabinet furniture
Cabinet furniture can be made of solid wood, MDF or chipboard (chipboard) panels, coated with paints or plastic laminate, and decorative inserts made of glass, metal, and plastic.
Over time, the appearance of even the highest quality interior items wears out, scratches and chips appear on the surface, the color fades, laminate and veneer peel off. In any of these cases, a complete, partial repair of cabinet furniture or its renewal is carried out.
Similar articles:
| How to cover a kitchen with self-adhesive film with your own hands |
| Furniture stickers |
| DIY kitchen decoupage |
| Installing an apron in the kitchen with your own hands |
Properties of laminated chipboard
Laminated chipboard has a very high demand in the market due to its simple processing. You can even cut a sheet or add accessories using a homemade method, which is why many business owners opt for laminated chipboard.
In addition, laminated chipboard acquires unique properties due to the film that covers the top layer. This is ordinary paper, but after impregnation with melamine, it is not afraid of water and most modern solvents. And this, in turn, leads to the fact that laminated chipboard is resistant to damage, temperature changes and shocks, but within reasonable limits.
Benefits of DIY restoration
Restoration done independently allows you to save the amount that would be spent on the services of a professional, and use it to purchase higher quality materials and furniture fittings.
What is important is the fact that all work will be performed to a high standard. At each stage there will be control of the cleanliness and usefulness of finishing materials.
Another big plus is the opportunity to experiment at any stage of restoration, which is completely excluded if the wardrobe or chest of drawers is given into the wrong hands.
The restoration process itself is simple. You need materials and tools that can be found in any home or freely purchased at construction or crafts outlets. The main thing is to know the sequence of stages and possible methods and options on how to update furniture with your own hands, what to use in this or that case, what actions are acceptable with different materials.
How to restore a tabletop using a furniture touch or wax
Partial restoration of a white oak table top before and after
There are special restoring compounds that can be used to perfectly restore furniture.
Materials for restoration of kitchen furniture
To avoid peeling and swelling of the coating, all component parts must be additionally processed. To do this, apply a layer of waterproof sealant to “weak” areas (joints between the sink and the table, between the table and the stove, etc.), and also install aluminum strips. This procedure must be carried out as soon as the furniture is purchased.
Chipboard with aluminum edge ensures the durability of furniture much more effectively
Restoration of a side chip from laminated chipboard
Cosmetic repair of cabinet furniture
Minor damage can be repaired without resorting to radical action. These include scratches on the varnish coating, small chips in places of constant mechanical impact, the presence of small areas where the varnish has lost color or transparency under the influence of high temperatures and moisture.
Scratches just need to be waxed and thoroughly polished with felt. With chips the situation is a little more complicated. First, the edges are sanded with fine sandpaper to create an even transition from the old layer to the base material. Then this place is varnished several times with intermediate sanding. The entire surface is leveled to smooth lines of the original state.
Removing chips is similar to the process of partially restoring the original appearance of the paint surface. First you need to identify the area that will be restored and completely get rid of the coating on it. Then the same painting and varnishing takes place using carefully selected color products. Don’t forget to smooth out the transition after each layer using a grinding machine or the finest sandpaper.
Cosmetic repairs also require peeling off the laminated film or veneer on the surface of MDF and chipboard in some places. This occurs as a result of constant exposure to elevated temperatures and the loss of the adhesive layer of its bonding properties. The problem is resolved by gluing the coating using construction adhesive or PVA.
Restoration of chipboard furniture: what you might need
- Soft furniture wax
(wax putty). Used to seal chips, scratches, cracks on wooden and laminated surfaces of cabinet furniture, interior doors, laminate and parquet. Provides moisture resistance to the restored surface. - Hard furniture wax
(melt putty). Requires melting before use (for example, using a lighter, soldering iron or gas torch). Application is similar to soft furniture wax. Recommended for restoration of chipboard surfaces with high intensity of use (countertops, shelves, floor coverings). - Retouching agents
- felt-tip pens or alcohol-based markers, valve and fiber. With their help, the texture of the material at the restoration site after waxing is completed to make it less noticeable. Ordinary felt-tip pens in shades that match the furniture, strokes, paints, even shoe polish and iodine will also work. - Fixing varnishes, polishes
(best in the form of sprays and aerosols) for surface treatment after restoration. For coating after restoration of defects, returning surfaces to their former shine, masking abrasions and minor scratches. - Melamine edging with adhesive
for replacement trim. - Two-component epoxy composition, PVA, dowels (chops), wooden plugs
for filling holes from torn hinges and other fasteners. - Tools
– plastic spatula, sandpaper, abrasive sanding sponge (fine), utility knife, hair dryer or iron, chisel, non-woven wipes and rags for finishing.
Often, during use, chipboard countertops and cabinet covers wear out.
A tabletop that has faded from abrasion without severe defects on the surface (deep scratches, cracks) can be restored as follows:
- Select the coloring agent according to its shade. It is best to use felt-tip pens - you can moisten a rag with them and rub in soft circular motions and walk across the tabletop until it acquires an even color. Then fix the tint with a fixing varnish.
- In some cases, it is enough to treat a chipboard tabletop with polishing mastic with pigment (available for sale for light and dark furniture) or polish for laminated furniture. After applying the product, the surface must be polished with special lint-free wipes.
Door repair
The most common breakdown of cabinet furniture is the failure of doors. This could be a simple misalignment due to unaligned hinges, wear, tearing out of the fasteners from the base, or spontaneous opening.
Often, door misalignment occurs due to improper adjustment of the fittings. Its design provides for the presence of 2 auxiliary bolts. One is responsible for the fit, the other regulates the position of the doors relative to the front plane. By experimenting with them a little, you can return the doors to the correct position.
If this step does not bring a positive result, the loop will need to be replaced. There is nothing complicated about this. You just need to buy another loop and put it in a given place, screw it in with self-tapping screws and adjust it.
To keep the doors closed, magnetic strips and response blocks are used. The first thing to do if spontaneous opening occurs is to clean both halves or correct their position relative to each other. It didn’t help, which means they need to be replaced.
And the most difficult thing is that the integrity of the slab has been compromised, and the screws that held the hinges in place have been torn out. You can try filling the holes with PVA glue or silicone, which does not lose elasticity after drying. After drying, secure the curtain again. But in most cases, you will have to move the fittings to another place, slightly higher or lower than the previous one.
Laminated models and their repair
Additional measures to protect chipboard countertops - applying a layer of sealant and installing protective aluminum strips
The surface of a countertop covered with a laminated sheet may swell. To get it back to its original form, you need to:
- use a regular hairdryer to heat the surface in the deformed area;
- remove the damaged part;
- treat parts where the coating has been damaged with an adhesive composition (glue);
- in 15 minutes pour in a thick mixture of sawdust and PVA glue, infused for 10 minutes;
- compact with a spatula;
- pulling the lower and upper surfaces towards each other, fill the void using a spatula.
- let dry overnight.
After deformation of the top layer at too high temperatures, it may be necessary to replace the tabletop
In order for the original dimensions to match, you need to make a template from a block of the same height as the tabletop. It is placed in the middle of 2 planks and the resulting structure is tightened with clamps. The resulting press will help the mixture gain density and get rid of glue residues.
When delaminating the chipboard base, you need to clean off the excess and use a spatula to fill it with a mixture of sawdust and emulsion, tighten it with clamps and let it dry
DIY marble countertop restoration