Technology for gluing drywall to a wall
Let me briefly remind you of the technology for gluing gypsum board sheets.
- Firstly, drywall is glued only to the wall. This technology does not work well with ceilings; it is not included in technological maps, although it is used by some craftsmen.
- Secondly, the surface for gluing must be free of other materials, dry and pre-primed for better adhesion.
- Thirdly, for the work you need to use only special glue.
- Fourthly, there are three options for gluing plasterboard to a wall: on a flat wall, on a wall with unevenness up to 20 m and unevenness over 20-30 mm.
- Fifthly, the preferred use of sheets with a thickness of 12.5 mm. Let me remind you that a standard sheet of plasterboard with a thickness of 12.5 mm weighs 9500 grams.
Drywall adhesive: which one to choose?
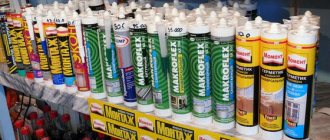
The list of types of adhesives recommended for attaching drywall is quite extensive:
- Specialized glue (“Perlfix” from the German one, “Ceresit”, Russian analogues “Volma” and “Montazh”).
- Plaster or putty based on gypsum. In terms of price, quality of adhesion to the surface being glued, and the degree of shrinkage during setting, there is practically no significant difference with specialized adhesives for working with plasterboard.
- Acrylic putty. Used when subsequent tiling is planned. The composition protects walls from mold, the harmful effects of fungi and high humidity. With it, drywall is attached to a base made of wood, shell rock, stone and foam blocks.
- Polyurethane assembly adhesive in an aerosol can. An ideal material for installing gypsum boards and gluing seams on curved walls. With its help you can level the ceiling and attach ceramic tiles. To work with it, you need a special gun that ensures economical consumption of the solution.
- Polyurethane foam with a low coefficient of expansion replaces glue.
- Tile adhesive. Its mobility and fine-grained filler make work convenient and fast.
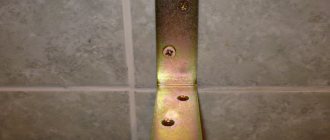
- Sealant. Any type of sealant replaces glue intended for gypsum plasterboards; in addition, it allows you to process joints, corners, and close cracks, making them impervious to moisture.
USEFUL INFORMATION: Is it possible to paint drywall without prior putty?
- Liquid Nails. A strong adhesive that is safe for health, but requires time to dry and is designed for a load of up to 15 kg. It is quite suitable for gluing not the thickest drywall.
Note! The mixture for attaching gypsum boards from Knauf requires professional skills; work must be carried out without delays, since the glue hardens quickly.
Recommended mounting mixture from Knauf
The Knauf company is not original; as always, it recommends only its own products, namely the Knauf Perlfix mounting mixture.
Knauf Perlfix
This is a dry mixture based on gypsum binder with polymer additives that provide high adhesion. It is intended for gluing drywall (gypsum plasterboard) to the wall, as well as for gluing insulating boards, PGP boards. Used for interior work only. Consumption: 5 kg/m2. Bags: 30 kg. Color from gray to pink.
KNAUF Fugen
This is not a mounting mixture, but a putty mixture based on gypsum binder with polymer additives. It is used only for gluing gypsum boards onto a flat surface. Sold in paper bags of 25 and 10 kg, or plastic bags of 5 kg.
Preparing a plasterboard wall: what is needed?
To fix the gypsum board to the wall, you need materials and tools:
- The selected type of drywall is moisture-resistant, ordinary.
- Dowel-nails, self-tapping screws.
- Selected adhesive for fixing sheets.
- Hammer, construction mixer.
- A plumb line, usually a sharp knife, a level.
- Container for preparing glue, spatula.
- Primer, roller, brush.
After collecting the necessary tools, as well as purchasing all the materials, you need to prepare the rough surface.
- Clean the wall of old cladding, wallpaper, paint.
- Existing cracks must be reinforced and puttied. Seal all holes with cement or gypsum based mortar.
- The surface is coated with a primer.
When the primer dries, gypsum boards are prepared. Holes for switch sockets are cut out in them.
For high-quality wall finishing, you need to properly prepare the adhesive mixture:
- The specified amount of water is poured into a clean container.
- Add a little dry mixture to the water and mix.
- After this, add the specified amount of dry mixture and slowly mix with a mixer.
To obtain a homogeneous mass, you do not need to set the mixer at high speed. This will cause a lot of air bubbles in the solution.
- After obtaining a homogeneous mass, pour a small amount of PVA into the glue and mix again.
After kneading, the solution must stand for at least 5 minutes to completely dissolve the additives and obtain elasticity.
Preparing walls and glue
Before you begin installing drywall with glue, it is recommended to prepare a set of necessary materials and tools:
- Sheets of finishing material
- Dowels
- Self-tapping screws
- Adhesive composition for installation of gypsum boards
- Hammer
- Special plumb line
- Screwdriver
- Rule
- Strong thread
- Construction knife
- Level
- Container for preparing glue, plaster mixture
- Drill with mixer attachment
- Several spatulas of different widths
Preparation of the working surface consists of:
- Cleaning the base from old coating, particles of dust, dirt;
- Degreasing the wall;
- Priming, which uses a special solution for cellular concrete bases (Ceresit CT17);
- After the primer has dried, you need to prepare plasterboard wall slabs in which you need to make holes for sockets.
In order for the finishing of walls with plasterboard on glue to last for a long time, it is recommended to adhere to the technology for preparing the working composition:
- Pour the liquid into the container according to the directions on the package;
- Add the required amount of dry putty;
- Mix everything well;
- The mixture should be homogeneous, similar in consistency to sour cream;
- Add PVA glue for greater effectiveness;
- Mix everything again.
It is not recommended to use an adhesive composition to glue the finishing material right away; you need to let it sit for some time so that all the components can bond well with each other.
When the base is polystyrene foam, polystyrene foam
Polystyrene foam and expanded polystyrene protect the home from the cold, but to prevent destruction and prepare the walls for finishing they require covering them with plasterboard. As a rule, covering a room with foam plastic steals 5 or even 10% of the usable area. If, in addition, you place drywall on a metal profile, the loss of space will be even greater, so gypsum board stickers are the best option here. The following will successfully complete the task:
- adhesive foam for drywall;
- acrylic putty.
USEFUL INFORMATION: How to level walls with plasterboard without a frame with your own hands (video)
Option No. 2 (irregularities up to 2 cm)
When the difference in wall level approaches 2 cm, the drywall should be glued in a different way, although the preparation of the surface and plasterboard, primer, and laying of the electrical cable do not differ from the previous option.
Instructions for gluing gypsum boards to moderately uneven walls are as follows:
- Prepare the adhesive mixture in larger quantities than in the first case, apply it to the drywall not with a notched trowel, but in separate dots or even piles, as in the next photo - this way the unevenness will be leveled out and, as a result, a strong fixation of the plasterboard on the wall will be ensured.
USEFUL INFORMATION: Plasterboard putty technology
- The sheet is placed on pads at the fastening point - the beginning, as a rule, is the most protruding section of the wall surface.
Glue dots are made along the perimeter of the sheet at a distance of 25 cm from each other, inside the perimeter they are placed every 40 cm. There should not be large gaps so that the reliability of the fastening does not suffer. For the same reason, you need to ensure that the height of the points is greater than the differences in wall level.
- Gluing begins by bringing the electrical wires out and lightly pressing the drywall, which should simply cling to the wall. It is better to work together, so that one master constantly holds and, if necessary, helps press the sheet.
- The final fastening is preceded by a thorough check of the plane in all directions to determine in which places to press the material. When flaws are identified, individual sections are tamped down, and the process continues until complete satisfaction with the result.
A special option when drywall is attached to a surface made of gas or foam concrete. In this case, for reliable fixation, the adhesive composition is applied not to the sheet, but to the wall, although this method requires care - when installing the gypsum board, it can be easily warped.
Execution of work
To properly glue gypsum plasterboards with your own hands, standard steps are carried out.
Preparing the base
Process technology:
- The surfaces are freed from all excess, cleaned of dust and dirt. If there is an old decorative coating that does not provide reliable adhesion, it is completely removed.
- The base is checked for visible and hidden deformations. It is taken into account that through cracks across the entire wall are a sign of problems with the foundation.
- If required, grooves are formed along which communication systems are laid. The created holes are sealed.
- Cracks and crevices are opened, primed and covered with putty. If required, a reinforcing mesh is applied to prevent cracking, after which a solution is applied.
- The wall is completely treated with a deep-penetrating primer with an antiseptic at least twice with intermediate drying. For coatings with poor adhesion, concrete contact is used to obtain the desired adhesion.
A clean and strong base is the key to high-quality installation, and primer is applied to the wall at least 2 times.
Particular attention is paid to areas that have been damaged by mold or fungus: they are thoroughly cleaned and treated with special mixtures.
Plasterboard gluing
There are various installation methods depending on the quality of the base.
Smooth walls
Work with such a surface is carried out according to the following scheme:
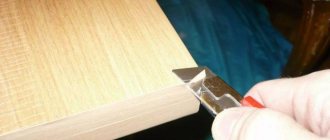
- If the sheets are without a chamfer, then it is formed independently with a construction knife directed at a slight angle. The material is also cut to a given size; there must be a gap from the floor and ceiling.
When installing plasterboard sheets around the perimeter, a damping gap of about 10 mm is left, otherwise the cladding may warp due to changes in temperature and humidity - Holes for switches and sockets are formed.
- Dry mixtures are prepared immediately before work, which will preserve their properties. Each serving is prepared for two large sheets.
- The part is placed on two perpendicular supports. The composition is applied to the wrong side of the drywall with a notched trowel, and the glue in a tube is applied using a special gun. It is important to distribute the mixture evenly over the entire surface.
- The element is lifted and placed next to the specified area, wires are pulled into the existing holes, after which the fragment is carefully pressed. The pressure on the surface must be gradually increased. At the same time, the installation is checked for level.
If foam adhesive is used for gluing gypsum boards, then the plane is checked within an hour after installation, because these compounds have a certain expansion coefficient, the remaining mixtures are leveled only once, after applying the sheet.
If the pressure is weak, then a mallet and a thin wide board are used, but it's important not to push too hard. Much depends on the accuracy of the first sheet, since it sets the direction for the rest.
Moderately uneven surface
Attaching drywall to a wall with noticeable curves is a more difficult task. An attempt to perform the work according to the previously described scheme will lead to undesirable consequences; the desired clutch will not be achieved.
Step-by-step instruction:
- GKL slabs are being prepared. The technology is similar to the previous version. It is important to correctly determine the wrong side in order to achieve the best result when finishing work.
The easiest way to determine the wrong side of a plasterboard sheet is to find the marking; it is always applied to the back side of the material - The mixture is mixed. It should turn out plastic and a little viscous. Since the principle of application in this case is different, more solution will be required, but you must remember that the lifetime of the composition is limited.
- The starting point for work is determined in advance. If the surface slopes inward, and the flat areas are the main ones, then they serve as a reference point. In case of bulging and numerous differences, it is necessary to glue the parts from the most protruding part. In such cases, the first element will serve as a guide for the rest.
- The prepared parts are placed on spacers in front of the work site. The fixing mixture is applied pointwise in increments of 15 cm along the edges and 20–30 cm in the center. In this case, there is no need to perform markup, everything is done conditionally. It is important to avoid too large gaps between points.
The adhesive can be applied both to the sheet of drywall itself and to the wall. - Start pouring the solution from the top so that by the end of the work the mixture does not slide down below.
- The plate is carefully lifted, wires are passed through the holes, after which the part is pressed. Using a level and light pressure, the sheet is leveled. The composition must set to prevent distortions when attaching the next part.
- The further process is carried out similarly.
In special cases, when the element is too bent when pressed, polyurethane foam is poured pointwise under the sunken side.
On a note! When working with foam concrete and similar materials, craftsmen advise applying the mixture not to the gypsum board, but to the base. This is more difficult, but will provide better adhesion.