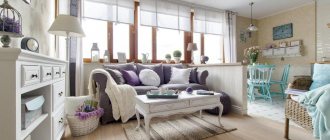
TV niche made of plasterboard: what it looks like, practical function
A special plasterboard frame gives the equipment a finished look. The simplest option for a niche is a small back wall into which a TV of a certain size is installed. To choose the shape and size of the structure, it is necessary to take into account the area of the room and the location of the furniture. In addition to the main place for the TV, open or closed shelves can be added to the niches.
Television niche with shelves Source piramida-stroi.ru
It is worth considering the dimensions of the equipment when creating the main frame for more reliable fastening. Modern TVs are lightweight, but to ensure safety and avoid unpleasant situations, you should take care to securely fix the equipment to the wall.
In most cases, to make the structure light, the TV is installed at a level of a meter from the floor using hanging mounts.
Design for a TV with open shelves Source nauka-i-religia.ru
Main functions of the architectural element:
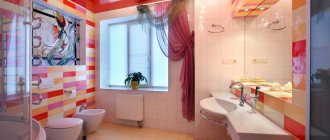
- Decorative wall decoration in the living room, bedroom, children's room. This design allows you to create a complete composition. The technique does not look like a single spot.
- The plasterboard structure hides wires, sockets, and uneven walls.
- The niche serves as a support for a TV, speakers, set-top box or cinema. It can contain shelves for decorative items, books and lighting fixtures.
- The portal in the kitchen is designed to accommodate a TV and utensils. In open shelves you can place beautiful dishes, a collection of figurines, wine bottles or other decorative elements.
Depending on the interior design, it is worth determining the size, shape and color of the niche. An interesting decorative element can become the highlight of the room.
Decorating a wall with a TV Source vestnikao.ru
Design ideas around the TV
Design options for the area around the TV device.
With shelves
A variety of shelves are a very common decor option. They can be decorated with books, photo frames, decorated with flower arrangements, figurines, or various equipment can be conveniently placed on them.
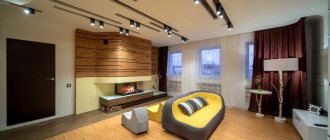
TV and fireplace
A TV in a niche, in combination with an electric fireplace, bio-fireplace or false fireplace, looks very beautiful, sets the right mood for the interior of an apartment, country house or cottage and makes the atmosphere much more comfortable and cozy.
Backlit
Thanks to well-placed additional lighting, the space not only becomes much brighter and lighter, but also noticeably transforms. In addition, the backlight favorably highlights and focuses attention on the TV screen.
With stucco
This decor gives the design special respectability and aristocracy. Plasma, recessed in stucco patterns, will become an incredibly presentable element of the room.
The photo shows a living room in the Art Nouveau style with a TV located in a niche decorated with stucco.
With speakers
Such a recess not only represents the center of the whole composition and is a full-fledged design element, but also provides the opportunity to hide wires and harmoniously fit speakers and all the necessary equipment into the space, without destroying its visual component.
Aquarium
Adds individual character to the environment and becomes a real living picture, giving the final aesthetic touch to the entire design.
Tips for arranging a niche
Practical advice on arranging a niche will help you design your future structure correctly. The preparatory stage is important; if you make some mistakes, you will have to re-equip the portal in the future.
Experts recommend:
- Determine the exact application of the structures. The choice of base material depends on this. For lightweight objects, plasterboard is suitable, for more massive ones - wood.
- The choice of material also depends on the room in which the niche will be located. In the kitchen, to create a decorative element, you need to use a base that is resistant to temperature changes and high humidity.
- At the preparatory stage, it is worth deciding on the number of shelves, the size and shape of the portal. The design should not be too bulky.
- The decorative element should be harmoniously combined with the main design style of the room.
- Installing horizontal portals allows you to visually lengthen the walls.
- Vertical structures visually increase the height of the ceilings.
- It is not recommended to overcrowd the TV niche with plasterboard, otherwise the structure may collapse.
- A niche with lighting looks much more interesting. Lighting devices can be either primary or additional light sources.
A niche for a TV with open shelves Source homeli.ru
Using simple recommendations will make the design beautiful and functional. Such a portal will definitely attract the attention of guests.
Niche design options
Arranging beautiful portals for TV, home theaters, multimedia systems is an excellent solution for repeatedly transforming the design of the interior decoration of living rooms, bedrooms, halls and even hallways. The financial side of the issue is not a problem here. The costs of purchasing materials, organizing and carrying out work here are minimal.
The kitchen space or dining room primarily involves compact and functional recesses finished in the form of laminate panels.
Judge for yourself - the cost of one sheet of plasterboard is 100 rubles for a standard cutting of 1500 * 600 * 12.5 mm. And this includes delivery. And when purchasing a large volume, the manufacturer usually gives a good discount.
You can make beautiful architectural solutions from plasterboard sheets. For example, arranging a recess for an aquarium next to your TV. Designing all sorts of decorative objects, be it a hole in the wall for installing a family photo or a place for placing a lush flower in a pot, is not difficult.
Decorative stonework is a natural object with an inimitable texture that becomes a wonderful addition to any design.
An additional arrangement of spotlights in the wall portals will ensure excellent well-being, uplifting your mood and life priorities, just by looking at such decor.
Arranging the edges with all sorts of decorative materials will give the interior design a completely different look. For example, organize an apartment mixborder. To do this, cover the protruding parts of the edges with tiles made of natural stone. If you want to save money, use substitute materials. Unique room decor in modern times is an affordable idea.
This finish allows you to add a certain rigor and reliability to the interior.
Have you always wanted to have a fireplace, but live in the city? No problem. Assemble an improvised chimney from plasterboard slabs. Visit a hardware store. There are often amazing finishing materials that imitate natural stone. This design will definitely not leave you indifferent.
An ecological fireplace will brighten up your home comfort. This is a device that simulates the burning of a real flame. For city apartments this is an ideal option. Above the fireplace there is a suggestion for installing a TV. Thanks to special fasteners for gypsum boards, such as “Harmut”, “Butterfly”, etc., you can hang the TV directly on a plasterboard partition.
A TV in a niche in combination with an electric fireplace, bio-fireplace or false fireplace looks very beautiful, sets the desired mood for the interior and makes the atmosphere much more comfortable and cozy.
Use gypsum boards when creating unique architectural compositions covering the entire wall. Make majestic arches, the portal of which is lined with rough cobblestones of natural stone. Organize lighting in specific areas. Also, install an LED strip around the entire perimeter.
At night, when such a composition is turned on in the network, the apartment will be illuminated by a true glow of superiority. This design will make you stand out as a connoisseur of extraordinary design, which is not so easy to come across these days.
Thanks to well-placed additional lighting, the space not only becomes much brighter and lighter, but also noticeably transforms.
Types of television niches
There are various options for designing niches for TV. To decorate the structure, depending on the intended purpose, various materials can be used:
- The surface can be coated with paint of any shade, the main thing is that all the colors in the interior are harmoniously combined with each other.
Plasterboard niche in the living room Source homeli.ru
- To decorate the portal, panels that imitate brick or stone masonry are used.
TV niche made of plasterboard Source remontnik.ru
- A variety of shades and textures of wallpaper allows you to highlight this area and make it more interesting and stylish.
Portal decorated with wallpaper Source vestnikao.ru
When creating a design, you should strive for rational use of space. A niche for a plasterboard TV should not only be beautiful, but also be as functional as possible. A unique portal design is selected for each room.
Types of niches for TV:
- Rectangular structures that follow the shape of television equipment are one of the most common types. This form is used in small rooms; it visually increases the space of the room.
Portal for a rectangular TV Source housesdesign.ru
- A vertical rectangular niche increases the height of the ceilings, it is ideal for spacious rooms.
Design for placing a TV Source mykaleidoscope.ru
- Round portals are rare, but they look quite interesting. Such designs become the main decoration in the interior. The wall for such a portal should be large; there may be smooth lines in the interior.
Unusual design of a television niche Source fi.pinterest.com
- Unusual forms of television niches should be chosen with extreme caution. A design that is too complex can ruin the entire look of the room.
A niche for a TV made of plasterboard Source vestnikao.ru
The choice of the type of niche for a TV depends on the overall style of the interior.
About sizes
The depth of the niche for the TV is one of the most important parameters that must be taken into account even before you design a niche for the TV. The dimensions of the niche should be at least 100 millimeters larger in each direction. This way you can achieve an enhanced visual effect, plus it’s better to install the TV on a wide surface. This also applies to niches for speakers, which should be larger than the devices themselves, and the niches themselves should not be very close to the TV.
Return to content
How to create it: take into account the dimensions and make indents
After choosing the type, size, shape and color of the television portal, you need to purchase building materials.
What you need to create a niche:
- galvanized profiles;
- GKL no thicker than 12 mm;
- dowels;
- profile connectors;
- metal corners;
- antifungal primer;
- wires;
- sockets;
- connectors.
Television portal in the living room Source mykaleidoscope.ru
After choosing the portal model, it is worth determining its dimensions, which depend on the following factors:
- dimensions of television equipment;
- wall area;
- shape and dimensions of the portal.
Optimal dimensions of a portal for a TV Source gipsokarton-blog.ru
The niche for a plasterboard TV in the living room should be in the most convenient location for family members and their guests to watch their favorite programs. It is recommended to place television equipment at a height of 1 m from the floor; this indicator can be calculated independently, taking into account the average height of family members.
TV height Source pinterest.es
From a medical point of view, the viewing angle from the center of the TV should not deviate by more than 30 degrees; it is permissible to attach the equipment to the wall at a height of 0.75 to 1.2 m from the floor surface.
The height of the furniture plays an important role. The center of the screen should be at eye level. If you place the equipment at a height exceeding the recommended values, the cervical vertebrae of the spectators will bear additional stress due to the unnatural position of the body.
Drywall portal Source mykaleidoscope.ru
When placing a TV in the bedroom, you should consider the height of the bed. There are no restrictions as such, the main thing is to create comfortable conditions for the audience. It is recommended to mount the screen in front of the bed. For small bedrooms, you can use mounts with a tilt-and-turn holder, which will allow you to change the location of household appliances.
Drywall portal in the bedroom Source design-homes.ru
Installing a plasterboard structure under a TV in a children's room has its own characteristics:
- The niche for the TV should be at the height of the child. A position that is too low can lead to damage to equipment, and a position that is too high can lead to the collapse of the structure.
- To prevent the child from throwing his head back while watching television, the angle of the screen from the direction of the eyes to the center of the TV should be approximately 30 degrees.
- The age of the child should be taken into account.
- The placement of furniture in the children's room determines the size of the portal and the location of the TV.
Television portal in a room for a teenage girl Source icaev.ru
Household appliances tend to break, so when planning the structure you should provide access to the back of the TV.
The dimensions of the niche must correspond to the dimensions of the equipment. It is recommended to leave a distance of 10 cm between the TV and the portal. This value can be greater, but not less.
Installing a niche for a TV Source picgalleria.com
Indents allow you to:
- provide TV maintenance;
- facilitate the installation of equipment;
- Provide ventilation to prevent overheating.
The remaining parameters depend on the chosen design of the TV niche.
Self-production
Before making a false wall with a niche for a TV, you need to make a sketch drawing, based on which you can draw up a drawing indicating the dimensions. This will help calculate the correct location of the profiles and simplify installation work. It is advisable to purchase everything necessary for the construction of the portal in advance in order to quickly complete the repair.
Preparing for work. Materials needed to build a niche with your own hands
No complicated tools are required. It is enough to find a hammer drill, a sharp knife and a hacksaw. Besides them, you only need a tape measure and a building level. Most often, the walls are not prepared, but in the open space inside the niche, leveling will be required (unless a gypsum plasterboard backdrop is installed there).
For installation you need the following materials:
- profiles for gypsum boards (ceiling-wall and guide);
- connecting, corner, hanging and other elements;
- fasteners: self-tapping screws with dowels and short ones;
- drywall of standard sizes or remnants from repairs;
- materials for finishing: reinforcing tape, gypsum putty, decorative coating and additional elements made of tenon or plastic.
Drywall marking
The main markings are applied to the wall - this is the projection of the future portal. All load-bearing supports will be installed along the lines, and markings must be prepared carefully, using a building level and measuring tools.
When the projection is ready, mark the removal of the false wall in which the niche will be located. To do this, determine the distance from the wall on the ceiling and floor. Its size is arbitrary and depends on the thickness of the TV panel (from the edge on the screen side to the most protruding point on the back of the device). It is advisable to calculate in advance the gap between the wall and the TV, depending on the method of mounting it, and take its size into account when determining the indentation.
Drywall is marked in width and height if the opening has a straight outline. When using smooth lines, it is advisable to take preliminary measurements and transfer the outline of the portal onto cardboard or paper. Try the rough material in place and adjust it after installing the frame. The manufactured parts will serve as a template for marking the plasterboard.
Installation of main frame profiles
Before attaching the profiles to the walls, you should determine where the electrical wiring will go and lay the cables from the installation box to the TV socket. If the design will have a backlight or they plan to install additional equipment next to the TV, then it is better to make a multi-slot socket.
The profiles begin to be attached along the marking lines, first installing vertical elements for upward-stretched portals and horizontal ones for the same niche. Fastening is carried out on dowels, punching recesses for them with a hammer drill with a nozzle selected according to the diameter. The fastening pitch is 30-40 cm.
When the projection of the box is ready, they begin to build a false wall. Guide profiles are placed on the removal line along the floor and ceiling. Verticals are attached to them, connecting the floor and ceiling in the corners of the structure and along the edges of the recess. If several niches are combined, the verticals are placed according to the markings on the wall. After this, all vertical parts of the structure are connected with jumpers: some of them will be load-bearing and are installed according to the projection on the wall. Horizontals and verticals must be verified with a building level.
At the end of the frame assembly work, the base of the false wall is connected by crossbars to profiles on the surface. Key points: corners of niches and any differences in levels of removal. For structural rigidity, additional jumpers can be placed in any place on the vertical elements. This is done if the new wall has a large area.
Installation of plasterboard sheets
The sheets are cut into pieces convenient for installation. If a curved structure is being made, then rectangular parts are installed first, filling the main part of the wall. The backdrop provided by the design is installed first. When the walls around the rounded niches are ready, curved parts are marked and cut according to pre-made and locally adjusted templates.
Straight-line boxes are assembled from rectangles, attaching them to the profiles framing the opening and all the stiffeners. It is advisable to join no more than 2 corners of adjacent parts at 1 point. The edges of the sheet should not hang over the void, and if the part is protruding beyond the crossbar, then an extra profile is installed, to which the edges of the sheet and the next part are attached.
The walls inside the niche are attached to the facade profiles and those installed on the wall. You can bend a strip for a curved surface by soaking the plaster inside the sheet. The cardboard shell is then perforated with a needle roller and watered generously. A wet sheet bends well, and after drying retains its shape. Large diameter curves can be made without soaking.
Mounting taking into account the load from the TV
If the TV receiver will not be hung on brackets to the wall, then the shelf must be strengthened when assembling the frame by installing several jumpers along the depth of the niche in increments of no more than 40 cm. When attaching plasterboard, screw the edges in increments of 15 cm. For equipment heavier than the TV -panel, it is better to make a shelf from thin boards like lining.
Finishing
After assembling the plasterboard base, glue all joints with reinforcing tape, and place a thin plastic corner on the outer corners. It is suitable for both straight and rounded lines. Level the surface with gypsum-based finishing putty (Ceresit, etc.). After drying for 24 hours, complete the finishing by painting parts of the niche, installing lighting, etc. You can stick tiles to resemble wild stone, brick or any type of wallpaper on the drywall.
TV installation
In a large niche, the TV is most often hung from the wall. To hide the wires, you can place the socket where it will be hidden by the panel itself, and roll up the TV power cord. A corner niche allows you to hide even an indoor antenna or a cable from an external one there (run it along the joint and decorate it). In the niche that outlines the screen, it is advisable to make holes in advance for the output of all wires and install a hidden socket behind a hatch in a false wall or on the side of a remote part of the wall.
Features of installing the panel in a round (oval) niche - additional installation of the shelf in a convenient place so that the screen is located in the center. To prevent the extra element from visually complicating the design, the panel is hung from the wall.
How to place a TV in a niche
The location of the television panel should be determined at the preparatory stage. It is necessary to take into account the location of the furniture, the direction of natural light, the model and dimensions of the structure. The distance between the screen and the viewer must be safe.
After installing a plasterboard niche under the TV, it will be impossible to make any changes. It is important to make the design as convenient and functional as possible.
Plasterboard construction for a TV Source homeli.ru
To reduce eye strain, the distance between the viewer and the television screen should be at least 3 m.
Options for decorative finishing of niches
Originality can be present at this stage as well. How exactly to decorate a niche depends on your preferences, tastes, and favorite examples of such design. Don't limit yourself to just the standard options.
The appearance of a plasterboard wall depends on the preferences of the household
Niche finishing options:
- Painting to match the wall - lighting is required for emphasis;
- Decorative plaster - creates a volumetric effect that occurs when applying several layers;
- A sticker with a pattern - and this is the most budget option, which is good when beautifully framed with a polyurethane baguette, and painting the slopes to match the wall or frame;
- Textured wallpaper, as well as fabrics, relief gypsum panels, bamboo panels, linkcrust - all this is glued using special technologies.
Well, perhaps your finishing idea will be the most original. Sometimes decorative mosaics and natural materials are used, and even laying with seashells is possible. In short, there are no restrictions.
TV niche lighting
The niche for a backlit TV looks quite interesting in the interior. The following types of lighting fixtures are suitable for lighting the structure:
- Fluorescent devices shine brightly and heat up to 35 degrees. They are recommended for use in rooms where small children live. The disadvantage of such lamps is that they have a short service life.
- Neon spotlights are distinguished by a wide palette of colors, consume little electricity, and do not heat up much. They have a long service life, which is at least 10 years.
- Popular LEDs are safe, have a long service life, and resemble natural light.
Niche made of plasterboard with lighting Source Do-it-yourself construction and repair
For the correct placement of lighting fixtures, it is necessary to carry out wiring and install sockets.
The number of light sources should be selected based on the area of the room and the size of the niche for the TV.
Niches made of plasterboard in the hall: device technology
The process of constructing a niche itself consists of three stages. The first is to build the frame. This, one might say, is a metal skeleton, which is assembled from load-bearing and guide profiles. They are all connected with self-tapping screws. In order to fit such a frame into the room, guide profiles must be attached to the floor and ceiling; they will determine the shape of the niche. They are also applied to the wall - and this will determine the volume of the niche. They are outlined with a pencil. After marking, the guides are attached to the bases.
The initial step in installing a plasterboard niche is installing the frame
To create a structure of complex configuration, you need to bend the metal profile with the radius of curvature you need. Before this, make cuts on the parts at five-centimeter intervals. Each section must be securely secured. It is at this stage that the lighting is thought out and the wiring for spotlights is laid.
Stages of arranging a niche
Before you start arranging the niche, you should get rid of the unevenness of the wall.
The main stages of creating a television niche from plasterboard:
- On the ceiling and wall, you need to mark a drawing of the future structure with marks in the places where the guides are installed.
- In accordance with the designations, metal profiles should be fixed into which vertical racks made of metal ceiling profiles are fixed.
- To connect the structure, it is necessary to install short sections of the ceiling profile at a distance of 50 cm. At this stage, you can make hidden lighting.
- The GLK sheets are attached to the profile using self-tapping screws, which need to be sunk deep, and then the unevenness should be well puttied.
- Apply 2 layers of primer to the surface of the niche.
- Then the drywall is treated with starting putty. For finishing, water-based paint, plastic or wood panels, and wallpaper can be used.
- If the design includes spotlights, they are installed in prepared places.
Illuminated TV niche Source thearchitecturedesigns.com
Plasterboard construction for TV Source dontcallmepenny.com.au
TV niche in the living room Source piramida-stroi.ru
Frame assembly
Unlike other popular designs, a niche or portal for a TV has special assembly specifics. As in most cases, the frame consists of a main part and load-bearing shaped elements that have no other function other than shaping.
The main set of profiles for creating a frame of almost any shape. Profiles CW and UW are used to form the base, CD and UD to strengthen the planes on which the drywall will be attached
For curved shapes, it is better to use a special bent profile that can recreate the bend of the correct shape
Assembly of the main part begins with the installation of guide profiles. Since niches are rarely made with a depth of less than 60–70 mm, the most suitable profile size for adequate load absorption is 50 mm. At least four vertical rows of guides are nailed to the rough plane of the wall, or, if continuous sheathing has already been completed, to profiles hidden behind the drywall. In the latter case, the section of wall for constructing a niche must be reinforced with horizontal crossbars every 40–50 cm - the assembled structure is attached to them.
All profiles in direct contact with the main wall, floor or ceiling must be glued with damping tape made of foam polyethylene
At the very bottom of the niche it is necessary to mount a small podium, which in plan will protrude beyond the rest of the structural elements. Its height is purely symbolic - up to 10 cm, and its purpose is to ensure the correct installation of the floor plinth. When using suspended ceilings, a similar design can be useful in the upper part.
For side columns, if they are straight, the guide profiles are duplicated in a position opposite to those already fixed to the wall. Fixed-length jumpers are inserted between them, which determine the depth of the recess. For the smallest niches, the second group of guides is simply inserted into the first.
If the columns have a curved front surface, the second row of guides is made with a segmented profile. Before installing it, you need to cut out the side segments of the sheathing, fold the drywall in four layers and follow the common marking line with a jigsaw. After sewing the sidewalls, a flexible profile is rolled along their edge; in the simplest case, this is a self-made “herringbone”.
It is a little more difficult to make the side edges curved: both groups of guides must be made of a flexible profile, and it is attached to the wall according to the marking line, which, in turn, is formed by tracing a template cut from plasterboard with a pencil. It will subsequently be used to sew the front edge, but first you need to screw a flexible profile around the perimeter of the wrong side. The structure is fastened, as in the general case, using spacer inserts.
Profile connection options. 1. Connection using bent “wings”. 2. Using a connecting “crab”. 3. Special insert for profile extension. 4. It is best to connect the profiles to each other using a cutter
The space between the columns forms a niche, which can be divided by a shelf for installation, or have a reinforced rear plane. In the first case, the frame is assembled in the same way as for columns: two profile lines connected by jumpers. If the shelf is slightly recessed, a pair of vertical posts will be needed for more rigid support. It is also necessary to strengthen the structure with braces, so loaded shelves are usually sheathed all the way to the floor, hiding the details of the frame structure.
Reinforcement of the rear wall is carried out using the counter-lattice method, applied to the rear side of the frame, repeating the step of installing the vertical posts. Here it is allowed to use a ceiling profile with a width of 60 mm, however, profiles in both directions must be attached to the wall with direct hangers.
Before sewing up the frame, lay the power cables for outlet groups and lighting, television wires and twisted pair inside the cavity of the frame. If the conductors used are not self-supporting or armored, they must be encased in a corrugated sheath. The cable train should not be attached to the frame - only to the wall, while at the exit point the wire is folded into a loop and laid in such a way that it can be easily reached through the hole under the socket installation box.