Modern interior design often does not welcome the use of familiar wooden cabinets, cabinets or shelves in the interior. In many cases, it is more rational to use less cumbersome solutions that fit organically into the environment. Drywall shelves, photos of which can be seen in catalogs of construction companies and on the Internet, will help you achieve maximum functionality in combination with decorativeness. With the right choice of their design and design, you can create an interesting and unique interior and make the room convenient and comfortable.
Application of plasterboard shelves
The use of plasterboard in the interior allows you to create beautiful shelves and exclusive built-in niches in the living room, kitchen, pantry and even in the bathroom.
- To zone the room, you can install functional partitions with through shelves.
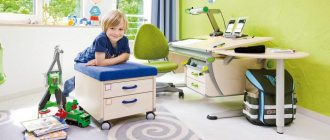
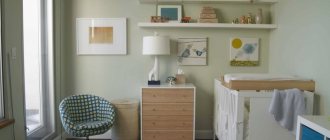
- Shelves made of plasterboard in the bedroom, made in the form of a separate element or an integral part of the main structure, look very original. In terms of functionality, such shelves are not inferior to standard wooden cabinets and chests of drawers.
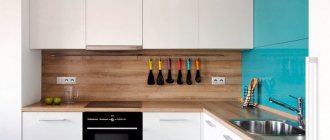
- Open shelves and built-in niches are widely used to store kitchen and other household utensils, which can significantly save space in the kitchen and pantry.
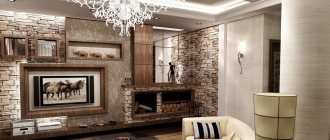
- Shelves and racks are often used to install household appliances in the living room, store books, favorite souvenirs and other small items.
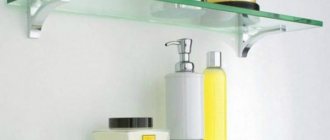
- Built-in shelves on the wall in the bathroom will not only fit harmoniously into the interior, but will also hide pipes and communications. Due to the high humidity of the room, plasterboard with high moisture resistance is used for these purposes.
To decorate such structures, both spotlights and lighting around the entire perimeter are used. You can enhance the play of light with the help of mirrors and glass elements. Such an additional light source will create a romantic atmosphere and bring mystery and grace to your interior.
Frame installation
Installation of the frame under the gypsum plasterboard shelf is carried out in several stages:
- surface marking;
- load calculation;
- assembly;
- fastening.
Surface marking
In order for the sheathing under the gypsum plasterboard shelf to be durable and last for many years, special attention should be paid to marking the wall or partition on which the fastening will be carried out. This must be done using a level, which will allow you to determine the differences in surface heights, and therefore the frequency of screwing in the dowels.
Drawing with the dimensions of the shelves for marking the wall surface. The surface should be marked with a special marker or an ordinary pencil. When marking, it is necessary to take into account the load that the shelf will bear.
Load calculation
Calculating the load is quite simple. You need to decide for what purpose the niche is being established. If this is a TV shelf made of plasterboard, then the strength level of the frame should be high. It is best to make additional fastening of the frame with jumpers from profiles.
If this is a shelf for shoes, then it is enough to create a regular sheathing for drywall, securely fixing the profiles together. If we are talking about a niche for various decorative ornaments, pictures that weigh little, you can assemble a lightweight structure without the use of additional fasteners.
Niche design with plasterboard shelves
In any case, the issue of calculating the load must be taken into account, because the reliability and durability of the structure depends on this.
Frame assembly
Most often, profiles that serve as guides are taken as the basis for the frame. This is justified by the fact that there are few different sections on such a beam. And this will allow you to create a neat and beautiful design. To bend the profile to shape, you need to make cuts. The more complex the shape of the structure, the more cuts will be required. This process can be carried out using scissors or a metal knife.
The process of attaching guide profiles to the wall. The prepared sections are joined together with self-tapping screws for a profile of a pre-calculated length. Each fastener must be tightly screwed. The steps should be performed one by one to ensure that the frame is strong and durable.
Assembled frame for plasterboard shelves
The process of fixing the profiles depends on the shape of the structure. The main thing is to choose high-quality and durable materials. After all, the reliability of shelves and niches depends on this factor.
Wall mount
Fixing a hanging shelf on the wall is quite simple. After all, there are pre-applied markings on the surface. If necessary, you can vary the distance during the process. The greater the load on the niche for the TV, the more often you need to screw in dowels or screws when attaching a shelf in the kitchen, room or bathroom.
Wall-mounted gypsum plasterboard shelves
Design of plasterboard shelves
The technical characteristics that gypsum board has allow you to create decorative elements in the interior of various shapes and sizes. The main advantages of this material include:
- simple and quick installation;
- flexibility of the material (it is possible to create structures of any shape);
- a large selection of finishing options (painting with any paints and pasting with materials of different textures is allowed);
- low cost.
USEFUL INFORMATION: Is it possible to plaster drywall: how to do it correctly and what to do it with?
You can add individuality to the room by making corner shelves from plasterboard with your own hands. Such designs will fit perfectly into a nursery, bedroom or living room. The use of corner elements is very important in a small room where the issue of saving space is acute.
Manufacturing and installing a corner structure is an excellent way to use free corners in a room for practical purposes.
The classic option is rectangular built-in shelves of various sizes and shapes. They are built into special niches, which can be part of the wall design created during the renovation stage, or can also be constructed from plasterboard sheets as a decorative element. If you decide to make plasterboard shelves with your own hands, the proposed photos will help you choose the most suitable design, and the installation guide will help you complete the job quickly and without errors.
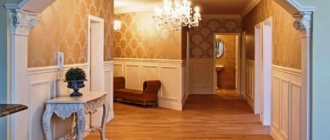
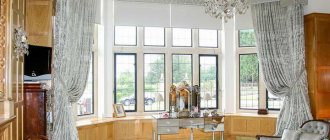
Drywall in the interior design of the hall
The hall in the apartment is a place that can be used for receiving guests, for family dinners, for relaxation and even for sleeping. This is especially true for small families and apartments in which several generations of the family live together. Therefore, the arrangement of niches, partitions and shelves in this room is especially important. The living room should accommodate a large number of people, which means it cannot be overloaded.
- By installing bookshelves on the wall in the hall facing the street, you can simultaneously hide the heating radiators and insulate the wall.
- If the room is used at night as a sleeping area, then you can make a niche around the sofa and, placing lighting in it, use it as night lighting, and the shelves next to the sofa will play the role of bedside tables.
- A TV and a built-in electric fireplace, as well as an aquarium, will fit perfectly into the niche located opposite the sofa.
- If the design of the room is arranged according to Feng Shui, then you cannot do without drywall. Its use allows you to make all sharp corners in the room rounded.
- Niches made of plasterboard with rounded shapes look impressive on the wall. The lighting located under the shelves allows you to create the feeling of the structure floating in the air, giving it weightlessness.
USEFUL INFORMATION: Laminated drywall: pros and cons, application and installation options
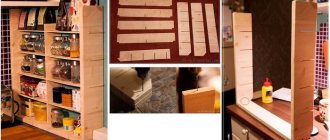
Stages of making plasterboard shelves
Before you make plasterboard shelves with your own hands, you need to prepare materials for installing the frame and main elements, namely:
- plasterboard sheets;
- metal profile – load-bearing and guiding elements;
- fasteners (dowels and screws);
- serpyanka mesh;
- primer and putty;
- finishing materials (wallpaper or paint).
Design
Step-by-step instructions for making a shelf begin with creating a diagram. Before making a shelf from plasterboard, the design, purpose and location of the shelf on the wall are determined. After creating a sketch, measurements are taken of the section of the wall where the future structure will be placed.
Correctly carried out calculations make it possible to determine the required amount of materials to create the supporting structure and component parts, as well as the volume of work to be performed.
The finished plasterboard structure can take the form of a built-in niche or a protruding decorative surface. In the first case, the shelves are mounted into the wall during the process of assembling partitions or leveling the surface, in the second - on a flat wall surface.
USEFUL INFORMATION: Drywall slopes: do-it-yourself installation
Advantages and disadvantages
The main advantage of gypsum plasterboard structures is their lightness. The rack weighs less than cabinet furniture and wooden products, although it is capable of performing all their functions. The panels do not burn, do not melt or emit toxic substances even when exposed to high temperatures.
For self-installation of a shelf in a plasterboard wall, the flexibility of the material is important. A person without experience, complex tools or furniture maker skills can assemble the frame and cover it with gypsum plasterboard parts. The parts are easy to cut with a sharp knife, and the metal profiles are connected using self-tapping screws and a screwdriver.
The design of the shelves can be anything. To assemble a curved structure (arched, round, etc.), you need to use special profiles that can be bent along any contour. GCR does not require complicated preparation; it is easy to add a slight curvature to any part, and for strong bending the material only needs to be slightly moistened with water. Built-in plasterboard shelves and partitions can be covered with the same materials that are used for finishing the walls and ceiling, creating a harmonious interior of the room without much effort.
Among the disadvantages of gypsum boards:
- fragility;
- ability to bend under heavy weight on spans of more than 50 cm;
- low resistance to moisture.
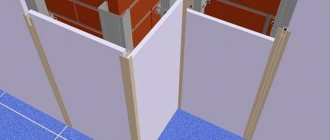
Creating a wireframe
The most labor-intensive and complex process that requires certain skills and abilities. After design, control marks are placed on the surface of the wall, which will correspond to the location of the surfaces of the future structure. To ensure that the shelves are perfectly level when marking, you must use a building level.
After applying the markings using dowel nails, the guides are fixed to the wall. A profile is attached to them in accordance with the drawing, making the frame for plasterboard three-dimensional. The perimeter is made from guides, the reinforcement is made from a supporting (rack) profile.
Installation of lighting fixtures
At the stage of creating the frame, wiring is laid for future lighting, if provided for by the project. The wires must be hidden in the corrugation. Holes are cut in a sheet of drywall for spotlights.
The best solution for illuminating a plasterboard shelf is to use an LED strip.
The finished shelf with lighting will harmoniously fit into any interior.
Covering the frame with plasterboard
Before sheathing, sheets of plasterboard are cut into individual parts of the required sizes. Next, along the marked lines, the necessary elements are cut out with a hacksaw or cut off with a sharp knife. All irregularities on the cut lines are sanded with sandpaper.
Using self-tapping screws, individual plasterboard parts are attached to a previously made frame. Possible misalignments of elements should be avoided to prevent fracture and deformation of plasterboard shelves in the future.
Important! In order for the structure to withstand the load, you need to use stronger plasterboard 1.8 cm thick or install standard wall material (1.25 cm) in 2 layers. Additional strength will be provided by frequent placement of frame jumpers.
Processing of joints
To obtain a perfectly flat surface of the shelves, it is necessary to carefully process the joints between the individual parts. To do this, apply a layer of putty to well-primed seams, then seal them with sickle mesh and putty again, not forgetting to also fill the holes from the screws with putty.
USEFUL INFORMATION: Putty for sealing drywall joints: which one to choose and which one is better
To give the edges of the structure an aesthetic appeal, special aluminum or plastic corners are used, which are glued with gypsum putty and hidden under its layer. The use of such corners will prevent mechanical damage and abrasion of the drywall.
After drying and sanding the treated areas, the entire surface is puttied, which is then also sanded until smooth.
Surface finishing
To ensure that the surface of the shelf is smooth and durable, it is finished.
It consists of the following:
Scheme for filling drywall joints.
- The entire surface is treated with a liquid primer.
- Holes from screw heads and joints between individual parts are sealed with starting putty.
- The edges and corners are covered with plastic or aluminum corners. A reinforcing mesh is glued over the joints between individual gypsum plasterboard fragments.
- Finishing putty is applied to the entire surface. Allow at least a day for it to dry completely.
- Grinding and polishing are carried out using fine-grained sandpaper.
- A liquid primer is applied to the treated surface.
Related article: Repairing the walls of a wooden house
The finishing touches are complete, you can move on to decoration.
Finishing work
After you have managed to make a plasterboard shelf with your own hands, you can begin finishing the surface. To do this, the structure can be painted or pasted over with various materials.
To create contrast in the interior, shelves and niches are painted in colors that differ from the main color of the walls in the room. To decorate plasterboard shelves in the kitchen, it is recommended to use self-adhesive film with a pattern. You can decorate the shelves in the bathroom using tiles or mosaics.
In addition to performing a decorative function, any finish protects the surface of the drywall from damage and moisture, thereby creating a reliable structure that will last you a long time.
Functional zoning of the living room with plasterboard
There are many ways to create zoning for your living room. The simplest and fastest of them is installing a decorative partition or screen. This method is best used in spacious and large rooms. A plasterboard partition for zoning a living room can be of a blind type. Its decoration coincides with the design of the walls in the living room itself.
You can make any shapes from drywall
A plasterboard partition can have built-in shelves. You can store accessories or books on them. Recently, it has become popular to insert a backlit aquarium into a plasterboard partition. This decorative technique will make your living room amazing and original.
Multi-level ceiling in the interior of a modern living room
The second option for zoning the living room is done using the ceiling. Plasterboard suspended structure is the most common and modern method of zoning. This method can not only divide a room, but also give it an amazing appearance.
Decorative element made of plasterboard
To carry out zoning of the premises in this way, multi-level structures are made, the boundaries of the levels of which should be determined by the zones. This is an important point. An unusual effect should appear in the interior. Very often, the boundaries between levels on the ceiling are decorated and decorated. To do this, you can use built-in spotlights or LED backlighting.
Plasterboard niche for TV