Making LED lighting
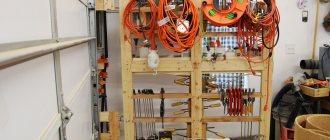
To install the LED strip yourself, we will take the following tools: a 3 mm drill, a hacksaw, 10x1.5 mm screws, a two-core wire, a screwdriver, and a tape measure.
If you plan to install the tape on the lower edges of the kitchen elements, then there are 2 options:
The tape is applied directly to the grease-free surface of the bottom of the kitchen cabinet.
Installed in the baseboard. A profile is screwed or glued to the bottom of the cabinet, and an LED strip is inserted into it and covered with a transparent insert.
LED lighting can be installed in a pre-prepared plasterboard housing. Then it is connected to the power supply and connected to electricity.
Typical connection errors
Serial connection of more than 5 meters of tape. This cannot be done.
Twisting instead of soldering wires (or connectors). If you don't want to solder, use connectors, they're cheap.
Failure to follow the connection order: power supply ⇒ controller ⇒ tape ⇒ amplifier ⇒ tape.
Save on the power supply by buying “back to back” in terms of power. Unfortunately, LEDs are both plus and minus in terms of watts consumed. If you buy a power supply without a 20-25% reserve, it will wear out and in a year you will buy a new one, but with a reserve.
Buying a controller with excess power. It won't get any worse, but you'll overpay. Correctly select the power 1 to 1.
Selection of very powerful tapes and installation without heat sink. For example, SMD5050 120 led/m consumes 28.8 W/m. With such power, the LEDs heat up quite strongly and the structure must be mounted on a heat sink - an aluminum profile. Otherwise, the diodes begin to degrade, lose power and burn out.
LED illumination of seedlings
Experienced gardeners often use LED lights for seedlings. It is durable, consumes little energy and shines brightly.
To assemble such a backlight yourself, you will need: UVR LEDs, special glue, a board or profile for attaching the light diodes, a power source, also known as a driver, a cable and a plug.
The LEDs are prepared and attached to the driver. It connects to the switch and plug. When arranging good lighting for seedlings, you will need to change the lamps every other: 2 red - one blue and so on.
It is recommended to place the light bulbs in 2 rows so that their rays do not intersect. When the seedlings are pinched, the order of the diodes should be changed: red, blue and so on.
To make LED backlight in a simple way, you need to buy a strip with LEDs. For this you need: four 20x20 corners, 2 strips of red and blue LEDs, a driver, a wire and a plug.
The installation diagram is simple and involves sticking a strip of lamps on the corners, connecting the driver, maintaining the polarity.
How to illuminate a tabletop or dining area with LEDs
For the work area, a device with an average degree of moisture protection is suitable - it has a special protective layer that protects against vapors and contamination, water and other liquids. This means that if wet cleaning is necessary, you can wipe down the cabinets along with the lamps.
Installing the tape to the table involves attaching a special aluminum profile. It is necessary to hide the wires and make the lighting aesthetically pleasing. You can also make lighting from self-adhesive tapes. By the way, by installing additional devices you can create a backlight that will change brightness and/or color.
Advice! A warm white LED strip color is optimal for a desktop, as it will not change the natural colors of the food.
Additional lighting can be made from LED strips in the work area. Designs with high moisture protection are also needed here. The tapes here are installed with double-sided tape. You can use several ribbons to create an expressive decorative effect.
LED backlight switch
What kind of LED backlight switch is there?
Divided into types:
- According to the control method.
- Installation type.
- By connection type.
Consists of parts: external part, sensor, switching circuit, surface-mounted or built-in housing. Mounting: a modular switch is attached.
Its small size makes it possible to install it on a profile. The switch is mounted next to the LED strip.
To make it, you need the ability to solder and knowledge of electrical engineering.
You will need a set of parts to assemble the switch. You need to assemble according to the diagram that can be found on the Internet.
Choosing a suitable LED strip - classification and comparison
Most often, LED backlight installation is made from SMD LEDs. They are classified according to a number of characteristics:
- Number of crystals – from 1 to 4;
- Glow type – full color or monochrome;
- Dimensions - in the range of 1.06x0.8 to 5.0x5.0 mm.
Before you buy an LED strip, you need to decide what type of lighting you want to make. Here are the following recommendations:
- SMD 50x50 strip with three-crystal LEDs is perfect for lighting the work and dining areas and can provide uniform bright light.
- For decorative lighting, a single-chip SMD 35x28 tape is suitable.
LED strip (LED) consists of several small LEDs located within the same plane. It can also have several varieties depending on the density of the LEDs:
- 30 pcs/meter;
- 60 pcs/meter;
- 120 pcs/meter;
- 240 pcs/meter
The power consumption and the brightness level of the generated lighting depend on the number of LEDs.
Tapes are divided into groups according to the degree of moisture protection:
- IP20 – not suitable for the kitchen because it cannot withstand high humidity;
- IP65 – average level of moisture protection, can be used in the kitchen;
- IP68 – complete moisture resistance – even a swimming pool can be illuminated with this tape.
LED illumination of the working area
The lighting of the work area is very dependent on the location of the lamps. To illuminate the tabletop, lamps should be installed under wall cabinets. Do not direct light from lamps into your face.
The most important part of installing LED countertop work area lighting is the direction of the light. For comfortable work, the light should be directed to the tabletop and avoid directing the light into the eyes.
To prevent lamps from dazzling, lamps with a diffuser are often used. Lighting should be provided in the dishwashing area, where food is prepared and cut up. Thanks to this, eye strain is reduced.
Electrical equipment, light, lighting
102 votes
+
Vote for!
—
Vote against!
When you renovate an apartment completely on your own, you can easily cope with such a creative process as creating unique LED lighting. How to make LED backlighting yourself, is it possible and how easy is it - these are the questions that arise before you. Thanks to the fact that suspended ceilings are now made from plasterboard, the installation of LED lighting has become possible in any apartment, as well as in any part of it: bedroom, kitchen or bathroom. You can even install it in a closet.
Table of contents
- What is LED tape
- LED backlight circuit
- The order of your actions
- LED ceiling lighting
- LED kitchen lighting
- Car lighting
- LED panel lighting
What is LED tape
What is an LED strip or LED strip? It is a flexible strip that has an adhesive base on one side, and LEDs and resistors are located on the other. The tape has multiple sections (5 cm), on which three LEDs and special marks are most often located, indicating where the tape can be cut. The LEDs in the strip are connected in a series circuit. Tapes can be environmentally protected plastic tubes or silicone, or they can be open, depending on the place of their use, and the tape is selected. The diodes used in the strip are of two types: SMD 3528 and 5060 (5050), the second are more powerful and can be used as independent sources of room lighting.
If you use an RGB strip for illumination, then it is important to know that it has four outputs - for the main mass and one for each color: red, green and blue.
LED backlight circuit
If you need to illuminate a large area, then it is better to make strips no more than 15 meters long, otherwise the lamps closest to the power source will burn out faster, since the voltage at the beginning of the circuit will be very strong.
The order of your actions:
- You decide on the type of LED: SMD 3528 or SMD 5050 - the latter will be more expensive, but they also have higher power.
- Determine the required LED density. There are 30, 60, 120. The indicated number shows the number of LEDs per meter - the higher the number, the brighter the lighting will be.
- We decide on the type of tape. For example, IP 44 is waterproof. We decide on the adhesive side - whether you need it or not.
- Color – single color or multi-color, the second requires a controller.
- Calculations: we measure the perimeter of the area where the lighting will be located, calculate the total area - multiply the power consumption of one meter by the resulting footage. Based on the data received, we select the power supply and controller.
- We determine the location of the backlight. Whether there will be plasterboard protrusions or not is up to you.
- Installation: we cut the tape (there are special marks on it - where you can cut), solder single-color sections according to the type “+” goes to “–“, for multi-color tape you need to solder sections of the same name with the letter designation “V+”, “R”, “G” ", "B". We remember that you can connect no more than 15 meters of tape to one power supply.
- Connection. We check the polarity - there should be no errors! If the power cord is not connected in advance, then connect the cord to contacts L and N, then if you have a multi-color ribbon, connect the controller and only then connect the ribbon directly.
Most often, contour lighting of the ceiling is used, but other options are also possible. With the help of LED lamps and strips, you can advantageously delimit parts of the room or emphasize the color scheme of the room. For example, if your bedroom is made in deep blue tones, then the ceiling can be decorated with a pattern of LED lamps so that it will seem as if there is a starry sky above your head. If two children live in a children's room, then an interesting solution would be to divide the room by light so that each child has his own corner for both work and sleep.
The advantages of LED backlighting are that it is easy to install, is relatively inexpensive, lasts a long time and comes in different colors. Whereas standard lighting household appliances have only two options: warm light and cold light. And if we talk about neon, it is short-lived and difficult to install.
The color options for LED lamps are varied - from single-color to RGB strips that can change color. If you don’t have strong money constraints, then buy a full-color tape and a separate controller for it. When buying a tape, choose one with silicone insulation; if your upstairs neighbors flood you, the wiring will be safe. As for choosing a specific color, it’s up to you to decide: green is more pleasing to the eye, but blue can be perceived incorrectly, sometimes even dull.
The lighting can be made in different ways - it can be LED lighting for a stretch ceiling, using a rigid module, spotlights can be used, as well as mini spotlights. Which of these to use will be best determined by your imagination, or perhaps a comprehensive solution for all family members, because everyone wants to rebuild the world around them to suit themselves, and even more so their own room. The main task when installing lighting is that it should be invisible from below, therefore, in order to hide it, they use protrusions or cornices, and the distance also matters. So, if the distance is too large, the backlight will illuminate the niche itself more than the ceiling itself, and if it is small, the diodes themselves and the spaces between them, which are not illuminated, will be noticeable.
LED strip lighting is simpler both in installation and in functionality - it can be installed where other lamps cannot cope. Even hard-to-reach places are no problem for the tape.
LED ceiling lighting
First, you will need to create a design project, that is, a work plan and a drawing of the final result. It is important to correctly calculate how many lamps you need, in what specific places to place them, how many meters of LED strip you will need, it is important to remember that it is most convenient to take a strip that is a multiple of 5 cm - at this distance you can place 3 LEDs. Then, after the calculations, you need to buy an LED backlight, a power supply for it, and if you buy a multi-color strip, then a controller for it. When everything is purchased, be sure to read the instructions. For ease of installation of the LED backlight, there is an adhesive layer on one of its sides. First, the attachment point must be cleaned and treated with an alcohol solution. Then remove the protective layer, press the tape to the attachment point and hold for a while. If according to the project your tape must bend, then remember that the bends must be more than 2 centimeters in diameter.
Depending on the country of manufacture, the diodes used, and the color color, the price of LED backlighting will differ.
LED kitchen lighting
LED lighting in the kitchen is already becoming very fashionable and popular; with its help you can designate different zones, create a coziness or an intimate atmosphere for a pleasant evening. Using LEDs in the kitchen you can illuminate niches, “aprons”, cabinets from above or below. Currently, such lighting is used in bars, restaurants, and hotels.
If you want to divide the space in the kitchen into work space and the rest, use different colors. For wooden furniture, you are better off using LEDs in warm shades of yellow and orange; if you have a high-tech kitchen, then blue or silver colors are more suitable for you. And the reception area can be equipped with a full-color tape with a controller.
You can also beautifully illuminate a bar counter or a glass cabinet with crystal - it will look simply magnificent and chic.
Car lighting
One of the latest innovations for a car is the installation of LED strips on it. At the same time, the car itself is illuminated from below, interior lighting is provided, or the instrument panel is illuminated with LEDs. Today, a wide range of LED bulbs installed in the dashboard are sold - they consume little energy and are quite bright. Since there are more and more identical cars in the parking lot, equipping it with LEDs will help make your car unique and different from the rest. You can tune your car using both LED lamps and LED strips. An unusual solution may be to illuminate the car's rims. Traditionally, blue diodes are used, but you can choose a different color, depending on the color of your car.
LED panel lighting
In addition to LED strips, there are also LED panels - they are usually very thin (about 13-15 cm) and come in a variety of colors and sizes. This new product attracts the attention of designers, as it allows you to solve problems such as, for example, too low ceilings. Or, if you need a bright color scheme for the walls, then the panels will simply help out, while the tapes will be lost. This is an excellent solution for a children's room, a restaurant, and a club setting; they can also be used in office and warehouse spaces.
LED panels are designed for different uses, they are designed for installation on concrete and brick walls or ceilings, can be built into a suspended ceiling, or can be suspended separately with special mounts.
You don't have to worry about your eyesight - the light panels are absolutely safe for your eyes. Typically, light panels have different lighting intensities, which can be adjusted using a special remote control.
LED lighting devices from lamps and spotlights to panels and strips are modern, stylish and non-standard. With the help of such lamps you will make the design of your apartment or office, or car unforgettable and unique. You can use LED lamps to improve various landscapes - in the design of hotels, amusement parks or even in a swimming pool. You can install them either yourself or by inviting specialists. In addition to beauty, LED lighting consumes much less electricity and is a high-tech and reliable product.
Photo of LED backlight
Why LED lighting is better
Advantages of LED lighting: low energy consumption, simplicity and ease of installation.
LED strips very quickly gained popularity in the market due to their technical characteristics: longer service life compared to other lamps, bright glow, energy saving. A special box is used to attach the tape. Installation of boxes for ice strips is carried out both outside and inside premises: on facades, walls, ceilings, as well as in the floor, furniture structures - wherever lighting is required.
The tapes are also convenient for installation work, as they can be freely shortened and cut. The box itself for the ice tape is made of durable materials - anodized aluminum and plastic. In addition, it is possible to choose the color and original design of the product.
Design Features
Box
LED strips are products with different numbers of LEDs. There can be from 30 to 60 pieces on one tape. Therefore, in order to ensure their high-quality installation during repairs, special aluminum or plastic boxes are used.
A plastic or aluminum box is a reliable sealed structure, on the basis of which all types of LED strips are placed. Such a device can either be purchased at a specialized store or made with your own hands. At the same time, making it yourself will cost you several times less, which is very important for a budget but stylish renovation.
Advantages of using boxes
Installing an LED strip in a box has the following advantages:
- the lamp is protected from all unwanted influences;
- ensures removal of excess heat;
- the appearance of the lighting is more neat and attractive, allowing the strip to fit harmoniously into the interior;
- connection security is ensured;
- it becomes possible to increase the service life of the tape;
- The installation of such a box is simple and can be done by hand.
Important! Justice requires naming the shortcomings. Among them is the need for certain labor costs when installing the box, especially on the cornices of ceiling structures. It is not very convenient to work; it is necessary to follow the sequence of actions so that as a result there are no wires or protruding ends of the tape on the surface.
Mounting methods
After we have figured out the features of the LED strip, as well as what types of boxes (aluminum, plastic, etc.) there are, we can begin to consider the issue of mounting the backlight itself. Most often, the LED strip is attached to the ceiling. When installing it in other places, the principle of fixation remains virtually unchanged. The peculiarity of this kind of strip is that it must be hidden in boxes. This should be done in order to create the necessary visual effects and make the light diffuse and more pleasing to the eye. There are the following options for installing the LED strip:
- box with an open niche;
- box with a hidden niche;
- without box.
Let's look at each of these methods in more detail.
No niche
In addition to the standard methods described above for placing LED backlighting, there are also other methods for mounting the strip. For example, the tape can be placed between existing ceilings and the tension fabric. As a result, the canvas itself will be illuminated from the inside.
This way we will get muted, soft and pleasant lighting, with which you can easily create a romantic atmosphere. A significant disadvantage of this installation is that if there is a need to replace the strip, it is necessary to partially dismantle the ceiling. But this is not very convenient, and it is also expensive. Therefore, this method can be found extremely rarely. But this minus may well cover the original appearance of the ceiling and lighting. In addition, LED lighting can be installed using a special box.
Box for strip
Installation in such a situation occurs as follows:
- we fasten the box around the entire perimeter of the room or in the necessary places;
- fastening occurs through special holes in the product;
- We place an LED strip inside;
- closing.
Note! It is not recommended to install the tension fabric in close proximity to lighting fixtures. This is due to the fact that light sources at close range can have a detrimental effect on the material from which the canvas is made. From all of the above, we can conclude that it is quite possible to make a box for an LED strip yourself. In this case, you can choose the ideal installation option for each specific case. Before installation, think through all the nuances, and the assembly will go as expected, and the lighting will turn out very beautiful.
Types of filters
Filters are needed to eliminate interference coming from LED lamps. It's all due to switching power supplies, which create interference and damage the working light bulbs. To get rid of them, special filters are installed. Their components: varistors, electromagnetic choke, capacitors.
There are several types of anti-aliasing filters: inductive, capacitive, LC RC filters. But for an LED strip, only an inductive anti-aliasing filter is suitable.
A varistor limits voltage drops and prevents damage to the device. The inductor's job is to smooth out the current. Essentially, an inductor is an inductive coil - a copper wire wrapped around a coil. Circuits are installed in series. Capacitors act as chokes, but are installed in parallel with the circuit.