One of the biggest problems of small apartments is equally small kitchens. But it has long been known that a person spends a quarter of the time spent at home. The kitchen is the place in the house where you need to place a lot of useful little things, and also in such a way that they do not interfere, and at the same time are always at hand. We suggest equipping a mini-pantry behind the refrigerator.
Consider getting some space for that much-needed pantry without cluttering the space. Even an approximately 12-centimeter gap, empty between the wall and the refrigerator, will do. Having equipped a mini-pantry there, you can easily pull out the cabinet and take everything you need, and then just as easily push it back.
The advantage of pull-out shelves
The main idea of this approach is to make the most efficient use of literally all the space that is at our disposal.
Such systems make it possible to greatly increase the capacity of a conventional kitchen unit, while still being located in the same area.
A lot of space is freed up, which can be used in various ways and, most importantly, you can easily move around the kitchen.
The most common option is built-in shelves in floor or wall cabinets. Their advantage is that they are easy and convenient to use.
As usual, the door opens, only we see not the usual 2-3 shelves, but a whole multi-level system that can be filled to capacity with the necessary items.
Such “boxes” can be completely removed from the closet, which means you don’t have to reach deep for the right thing. Everything can be laid out evenly and you can get to the right thing whenever necessary.
In addition, the pull-out shelves are equipped with a reliable mechanism. The shelves do not need to be supported so that they do not collapse under the weight on the floor.
Types of retractable structures
There are several options that can be implemented in your kitchen, depending on the needs of the room.
Drawers
Such simple designs can have different configurations of depth and width. Often they can be equipped with additional partitions or sections designed to store small items.
Drawers are equipped with the ability to pull out the entire structure at once. This way you can view all the contents of the cabinet at once.
It is very convenient if you need to carry out an “audit” on the shelves or quickly look at what you need to buy before going to the store.
It will be convenient to arrange such boxes depending on the purpose of their contents. For example, it is best to place a cabinet with pots and pans near the stove, and dishes near the sink.
Cargo
In essence, this is the same drawer, but it is designed to be used for bottles and tall cans. It is quite narrow, its width does not exceed 20 cm.
The small dimensions allow such a cabinet to be placed in various openings where it can be handy. You can place spices in them, which will be convenient next to the stove.
It often happens that there is a free corner or some space left in the kitchen. This is where a cargo box fits perfectly.
Baskets for kitchen sets
Retractable baskets built into furniture look very beautiful and significantly unload the space due to their “light” appearance.
Depending on the size, they can be built into a cabinet or cabinet of any size. In this case, the guides will be installed in such a way that the basket slides out completely, which will ensure comfort when using it.
This product can perfectly complement the interior. Let's say, it would be perfect for Provence or country.
How to use the space above the refrigerator?
In a properly equipped small kitchen, every centimeter of space has its own functional purpose. And the space above the refrigerator is no exception.
Quite rarely, apartment owners think about the rational use of this space. But in vain, because it can turn out to be very practical. Let's look at five options for how you can use the space above the refrigerator.
Method No. 1 - household appliances
In the spacious area above the refrigerator you can place various household appliances . For example, here you can put a microwave oven, which is sometimes so difficult to fit into the interior of the kitchen. However, this option is suitable for you if you rarely use a microwave oven and do not have a tall refrigerator. Otherwise, using the microwave oven will be extremely inconvenient.
It is more rational to fill this niche with a small TV. Of course, if the TV is placed on a high refrigerator, watching it will not be very convenient. However, in a small kitchen it is sometimes simply impossible to find another place for the TV, so this option for placing the TV in the kitchen is quite common.
You can also store large equipment such as a bread machine or multicooker on the refrigerator. However, you will have to remove it every time you use it, which is not very convenient if you use it often.
Method number 2 - storing wine
Sometimes a wine collection takes up a lot of space and you have to allocate a shelf or even a separate cabinet for it. However, to free up space, it is enough to make a small organizer above the refrigerator that will compactly accommodate the entire collection.
Method number 3 - culinary library
Most housewives use many cookbooks when preparing food, which require a lot of space. If you don’t want to fill your already filled drawers and cabinets with books, then you should pay attention to the refrigerator. As a rule, there is space between the “cold factory” and the ceiling, which will allow you to place a culinary library.
Photos of examples of retractable shelves in the kitchen
This master class will be especially useful for those who live in small one-room apartments. I'll show you how to make a retractable shelf in the gap between the wall and the refrigerator. It would seem that the width is only a few centimeters, but you will definitely be surprised when you see how many items can be stored in this gap. Initially, the shelf-rack is not visible at all. In fact, after its manufacture, nothing will change in your kitchen, except that a new and convenient space will be created for storing various jars, bottles, etc.
The rack can be pulled out with a simple movement. Now look how much is stored there. The gap distance is only 11.5 cm (in the photo the tape measure is in inches), and what a huge number of different items can be stored.
How to get comfortable in a small kitchen: expert advice
If you have a small kitchen, this does not mean that you will necessarily bump into the corners of the table, suffer while preparing food and rearrange jars for half an hour in order to get the right jar of spice. Listen to the advice of experts, and your kitchen will become much more convenient.
1. Not enough horizontal cooking surface? There is a cabinet on wheels that can be rolled out and used as an additional tabletop.
2. As an option: an additional tabletop can be built under (or even into) the main one.
3. If you're handy, here's an idea: You can cut a hole in the countertop and put a trash can under it.
4. A small kitchen should not have non-functional corners: order a corner cabinet, it is very spacious.
5. Space under cabinets is often wasted. And there you can make basement drawers and store things that are not used every day. For example, a supply of bottled wine.
6. Another empty space that cannot be allowed in a small kitchen is under the edge of the sink. The most suitable home for kitchen sponges and rags.
7. When there is no room to turn around in the kitchen, everything is often piled up indiscriminately under the sink. If you make a pendant for products packaged in spray bottles, you can place everything more compactly.
8. If your kitchen cabinets have narrow pull-out sections, you can use them not only to store bottles, but also nail paper or cloth towel hangers.
9. A quick way to update your kitchen backsplash is to use a skinali (a panel of tempered glass with a pattern).
10. It is very convenient to place kitchen appliances on retractable platforms - they do not take up countertops and are always at hand.
11. Is the sink located near the window? It's even more interesting this way. And you can buy a folding faucet or one that can be pulled out and placed on the sink.
12. A folding tabletop is convenient for those who do some kind of handicrafts, but there is not enough space at home. It is clear that in such a situation a folding crane is needed.
13. If there is empty space between the wall and the refrigerator, order a pull-out cabinet or just narrow shelves. There are many items in the kitchen that don't require much space.
14. If after installing the kitchen cabinets the passage is still wide, you can install a narrow cabinet on the opposite wall, to the depth of a can. A shoe shelf can act as such a cabinet. You will store all your supplies in jars with screw-on lids, freeing up a lot of space in your cabinets.
15. Manufacturers of children's furniture offer a wide range of cabinets for storing toys and other things in children's rooms. There is nothing stopping you from using this furniture in the kitchen; just add soft seats and backs to the drawers, and you will get a comfortable corner sofa.
16. Another option for a folding table in the kitchen, where there is a shallow niche in the wall.
The table turns... just into a decorative element.
17. The table can be made on wheels: if necessary, its tabletop becomes a working surface, the rest of the time it stands next to the sofas. True, kitchen tables are usually lower than cabinets, so you will have to make it to order. And the bench can simply be hung at the desired height.
18. The mobile table in the kitchen can be replaced with 2-3 small ones. If necessary, they are moved and turned into one large table, and the rest of the time they serve for different purposes in the adjacent living room.
19. A table on a chain is in the spirit of young people, oh bachelor, but a board on the windowsill, to which a shelf with books is attached, will also replace the table in the morning.
20. This set for a small kitchen includes both a table and chairs. The tabletop slides into the drawer, the chairs are folded and hung - there is free space in the kitchen again.
21. Jar lids can be attached to the bottom of hanging cabinets or to the ceiling, and jars containing supplies are simply screwed onto them. If the jars are not heavy, just gluing the lids on is enough.
22. Herbs and spices can be stored in a wire basket. Then you don’t have to look for them for a long time - everything is before your eyes.
23. If the children have grown up, you can play yourself and use the construction set to create containers for storing kitchen utensils.
24. The metal panel with holes holds many items needed in the kitchen.
25. Even in the smallest kitchen there is room on the wall for a phone stand so you can cook according to a recipe from the Internet.
26. The tablet can be mounted on a camera tripod - this makes it easier for you to follow the step-by-step instructions offered by experienced chefs.
27. The kitchen is small, and the child is spinning under his feet. Keep him busy with drawing. If you paint the refrigerator with special chalkboard or marker paint, your child will be able to paint it while you prepare dinner. And then everything is easily erased.
28. You can make refrigerator magnets with your children. For example, these round pieces are made of sawn wood with glued magnets.
29. A board for drawing and writing will be useful not only for children. Write down the name of the product you just ran out of. You will get a noticeable reminder.
30. If the kitchen height is small and the cabinets hang low, you can purchase a hood that is built into the countertop. As you can see, many tips are suitable for making your small kitchen more convenient. Take action!
Materials
Required materials I used for this project:
- Back board for the back. Mine measures 61 cm in depth and 121 cm in height - essentially these are the dimensions of the entire rack without thickness. The width of the entire rack is slightly less than the width of the gap.
- Boards for shelves - 6 pieces.
- Two boards for the top and base.
- Two boards on the sides of the shelf.
- Two wheels for moving the entire structure.
- Round wooden slats.
- Wood screws
- Wood glue.
- Cabinet handle for pulling out the rack.
I don’t see the point in indicating the exact dimensions of all the boards, since everything will be your own. If something happens, it won’t be difficult to calculate them yourself. But to do this, first measure the width of your gap between the refrigerator and the wall, the depth of this gap. Decide on the desired height of the future shelf. All this can be done in about 15 minutes by drawing a sketch on paper with a pencil.
Frame - materials and dimensions
If you are concerned about the topic of a TV stand with spider fasteners. Follow the link.
As expected with any type of stand for equipment installation, the equipment is first purchased. Based on the performance of a particular refrigerator, a stand is selected. Very popular values for width and depth are numbers from 50 to 60 cm. If your refrigerator is, say, 80 cm in width, then using a stand with these values is simply scary. The fall of such heavy equipment can end quite sadly. In this case, you will need a bedside table with a width of up to 85 - 90 cm. It would be nice if there was not a very large gap of a few centimeters on both sides. The distance between the bottom and the lid cannot be less than 20 cm. A height not exceeding 50 cm is considered good.
The reliability of the frame is no less important. It is assembled from classic components with a rigid screed. It is necessary to select only the most durable materials:
If you are concerned about the topic of custom TV stand. Follow the link.
- Wood. Will support the weight of even large equipment without cracking. To do this, you do not need to use thin sheet materials such as thick plywood. It must be natural wood. Glued wood panels are considered to be a fairly durable and cheap material. Wood that has undergone heat treatment is less common. But, this option makes it resistant to all types of pests and microorganisms. Endurance to stress also increases;
- MDF. As a rule, the material has the necessary strength and endurance. But, you will have to increase the thickness of the sheet. If slabs with a thickness of 16 mm are used as standard, then here it is better for you to stop at 22 - 25 mm. This will reduce the risk of delamination and internal cracks in the housing. However, the slab is based on compressed wood particles. It is better to use it as a bedside table for a small refrigerator or to strengthen the body with racks made of metal corners (hard ribs);
- Metal. Another material that is guaranteed to hold up well during testing. Give preference to rust-resistant alloys. This way the bedside table will preserve its beautiful design longer.
No matter how much you praise plastic, in this case this material should be avoided. Even high quality plastics are not able to withstand high loads for a long time. During operation, the plastic slowly but correctly loses strength.
Making a kitchen rack
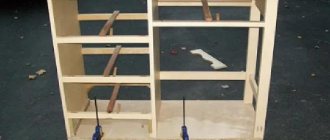
The entire structure can be assembled using just self-tapping screws, but in addition I glued everything with wood glue. I laid out the shelves and estimated the number needed. I started assembling the box. I installed the joints with glue. I left it to dry, pressing it with whatever I had. The result was a glued shelving box. Additionally secured with self-tapping screws. If you use thin boards, drill a hole before screwing in the screw to prevent the board from cracking. In the end I got to the shelves, placed them and screwed them on with self-tapping screws. Since the rack is very narrow and bottles and cans can fly off when pulled out, you need to make a kind of side. At first I thought about stringing a fishing line or rope, but in the end I settled on round slats. I drilled holes on the sides, cut the strip to length, inserted it and secured everything with glue. At the end, we measure the thickness so that there are no excesses. In my case there shouldn’t be any, since I don’t have the opportunity to move the refrigerator a little further.
Build process
Place the side boards around the back panel and begin assembly. Find the space where you would like the screws to go in, pre-drill each hole, this helps prevent the wood from splitting. Using 3cm screws, attach the side panels, top and bottom panels. After this, install the shelves and cut the dowels to size.
A hotel in England sheltered a man for free, and he repaid the kindness.
I turn popsicle sticks into convenient toaster tongs: the technology is very simple
The Voice of War and Victory: how did Levitan’s great-grandson grow up and did he follow in his footsteps?
Attach casters to the bottom of the bottom shelf. I added an extra board to make the structure a little more stable.
Optional step: Build a small shelf that fits between the wheels.
