The ongoing war for free space in the apartment is the occupation of many owners whose homes cannot boast of impressive footage. For this reason, various types of furniture have appeared for quite some time now, helping to save precious meters in rooms and corridors. This army of “saviors” includes sliding wardrobes - comfortable, tall and therefore very roomy. Not everyone is able to choose the right model in the store; the fault most often becomes the wrong size of the furniture. You can go the other way - make a built-in wardrobe with your own hands. If this option does not frighten you, then first you need to get acquainted with the upcoming work. This knowledge will give you a chance to avoid potential mistakes that await beginners at every step.
Advantages and disadvantages
Only after familiarizing yourself with the pros and cons of this process can you make a final verdict - to have a built-in wardrobe in the house or not. The advantages rightfully include:
- Significant cost savings, because purchased structures are quite expensive. If the owners decided to “gut” the old furniture to make new furniture, then the benefits are completely undeniable.
- Rare apartments can boast of completely smooth walls that do not require time-consuming and expensive leveling. In this case, the built-in wardrobe will easily and elegantly disguise defects and save money that would have to be “thrown away” on repairs.
- Purchased furniture does not always satisfy all the needs of family members, since each home has its own set of objects and things that need to be placed in the built-in closet. Making it yourself is the only chance to get the most comfortable storage, because it is easy for the craftsman to take into account all the wishes of family members.
- Saving usable space. In almost any apartment it is possible to find a convenient place for a built-in wardrobe, but it is rarely possible to fit purchased standard furniture there. Yes, there is an alternative option - making it to order, but this way out is completely unattractive, because you will have to pay double the price.
The disadvantages of self-assembly are relative. Only one thing can be included in this category - that such furniture cannot be rearranged, however, the owners of a built-in wardrobe are unlikely to set themselves such a task, because it will be placed in an ideal place. The best option for such furniture is a coupe.
Determining the cause of the malfunction
The first thing to do is to establish the reason why the lock is jammed. This can be problematic right away, because the lock is embedded in a metal or wooden door, and even if it is overhead, it is unlikely that you can directly open its body.
If you need to open a lock without a key, then you shouldn’t do anything in a hurry - you should first try to determine the cause by its appearance, the interaction of the parts of the locking device and the sounds that accompany the process of identifying damage.
Based on the information received, the method by which the autopsy will be performed is selected.
- A key jammed in the lock implies 2 types of breakdowns: the key has a certain degree of freedom (limited movement) or does not turn and is not pulled out at all.
Partial movement indicates that the lock secret has broken, or some kind of blocking, foreign object has gotten into the keyhole.
If there is no movement, then the secret itself is jammed. Also, the reason may be that a key that is suitable in configuration, but not the “original” one, or original, but has significant damage, is inserted into the lock. This applies to both regular and round keys.
- If the door lock does not open, but the key is easily inserted and removed, this indicates a broken secret, or perhaps, as in the first case, a foreign object has gotten into it. It can also be assumed that the movement is hampered by a jammed shank of the bolt or crossbars, which happens, most often, when installed incorrectly, when the fastening, fixing and adjusting screws are overtightened, resulting in distortions and disruption of technological clearances.
- The lock does not open, but turns one turn. Here you should inspect the key to identify significant damage that cannot be corrected and that does not allow the lock to recognize the original key.
- A separate category is the magnetic lock. What to do and how to open it depends on the type of locking mechanism - it can be a regular bolt or an electromagnet. In the first case, a power outage deactivates the magnetic lock in the closed position, and in the second, in the open position.
There is not much difference between how to open a padlock and a regular one - in general terms, their mechanisms are the same. Only the most common, most common causes of lock malfunction are described here, which are given to understand the algorithm for opening them.
Built-in materials
Selecting them is the first stage of preparatory work. The range of potential materials for assembling such cabinets is no different from those that are usually used to make any furniture.
- Wood is a traditional material: environmentally friendly, prestigious, beautiful, easy to process. However, do-it-yourself built-in wardrobes are rarely made from it. The reason for its unpopularity is humidity, which is always higher in niches. It is its fluctuations when opening the cabinet that are the main threat to wood used for cabinet furniture. If the owners have chosen wood, then the material must be found to be impeccable: it should not have any defects - curls, knots or cracks. Impregnation with a water-polymer emulsion or hot drying oil is required.
- Chipboard is the most common raw material. These boards are made from pressed chips using formaldehyde resins as a binder. Laminated chipboard is a more suitable material; it is a constant favorite of the best companies producing this type of furniture. The disadvantage for self-production is that the fine processing is quite heavy, so chipboard or laminated chipboard are only suitable for creating simple structures.
- Fiberboard is another pressed board representative made from steamed wood fibers. Its use depends on the type of material: semi-solid fiberboard is used to make drawers and back walls of cabinet structures, hard and super-hard varieties are already used to create furniture. For built-in cabinets, low-density material is not the best material, even for the bottom of the drawers. The reason is the same - humidity.
- MDF (fine fraction) is the best candidate, as these boards are more environmentally friendly, moisture resistant and dense, because they are made from wood dust, which is compressed at the highest possible temperature. The result of such heating, which ensures excellent quality and complete safety of MDF, is the release of natural resin - lignin, which reliably binds particles.
There are other materials too. The first contender is plywood, which is more often used to create built-in cabinets intended for storage rooms, or sent “in exile” to the country. For the same Cinderella structures, furniture panels are often chosen. Drywall is the black sheep on this list because, due to its low strength and fragility, the material cannot be used as a load-bearing structure. It needs a serious metal frame.
Design
Sliding wardrobe facades can be made from either one material or a combination of several. Laminated chipboard or wood is combined with mirrors, decorative glass, natural and artificial leather, rattan, plastic - it all depends on your imagination. Several elements, separated by a profile, are inserted into a metal frame.
A design feature of hinged facades is the inability to combine materials. All that manufacturers offer are blind doors or frames with glass or a mirror inside.
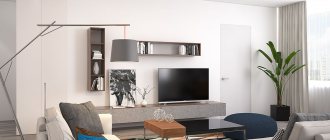
Finding a location, optimal dimensions
The built-in wardrobe is convenient, spacious, but at the same time it takes up little space. You can find a place for it:
- In a niche. This is the most convenient option for using such an empty recess.
- In the corner. This placement makes it possible to expand the space inside the closet and use a not very functional area of the room. The advantage of this solution is the possible cladding of mirrors, which gives a chance to visually increase the area of a small room.
- Between walls - wide or narrow, at the dead end of the corridor. There are very original options: for example, rational use of empty space near the window.
If a place for a cabinet has already been found, then the first necessary step is choosing the appropriate dimensions.
- Height. In this case, a simple answer suggests itself: to make maximum use of a niche or wall, only one piece of furniture is ideal - under the ceiling.
- Depth. The standard size of a regular cabinet with a hanger bar is 500-550 mm. If you plan to create a compartment design, then you need to take into account that the sliding doors will “eat up” about 100 mm, so 600-650 mm is optimal here. When they plan to make furniture not too deep (about 300-350 mm), they must take into account that the walls will have to be attached to the walls due to instability.
- Width. It is determined by the length of the niche or wall intended for the built-in wardrobe.
After determining the dimensions, they move on to the next important stage before creating the project - measurements.
What is a deadbolt lock?
The second name for this locking mechanism is rack and pinion. Its main distinguishing feature is the opening mechanism: the key is not turned, but is moved linearly in a perpendicular direction relative to the door (this is similar to pressing into a hole). This can be done thanks to the increased length of the key and special slots on it. Due to the length and shape of the keys, they are not convenient to carry in your pocket.
The rack-and-pinion locking mechanism includes:
1. Steel body. The housing can have different sizes depending on the purpose.
2. Rail or crossbar. This element performs the function of a bolt. A crossbar is a steel block with a set of teeth and grooves; it can have forward and reverse motion.
3. Spring. The main task of the spring is to push the bolts towards closing when the key is removed.
4. Key.
The locking mechanism operates through the interlocking of key and bolt teeth and grooves. As a rule, the crossbar contains an element to secure it when closing the lock.
The deadbolt lock is mounted directly on the gate/door leaf indoors. Its body is attached to the door leaf in two ways: if the door is made of metal - with special studs with nuts or bolts, if the door is wooden - with self-tapping screws.
And of course it is important to know where you can buy a deadbolt lock. The Bastion store offers a wide range of products at competitive prices.
If we talk about the degree of safety of rack and pinion mechanisms, they belong to the first class, as they have a simple design. This indicates low reliability, so they are not suitable for facilities where expensive property is located. This is a great option for extra protection.
The advantages of these locking mechanisms include reasonable price, the ability to manually open from inside the room, simplicity and strength, and long service life.
The disadvantages include the following:
1. The mounting holes of the locking mechanisms are located non-standardly, so replacing it is quite difficult: you need to find a lock with the same arrangement of holes.
2. The mechanism can be opened using a regular knife, screwdriver or nail; just move the crossbars through the hole between the door/gate and its frame.
3. If the key is lost, it is problematic to make a duplicate.
Thus, a deadbolt lock is the best option for a garage, utility room, shed, entrance, and so on. The ideal solution is to use a rack and pinion lock as an addition to the locking mechanism with a greater degree of reliability.
Measurements, drawing development, design
Understanding how all measurements should be taken is essential. Not all walls or niches where the cabinet will be built have the correct geometry. Therefore, measurements are made as follows:
- first measure the width and height of the back wall, and do this in the lower, middle and upper parts, the verticals are measured from the left and right edges, in the middle;
- Having stepped back from the back wall to a distance equal to the depth of the future cabinet, measure the “front line” in the same way - in three places.
Take into account the thickness of the material, the curvature of the walls, as well as their vertical or horizontal blockages. The lower value is always taken as a basis. Otherwise, the built-in wardrobe will not be able to “squeeze” into the space intended for it. However, serious gaps are only slightly better, so careful calculation is required. It is necessary to check the verticality of each surface. If they are not perfect, then the next step is to straighten them out.
As for the drawing, it is not recommended to start working independently without minimal skills. It’s easier to contact a specialist designer, or trust one of the services - 3D furniture designers. This option will give confidence in the accuracy of the diagram, which means there will be a guarantee that the structural elements will not require adjustments.
If you want to do everything yourself, then you need to take into account some details of this stage of work:
- The width of the wardrobe doors is always the same. Each of them must hide a full section behind it; dead zones and overlaps must be avoided. Interference with the extension of mechanisms (boxes, baskets, pantographs) should be eliminated.
- Hinged facades are not so demanding. In this case, there can be many doors; they are combined with drawers, open shelves and niches. If we take into account the appearance of the structure, then a symmetrical (alternating) arrangement of elements looks better.
You can come up with a design yourself, but it is not recommended to invent extremely complex structures. To make the built-in wardrobe convenient and functional, all family members are advised to take part in the discussion of the drawing. The simplest option is to use ready-made drawings, but adjust them to your size and preferences. In this case, the risk of errors will be minimal. According to the resulting drawing, a list of all parts is compiled.
Features of filling a corner compartment
There are two main types of construction:
With a partition. In this case, operation becomes significantly more difficult, since useful space is lost and it becomes inconvenient to use the right angle.
No partition. In this case, you can order a pole that is placed in the middle. Partitions are connected to it and additional storage space appears.
The second type is preferable. It will allow you to accommodate more clothes, equipment and small items, but takes up little space
The side parts are filled in the standard way, like ordinary wardrobes. You can put small change, various photo frames or books in the corner.
Internal space planning by zones
Visually, the space can be divided into three parts: upper, middle and lower. This is exactly how you can arrange clothes inside a wardrobe.
Lower
Depending on the room where the wardrobe is located, you should choose the filling. Most common types:
- Hallway. Models for this part of the apartment have a non-standard shape. They often have a narrower shape, but are longer. The lower sector is designed in such a way that it is comfortable to store shoes and care products there: brushes, various types of oils and creams, additional insoles, etc.
- Bedroom. In this furniture, the lower compartments often have a lot of free space. Therefore, it is best to keep bedding items there, such as blankets, sheets, pillowcases, etc. The compartments can be enough for several sets of bed linen. Some models have a modular structure of this zone. Spacers can be rearranged, their size and length changed.
- Living room. It is not customary to store household items in this room. Therefore, equipment that is installed in this room can be stored there.
- Children's room. Shoes for children are rarely placed together with adults, so that they do not get dirty. Therefore, keep seasonal shoes in the lower compartment. It is also suitable for bedding and toys.
Average
The middle sector is the main part of the wardrobe. Used for heavy outerwear and casual wear. The height of the compartment can be one and a half meters, which is enough to fully store jackets, blazers and coats on hangers. In addition, the middle compartment often has shelves and movable shelves for storing trousers, T-shirts, and shirts. That is why the bulk of littering occurs in this zone.
The middle compartment performs the following functions:
- High ergonomics for storing a large array of things;
- Storing things on longitudinal and transverse rods;
- Sorting by individual shelves;
- Creating quick access to accessories (bags, baseball caps);
- Installation of additional modular systems, boxes.
It is in this area that things used daily are located. The arrangement of the rods and shelves is designed in such a way that everything can be quickly taken out and put back.
Often the middle compartment is supplemented with a mirror, hooks for umbrellas and bags. Varieties of children's furniture have a smaller height, so the space for clothes is slightly lower.
Bedroom and living room closets often have special rods for storing suits and other sets of clothes.
Upper
The hidden sector is for little-used items that are not used on a daily basis. Its height, as a rule, does not exceed 600 millimeters, so seasonal clothes are stored there in boxes.
What can be put in this sector:
- Seasonal clothing, accessories, bags, hats;
- Bedding, pillows, blankets;
- The living room is a convenient place to keep household appliances and chemicals;
- In the nursery there may be boxes of toys and computer peripherals.
Necessary materials, tools
Laminated chipboard is the most popular material for making built-in cabinets yourself; it is inexpensive but quite reliable. The thickness of this material for the frame is usually 16 mm (minimum), for door leaves - 25 mm. You will also need fiberboard for the bottoms of the drawers, for the back side of the structure, if they plan to make one. You will also need:
- drill or hammer drill;
- stationery knife;
- pencil, tape measure;
- hex wrench and Phillips screwdriver;
- PVC edge (1 mm for internal elements, 2 mm for external elements), if the work is entrusted to furniture makers, a “home” replacement is melamine tape;
- marker;
- hammer;
- sandpaper;
- drills: regular (5-7 mm) and confirmed;
- pipe cutter (metal hacksaw);
- level, plumb;
- awl for marking holes for fasteners;
- Grinder;
- screwdriver;
- jigsaw
Potential fittings and fasteners are worthy of a separate list. It includes:
- trousers;
- retractable rods;
- tie makers;
- pipes for hangers and holders for them;
- screws for handles;
- anchor bolts;
- dowel-nails;
- nails (small, for fiberboard);
- confirmations;
- guides for shelves (timber, profile);
- shelf supports;
- self-tapping screws;
- metal corners;
- eccentrics;
- dowels.
Before purchasing furniture fasteners, they are calculated, but purchased with a reserve. All accessories - front, functional - only in the quantity that is necessary. However, it is an important component of the design and cannot be saved, so it is better to choose high-quality materials.
How to open a lock without a key - method two: drilling
This method is the most common among home craftsmen, because in order to open the lock you do not need any special tools, you only need:
- Drill.
- Flathead screwdriver.
We are now talking about cylinder locks, with a cylinder as in the photo below, which are now very popular.
"Cylinder" of a mortise or padlock cylinder
Another example of the “core” of a lock that can be opened with a drill is in the next photo. As you can see, the keys and the external structure of the lock can be different, the main thing is that there is a cylinder inside.
Cylinder lock with handle, for opening the door from the inside
- So, to drill out a lock, you need to carefully drill a hole a few millimeters below the keyhole.
- In the beginning, it is better to take a thinner drill, 3 mm in diameter, and then expand the drilled hole with a thicker drill, 6 mm in diameter.
- You need to drill the lock core to a depth approximately equal to the length of the key. When you reach the desired mark, periodically try to open the lock with a flat-head screwdriver inserted into the old keyhole.
- When the work is finished, you can use a screwdriver to open the door.
VIDEO: How to drill a lock?
Lock structure: why can it be drilled?
- Inside the cylinder lock there are special movable projections, which are called pins or pins.
- At the very bottom of the keyhole there are small springs.
- The springs have locking pins of equal length.
- The locking pins have code pins of varying lengths.
- When a key is inserted into a keyhole, its teeth press on the code pins in such a way that there is a gap between all the code and locking pins. And the lock can be opened.
- However, if you drill out the locking pins, the lock can be opened without a key.
Cylinder lock device
Harvesting and preparation
First, cutting maps are made exactly according to the list of parts. They are laid out on a sheet of material and the sides that need to be trimmed are indicated. At the same stage, the length of the edge is calculated.
The first independent work carries the risk of making mistakes, and they can be very expensive, so you need to understand that attracting professional assistants is a necessary measure. Self-sawing will take a lot of time, and no one can guarantee that the result of this work during the assembly process will only please you. There are some other advantages of turning to furniture makers:
- they buy materials at wholesale prices, and the home craftsman will have to pay 20% more, this is the minimum;
- All cuts will be edged immediately, which will additionally protect the material from moisture;
- cutting parts on a computerized machine is synonymous with speed and quality of parts.
If you have the skills for such work, then the material is sawed with a jigsaw, then the ends of the cuts are prepared for edging: they are leveled with a grinder, then treated with sandpaper.
- After completing this operation, the workpieces are edged. If melamine tape is purchased, it is glued with an iron, the excess is cut off with a stationery knife, and processed with sandpaper.
- Start drilling holes for fasteners: all parts are first marked with an awl, according to the drawing, then drilled.
- The components are prepared: the boxes are assembled, the bottoms and guides are attached to them, and the handles are screwed on.
There is no preparation of fittings at this stage. This part of the work is carried out after installing the built-in wardrobe, the reason is possible (and serious) discrepancies with the drawings.
Types of locks
Before you start opening the lock, you need to understand its mechanism. This will help you understand how the secret works and it will be easier to understand all the steps to unlock it. Overhead and mortise locks are divided into 2 types:
- cylindrical;
- disk cylindrical;
- suvaldnye.
Cylinder locks have small, flat-shaped keys that have grooves, indentations, or recesses on them. When the key is inserted into the lock, its configuration positions the locking pins (the so-called “pins”) in a certain order and the cylindrical part rotates, moving the bolt.
A separate category of cylindrical locks are disk (Finnish) locks, the secret of which consists of a set of disks. Such locks often have a part protruding beyond the door leaf, in which the lock cylinder is located. To open, a semicircular key with recesses is used. When you turn the key, the discs line up in a certain sequence, and the key turns further, opening the lock.
Lever locks have a characteristic wide slot for a key, which has a long shaft with two bits (rarely one). The beads have protrusions and depressions that are designed to displace the levers and move the crossbar.
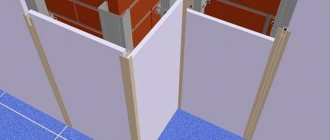
Fastening the frame
Built-in wardrobes differ from ordinary furniture in that they may not have a full frame. Its role is played by the floor, ceiling and walls of the niche (corner) in which they will be located. Therefore, the frame here is called a false panel designed to fix the compartment guides.
- First, they arm themselves with a marker, tape measure and level: lines are marked on the wall for a false frame.
- After this operation, the guides are cut and fastened: holes for the dowels are drilled with a hammer drill, then the profile or beam is fixed. Another option is to use furniture corners.
- If a vertical partition is planned, then guides are also installed for it. Install a partition and shelves that are attached to it.
The false panels are installed in the same way, and the doors are fixed last.
The second option is to make a box for the opening, which will protect things from temperature changes, and therefore from humidity. This method is more expensive and labor-intensive. The box is assembled using dowels or metal corners, and the partitions and shelves are immediately fixed. The frame is attached to the walls with self-tapping screws. When the internal work is completed, they move on to the most difficult stage.
Methods for opening lever locks
Devices with high resistance to opening. The secret mechanism is based on the work of plates with figured cutouts. It is very difficult to open it non-destructively.
What can be done:
- Drill out the lock where the levers are attached to the bolt shank. Then insert a thick wire hook through the keyhole and move the bolts.
- Knock out the larva with a strong blow.
- Press out the door leaf with a pry bar or crowbar. The door and door frame will be damaged, but the lock will remain intact.
- Use a roller - a cone-shaped tool. It is driven into the lock mechanism and destroys it.
- Determine the security of each lever using wires. This is a long and painstaking method that is accessible to specialists and allows you to preserve the mechanism.
It is possible to open a rim lock, especially if you have certain skills and tools. If you do not have enough time and energy for manipulation, it is better to turn to professionals. Doing it yourself may result in having to completely drill out the lock and replace the door.
Our online store offers rim locks from well-known brands in different price categories. We will help you choose a reliable, burglar-resistant mechanism or offer a budget model to solve your problems. To consult with a specialist, call us or use the special form on the website.
Door installation
Sliding systems differ in the material of the guides and the sliding principle. Aluminum or steel is used to make rails. First of all, they take into account what material was chosen for the door frame, but aluminum profiles are often preferred.
There are 2 types of structures - top-hung and bottom-hung. In the first, the rollers are on top, in the second they move along the lower rails, and the upper guide serves only as support. The latter system is more popular and convenient. The work is performed in the following sequence:
- At the first stage, the horizontality of the lower and upper surfaces is checked. If necessary, they are leveled.
- Having calculated the length of the profiles, they are cut. First, attach the top guide. The simplest methods of fixation are anchor bolts and dowels.
- To accurately position the bottom rail, use a plumb line, since any misalignment will invariably lead to rapid wear of the fittings.
- Rollers are fixed on the bottom of the doors. They are inserted into the upper, then into the lower guide: first the far element is hung, then the near one.
- The last stage is checking the stroke, installing and adjusting the stoppers.
Sliding cabinet opening systems
If the first four methods could be attributed to hinged variations of opening cabinets, then sliding compartment doors are a fundamentally new approach to equipping furniture. In it, the facades are not attached to the body, but “slide” along the rails on wheels.
There are two types of sliding compartment systems: suspended and supported. If you are inclined to purchase a sliding wardrobe, we recommend that you learn more about the nuances of choice.
Forethought as a reliable method of getting rid of unforeseen problems
In this article, we have presented the most effective ways to open a mailbox without a key without breaking the lock. They are suitable for standard locks. In the case where a modern new lock was installed on the box, it is almost impossible to open it using the above methods.
If you are just waiting for correspondence that interests you, you can wait for the postman. They usually go in the morning or evening. You can also leave a note on the mailbox asking you to drop mail into your neighbors' box if you have previously agreed with them about the possibility of using their box.
To completely avoid such problems and not look for ways to open a mailbox lock , it is recommended to store a spare key or a duplicate of the original in a desk drawer or closet. This way, even if you lose the main key, you will always have another one that can be replicated later.
Turning a paperclip into a master key
To open the lock you will need:
- Two paper clips. One will act as a master key, and the second will act as a tensioner to turn the locking mechanism.
- Pliers. With their help, it is much easier and more accurate to bend a paper clip or hairpin, giving it the desired shape for opening.
Do-it-yourself master key
Now we assemble our homemade master key:
- Bend the long tip of one paper clip twice until it becomes a straight wire. We will insert it into the keyhole of the door. You can add a slight bend at the end to make it easier to press the pins.
- Now we make the tensioner. It can be done in two ways:
- We bend the long end of the paper clip at a right angle, having first straightened it twice. This option is simple, but not high quality.
- Bend the ends of the paper clip so that the curved part remains in the middle. At the same time, you connect the ends of the wire. One tip should be slightly longer. Then step back 1 cm from this elongated piece and make an angle of 90 degrees.
The preliminary work has been completed, now we move on to the main question: how to open a door lock with a paper clip.